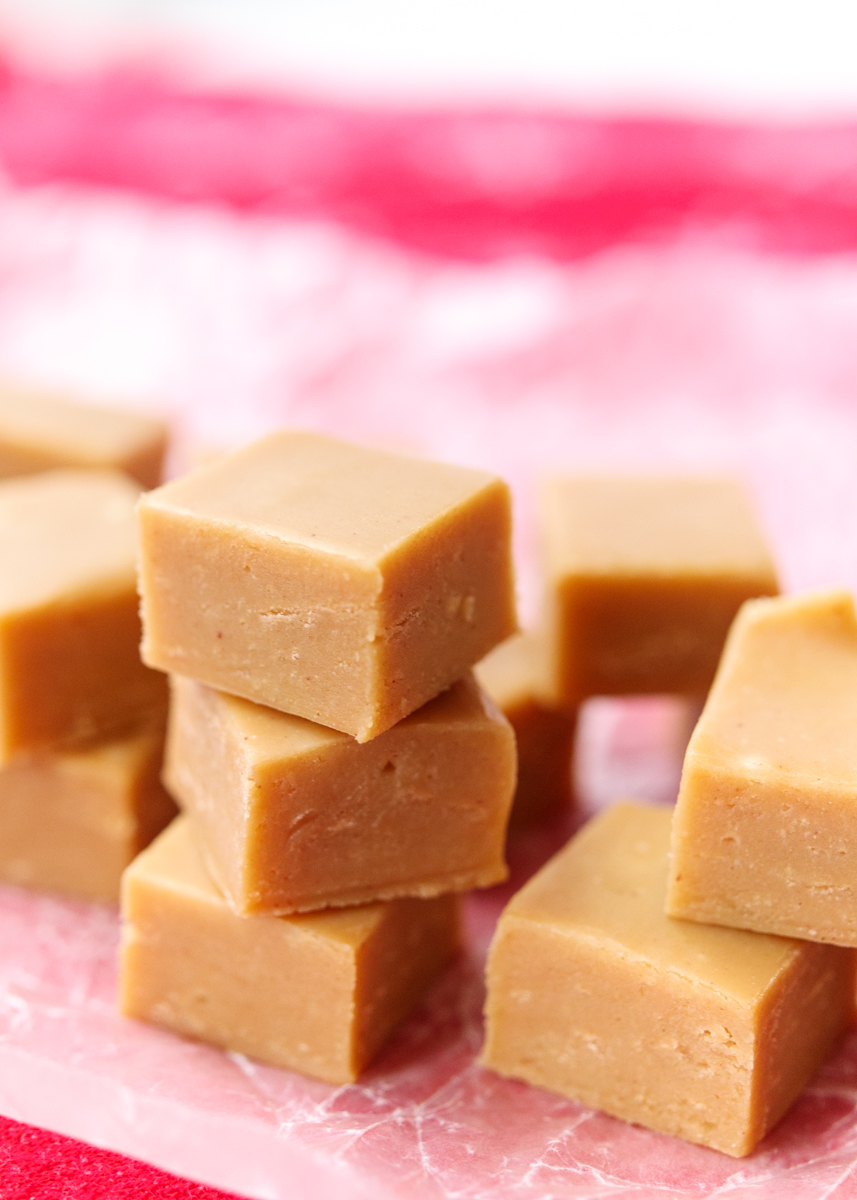
World’s Smoothest Peanut Butter Fudge

World's Smoothest Peanut Butter Fudge  |  Lemon & Mocha

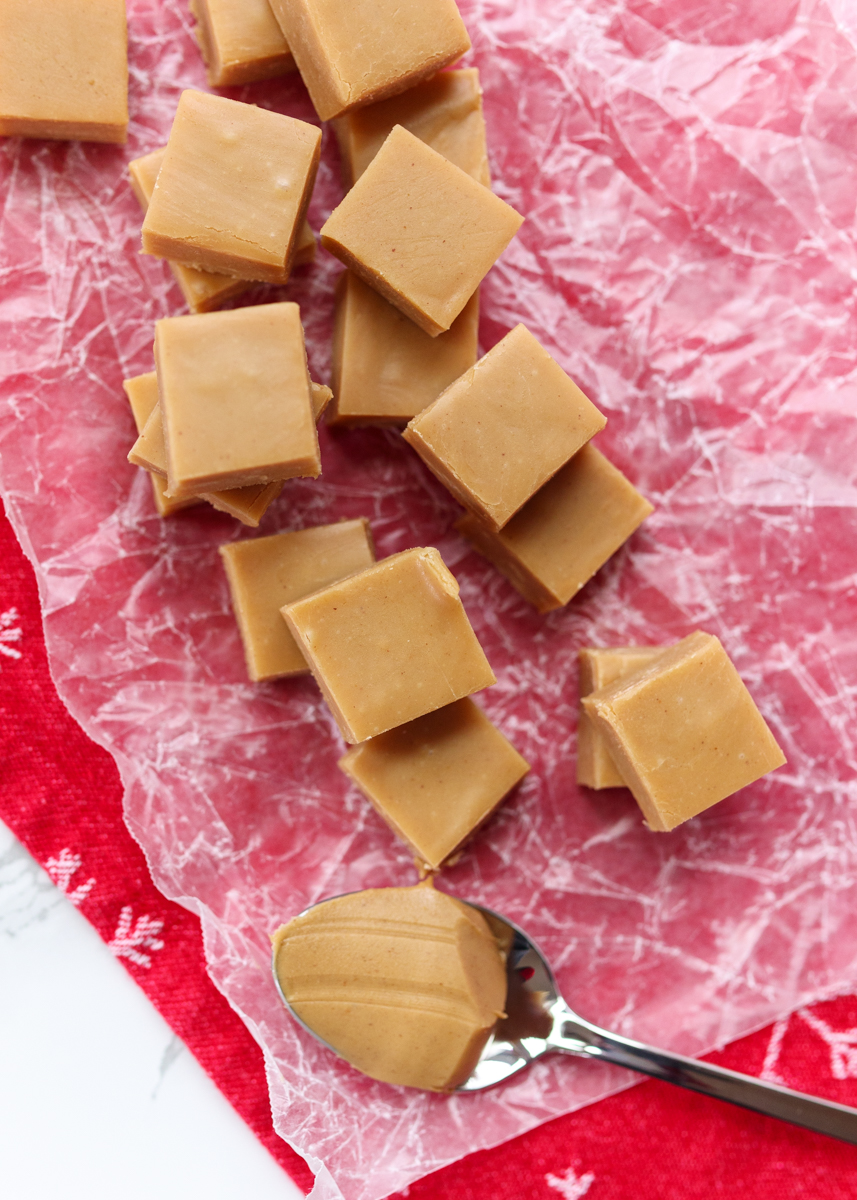
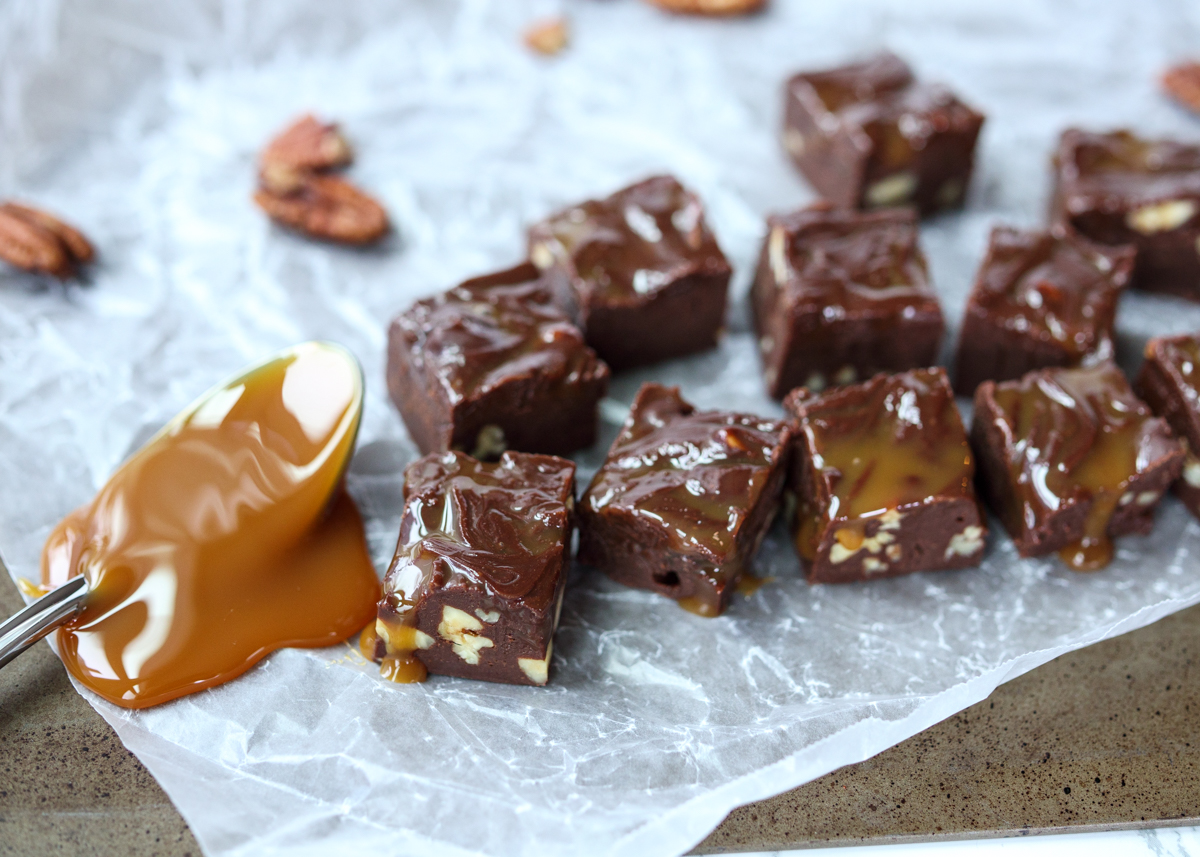
I have some more fudge for you today and you will not want to miss this one! This is the first non-chocolate fudge variation I’ve posted, but that’s okay because we have peanut butter. If you are someone that likes to eat peanut butter off a spoon and lives for the center of a Reese’s then you will love this creamy peanut butter fudge.

World's Smoothest Peanut Butter Fudge  |  Lemon & Mocha

It has the same smooth texture of the original fudge that you get from using sweetened condensed milk instead of granulated or powdered sugar. The fudge has just the right amount of sweetness and a hint of vanilla letting the peanut butter flavor really shine through.

World's Smoothest Peanut Butter Fudge  |  Lemon & Mocha

You can thank my former boss, Darcy, for this creation! Two years ago I set out to attempt to convert my fudge recipe into a peanut butter version after Darcy said that was her favorite flavor. I swapped the bag of chocolate chips for peanut butter chips and used a white chocolate baking square instead of the unsweetened chocolate one so there wouldn’t be any cocoa flavor in the fudge. Finally, I got rid of the butter and added in peanut butter. Normally just peanut butter on its own isn’t a great swap for butter in baking, but since we’re making candy and only using two tablespoons I figured I would give it a shot.

World's Smoothest Peanut Butter Fudge  |  Lemon & Mocha

The end result was peanut butter perfection and I’ve been making it this way ever since! I was so excited it worked out since not all my variation attempts have been successful. One of the versions I was hoping to post this year did not set up quite right, but that just prompted me to come up with an even better flavor idea that I will be sharing next Friday!

World's Smoothest Peanut Butter Fudge  |  Lemon & Mocha

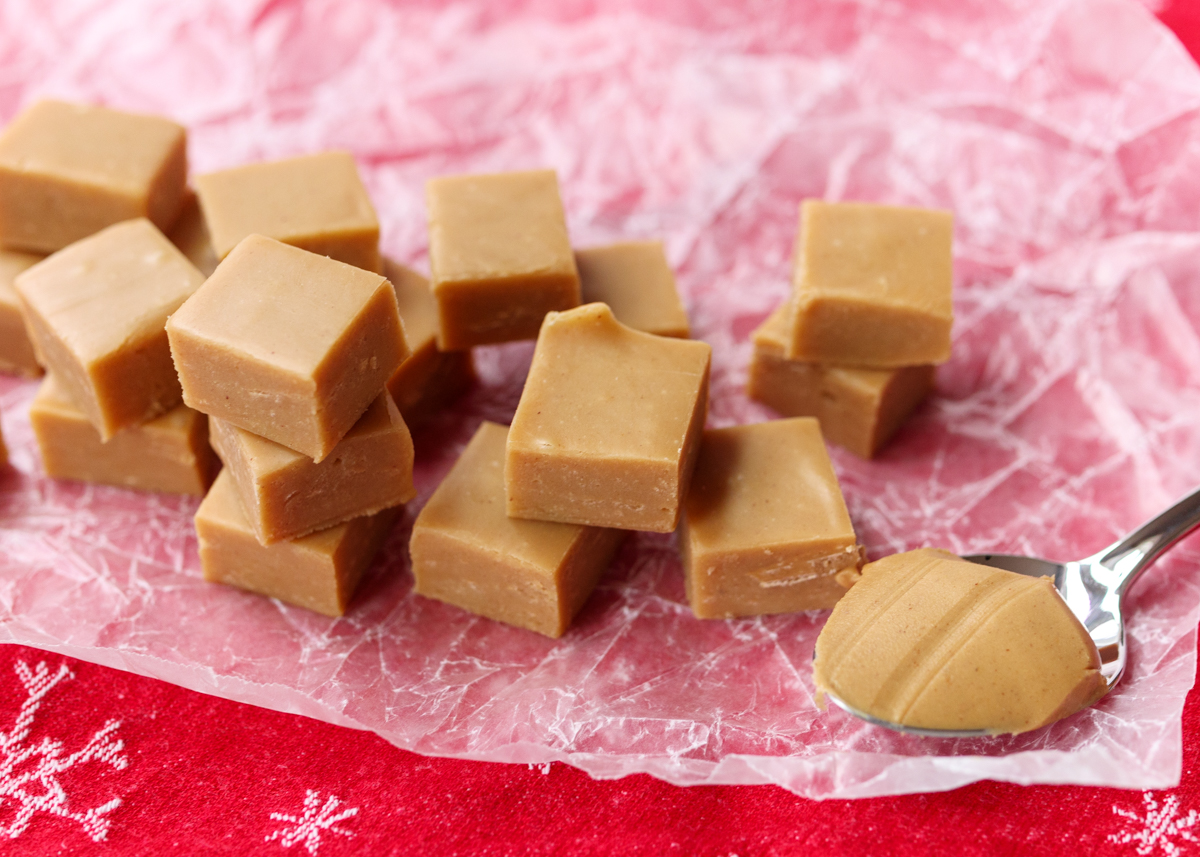
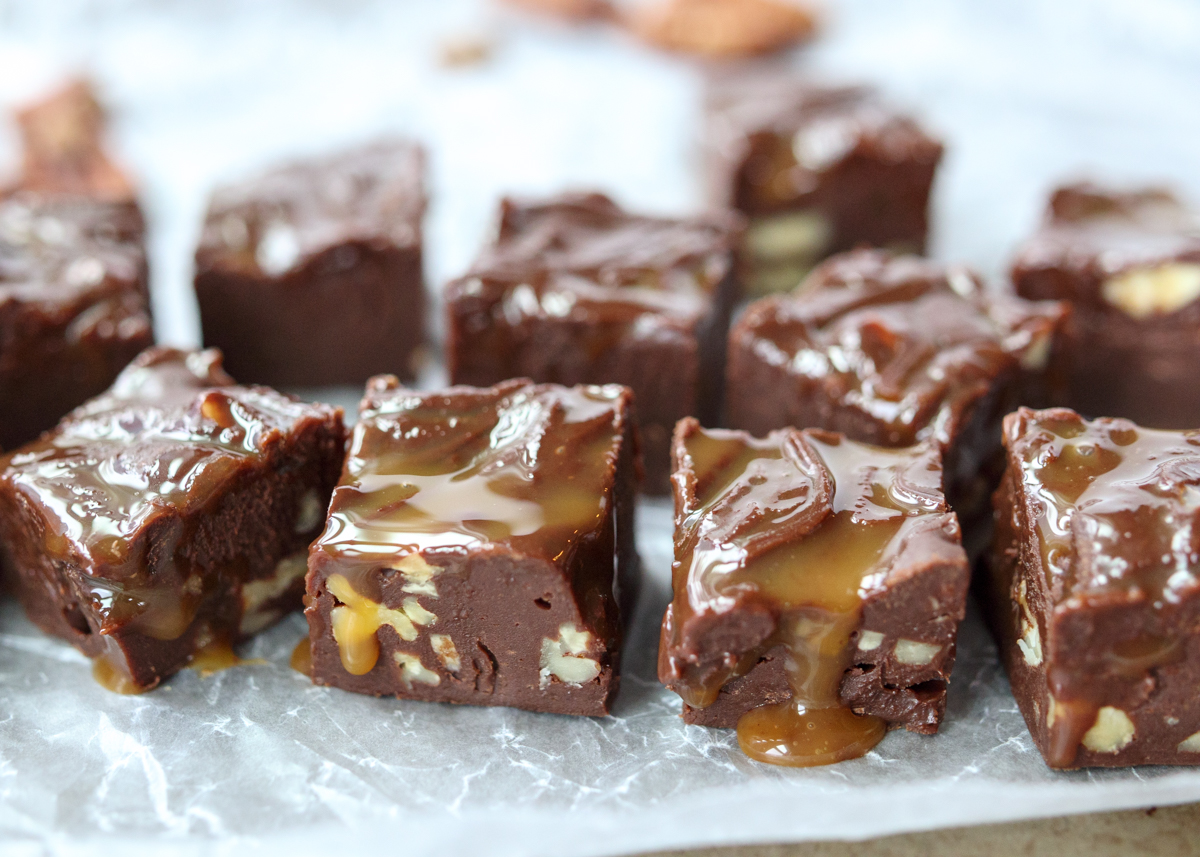
Now back to this addicting peanut butter version. I make a note about it in the recipe, but I’ve only ever made this with creamy “regular” peanut butter, like Jif, so I can’t guarantee you will get the same results if you use the type of peanut butter that you have to stir because the oil separates. Usually that type of peanut butter doesn’t work as well in baked goods and treats. Also, as I say with all the fudge, I think this tastes best eaten cold straight from the fridge. Yum!

World's Smoothest Peanut Butter Fudge  |  Lemon & Mocha

Peanut Butter Fudge
 
Yield: 36-64 pieces depending on how big you cut them
Ingredients
  • 1 ounce Baker's white chocolate baking squares
  • 2 tablespoons creamy peanut butter, like Jif
  • One 12-ounce bag peanut butter chips
  • 1 14-ounce can Eagle Brand sweetened condensed milk
  • 1 teaspoon vanilla extract
Directions
  1. Line an 8" x 8" pan with wax paper and set aside.
  2. Melt peanut butter and the Baker’s chocolate in a double boiler over medium heat, stirring occasionally.
  3. Pour in half the bag of peanut butter chips and stir with a heatproof rubber spatula to help melt. Once partially melted add the rest of the bag of peanut butter chips and stir until fully melted.
  4. Carefully stir in the condensed milk to combine and remove from the heat. Stir in the vanilla extract.
  5. Pour the peanut butter mixture into the prepared pan and smooth the top with the spatula.
  6. Refrigerate until the fudge is set then cut into bite size pieces. Best eaten straight from the fridge.
Notes
I have only made this with creamy Jif-type peanut butter. I can not guarantee the same results with a natural peanut butter (the type you have to stir because the oil separates). Also, a peanut butter with less sugar might not taste sweet enough.

Some of the links above are affiliate links, which means I may receive a small commission for my referral if you purchase something. This does not affect the retail cost of the item. Thank you for supporting Lemon & Mocha!

Turtle Caramel Pecan Fudge

Turtle Caramel Pecan Fudge  |  Lemon & Mocha

It’s not even December, but I can’t help diving into holiday season content. I just have too many recipes I’m excited to share! Normally I don’t start listening to Christmas music until December, or at the very least I wait until Thanksgiving is over, but I’ve been seriously in a holiday mood this year. I think it was all the baking I was doing the week before Thanksgiving and the early snow we got here in New England, but I have to confess that I had Christmas music playing in my kitchen two weeks ago. Oops!

Turtle Caramel Pecan Fudge  |  Lemon & Mocha

If there’s one dessert that is guaranteed to get me in the Christmas spirit it has to be Diane’s fudge. I love my stepmom’s classic fudge recipe (and you all do too – it’s the most popular recipe on Lemon & Mocha!), but I love all the fun variations I’ve made over the years even more. I’ve shared S’mores Fudge – crazy good – and Chocolate Peppermint Fudge – so Christmasty!

Turtle Caramel Pecan Fudge  |  Lemon & Mocha

Today, we’re all about the Turtle Caramel Pecan Fudge. In case you aren’t familiar, chocolate turtles are chocolate covered pecans with caramel inside and they kind of look like little turtles. I wanted to take those flavors and bring them into this classic semi-sweet chocolate fudge. The end result was messy, but so good!

Turtle Caramel Pecan Fudge  |  Lemon & Mocha

The chopped pecans are folded into the fudge so you get a little crunch in each bite. The caramel is drizzled on the fudge then swirled in before the fudge sets.

Turtle Caramel Pecan Fudge  |  Lemon & Mocha

I used Smucker’s salted caramel sauce since I love how quick it is to whip together a batch of fudge so I didn’t want to over-complicate it with homemade caramel. Do you think you will try this twist?

Turtle Caramel Pecan Fudge  |  Lemon & Mocha

Turtle Caramel Pecan Fudge
 
Yield: 36-64 pieces depending on how big you cut them
Ingredients
  • 1 ounce Baker's unsweetened baking chocolate
  • 2 tablespoons unsalted butter
  • One 12-ounce bag semi-sweet chocolate chips
  • 1 14-ounce can Eagle Brand sweetened condensed milk
  • 1 teaspoon vanilla extract
  • ½ cup chopped pecans
  • ⅓ cup caramel, see note
Directions
  1. Line an 8" x 8" pan with wax paper and set aside.
  2. Melt butter and the Baker’s chocolate in a double boiler over medium heat, stirring occasionally.
  3. Pour in half the bag of chocolate chips and stir with a heatproof rubber spatula to help melt. Once partially melted add the rest of the bag of chocolate chips and stir until fully melted.
  4. Carefully stir in the condensed milk to combine and remove from the heat. Stir in the vanilla extract and the pecans.
  5. Pour the chocolate mixture into the prepared pan and smooth the top with the spatula. Drizzle the caramel sauce over the top of the fudge and use a knife to swirl into the fudge.
  6. Refrigerate until the fudge is set then cut into bite size pieces. Best eaten straight from the fridge.
Notes
Your caramel should be soft enough to drizzle off a spoon. If it’s too firm from being in the fridge, heat it slightly.


Baked Trader Joe’s Cauliflower Gnocchi with Crispy Shrimp and Pesto

Baked Trader Joe’s Cauliflower Gnocchi with Crispy Shrimp and Pesto  |  Lemon & Mocha

Welcome back, everyone! I hope you all had a wonderful Thanksgiving and hopefully some relaxing time off! I’m diving right into this recipe because I can’t wait any longer. This is one of those recipes that didn’t really start as a recipe. It was just something I threw together for Matt and I for dinner and it was so outrageously delicious that I decided it needed to be shared on Lemon & Mocha as soon as possible. And by as soon as possible I mean a couple months later because I’m working with a schedule here! This is my Baked Trader Joe’s Cauliflower Gnocchi with Crispy Shrimp and Pesto. We also have some seared asparagus, sweet peas and sautéed shallots tossed in there.

Baked Trader Joe’s Cauliflower Gnocchi with Crispy Shrimp and Pesto  |  Lemon & Mocha

Before we go much further though, we need to discuss the product this whole dish centers around – Trader Joe’s cauliflower gnocchi. Have you tried this yet? They are frozen gnocchi that have cauliflower as the bulk ingredient and have only 140 calories per serving! They are high in sodium since they are a frozen food after all, but the low calories and fat are pretty hard to beat. When I first saw people posting these gnocchi on Instagram, a lot of people were complaining about them being mushy when cooked according to the stove-top instructions on the back of the bag. The ultimate question seemed to be how to cook Trader Joe’s Cauliflower Gnocchi.

Baked Trader Joe’s Cauliflower Gnocchi with Crispy Shrimp and Pesto  |  Lemon & Mocha

I thought about how much I love roasted cauliflower and how there’s no way they could get mushy if baked so I thought I would give it a shot. It worked! The gnocchi came out tender and perfectly crispy! Now, if you don’t have a Trader Joe’s near you there’s plenty of different cauliflower gnocchi recipes posted online if you search and you should be able to bake homemade gnocchi. I will probably test some of the recipes out in the coming months since I like making gnocchi, but in the meantime I’m sticking with these time-saver frozen ones.

Baked Trader Joe’s Cauliflower Gnocchi with Crispy Shrimp and Pesto  |  Lemon & Mocha

Anyways, back to this dish. The gnocchi are great on their own or with marinara sauce, but then you would miss out on these crispy shrimp coated in garlic, shallot and pesto. There are not a ton of gnocchi in the bag so I made sure to add in lots of green veggies so the dish would be plenty for the two of us for dinner. I highly recommend the asparagus and peas, but feel free to substitute in whichever vegetables you have on hand that would pair well with the shrimp and pesto. Maybe some spinach and pan-seared cherry tomatoes? Yum! Okay, I hope you all enjoyed this post because on Wednesday we’re going full-blown Christmas dishes and treats!

Baked Trader Joe’s Cauliflower Gnocchi with Crispy Shrimp and Pesto
 
Yield: 2 servings
Ingredients
  • 1 bag Trader Joe’s cauliflower gnocchi
  • 1 tablespoon olive oil, plus more as needed
  • ½ shallot, minced
  • 1 clove garlic, minced
  • ½ to ¾ pound asparagus, trimmed then cut into thirds
  • ⅔ cup frozen peas
  • 10 raw shrimp
  • ¼ cup pesto
  • Salt and pepper
Directions
  1. Preheat the oven to 400 degrees F.
  2. Spread the gnocchi out on a baking sheet. Lightly spray them with cooking spray then bake for 40 minutes, or until they are crispy and golden, tossing/flipping 1 or 2 times during cooking.
  3. When the gnocchi are almost done, heat the olive oil in a skillet over medium-high heat. Add the shallot and garlic and sauté for 2 minutes. Add the asparagus and cook until al dente, about 4 minutes. Season with salt and pepper. Add the frozen peas.
  4. Push the veggies to the edges of the skillet and add a very little bit more olive oil. Add the shrimp so they are each directly touching the pan and sauté for 3 minutes on each side, or until pink and curled. Lightly season the shrimp with salt and pepper when you put them in the pan. Reduce heat to low. Add in the cooked crispy gnocchi and the pesto. Toss to combine and season with additional salt and pepper if needed. Add more pesto or olive oil as needed. Top with grated Parmesan if desired.


Leftover Turkey Lettuce Wraps with Cranberry Tahini Sauce

Leftover Turkey Lettuce Wraps with Cranberry Tahini Sauce  |  Lemon & Mocha

Tomorrow is the big day! Are you sick of Thanksgiving recipe posts yet? I love seeing everyone’s Thanksgiving recipes because it gives me inspiration for Christmas meals and cozy dishes to enjoy all winter long. I have a non-holiday recipe queued up for Monday – and you will not want to miss it – and then I’m diving right into Christmas dishes! I would take a longer break, but there’s just so many holiday recipes I’m excited to share with you all.

Leftover Turkey Lettuce Wraps with Cranberry Tahini Sauce  |  Lemon & Mocha

Last week I shared the Leftover Turkey Pull-apart Sliders with a Maple Mayo and Cranberry Barbecue Sauce and today I have another creative way to re-imagine your leftover turkey, cranberry sauce and even your leftover butternut squash! These Leftover Turkey Lettuce Wraps with Cranberry Tahini Sauce are healthy and light, which is perfect after a day filled with eating, eating and more eating!

Leftover Turkey Lettuce Wraps with Cranberry Tahini Sauce  |  Lemon & Mocha

I’ve used tahini in a few recipes here on Lemon & Mocha. If you aren’t familiar with the ingredient, it’s ground sesame paste and it’s a healthy way to bring rich flavor and nuttiness to a dish. This cranberry tahini sauce was so good that I found myself seeking out things to put it on when we ran out of turkey lettuce wraps. I loved it as a salad dressing and as a dipping sauce for my grilled chicken. While the cranberry tahini sauce has many uses, it’s especially delicious when drizzled over tender turkey and sweet roasted butternut squash all wrapped up in a fresh lettuce leaf.

Leftover Turkey Lettuce Wraps with Cranberry Tahini Sauce  |  Lemon & Mocha

Even though I came up with this dish as a fresh take on leftovers you better believe I’m going to be cooking up some turkey and butternut squash in the next few months so we can have these lettuce wraps for dinner and lunches.

Leftover Turkey Lettuce Wraps with Cranberry Tahini Sauce  |  Lemon & Mocha

I hope you all enjoy these as much as we did! Happy Thanksgiving!

Leftover Turkey Lettuce Wraps with Cranberry Tahini Sauce  |  Lemon & Mocha

Leftover Turkey Lettuce Wraps with a Cranberry Tahini Sauce
 
Yield: 4 servings
Ingredients
for the dressing
  • 3 tablespoons cranberry sauce
  • 2 tablespoons tahini
  • 1½ tablespoons water
  • 1 teaspoon lemon juice
  • ⅛ teaspoon garlic powder
for the lettuce wraps
  • 12 butter lettuce leaves
  • Leftover roasted turkey, about 8 ounces
  • Leftover cooked butternut squash, about 1 cup
Directions
for the dressing
  1. Blend together all the ingredients until smooth.
for the lettuce wraps
  1. Top each lettuce leaf with some turkey and roasted butternut squash then drizzle with the tahini cranberry dressing.


Lemon Garlic Green Beans

Lemon Garlic Green Beans  |  Lemon & Mocha

I have one final Thanksgiving recipe to share with you! If you are looking for a quick way to sneak some last minute veggies into your Thanksgiving menu then these Lemon Garlic Green Beans are calling your name! We aren’t kidding around with this flavor combination; there’s three cloves of garlic and an entire lemon in this dish so the green beans really live up to their name.

Lemon Garlic Green Beans  |  Lemon & Mocha

Green beans sauté fairly quickly so I love making them around the holidays so I’m not using oven space. I’ve made these for Christmas and Easter, as well as regular weeknights when I’m looking for an easy green side dish.

Lemon Garlic Green Beans  |  Lemon & Mocha

Years ago I shared my French Onion Green Beans, which are really tasty, but these Lemon Garlic Green Beans are extra simple. Sautéed green beans are tender, but not mushy, and these burst with lemon acidity and garlic flavor when you bite into them.

Lemon Garlic Green Beans  |  Lemon & Mocha

Although I love this dish I’m actually not making it for Thanksgiving this year. That’s mostly because I knew I wanted to share these green beans with you months ago, but I just finalized the Thanksgiving menu last week. Below is our menu! It’s the first Thanksgiving I’ve ever hosted and I wanted to keep things light and simple since it’s just five of us. I have a bunch of new dishes I’m making and I’m excited to share those recipes with you later.

Lemon Garlic Green Beans  |  Lemon & Mocha

What are you making for Thanksgiving?

Lemon Garlic Green Beans  |  Lemon & MochaAppetizers
Matt’s Mom’s antipasto platter
Roasted shrimp cocktail

Main Meal
Fall Spinach and Arugula Salad with Tahini Dressing
Rosemary olive oil bread – love my Breville loaf maker!
Matt’s sous vide turkey breast – I’m the only one that prefers dark meat, plus it comes out so amazing and tender in the sous vide immersion circulator
Cranberry apple roasted beet compote
Pan-seared crispy baby potatoes
Matt’s Mom’s stuffing
Roasted butternut squash
Roasted brussels sprouts with avocado and a honey lime dressing

Dessert
Cherry pie
Apple pie

Lemon Garlic Green Beans
 
Yield: 6 servings
Ingredients
  • 1 pound green beans, trimmed
  • 2 tablespoons olive oil
  • 3 cloves garlic, thinly sliced
  • 1 small lemon, thinly sliced
  • Salt and pepper
Directions
  1. Blanch the green beans. Do this by boiling the green beans for 5 minutes then plunging them into ice water. Drain the water.
  2. Heat the olive oil in a skillet over medium-high heat. Cook the garlic for 1 minute then add the green beans. Season generously to taste with salt and pepper. When the green beans are hot, add the lemon slices and cook for 1 minute before removing from the heat and serving.

Recipe from Martha Stewart.
Some of the links above are affiliate links, which means I may receive a small commission for my referral. This does not affect the retail cost of the item. Thank you for supporting Lemon & Mocha!