Holiday

Lemon Rosemary Sugar Cookies

Lemon Rosemary Sugar Cookies  |  Lemon & Mocha

Happy December! December is clearly the king of all months when it comes to cookies so it only makes sense to share a royally epic cookie recipe for my first post of the month. Here on day six of Lemon & Mocha’s 12 Days of Cookies we’re all about these Lemon Rosemary Sugar Cookies.
Lemon Rosemary Sugar Cookies  |  Lemon & Mocha

These are my favorite cookies I’ve ever made. I know, I know, such a bold statement! Especially when there’s no chocolate and they’re decorated cookies so you’re probably wondering who I am and what happened to Lauren. However, they are my favorite cookies I’ve ever made because they’re the first cookie where I’ve gone out of the box and truly experimented with flavor – and they turned out amazing. So amazing that I ended up having to make multiple batches of them last holiday season.

Lemon Rosemary Sugar Cookies  |  Lemon & Mocha

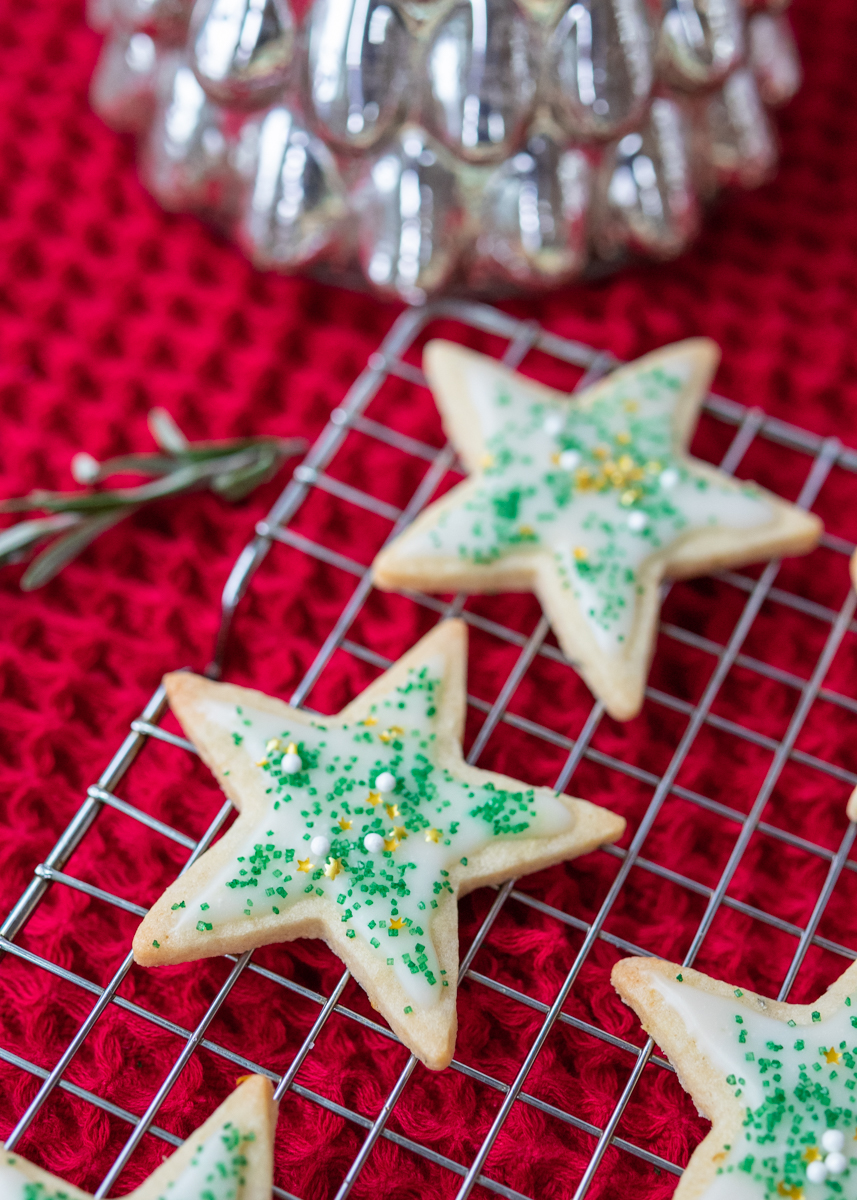
After plenty of trial and error, these sugar cookies are tender and have the perfect balance of rosemary and lemon flavoring. Both are present without either being too overpowering and they both add something unique and that-was-so-good-I-need-another-one-ness to the cookies.

Lemon Rosemary Sugar Cookies  |  Lemon & Mocha

The glaze on top is lightly flavored with lemon as well and it adds just the right amount of sweetness to the cookies. Plus, it makes them look extra cute and festive!

Lemon Rosemary Sugar Cookies  |  Lemon & Mocha

The inspiration for these cookies came from watching all the different holiday baking competition shows last year. There were a few times the bakers used savory herbs in their recipes and I was so intrigued by the idea and the judges positive reactions that I figured I would give it a shot. I never thought a lemon rosemary cookie would be in my must-bake holiday cookie line-up, but here we are! Enjoy, everyone!

Lemon Rosemary Sugar Cookies  |  Lemon & Mocha

Lemon Rosemary Sugar Cookies
 
Yield: about 24 medium cookies
Ingredients
for the cookies
  • 12 tablespoons unsalted butter (1½ sticks), slightly softened
  • ¾ cup granulated sugar
  • 1 large egg, room temperature
  • 1½ teaspoons vanilla extract
  • ½ teaspoon lemon extract (or ¼ teaspoon lemon oil)
  • ¼ teaspoon almond extract
  • 2¼ cup all-purpose flour
  • ½ teaspoon baking powder
  • ¼ teaspoon salt
  • 2 teaspoons chopped fresh rosemary
  • Zest from ½ large lemon
for the icing
  • 1½ cups powdered sugar
  • ¼ teaspoon vanilla extract
  • ¼ teaspoon lemon extract
  • 1 teaspoon light corn syrup
  • 2 - 2½ tablespoons room temperature water
  • Pinch of salt
  • Green sanding sugar and sprinkles, for decoration
Directions
for the cookies
  1. Preheat oven to 350 degrees. Line 2 baking sheets with parchment paper and set aside.
  2. In a medium bowl, whisk together the flour, baking powder, salt and rosemary. Set aside.
  3. In the bowl of a stand mixer or in a large bowl with a hand mixer, beat the butter for 1 minute on medium-high speed. Add the sugar and beat on high speed until fluffy, about 3-4 minutes. Add the egg, vanilla extract, lemon extract, almond extract and lemon zest. Beat on high until fully combined.
  4. Add half the flour mixture. Beat on low speed until just combined. Add the remaining half and beat until only a few streaks remain. If the dough feels too soft add an additional 1 tablespoon of flour.
  5. Divide the dough in half. Roll out the first half onto a piece of parchment until you have a slab about ¼” to ⅛” thick. Repeat with the remaining half. If the dough is too sticky to roll out, put in the fridge for about 10 minutes before rolling. Stack the parchment slabs on top of one another on a baking sheet and place in the fridge for at least 1 hour.
  6. Use a medium cookie cutter to cut out the dough. Place the cut cookies onto the prepared baking sheets. Bake each cookie sheet for 9-12 minutes, rotating the baking sheet halfway through the baking time. Cookies are done when they have lightly colored edges and tops. Let cool for 5 minutes on the baking sheet set on a wire cooling rack then move to the cooling rack to cool completely.
for the icing
  1. Whisk everything together, starting with the 2 tablespoons of water. When you hold up your whisk and let it drip, the icing should hold for just a few seconds before dripping. If it’s too thick add the additional ½ tablespoon of water. If it’s too thin, add a little more powdered sugar.
  2. When the cookies are completely cooled, fill the icing in a pastry bag fit with a small tip to ice the cookies. Ice a few at a time before sprinkling with sanding sugar and sprinkles before they harden. I usually do this with the cookies set in a rimmed baking sheet lined with wax paper so sprinkles don’t go all over the place. Let the cookies set at room temperature for 24 hours to give the icing time to completely harden before stacking in containers.


Dark Chocolate Pecan Bars

Dark Chocolate Pecan Bars  |  Lemon & Mocha

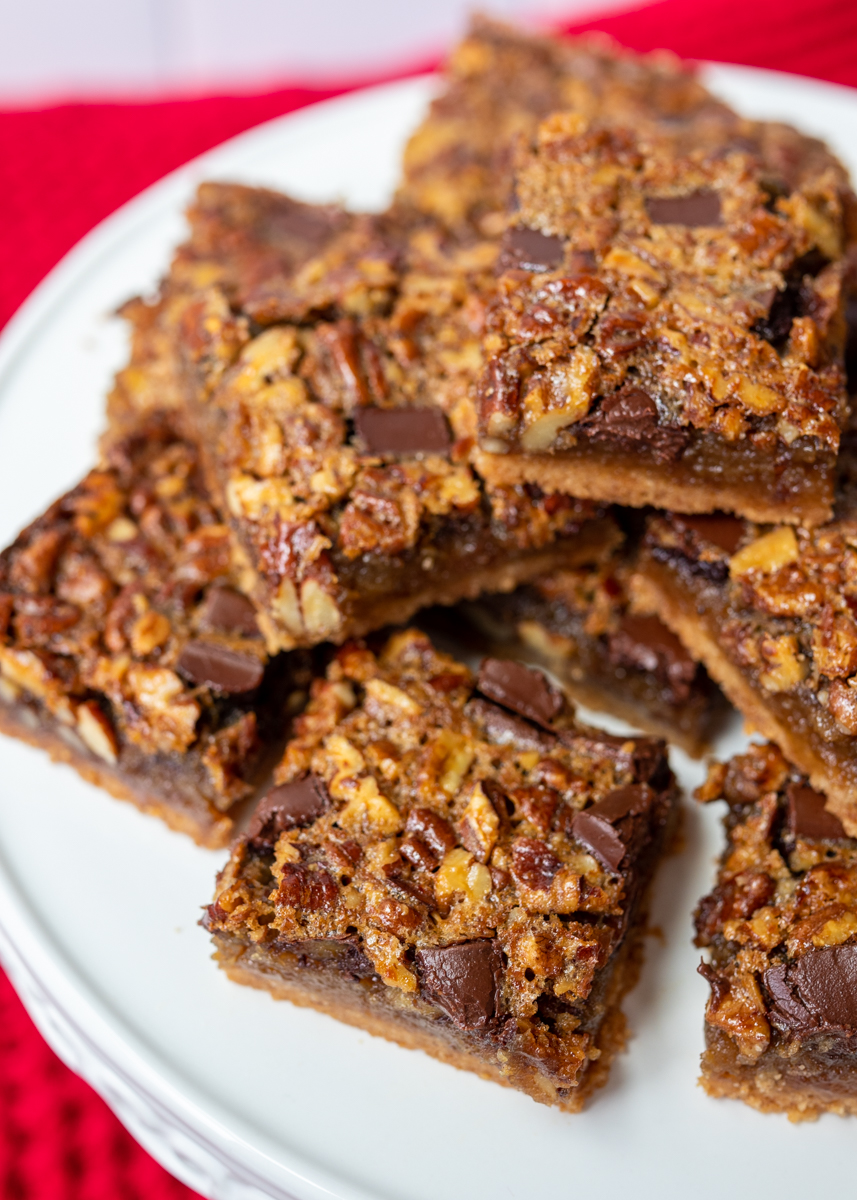
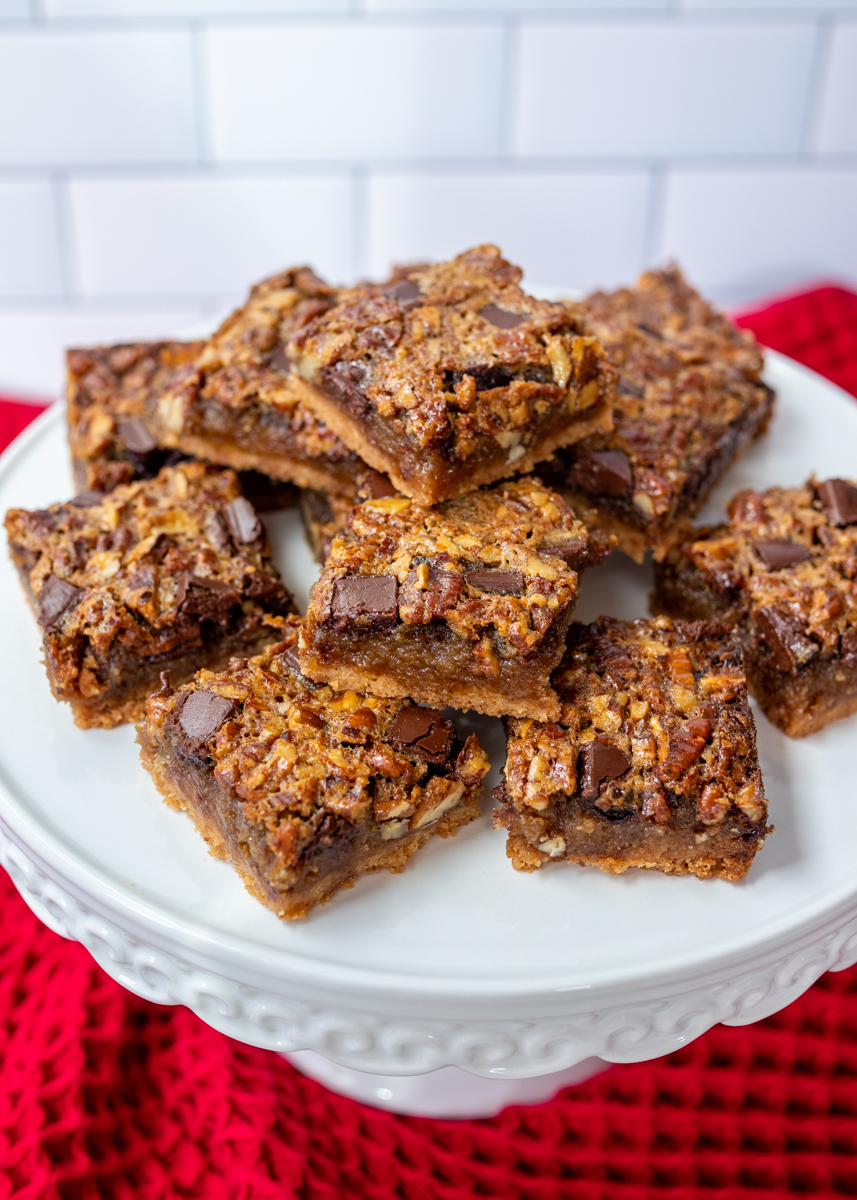
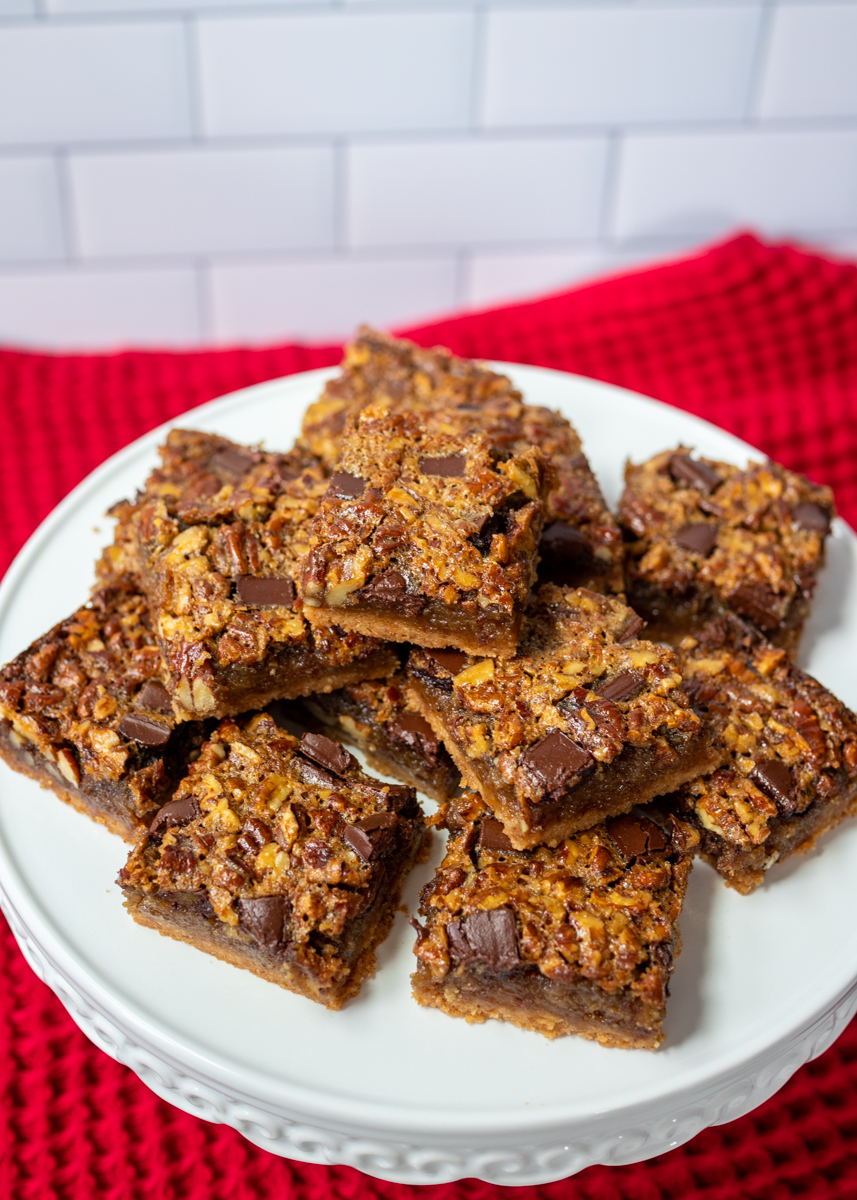
Today is a very special day for two reasons! The first reason November 25, 2019 is so incredibly awesome is because I’m sharing these epic Dark Chocolate Pecan Bars with you all. I promise after you try these bars life will soon be B.D.C.P.B. (Before Dark Chocolate Pecan Bars) and A.D.C.P.B. (After Dark Chocolate Pecan Bars).

Dark Chocolate Pecan Bars  |  Lemon & Mocha

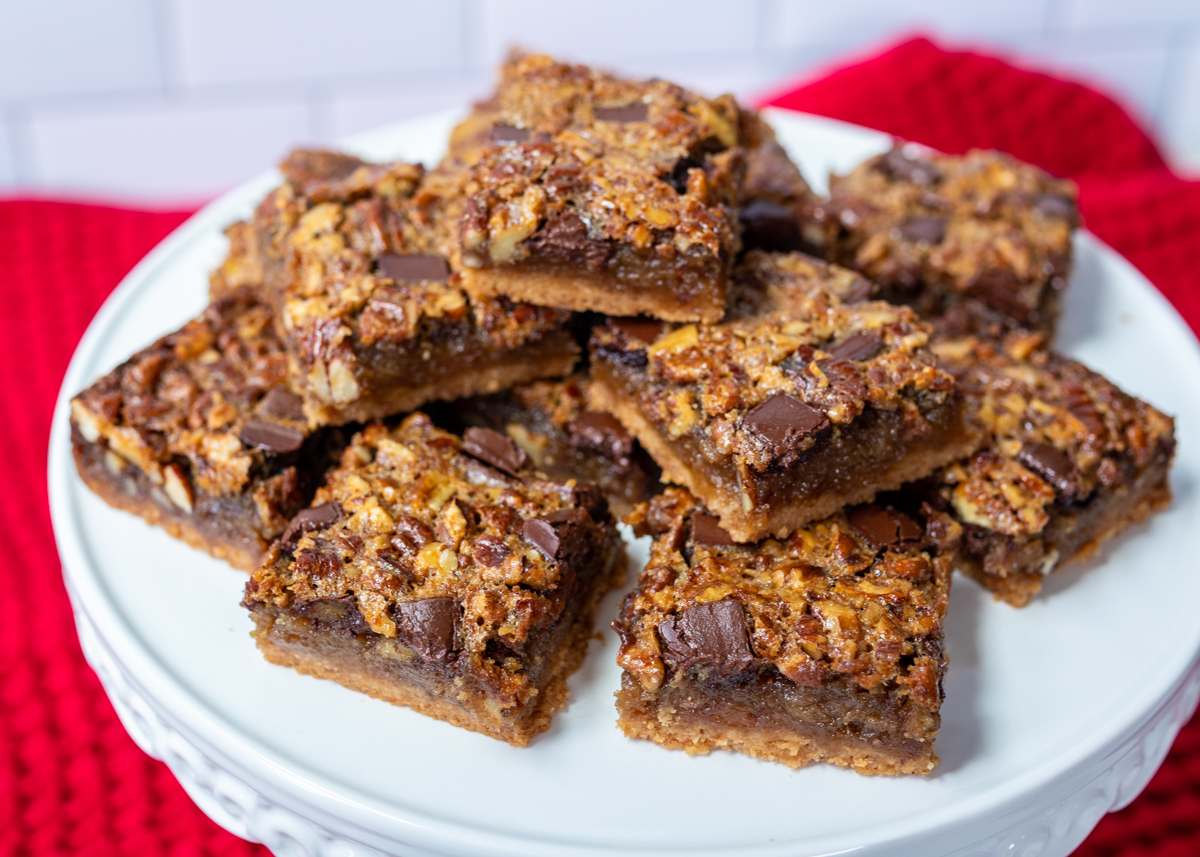
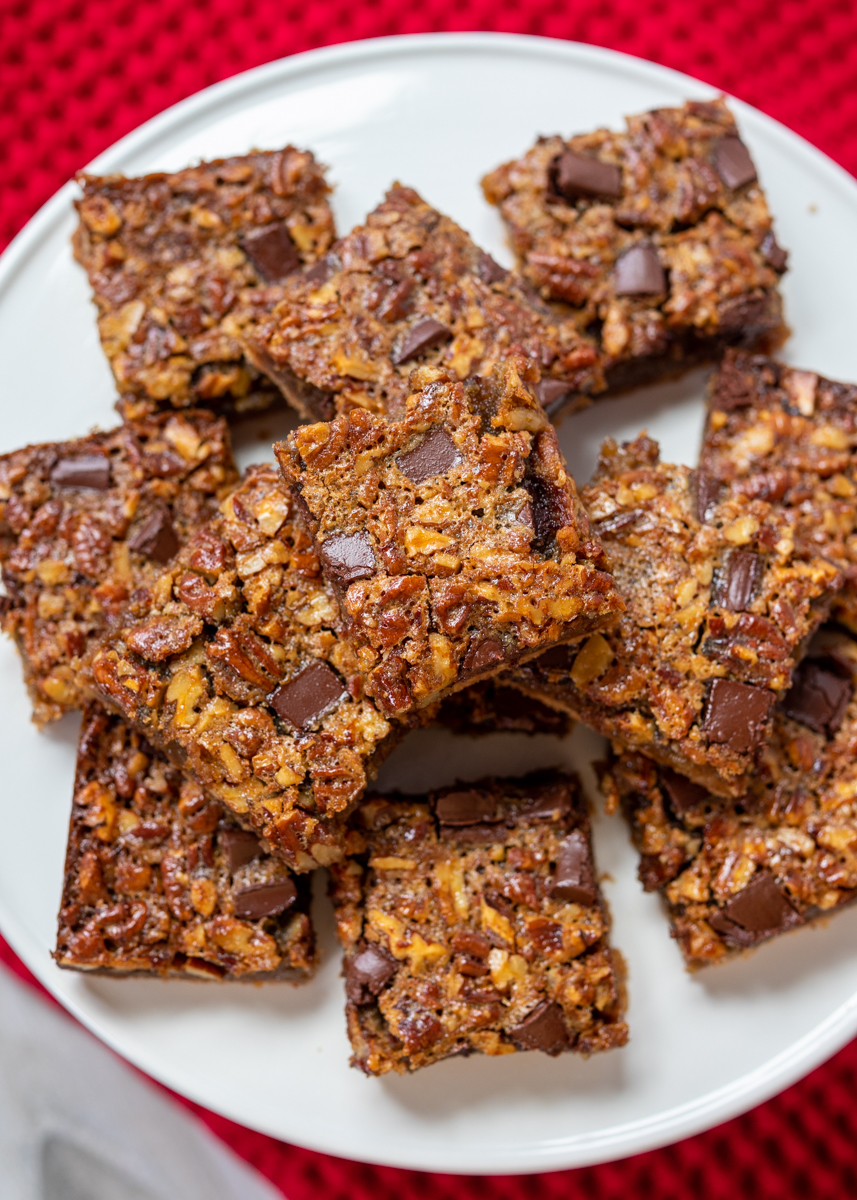
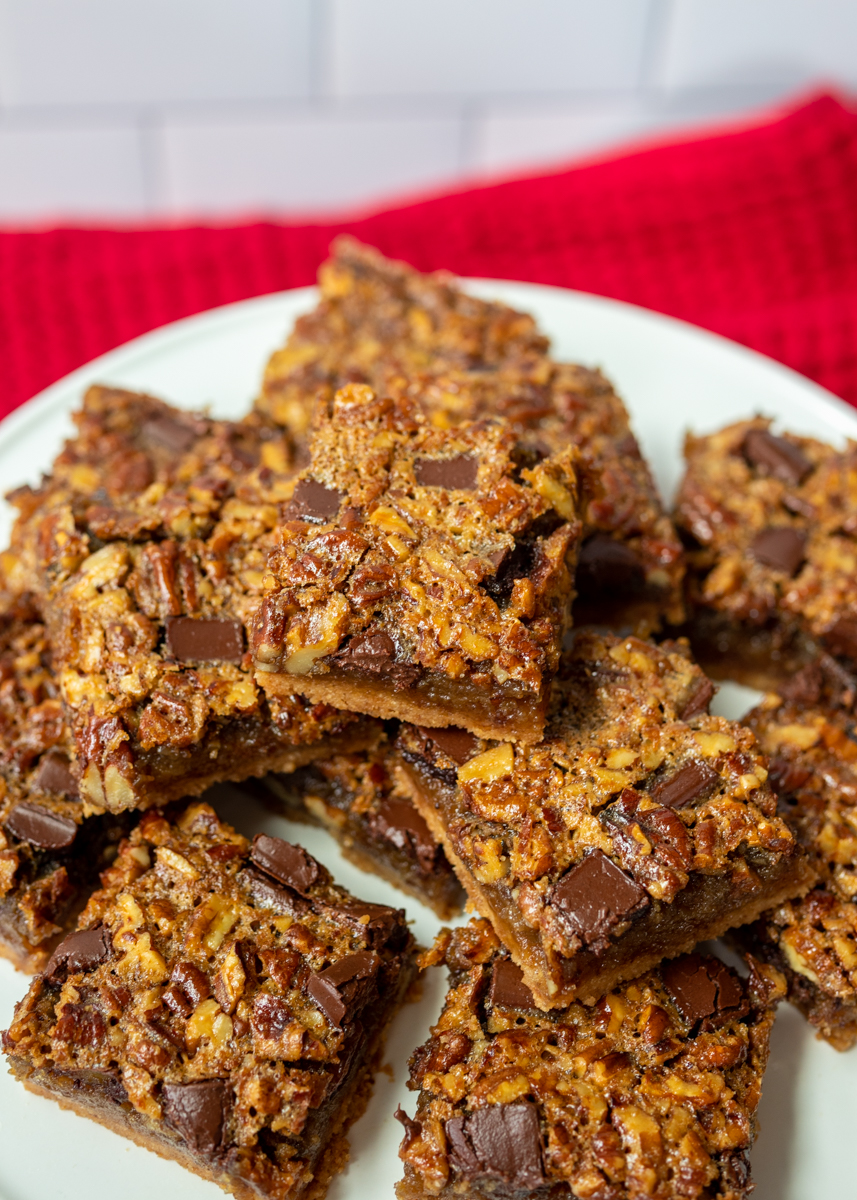
Gooey, crunchy and loaded with pecans, these bars are really just that good. Plus, they have chocolate chunks in them, which always, always takes pecan pie to the next level. They are like your favorite pecan pie in an easy to eat bar form with a crust made from ground pecans, flour, sugar, salt and butter instead of a pie crust.

Dark Chocolate Pecan Bars  |  Lemon & Mocha

I’ve eaten these Dark Chocolate Pecan Bars at a variety of temperatures and they all taste delicious. By that I mean the temperature of the bars, by the way, not the temperature outside, although I’m sure I would enjoy these bars in all weathers as well! Room temperature, chilled in the fridge or straight from the freezer have all resulted in perfectly tasty pecan bars. Then there was this one day when I decided to defrost a pecan bar I had frozen a little in the microwave and it got a little warm and it was melty and extra gooey and I’m starting to feel a little faint just thinking about it.

Dark Chocolate Pecan Bars  |  Lemon & Mocha

I would talk about how you could add a little scoop of vanilla ice cream to it, but then I definitely might actually pass out from how amazing that sounds so I’m going to change gears and talk about the second reason today is special. It’s my stepmom’s, Diane, birthday! Yay! For those of you who have been following Lemon & Mocha for a while, you know that Diane loves chocolate and also pecan pie so it’s only fitting to post these bars on her birthday.

Dark Chocolate Pecan Bars  |  Lemon & Mocha

Oh, I almost forgot to mention that these are cookies #3 in our 12 Days of Cookies series we’re doing this holiday season on Lemon & Mocha and they also are the Food Network Magazine November cookies so thumbs up to Food Network Magazine for coming up with such an awesome recipe!

Dark Chocolate Pecan Bars  |  Lemon & Mocha

Dark Chocolate Pecan Bars
 
Yield: 24 bars
Ingredients
for the crust
  • ⅓ cup pecans
  • 2 cups all-purpose flour
  • ½ cup granulated sugar
  • ½ teaspoon salt
  • 12 tablespoons cold unsalted butter (1½ sticks), cut into cubes
for the topping
  • ¾ cup dark corn syrup
  • ½ cup granulated sugar
  • ½ cup brown sugar
  • 4 large eggs
  • 4 tablespoons unsalted butter, melted
  • 2 teaspoons vanilla extract
  • ⅛ teaspoon salt
  • 1½ cups pecans, roughly chopped
  • ½ cup semisweet chocolate chunks
Directions
for the crust
  1. Preheat the oven to 350 degrees F. Line a 9x13” baking pan with aluminum foil, being sure to leave a 2-inch overhang on 2 sides. If not using nonstick aluminum foil, coat the foil with cooking spray. Set aside.
  2. In a food processor, pulse the pecans until they are finely ground. Add the flour, sugar and salt. Pulse to combine. Add the cold butter cubes and pulse until the dough starts to clump together. The dough will still be crumbly and sand-like. Pour the pecan mixture into the prepared baking sheet and use your fingers to press down into an even layer. Bake for 25-30 minutes, or until golden brown and set.
for the filling
  1. While the crust is baking, make the filling. In a large mixing bowl, whisk together the corn syrup, granulated sugar, brown sugar, eggs, melted butter, vanilla and salt. Once smooth, stir in the pecans. Pour the filling over the warm crust as soon as it’s out of the oven. Sprinkle the chocolate chunks over top. Return to the oven and bake for 25-30 minutes, or until the top is set and doesn’t jiggle if you wiggle the pan. Place the baking pan on a wire cooling rack and let the bars cool completely in the pan. Once cool, remove from the pan and cut into squares.

 Recipe from January/February 2019 issue of Food Network Magazine.

Some of the links above are affiliate links, which means I may receive a small commission for my referral. This does not affect the retail cost of the item. Thank you for supporting Lemon & Mocha!

Baked Brie Fruit & Nut Tartlets

Baked Brie Fruit & Nut Tartlets  |  Lemon & Mocha

Sometimes the tastiest recipes are born out of a classic fridge and freezer clean-out. Last month I was trying to clear out our freezer to have space for all the freezer meals I prepped in anticipation of our little guy’s arrival. Side note: I plan to do a detailed freezer meal prep post when I’m back from my maternity leave so stay tuned!

Baked Brie Fruit & Nut Tartlets  |  Lemon & Mocha

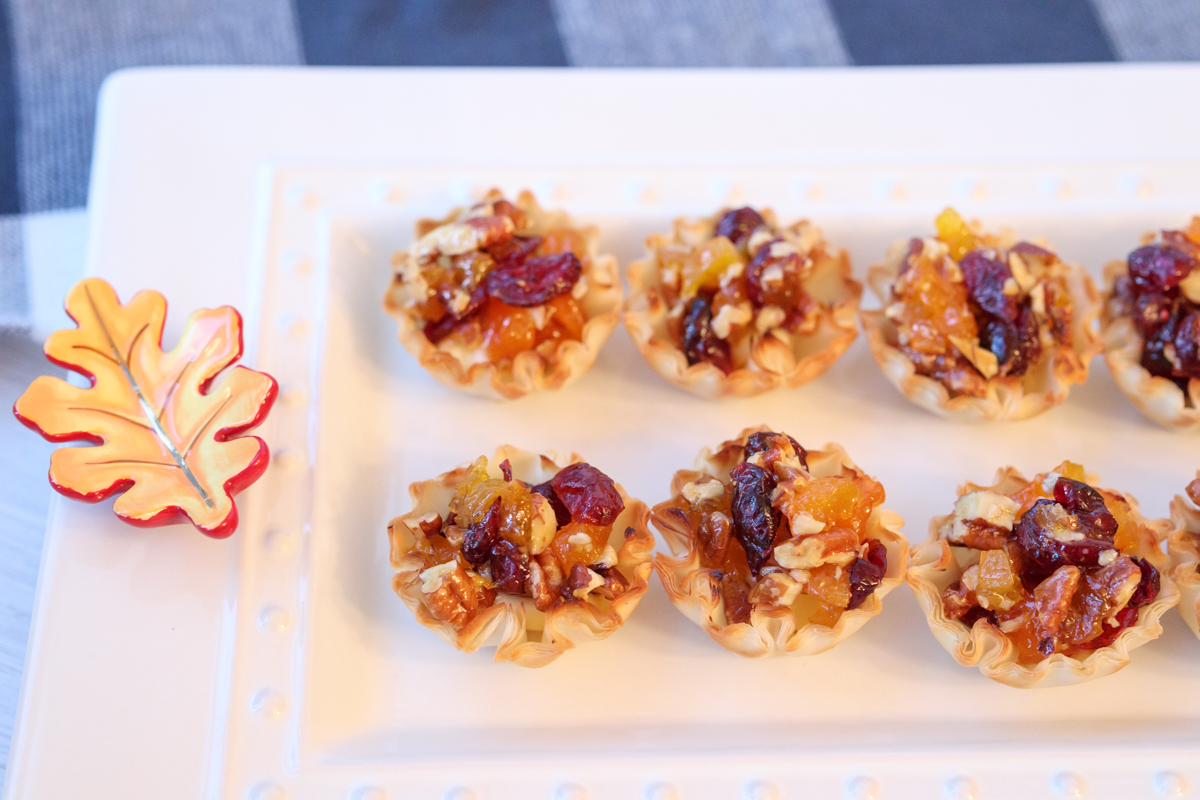
Anyways, the freezer was stuffed with all sorts of odds and ends, one of which was a package of these frozen mini fillo shells. I can’t for the life of me remember why I bought them, but it was clearly for some recipe that never came to be. While I was brainstorming what to stuff the flaky tartlet shells with I thought about how much I love baked brie, especially in the fall when it starts getting chilly outside.

Baked Brie Fruit & Nut Tartlets  |  Lemon & Mocha

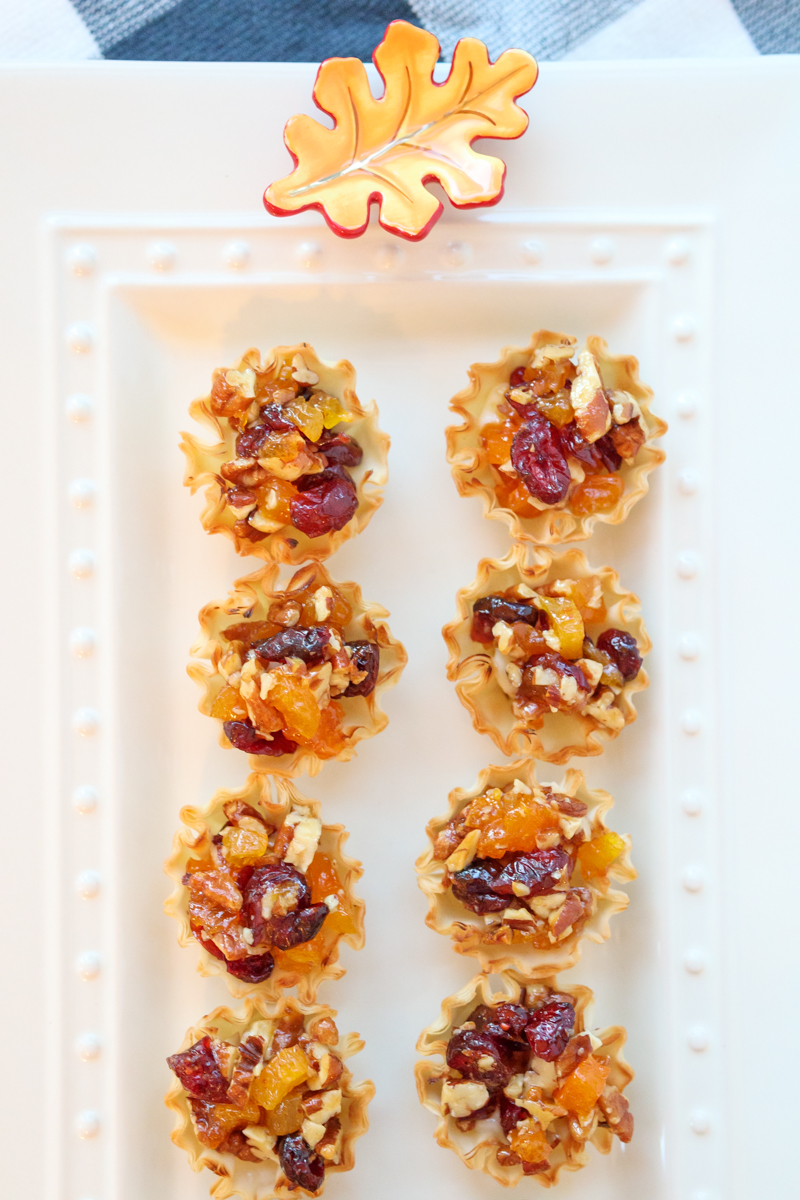
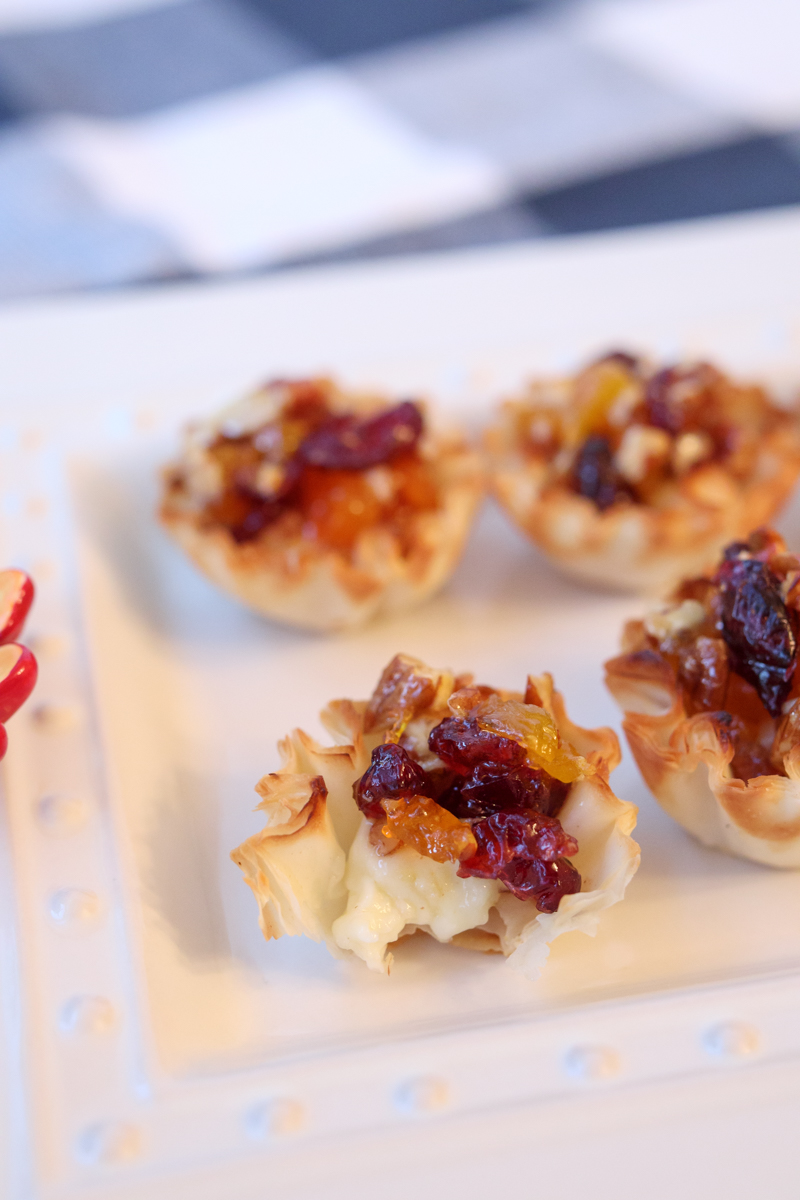
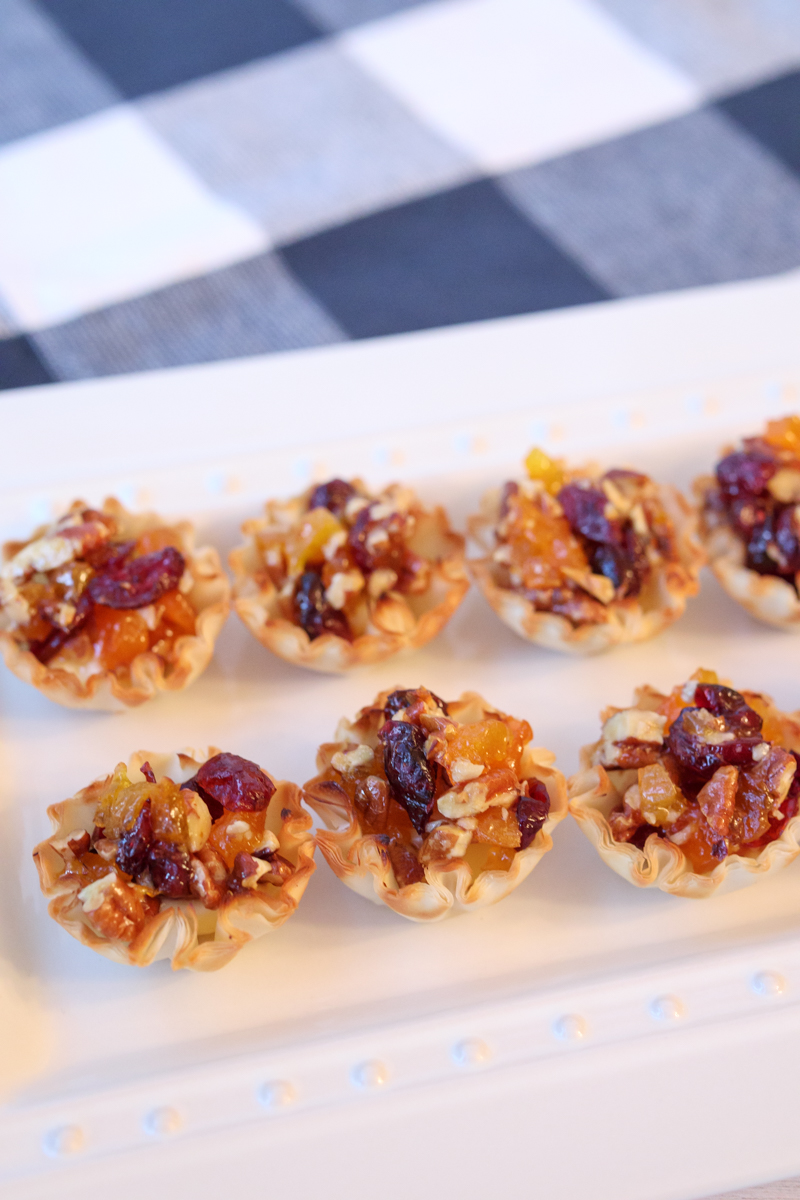
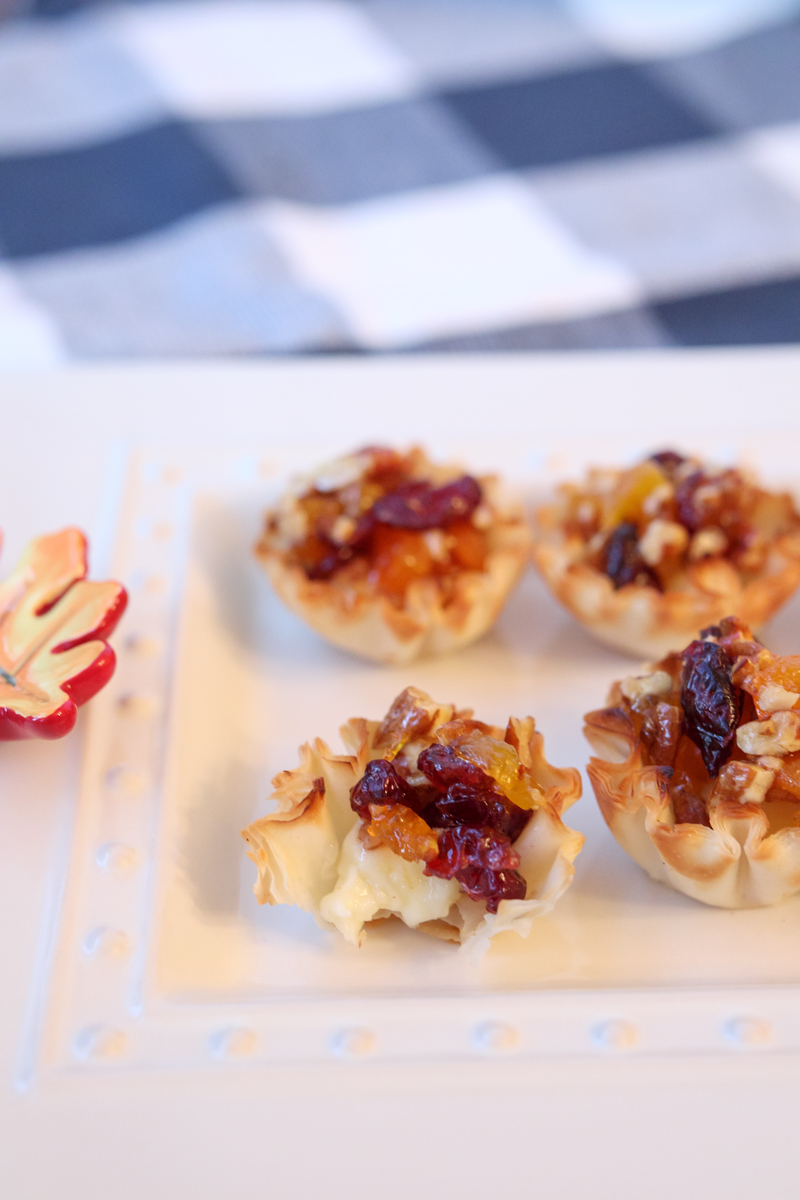
These bites are a take on a baked brie that’s been cooked until gooey and smothered with warm nuts and dried fruit. The first time I made them they were really good, but they needed more of that gooey brie so I adjusted the recipe to ensure you won’t be missing the cheese in your tartlets.

Baked Brie Fruit & Nut Tartlets  |  Lemon & Mocha

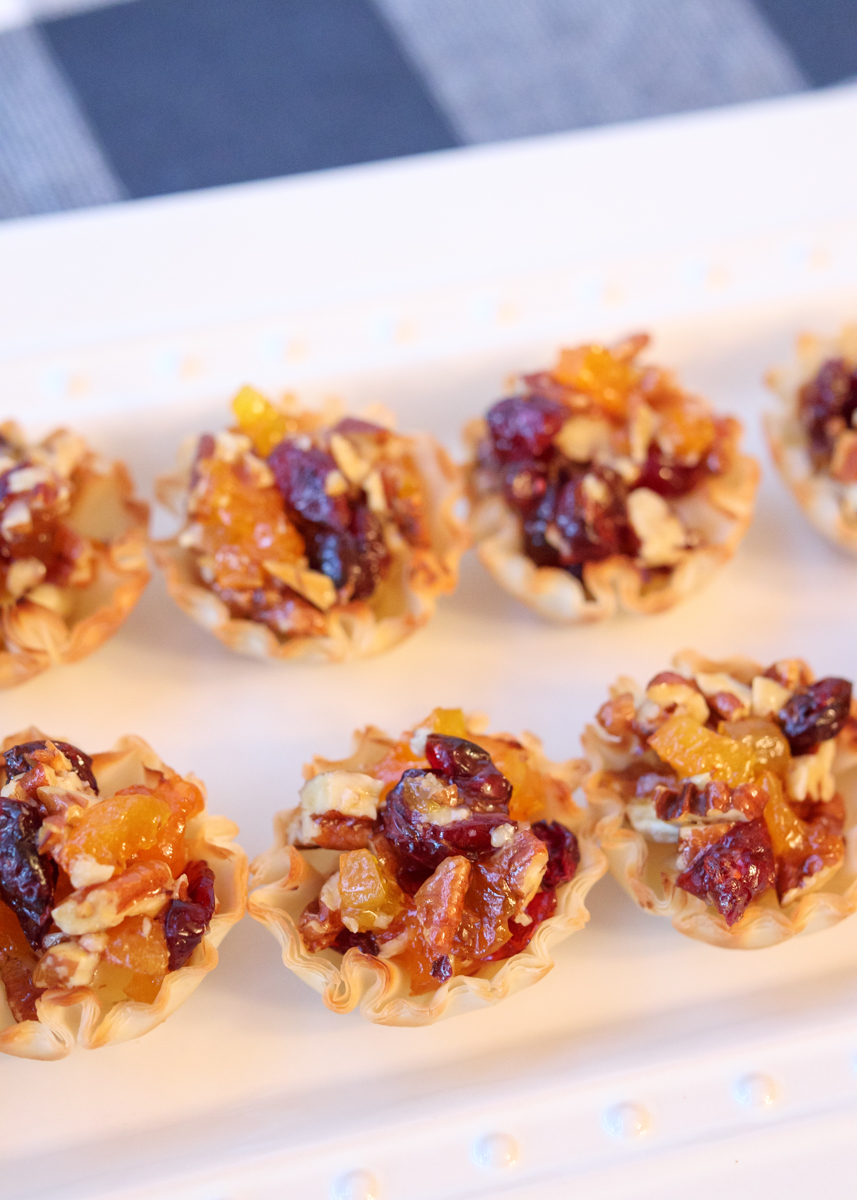
For the topping, we’re combining crunchy toasted pecans, tart dried cranberries, dried apricots and some apricot preserves for a little sweetness. This mixture gets dolloped on top of the brie in the fillo shells before being baked for just ten minutes. These is a great mini appetizer for Thanksgiving or a Christmas party, especially because it is so incredibly quick to throw together.

Baked Brie Fruit & Nut Tartlets  |  Lemon & Mocha

Now, I hope you all have enjoyed the last several savory recipes because from this Friday until Christmas Lemon & Mocha is going to be all about the sweets! I’m doing something fun and exciting this holiday season: Lemon & Mocha’s 12 Days of Cookies. I have so many must-make cookie recipes to share and I can’t wait for you to see them all!

Baked Brie Fruit & Nut Tartlets  |  Lemon & Mocha

Baked Brie Fruit & Nut Tartlets
 
Yield: 15 tartlets
Ingredients
  • ¼ cup chopped pecans
  • ¼ cup dried cranberries
  • 4 dried apricots, chopped
  • 2 tablespoons apricot preserves
  • 6 ounces brie, rind removed
  • 15 frozen mini fillo shells (Athens brand)
Directions
  1. Preheat oven to 350 degrees F.
  2. Toast the pecans. Place the chopped pecans on a baking sheet then bake for 3-5 minutes. Remove from the oven and let cool slightly.
  3. In a small bowl, combine the toasted pecans, dried cranberries, chopped apricots and apricot preserves. Set aside.
  4. Place the tartlet shells on a baking sheet. Cut the brie so you can put a small wedge into the bottom of each tartlet shell. Cover the brie in the tartlet shell with a spoonful of the apricot mixture. Bake for 10 minutes. Serve hot.


Halloween Monster Turkey Burger Sliders

Halloween Monster Turkey Burger Sliders  |  Lemon & Mocha

Halloween is tomorrow! Yay! As I’ve mentioned on Lemon & Mocha numerous times before, I love Halloween! I have so many fun childhood memories of Halloween and I can’t wait to start making Halloween memories with our little guy on the way.

Halloween Monster Turkey Burger Sliders  |  Lemon & Mocha

We went back and forth on whether we should put up Halloween decorations with me being just a couple weeks away from my due date, but ultimately I just couldn’t not put them up, even though I felt a little crazy for doing it. Do you decorate your house for Halloween?

Halloween Monster Turkey Burger Sliders  |  Lemon & Mocha

I usually post a chocolatey treat for Halloween, but since Matt and I are up to our eyeballs with all the desserts I’ve been baking I busted out a cute savory treat instead.

Halloween Monster Turkey Burger Sliders  |  Lemon & Mocha

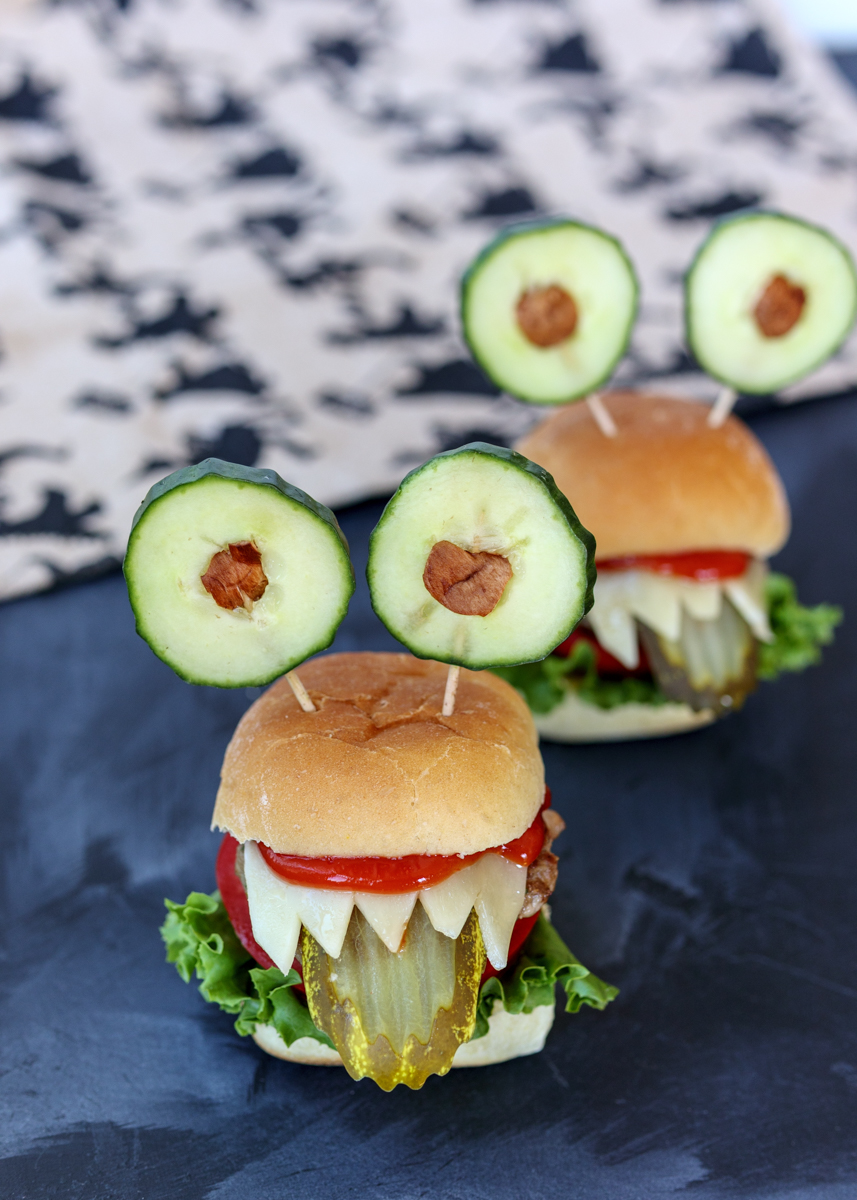
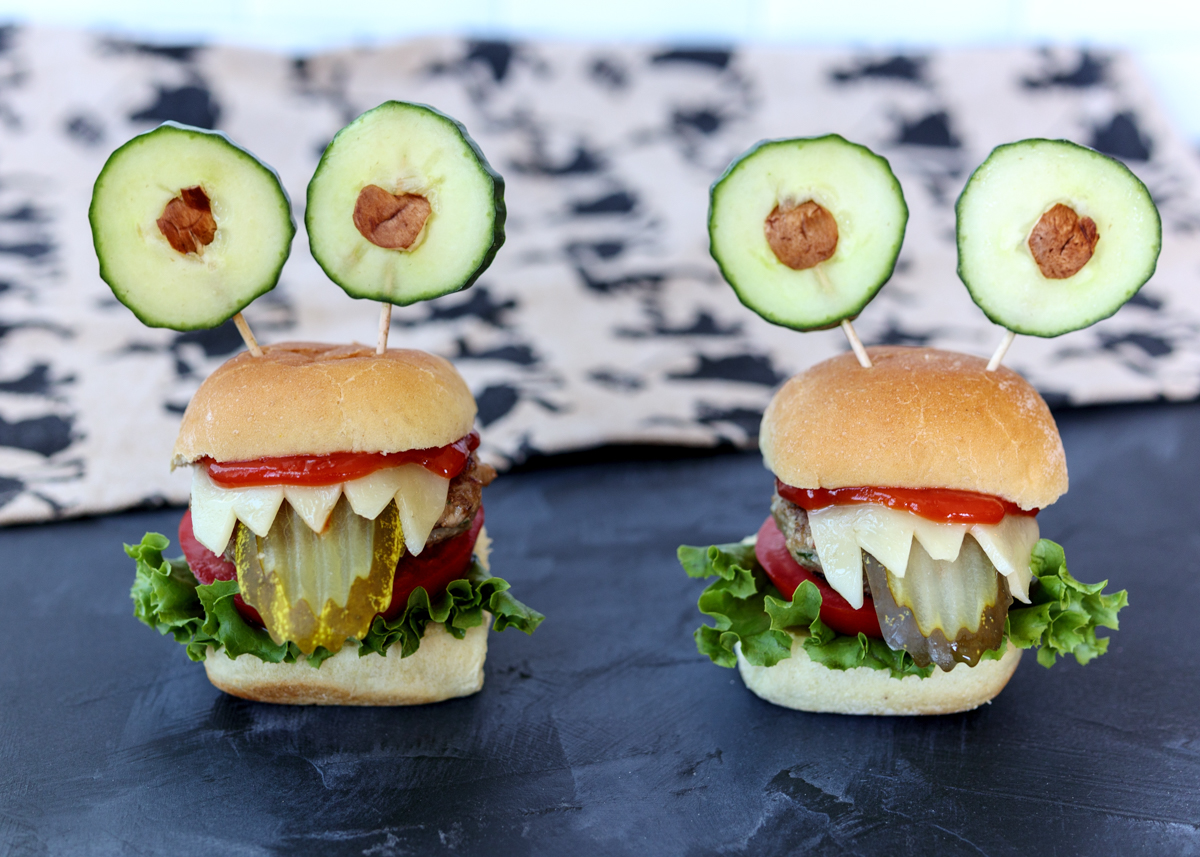
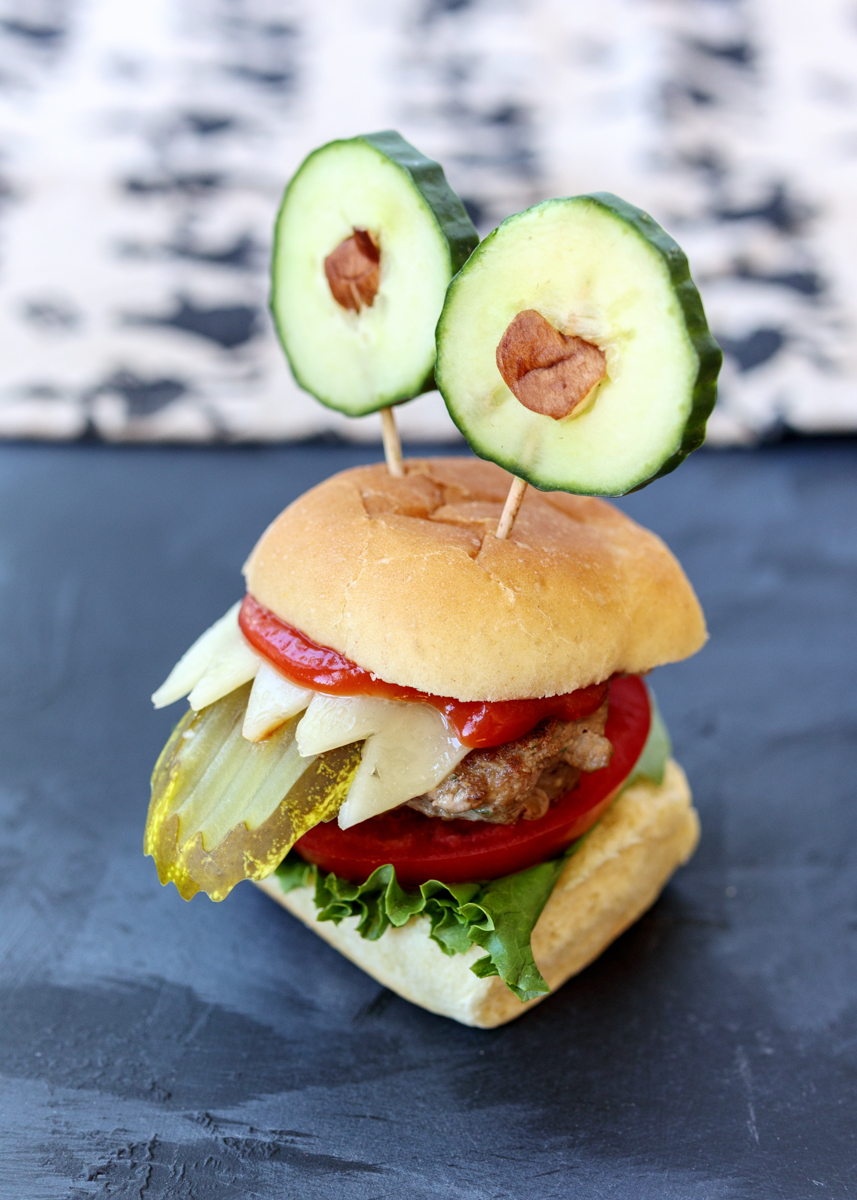
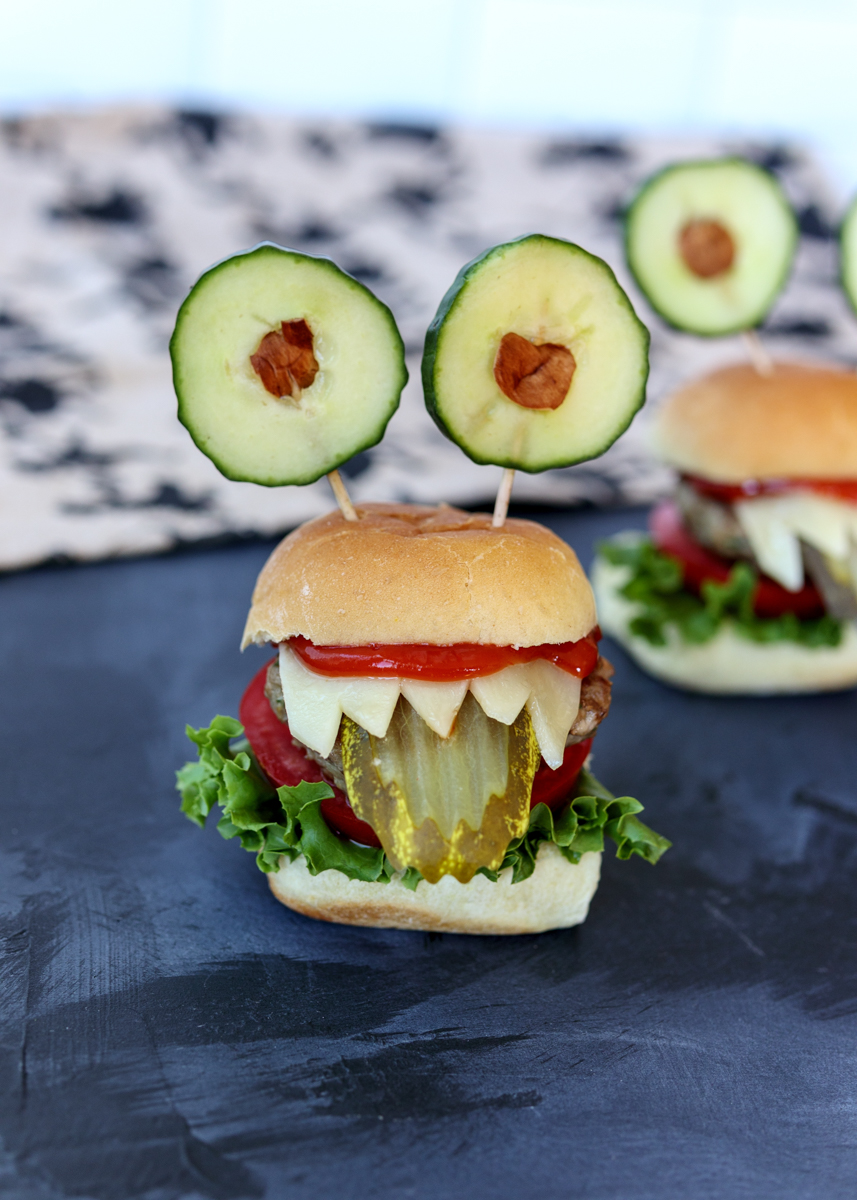
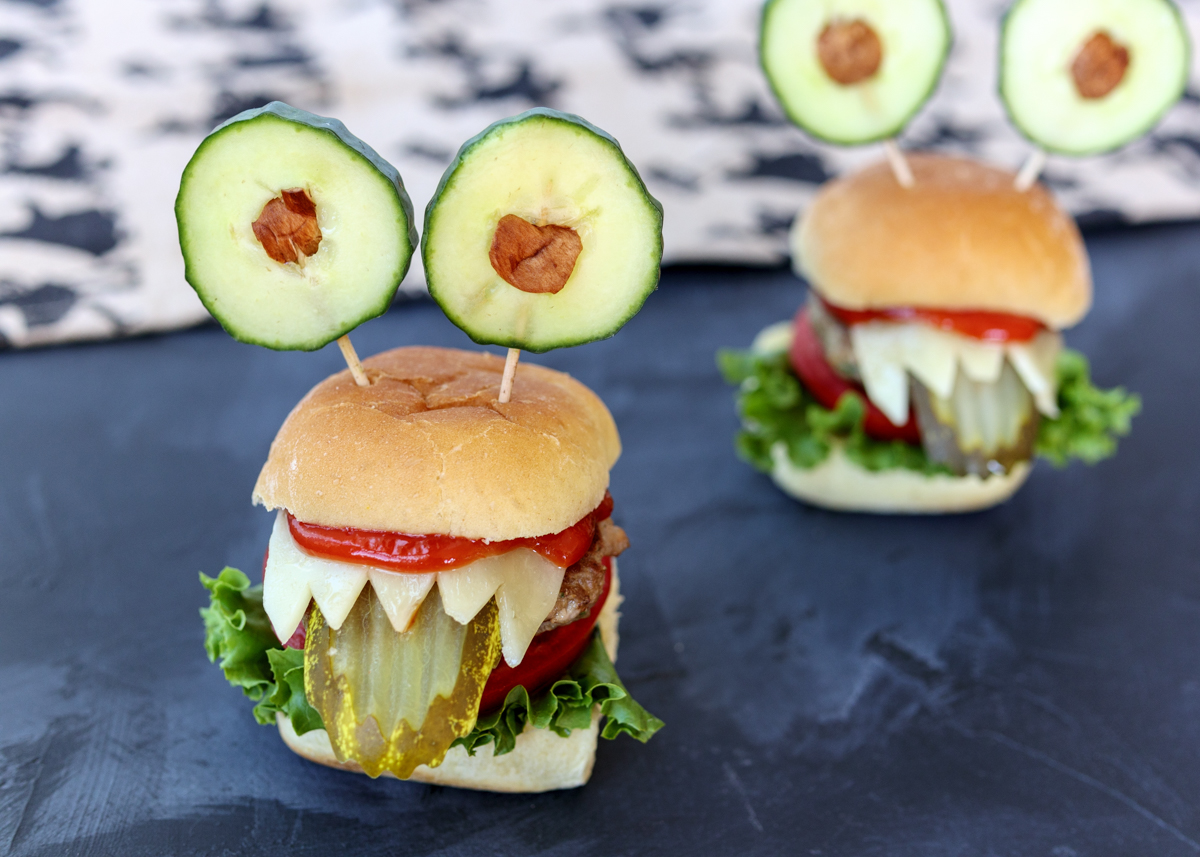
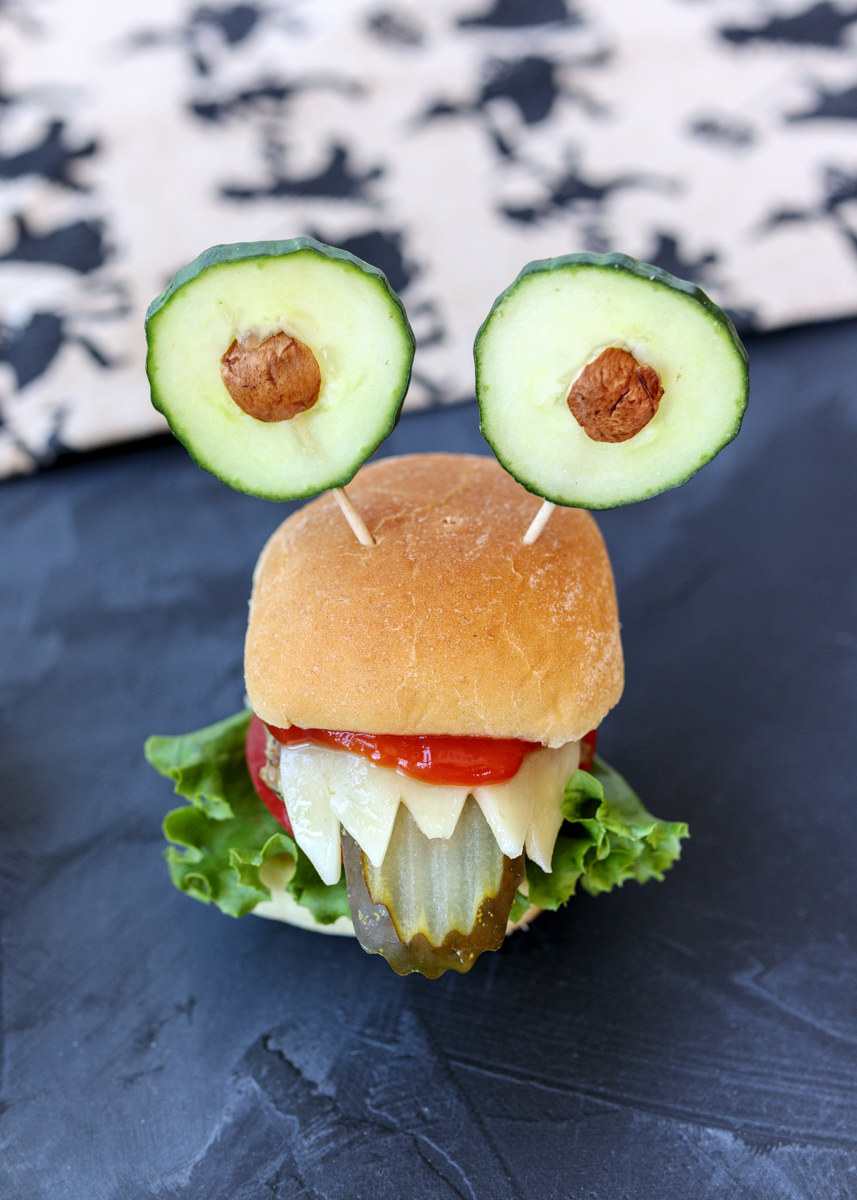
Turkey sliders have been fashioned into silly Halloween monsters, complete with cucumber eyeballs and pickle tongues! As fun as these Halloween Monster Turkey Burger Sliders are, they’re also so good! The turkey patties are juicy and packed with flavor because we’ve added a minced mixture of mushrooms, shallot and parsley to the ground turkey.

Halloween Monster Turkey Burger Sliders  |  Lemon & Mocha

Throw in a little olive oil, Worcestershire sauce and seasoning and then they are grilled or pan-seared to perfection. Since they’re so tiny they cook really quickly; just about four minutes on each side. Top it all off with some melty cheese and fresh veggies for a delicious dinner the whole family will love. Just don’t forget to cut pointy teeth marks into your sliced cheese! Happy Halloween, everyone!

Halloween Monster Turkey Burger Sliders  |  Lemon & Mocha

Looking for some more Halloween treat inspiration? I have a few recipes below to get you started:

Boozy Pumpkin Nutella Hot Chocolate  |  Lemon & Mocha

Boozy Pumpkin Nutella Hot Chocolate

Leftover Halloween Candy Chocolate Lasagna

Leftover Halloween Candy Chocolate Lasagna

Halloween Witch Chocolate Cupcakes

Halloween Witch Chocolate Cupcakes

Chocolate Marshmallow Monster Cookie Sandwiches

Chocolate Marshmallow Monster Cookie Sandwiches

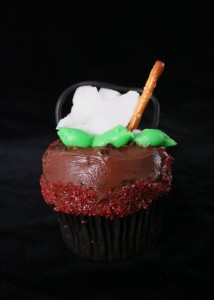
Halloween Witches' Cauldron Cupcakes

Halloween Witches’ Cauldron Cupcakes

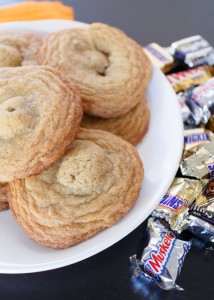
Leftover Halloween Candy Cookies

Leftover Halloween Candy Cookies

Halloween Monster Turkey Burger Sliders
 
Yield: 4 servings
Ingredients
  • 5-6 cremini mushrooms, stems removed, plus more for eyes
  • ½ shallot
  • 3 tablespoons fresh parsley
  • 1 pound ground turkey, 90% lean
  • 2 tablespoons olive oil
  • 1 teaspoon Worcestershire sauce
  • 1 teaspoon salt
  • ¼ teaspoon ground black pepper
  • 1 English cucumber
  • 16 toothpicks
  • 4 slices deli cheddar or American cheese
  • 8 slider buns
  • 8 small pieces of romaine lettuce
  • 8 small slices of tomato
  • 4 pickle sandwich slices, cut in half
  • Ketchup
Directions
  1. Add the cremini mushrooms, shallot and parsley to a food processor. Process until finely chopped. If you don’t have a food processor, finely chop by hand.
  2. In a large bowl, combine the mushroom mixture, ground turkey, olive oil, Worcestershire, salt and pepper, being sure not to over-mix. Divide the mixture into 8 even portions and form into slider patties, roughly a little bigger than the size of your slider buns. Let patties set in the fridge, covered, for 30 minutes.
  3. While the patties are in the fridge, prep your monster eyes and cheese teeth. Slice the English cucumber so you have 16 rounds. The slices can be thin, but not so thin that you’ll have difficulty securing them with a toothpick. Use extra cremini mushrooms to cut out little circles that will be the center of the eyes. Carve a little round out of the center of an English cucumber slice the size of one of your mushroom eye centers. Stick the mushroom center into the hole in the cucumber and stick a toothpick up through the cucumber and the mushroom piece securing it in place. Repeat for the remaining 15 eyes. For the cheese teeth, cut each slice of cheese in half then cut little teeth points at the edge of each slice. Repeat until you have 8 cheese teeth slices.
  4. Lightly spray a grill pan or nonstick sauté pan with olive oil cooking spray and heat over medium-high heat. Cook the slider patties for 4 minutes on each side, or until they reach an internal temperature of 165 degrees F. Remove from the heat and add a cheese teeth slice to each slider so that the teeth prongs overhang a little.
  5. To assemble a slider, place a piece of lettuce on the bottom slider bun. Top with a tomato slice then the cheese-topped patty. Lift up the cheese a little to tuck the pickle half underneath so it sticks out like a tongue. Top with some ketchup then the top slider bun. Stick two cucumber toothpick eyeballs into the top. Repeat for the remaining sliders.


Peanut Butter S’mores Fudge

Peanut Butter S'mores Fudge  |  Lemon & Mocha

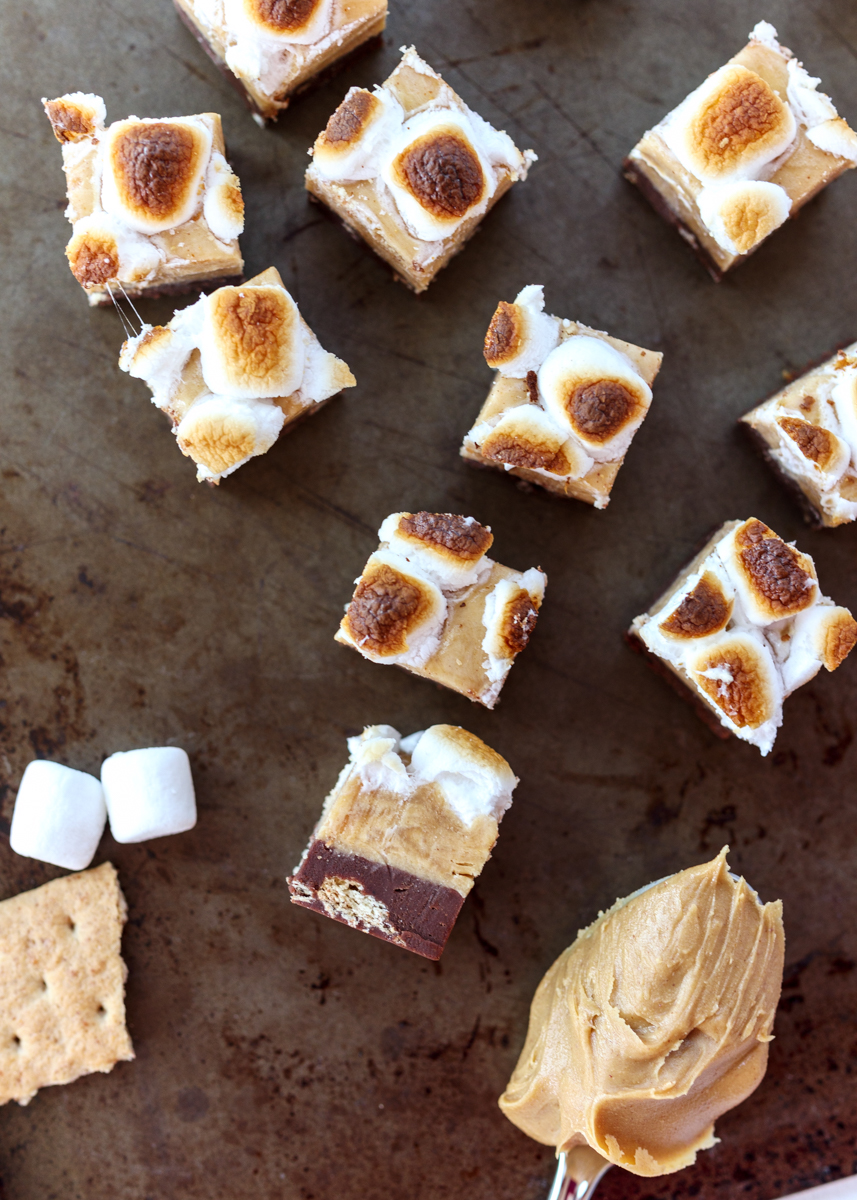
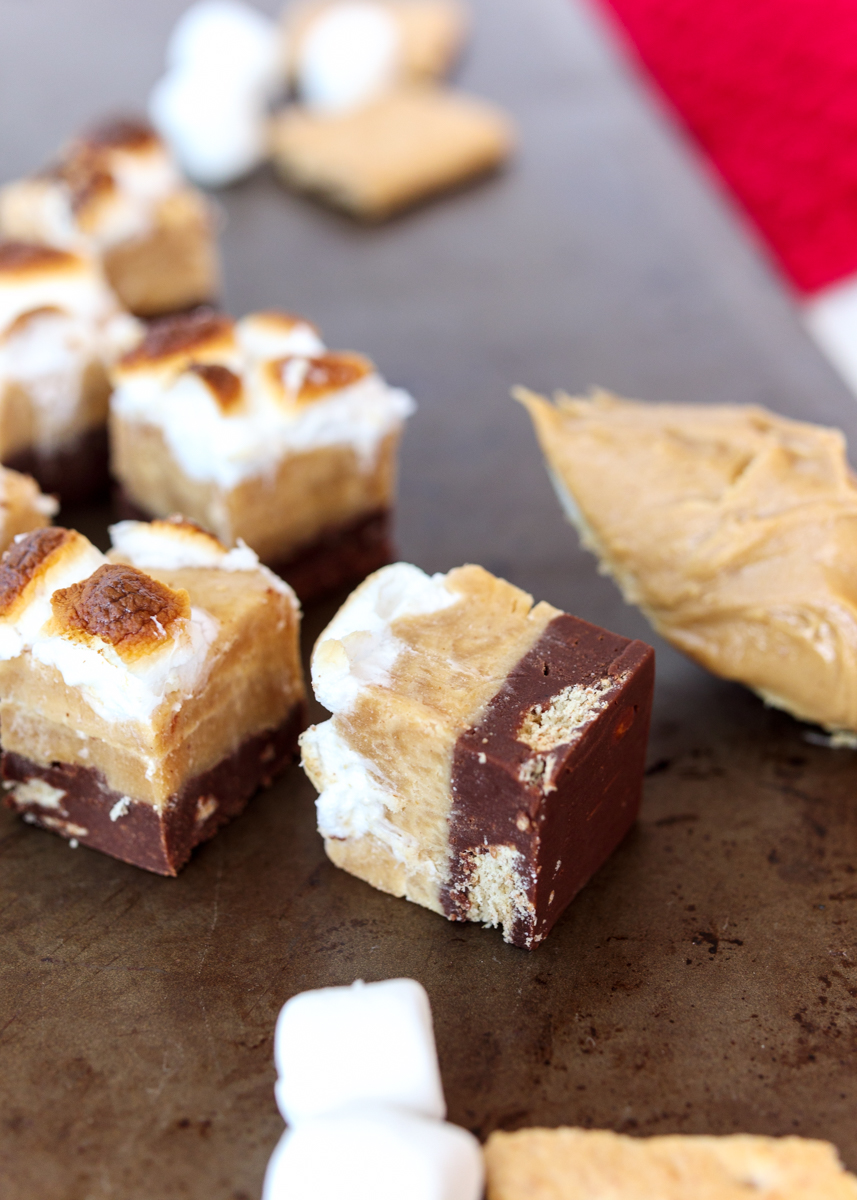
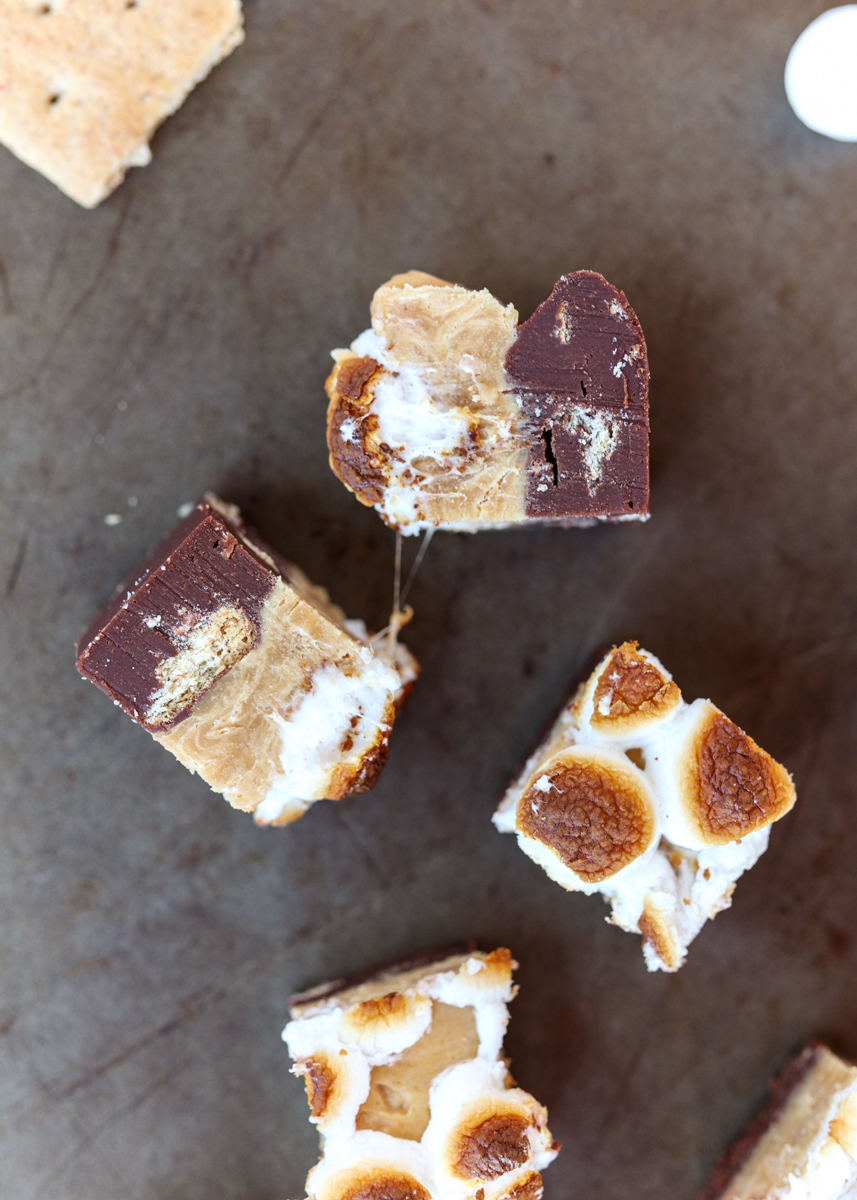
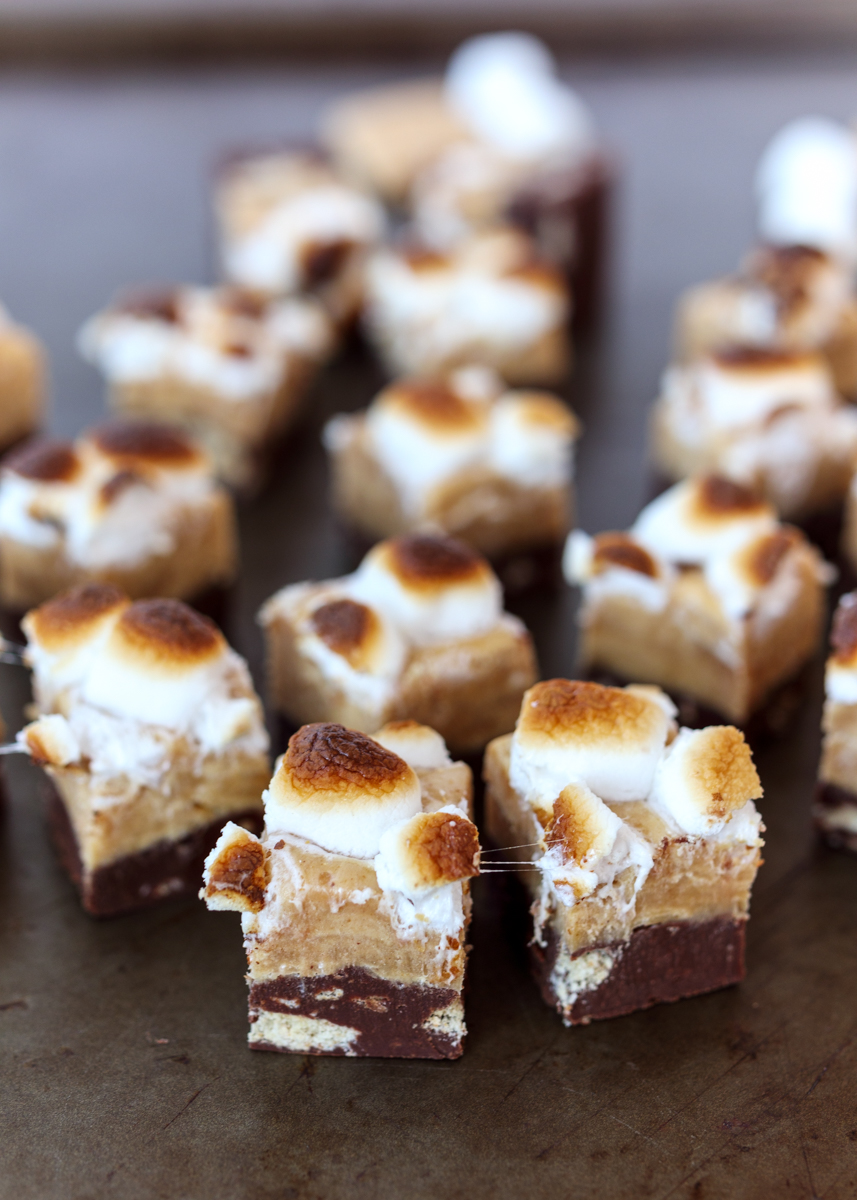
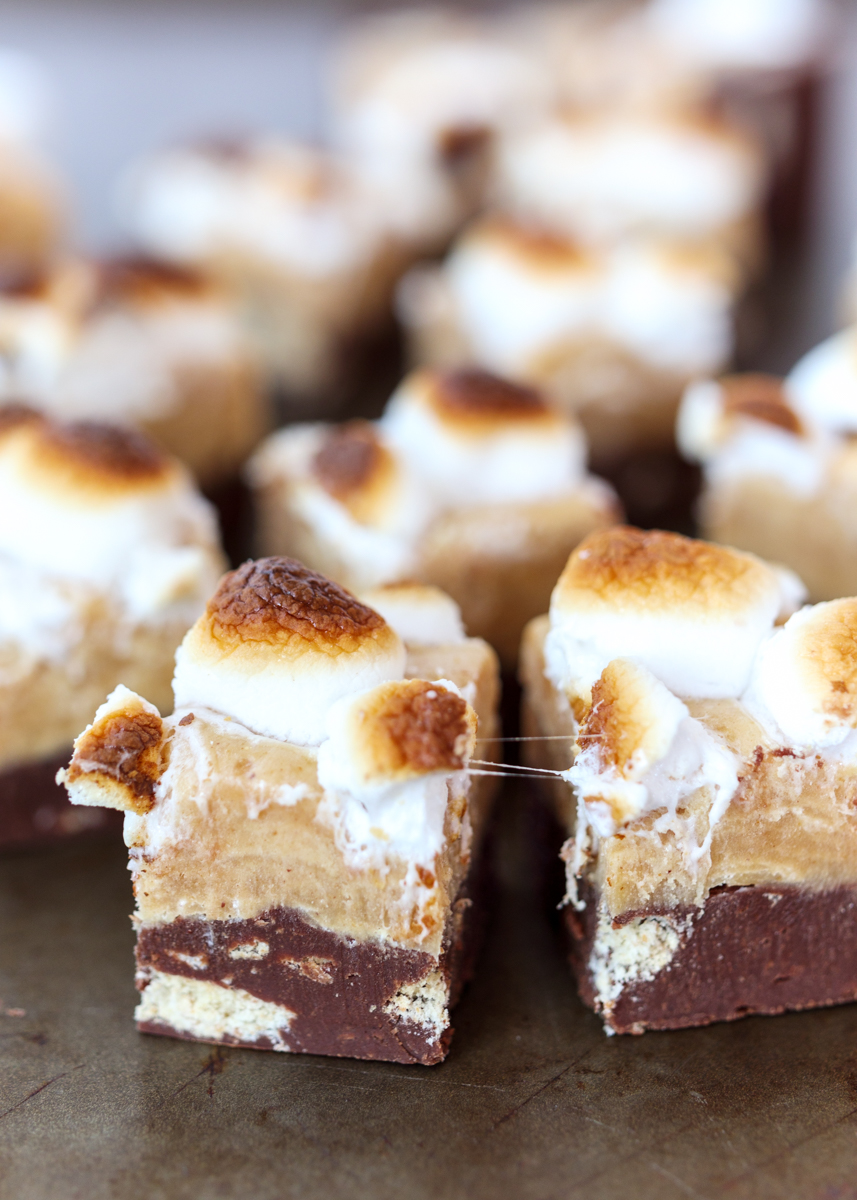
Peanut. Butter. S’mores. Fudge. YES! This, my friends, is what fudge dreams are made of and you can be eating some giddy with delight in no time at all.

Peanut Butter S'mores Fudge  |  Lemon & Mocha

I’ve shared the World’s Smoothest Peanut Butter Fudge and the unreal S’mores Fudge, but it was time these two met for an insanely delicious mash-up. I came up with this combination last year when I decided to morph together Matt’s favorite fudge variation, the S’mores Fudge (which is also my favorite), with my second favorite fudge variation, the World’s Smoothest Peanut Butter Fudge. After one bite, and then a second, third, and fourth, etc. just to make sure, I was convinced that peanut butter and s’mores belong together.

Peanut Butter S'mores Fudge  |  Lemon & Mocha

I have never made a peanut butter and s’mores treat before, but this one fudge recipe has changed that forever so expect some additional future pb-s’mores combinations. In the meantime, let’s focus on this life-changing fudge recipe in front of us.

Peanut Butter S'mores Fudge  |  Lemon & Mocha

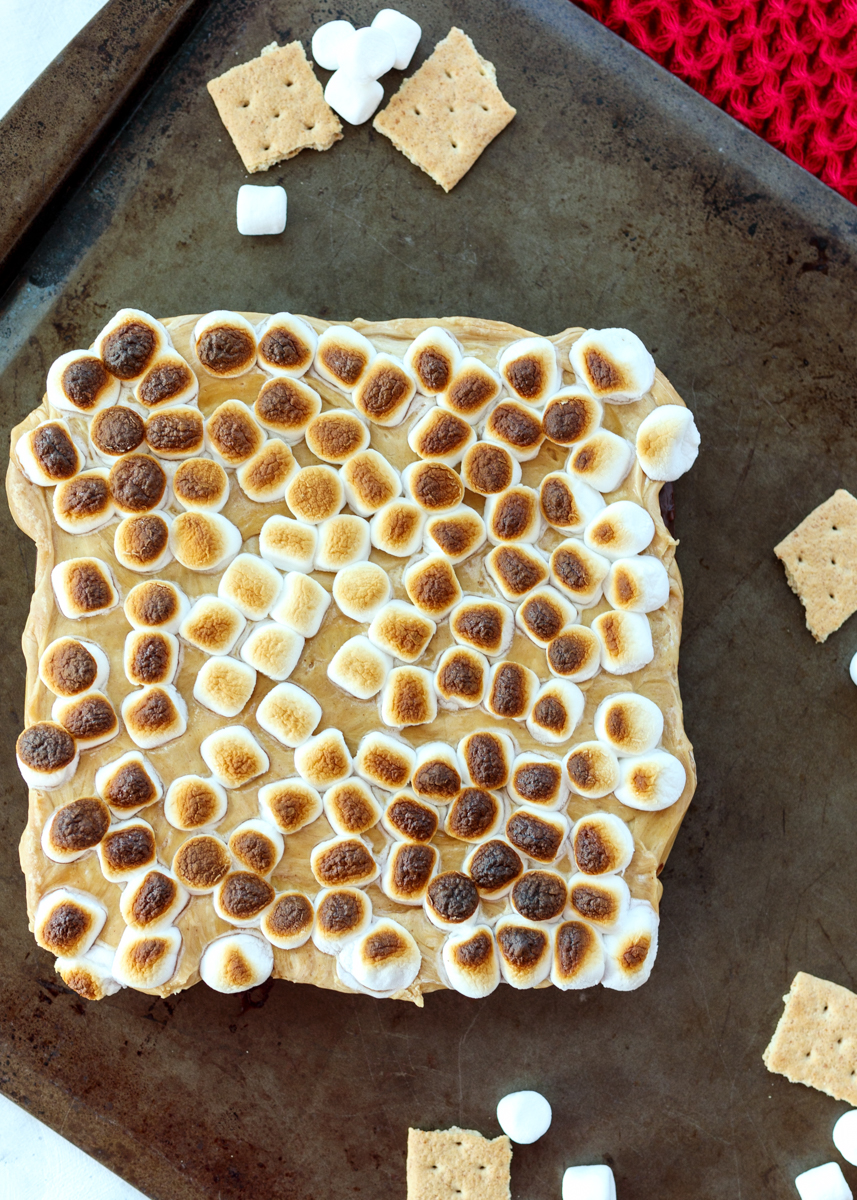
The base is the World’s Smoothest Chocolate Fudge with broken graham cracker pieces folded in. The second layer is the World’s Smoothest Peanut Butter Fudge with marshmallow fluff swirled in. Finally, it’s all topped off with some torched mini marshmallows. Yum!

Peanut Butter S'mores Fudge  |  Lemon & Mocha

I wanted this to still be a normal sized batch of fudge so we’re dividing the can of sweetened condensed milk between the two flavors and essentially making two half portions to get one regular sized batch. I promise you everyone will go nuts over this Peanut Butter S’mores Fudge!

Peanut Butter S'mores Fudge  |  Lemon & Mocha

If you’re looking for more fudge inspiration as we head into the weekend, below are all the Lemon & Mocha fudge posts. Enjoy!

World’s Smoothest Chocolate Fudge
Chocolate Peppermint Fudge
S’mores Fudge
Turtle Caramel Pecan Fudge
World’s Smoothest Peanut Butter Fudge
Saltine Toffee Fudge aka Christmas Crack Fudge
Dirt Fudge
Dark Chocolate Pistachio Cranberry Fudge
Dark Chocolate Raspberry Fudge

Peanut Butter S'mores Fudge
 
Yield: 64 pieces
Ingredients
  • 1 tablespoon unsalted butter
  • ½ ounce unsweetened Baker’s baking chocolate
  • 14 ounces sweetened condensed milk, divided
  • 1 cup semisweet chocolate chips
  • 1 teaspoon vanilla, divided
  • ⅓ cup broken graham crackers
  • 1 tablespoon creamy peanut butter
  • ½ ounce Baker’s white baking chocolate
  • 1 cup peanut butter chips
  • ⅓ cup marshmallow fluff
  • 1 cup mini marshmallows
Directions
  1. Line an 8" x 8" pan with wax paper and set aside.
  2. Melt the butter and the Baker’s chocolate in a double boiler over medium heat, stirring occasionally.
  3. Pour in the chocolate chips and stir with a heatproof rubber spatula until fully melted.
  4. Carefully stir in half of the can condensed milk to combine and remove from the heat. Stir in the ½ teaspoon of the vanilla extract and the broken graham crackers.
  5. Pour the chocolate mixture into the prepared pan and smooth the top with the spatula.
  6. When the double boiler is cool enough to clean, wash and dry to use for the second layer. Melt the peanut butter and the Baker’s white baking chocolate in a double boiler over medium heat, stirring occasionally.
  7. Pour in the peanut butter chips and stir with a heatproof rubber spatula until fully melted.
  8. Carefully stir in the remaining half of the condensed milk to combine and remove from the heat. Stir in the remaining ½ teaspoon of the vanilla extract and the marshmallow fluff.
  9. Pour the peanut butter mixture into the prepared pan on top of the chocolate layer and smooth the top with the spatula. Sprinkle the mini marshmallows over top and lightly press down. Toast mini marshmallows in a broiler or with a kitchen torch. You can do this before or after the fudge has set in the fridge. If using the broiler be sure to watch it carefully so the marshmallows don’t over-toast.
  10. Refrigerate until the fudge is set then cut into bite size pieces. Best eaten straight from the fridge.