Holiday

Brie-Stuffed Mushrooms

Brie-Stuffed Mushrooms  |  Lemon & Mocha

Do you cook from cookbooks often? I have a few cookbooks that I’ve made countless recipes from and have shared on here: Rachael Ray’s Look + Cook, The Perfect Scoop, Cook This, Not That! and Pati’s Mexican Table. Then I have a whole bunch of cookbooks that I’ve drooled over the pages of many, many times, but that I have yet, years later, to make any of the recipes. Every year I say that this will be the year I cook from all the cookbooks I’ve never used before, but this year I mean it and I’m already off to a great start! In addition to a few recipes I have picked out for the blog, like these epic Brie-Stuffed Mushrooms, I thought maybe I would be more motivated if I turned over some of the selection power to Matt.

Brie-Stuffed Mushrooms  |  Lemon & Mocha

Last month Matt picked a cookbook I haven’t cooked anything from yet along with a recipe from that book and then we cooked it together. It wasn’t for the blog so there was no pressure for it to look good or to be made during daylight hours for photograph reasons. January’s pick was an Eight-Hour Skirt Steak with Balsamic Mushrooms from Sous Vide at Home, which he had gotten me last year. Matt cooked most of the dish himself and it was incredible! This month, Matt picked the Half Baked Harvest Cookbook, who is one one of my favorite food bloggers, and we’re going to be making her Farmhouse Cheddar and Angel Hair Frittata next week. Yum – I can’t wait to try it! I’m liking this new monthly tradition, although if any of the recipes become new favorites then I of course will have to re-make them to share with you all!

Brie-Stuffed Mushrooms  |  Lemon & Mocha

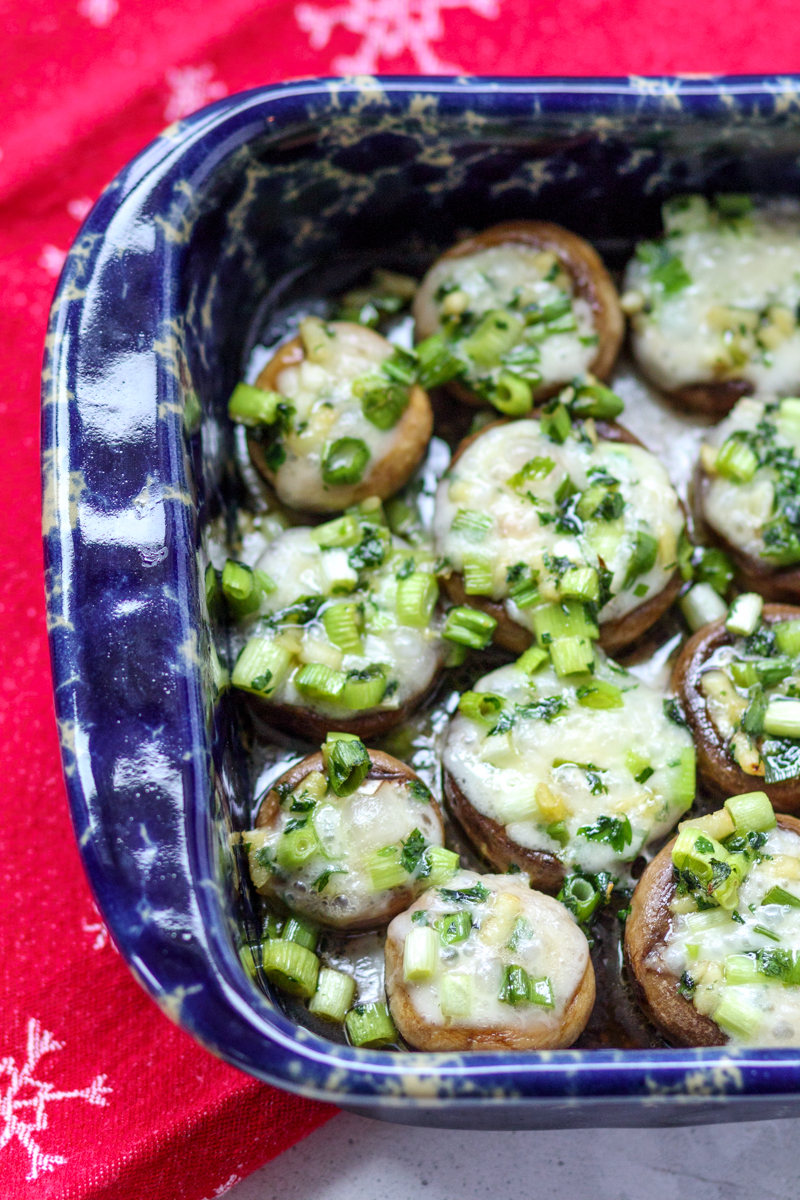
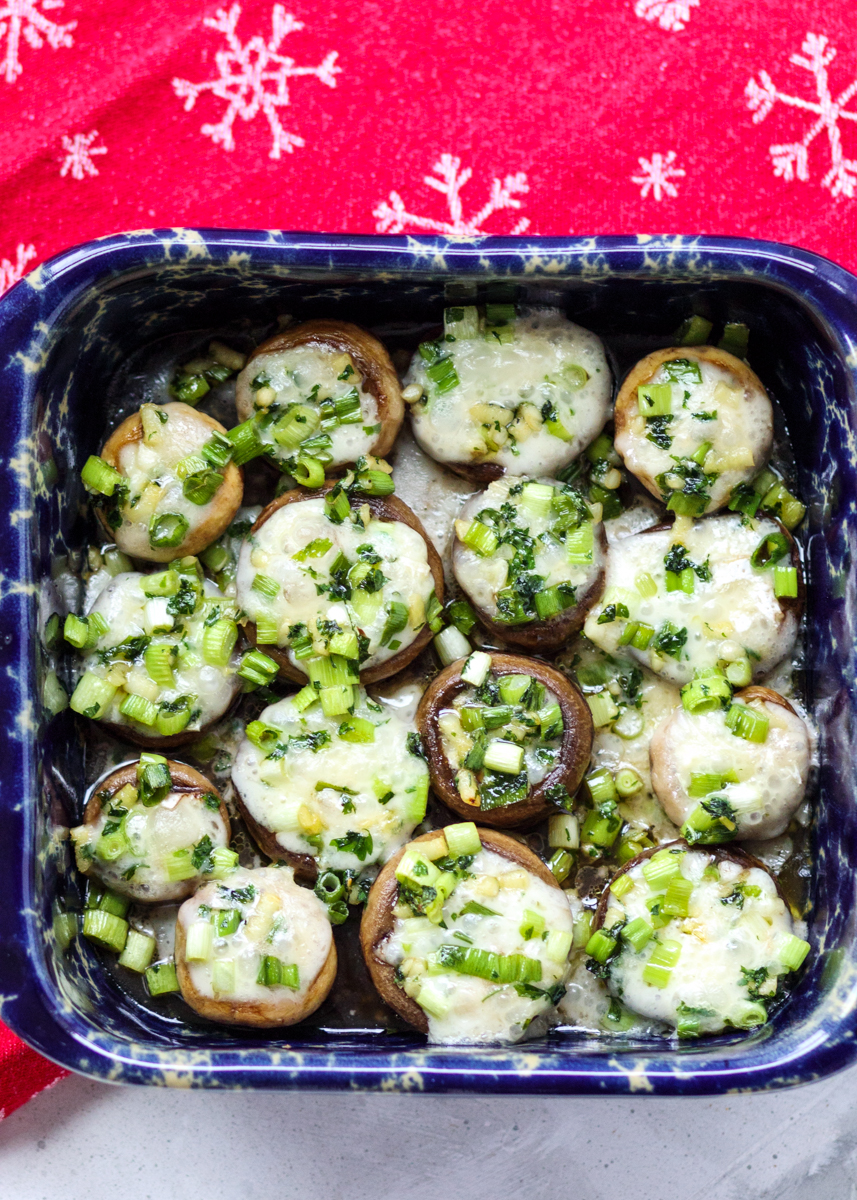
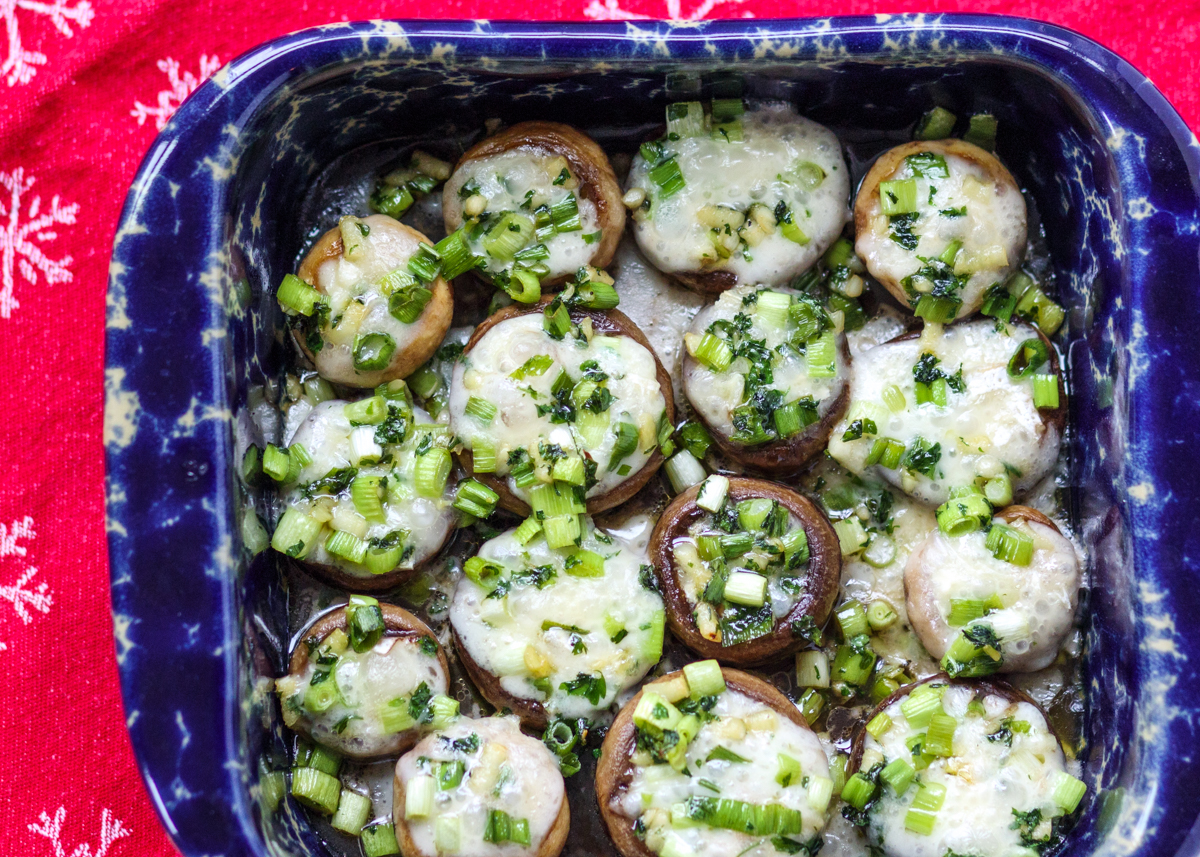
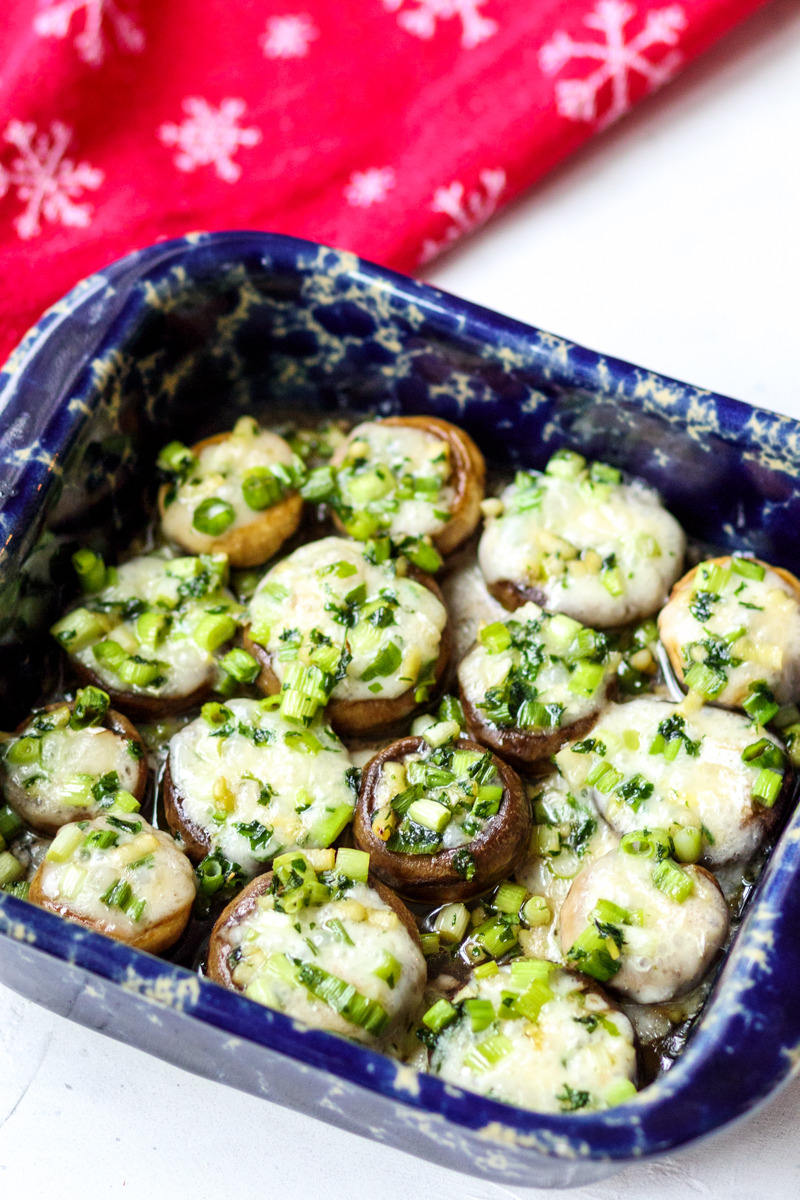
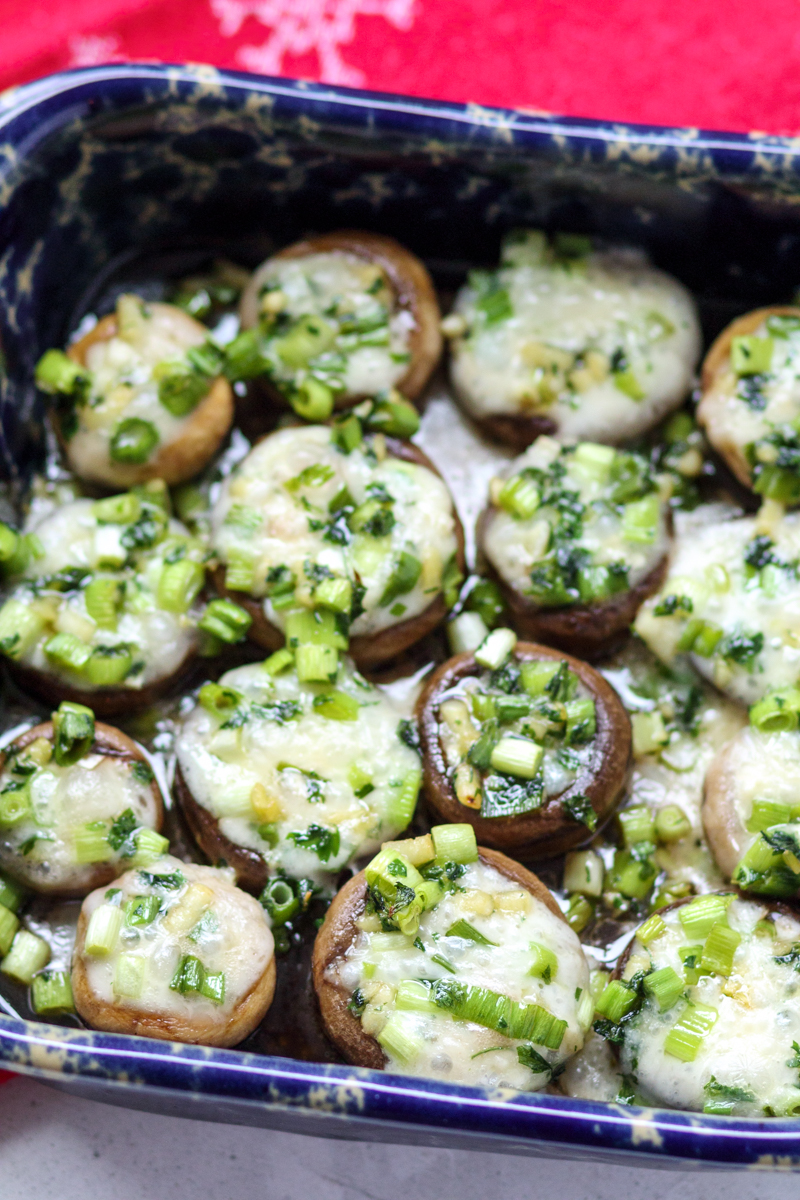
Today I’m sharing these cheesy, garlicky and buttery Brie-Stuffed Mushrooms from The Pioneer Woman Cooks: Food from My Frontier, which is Ree Drummond’s second cookbook. Button mushroom caps are lightly sautéed in butter before being stuffed with chunks of creamy brie cheese and baking in the oven. The best part is the sautéed parsley, garlic and green onions that get poured overtop the mushrooms.

Brie-Stuffed Mushrooms  |  Lemon & Mocha

This party appetizer is so simple, but looks really fancy, making it perfect for the holidays or even an Oscar party! According to Ree, “Guests will kiss you and demand to be invited back next time” so make sure you make these mushrooms for company you like!

Brie-Stuffed Mushrooms  |  Lemon & Mocha

Are you excited for the Oscars? Matt and I missed all the best picture nominees in theaters except for Black Panther, so we’re going to be streaming some of them this weekend to try to catch up. This article shares where to watch all the best picture nominees if you’re interested. Have a great weekend, everyone!

Brie-Stuffed Mushrooms  |  Lemon & Mocha

Brie-Stuffed Mushrooms
 
Yield: 15-18 mushrooms
Ingredients
  • 12 ounces white button mushrooms, washed and stems removed
  • 4 tablespoons unsalted butter
  • ¼ cup chopped flat-leaf parsley
  • 4 garlic cloves, minced
  • 4 scallions, ends removed and sliced
  • Splash of white wine (optional)
  • 8 ounces Brie cheese, cut into bite-size chunks
  • Salt and pepper
Directions
  1. Preheat the oven to 350 degrees F.
  2. In a large skillet over medium heat, melt the butter then add the mushroom caps. Toss the mushroom caps in the melted butter. Lightly season with salt and pepper then let sauté for a minute. Remove from the mushrooms from the skillet. Add the parsley, garlic and scallions to the skillet. If you’re using the white wine, add it now. Cook for 1-2 minutes, stirring frequently, then remove from the heat.
  3. Place the mushroom caps, stem-side up, in a baking dish. A square baking pan or pie dish works well. Add a chunk of brie to the opening of each mushroom cap then pour the parsley mixture over the top. Bake until the cheese has melted, about 15 minutes. Serve them after they’ve cooled slightly.

Recipe from The Pioneer Woman Cooks: Food from My Frontier.
Some of the links above are affiliate links, which means I may receive a small commission for my referral. This does not affect the retail cost of the item. Thank you for supporting Lemon & Mocha!

Funfetti Peanut Butter White Chocolate Waffle Snack Mix

Funfetti Peanut Butter White Chocolate Waffle Snack Mix  |  Lemon & Mocha

Funfetti Peanut Butter White Chocolate Waffle Snack Mix! Just writing the name of this post is getting me excited! Sometimes you want a dessert that’s easy and doesn’t require any baking. Sometimes you want a dessert that’s called a snack so you can eat it whenever you want. And sometimes you just want something you can cover in rainbow sprinkles. All of these scenarios are perfect reasons to make this sweet and salty treat.

Funfetti Peanut Butter White Chocolate Waffle Snack Mix  |  Lemon & Mocha

This snack mix is a slight twist on normal muddy buddies. Muddy buddies, or puppy chow, is rice cereal that’s been tossed in a peanut butter chocolate mixture before being coated in powdered sugar. Today we’re swapping the chocolate for white chocolate and there’s no rice cereal in sight. That’s because instead we’re using pretzel sticks, popcorn and buttered Belgian waffles! Yes, I said waffles. Pretzel sticks help bring in a little saltiness to the snack, which is great since white chocolate is pretty sweet. You could always use mini pretzels instead of pretzel sticks, but I still had some in our snack drawer from the Game Day Cookies.

Funfetti Peanut Butter White Chocolate Waffle Snack Mix  |  Lemon & Mocha

Have you ever had chocolate coated popcorn? It’s one of my favorite treats so I love having the popcorn in this snack mix. There are three ways you can make the popcorn in the microwave and I have them all listed in the recipe. My ideal method is to use this collapsible silicone popcorn microwave popper. I got it for Matt as part of his Christmas gift a few years ago and it has been a big hit in our house. Since it collapses it takes up minimal space (kitchen cabinet space is precious!) and you can pop popcorn kernels in it without any oil. Sur La Table doesn’t sell the one I bought anymore, but I found it on Amazon. If you don’t want to go that route, you can always use a paper lunch bag or a microwave safe bowl with a microwave safe plate fit on top. I haven’t tried that last method, but I’ve seen a lot of people mentioning it as a way to microwave popcorn without a bag.

Funfetti Peanut Butter White Chocolate Waffle Snack Mix  |  Lemon & Mocha

Anyways, moving on to the star of this snack mix – the buttered waffle pieces! I think every snack mix in my future needs to include chunks of Belgian waffle covered in powdered sugar because it is seriously addictive. I used frozen cinnamon Belgian waffles from Wegmans and that extra cinnamon flavor sent them over the top.

Funfetti Peanut Butter White Chocolate Waffle Snack Mix  |  Lemon & Mocha

Also, I don’t know how I’ve gone this whole post so far without drooling over the peanut butter in this since I’m peanut butter obsessed. The peanut butter flavor mixed with the white chocolate is absolute perfection. I hope you enjoy this tasty treat and happy early Valentine’s Day to you all!

Funfetti Peanut Butter White Chocolate Waffle Snack Mix  |  Lemon & Mocha

Funfetti Peanut Butter White Chocolate Waffle Snack Mix
 
Ingredients
  • 3 tablespoons popcorn kernels
  • 2 frozen Belgian waffles
  • 1 tablespoon butter
  • 1½ cups broken in half pretzel sticks
  • 6 ounces white chocolate
  • ¼ cup creamy peanut butter
  • ½ cup sprinkles
  • ¾ cup powdered sugar, plus more if needed
Directions
  1. Place the popcorn kernels in either a brown paper bag with the top folded closed a couple times, a silicone microwave popper with the lid on, or in a medium microwave safe bowl with a microwave safe plate snugly fitted on top. Heat the kernels starting with 3 minutes and stopping the microwave as soon as the popping becomes infrequent. Carefully remove from the microwave and place in a large mixing bowl. If there are any un-popped kernels save them for the next time you make popcorn.
  2. Toast the Belgian waffles in your toaster or toaster oven. When they’re toasted, divide the butter between the waffles and it on both sides. Cut the waffles into bite-sized pieces. Add the waffle pieces and broken pretzel sticks to the mixing bowl with the popcorn.
  3. Melt the white chocolate in a small microwave safe bowl. Start with 30 seconds, carefully remove and stir, then continue in 15 second increments, stirring after each increment, until it is melted. White chocolate seizes up easily so be sure not to over-heat. Add the peanut butter and stir until smooth. Pour the peanut butter white chocolate mixture over the bowl of snack mix. Gently toss to coat completely. Add the sprinkles and toss to coat. Sprinkle on the powdered sugar and toss to coat. Add more if needed. Snack mix can be stored in an airtight container, but tastes best eaten right away.
Notes
These recipe can easily be halved or doubled.

Some of the links above are affiliate links, which means I may receive a small commission for my referral if you purchase something. This does not affect the retail cost of the item. Thank you for supporting Lemon & Mocha!

Recipe slightly adapted from Averie Cooks.

Chocolate Raspberry Heart Cookie Pops

Chocolate Raspberry Heart Cookie Pops  |  Lemon & Mocha

I’m posting the February cookies early so you have plenty of time to make them for Valentine’s Day next week. Which you will definitely want to do because how cute are these heart cookie pops? They are also game-changer cookies, but I’ll get into that in a bit. I have to admit that I was a little nervous about making these cookies because the recipe called for two things I’ve never done before; making cookie pops and making royal icing. I am happy to report that both were easier than I anticipated and there is no reason to be intimidated about making these Chocolate Raspberry Heart Cookie Pops!

Chocolate Raspberry Heart Cookie Pops  |  Lemon & Mocha

The dough could not be easier to make since you whip it up in a food processor. I know not everyone has a food processor (if you are thinking of getting one I highly recommend the 14-cup Cuisinart I have), but I imagine you could use a stand mixer instead. The butter gets cubed up and added into the dough while it’s cold, just like when making a pastry crust, so there’s no waiting around for your butter to come to room temperature. Since the dough is cold from the chilled butter, it’s very easy to roll out without any stickiness.

Chocolate Raspberry Heart Cookie Pops  |  Lemon & Mocha

I had to re-roll my dough because I initially rolled it too thin. You need the dough to be about 3/8-inch to 1/2-inch thick in order to insert the lollipop stick, which is thicker than you would think so break out that measuring tape! Since the dough was so thick, inserting the lollipop sticks was easy – first challenge complete! When I was cutting out the circles of dough I cut them tightly together so I was able to get all twelve circles from the initial rolled dough. The recipe says to gather, refrigerate and re-roll the scraps to cut out more cookies. Twelve cookie pops was already plenty for me so instead I just baked the scraps as is after I was done baking the cookie pops. They looked like funny bat winged cookies, but they still tasted delicious!

Chocolate Raspberry Heart Cookie Pops  |  Lemon & Mocha

Next up was the royal icing. Basically, the recipe has you make an icing that’s pretty stiff, which you pipe around the edge of the cookie. You then thin the icing and fill in the rest of the cookie within the piped line. I found it a little difficult to pipe a smooth line around the edge of the cookies, but after a few wonky lines I had it down. I don’t think I’ll become a cookier anytime soon, but they look so nice when they’re done. I went with a little heart on top instead of the swirl rose design on the original Food Network Magazine recipe.

Chocolate Raspberry Heart Cookie Pops  |  Lemon & Mocha

Okay, now back to that game-changer comment I made earlier. These Chocolate Raspberry Heart Cookie Pops taste so good! As in, both Matt and I called them dangerous and tried to hide them. Matt hit the flavor spot on – they taste like a buttery version of that Sheila G’s Brownie Brittle. I couldn’t find cherry extract in my grocery store, which the original recipe calls for, so I went with raspberry extract and I’m happy I did because the flavor was subtle, fruity and complements the chocolate cookie perfectly. There’s also something really satisfying about eating a cookie off a lollipop stick. This chocolate cookie base is definitely going to be a new regular in my cookie rotation. Next time I’m going to try chilling it in a log to make slice and bake cookies. And I might even slice them thick enough to stick lollipop sticks in them again. Yum!

Chocolate Raspberry Heart Cookie Pops  |  Lemon & Mocha

Chocolate Raspberry Heart Cookie Pops
 
Yield: 12 cookie pops
Ingredients
for the cookies
  • 2 cups all-purpose flour
  • ¾ cup powdered sugar
  • ⅓ cup unsweetened Dutch-process cocoa powder (I used Hershey’s Special Dark cocoa powder)
  • ¼ cup granulated sugar
  • ½ teaspoon salt
  • 2½ sticks cold unsalted butter, cut into cubes
  • 2 teaspoons vanilla extract
for the icing
  • 2½ cups powdered sugar
  • 1 tablespoon plus 2 teaspoons meringue powder
  • ¼ cup water, plus more as needed
  • ½ teaspoon raspberry extract
  • Red gel food coloring
Directions
for the cookies
  1. Prepare two sheets of parchment paper that are sized to line a baking sheet. Set aside. In a food processor, pulse together the flour, powdered sugar, cocoa powder, granulated sugar and salt. Once combined, add the cold butter cubes and the vanilla extract. Pulse until the mixture looks like it has larger crumbs and will hold together when pinched. Transfer the dough to a large bowl or clean work surface and press the dough into a ball. Knead the dough a few times. Place the dough ball on one of the pieces of parchment paper then top with the other sheet. Press the dough to flatten then roll out the dough until it’s ⅜-inch to ½-inch thick. Refrigerate the dough slab for about 1 hour, or until firm.
  2. Make sure oven racks are positioned in the lower and upper thirds of the oven. Preheat to 325 degrees F. Using a 3-inch round cookie cutter or biscuit cutter, cut out 12 cookies and arrange 2 inches apart on 2 baking sheets lined with parchment paper. Carefully insert a 6-inch lollipop stick about ¾ of the way into each round cookie. If needed, form the scraps into a ball, refrigerate and re-roll to cut out more cookies. Or, refrigerate the scraps as is to bake as odd shaped scrap cookies once the other cookies are done baking.
  3. Bake the cookies until they are set for 25-30 minutes, switching the pans from top to bottom and front to back halfway through. Mine took closer to 30 minutes. Let cookies cool for 10 minutes on the pan on a wire cooling rack then transfer cookies to the wire cooling rack to cool completely.
for the icing
  1. In a large bowl or the bowl of a stand mixer, whisk together the powdered sugar and the meringue powder. Add the water and raspberry extract then beat with a hand mixer or in a stand mixer on medium speed for about 3 minutes, or until there are soft glossy peaks. Tint the icing with the red food coloring. I found that I needed a lot of gel food coloring to achieve a red color (almost half a tube). The icing should be able to be piped without being runny. If the icing is too thick add up to 1 more tablespoon of water. I needed to add about 2 teaspoons more water.
  2. Put ½ cup of icing into a pastry bag or resealable plastic bag and snip a corner. If you wanted to be more precise you could use a small round pastry tip (I didn’t do this, but I would probably do it next time). Apply firm and even pressure to pipe the icing around the edge of each cookie. I found it piped cleaner when I made sure I didn’t have the tip of the bag too close to the cookie. Set the piping bag aside for decorating the heart detail later.
  3. Add 1 teaspoon of water at a time to thin the remaining icing in the bowl until it is the consistency of runny yogurt. Put the icing into a new pastry bag or resealable plastic bag (no need for a pastry tip) and pipe a bunch of icing within the outline of 6 of the cookies. Use an offset spatula or the back of a spoon to smooth out the icing and bring it all the way to the piped edge. You want to pipe enough icing that it’s easy to smooth, but not so much that it is spilling over the piped outline. Repeat with the remaining 6 cookies then let set at room temperature for about 1 hour. Use the reserved original piping bag of icing to pipe the heart details onto the cookies.
Notes
The cookies have a nice crispy texture to them. I stored them without the icing in a plastic container and they stayed that way. However, probably because of the icing, after storing them with the icing on, they became soft. They tasted really good both ways. I’m not sure if there is a way to avoid them from becoming softer because of the icing.


Recipe from January/February 2019 issue of Food Network Magazine.

Some of the links above are affiliate links, which means I may receive a small commission for my referral. This does not affect the retail cost of the item. Thank you for supporting Lemon & Mocha!

Strawberry Chocolate Ganache Cake Balls

Strawberry Chocolate Ganache Cake Balls  |  Lemon & Mocha

I’m going to have a hard time writing about these Strawberry Chocolate Ganache Cake Balls because every time I think about them my mind goes blank except for thoughts of wanting to eat them. By the time I’m done writing this post I’ll probably find myself in the kitchen making a batch of these because I made and photographed them so long ago – like last September long ago! Which means I don’t have any right now while I’m writing about them and editing the photos, which is probably the most torturous writing endeavor ever.

Strawberry Chocolate Ganache Cake Balls  |  Lemon & Mocha

Typically, cake balls consist of cake and buttercream mushed together and then dipped in chocolate. Instead of the traditional buttercream, these cake balls are made with my Perfect Chocolate Cake recipe and my Chocolate Ganache. Chocolate ganache is silky, decadent and a pure chocolate-lover’s dream. Alternatively, if you wanted to speed the recipe up you could use a store-bought chocolate cake mix instead.

Strawberry Chocolate Ganache Cake Balls  |  Lemon & Mocha

Just the cake and the ganache together is enough to make me swoon, but I’ve rolled the cake balls in powdered freeze-dried strawberries to add some tartness and fruitiness. What are powdered freeze-dried strawberries? Just store-bought freeze-dried strawberries that you can get at Trader Joe’s and or Target that I’ve crushed up in my mini food processor to make a powder. I got this idea from one of my favorite candy retailers – Chukar Cherries out of Seattle, Washington. Matt and I first tried Chukar Cherries products during our Seattle vacation in 2013 and we’ve been hooked ever since. They have these raspberry truffles that are dried cranberries covered in white chocolate and then rolled in raspberry powder. They are sweet, tangy and crazy addictive.

Strawberry Chocolate Ganache Cake Balls  |  Lemon & Mocha

I’ve even seen raspberry powder and strawberry powder in a local spice shop here, but it would definitely be less expensive to buy the pack of freeze-dried strawberries and crush them yourself. After rolling the cake balls in the powdered freeze-dried strawberries they are dipped in melted semisweet chocolate to form a rich chocolate shell on the outside.

Strawberry Chocolate Ganache Cake Balls  |  Lemon & Mocha

I initially made these cake balls because I had all these leftover ingredients, but they are worth a special trip to the kitchen just to make these Strawberry Chocolate Ganache Cake Balls. Obviously they are a perfect treat for Valentine’s Day, but seeing as how I first made them during a warm day in September they really are the perfect chocolate dessert any day of the year!

Strawberry Chocolate Ganache Cake Balls  |  Lemon & Mocha

Strawberry Chocolate Ganache Cake Balls
 
Yield: about 4 dozen
Ingredients
for the cake
  • 2 cups granulated sugar
  • 1¾ cups all-purpose flour
  • ¾ cup cocoa powder
  • 1½ teaspoons baking powder
  • 1 teaspoon baking soda
  • 1 teaspoon salt
  • 2 large eggs
  • 1 cup buttermilk, see note
  • ¼ cup butter, melted
  • ¼ cup vegetable oil
  • 1 tablespoon vanilla extract
  • 1 cup hot coffee, see note
for the chocolate ganache
  • ¾ cup heavy cream
  • 1 12-ounce bag of semisweet or bittersweet chocolate chips (see note)
  • 3 tablespoons unsalted butter, softened
for the cake balls
  • 1 bag freeze-dried strawberries, about 1 ounce
  • About 4 cups semisweet chocolate chips (see note) or chocolate coating wafers
  • 1 tablespoon vegetable oil or coconut oil
Directions
for the cake
  1. If you want to use a box mix, bake it according to the box directions in a 9x13 pan then skip ahead to the last step in this section.
  2. Preheat the oven to 350 degrees F. Grease and flour a 9x13 pan. Set aside.
  3. In a large mixing bowl or in the bowl of a stand mixer, sift together the sugar, flour, cocoa powder, baking powder, baking soda and salt.
  4. In a medium mixing bowl, whisk together the eggs, buttermilk, melted butter, vegetable oil and vanilla extract. Pour the liquid ingredients into the dry ingredients and mix together until smooth.
  5. Pour the hot coffee into the batter and stir until combined. The batter will be extremely liquidy. Pour the batter into the prepared pan. Bake for 35-40 minutes, or until a toothpick inserted in the center comes back mostly clean.
  6. Let cool in the pan for a couple minutes then remove to a wire cooling rack to cool completely before making the cake balls.
for the chocolate ganache
  1. Heat the cream over medium heat until steaming, stirring constantly.
  2. Once steaming, remove the cream from the heat. Add the chocolate and stir then let sit for 5 minutes.
  3. Add the butter to the chocolate mixture then stir until smooth. You may need to return to low heat to stir and melt all the final bits of chocolate and butter. Let cool.
for the cake balls
  1. Line 2 baking sheet that fit in your fridge or freezer with wax paper. Set aside. Turn the freeze-dried strawberries into a powder using a food processor or by carefully crushing into a powder in the bag with a rolling pin. Place in a small bowl and set aside.
  2. In a large mixing bowl, completely crumble the cake then combine with 1½ cups of the cooled chocolate ganache. Stir together until the chocolate ganache is completely incorporated and the cake balls are roll-able, but not too wet, adding more chocolate ganache as needed. Roll the mixture into balls, then roll each ball in the powdered freeze-dried strawberries. Place on the prepared baking sheets then either freeze for a little bit or refrigerate for a few hours. You want them to be cold and solid, but not frozen.
  3. When you’re almost ready to take the cake balls out of the fridge or freezer, melt the chocolate chips and vegetable oil or the chocolate coating wafers. I melted mine in two batches instead of melting it all at once. Microwave in a tall deep bowl (like a microwave-safe liquid measuring cup) for 30 seconds, stir, then continue in 15 second intervals until the chocolate is completely melted. Make sure not too over heat it or the chocolate will seize up. Alternatively, you could melt the chocolate using a double boiler. Use a spoon or fork to dip each chilled cake ball into the chocolate, letting the excess drip off before placing back on the wax paper lined baking sheet. Top each cake ball with a sprinkling of the powdered freeze-dried strawberries and some Valentine’s Day sprinkles before the chocolate hardens. Store in the fridge - if you don’t eat them all right away!
Notes
To make your own buttermilk: pour 1 tablespoon of lemon juice or vinegar in a liquid measuring cup. Pour milk, any fat percentage, into the measuring cup until you have 1 cup. Let sit for 5 minutes before using.
If you don’t want to use coffee you can use hot water, but the flavor of the chocolate won’t be as pronounced. You can use decaffeinated coffee if you prefer.
For the chocolate ganache (and if using chocolate chips instead of chocolate coating wafers for the outer layer), I recommend using Ghiradelli, Guittard or Scharffen Berger.
Any leftover ganache will keep in an airtight container in the fridge for up to 4 weeks.

Some of the links above are affiliate links, which means I may receive a small commission for my referral if you purchase something. This does not affect the retail cost of the item. Thank you for supporting Lemon & Mocha!

Roasted Acorn Squash with a Thai Peanut Sauce

Roasted Acorn Squash with a Thai Peanut Sauce  |  Lemon & Mocha

Are you guys peanut butter fanatics like I am? Most days I just look around the kitchen to see what would be a good vessel for my peanut butter snack. Pretzels? Check. Carrot sticks? Yup. Pancakes? Yes, please. Spoon? Sure, why not?

Roasted Acorn Squash with a Thai Peanut Sauce  |  Lemon & Mocha

Sometimes when I’m coming up with recipes I think the same way. I quickly discovered that roasted acorn squash makes an excellent peanut butter vessel. Especially when the peanut butter is combined with coconut milk, lime juice, coconut aminos (or soy sauce) and maple syrup to make a rich, tangy, salty and slightly sweet sauce. Add some chopped crunchy peanuts and savory scallions and you have absolute veggie perfection.

Roasted Acorn Squash with a Thai Peanut Sauce  |  Lemon & Mocha

Have you ever used coconut aminos? I bought a bottle at Trader Joe’s and this was my first time using it. Many people use it as a substitute for soy sauce since it tastes similar, although slightly sweeter. Coconut aminos is lower in sodium and contains no soy. If you would rather use low sodium soy sauce because that’s what you already have in your fridge you might need to adjust the sauce to taste a little since it’s not a direct substitution.

Roasted Acorn Squash with a Thai Peanut Sauce  |  Lemon & Mocha

I love pretty much all roasted vegetables and acorn squash is no exception. The slices get tender, a little crispy and caramelized. Plus, how fancy do they look all laid out on the platter? You definitely need a very sharp knife to cut through the squash. If you’re finding the squash too difficult to cut through, cut a few slits in the skin of the squash then microwave for three minutes to help soften the skin.

Roasted Acorn Squash with a Thai Peanut Sauce  |  Lemon & Mocha

Looking for more peanut vessel inspiration? Check out my Thai Peanut Chicken Tacos, Sesame Peanut Noodles with Chicken or Apple Nachos. Or if you want something a little sweeter, the Chocolate Drizzled Peanut Butter Crunch Chocolate Brownies and the Peanut Butter Apple Bars are both loaded with peanut butter. Yum!

Roasted Acorn Squash with a Thai Peanut Sauce  |  Lemon & Mocha

Roasted Acorn Squash with a Thai Peanut Sauce
 
Yield: 4-6 servings
Ingredients
  • 2 acorn squash
  • ¼ cup creamy peanut butter (I used Jif)
  • 2 tablespoons coconut aminos
  • 2 tablespoons light coconut milk
  • 1 tablespoon maple syrup
  • 1 tablespoon lime juice
  • ¼ teaspoon ground ginger
  • ⅛ teaspoon red pepper flakes, or more to taste
  • ¼ cup chopped peanuts
  • ¼ cup chopped scallions
  • Cooking spray
  • Salt and pepper
Directions
  1. Preheat the oven to 400 degrees F. Line a baking sheet with aluminum foil or parchment paper and spray with cooking spray. Set aside.
  2. Cut the acorn squashes into ½-inch slices. Use a small round biscuit cutter or a knife to remove the center of each slice to leave you with acorn squash rings. Lay the squash slices in a single layer on the prepared baking sheet. Spray with nonstick cooking spray then season with salt and pepper. Roast until tender, about 25 minutes.
  3. While the squash is roasting, make the peanut sauce. Whisk the peanut butter, coconut aminos, light coconut milk, maple syrup, lime juice, ground ginger and red pepper flakes in a small mixing bowl until well combined.
  4. When the squash is done, layer on a serving dish. Drizzle the peanut sauce over top then top with the chopped peanuts and scallions. Serve warm.
Notes
Substitutions: If you can’t use coconut aminos, you can try swapping in low sodium soy sauce. You might need to increase the amount of maple syrup. If you can’t use light coconut milk, substitute water.
Leave the acorn squash unpeeled. When you cut the slices you want the squash positioned so the stem end is facing your left hand and the bottom end of the squash is facing your right hand (if you are going to be cutting with your right hand).