Dessert

Classic Ice Cream Cake

Classic Ice Cream Cake  |  Lemon & Mocha

Classic Ice Cream Cake! Yes! This is the recipe that has been missing from Lemon & Mocha for far too long. As you all know, myself and my family are all obsessed with ice cream. And let’s be honest, most people are obsessed with ice cream. So when you tell people the cake you made is not just a cake, but an ice cream cake, you are guaranteed to get an overly enthusiastic response.

Classic Ice Cream Cake  |  Lemon & Mocha

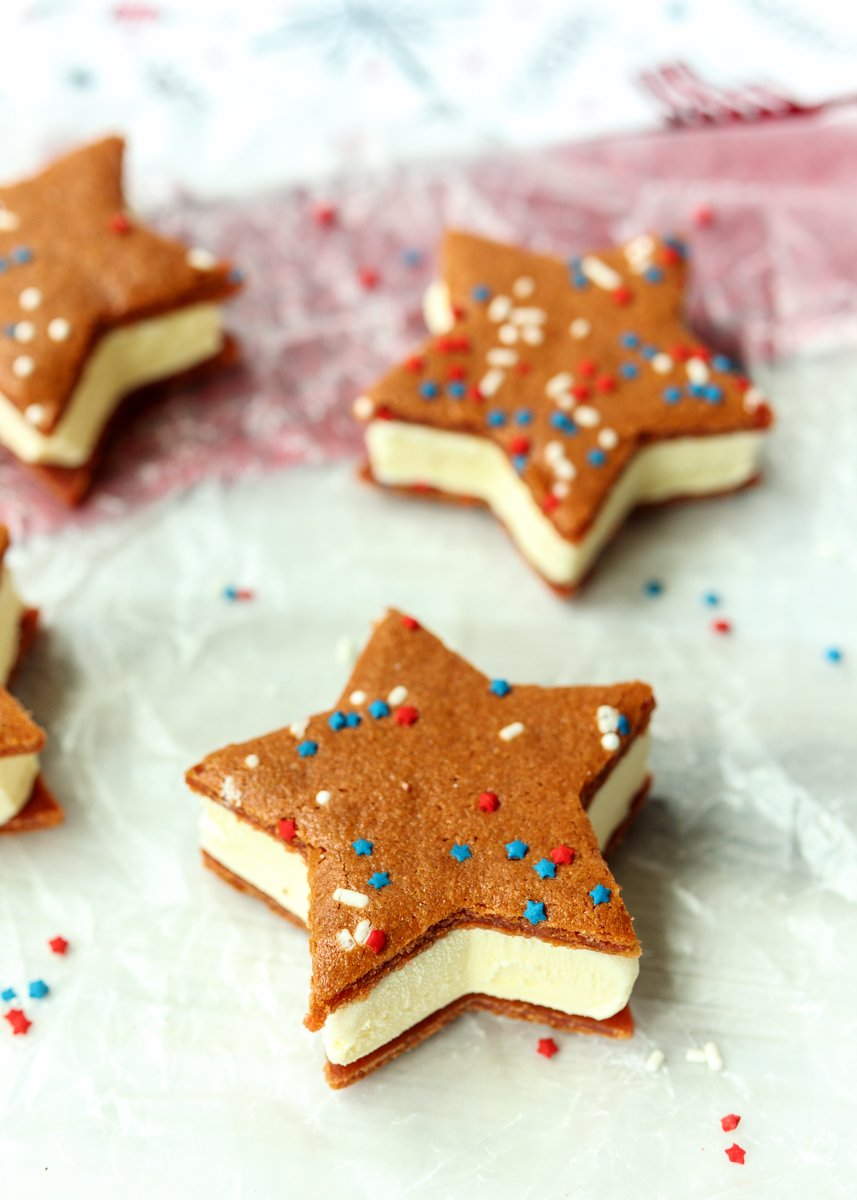
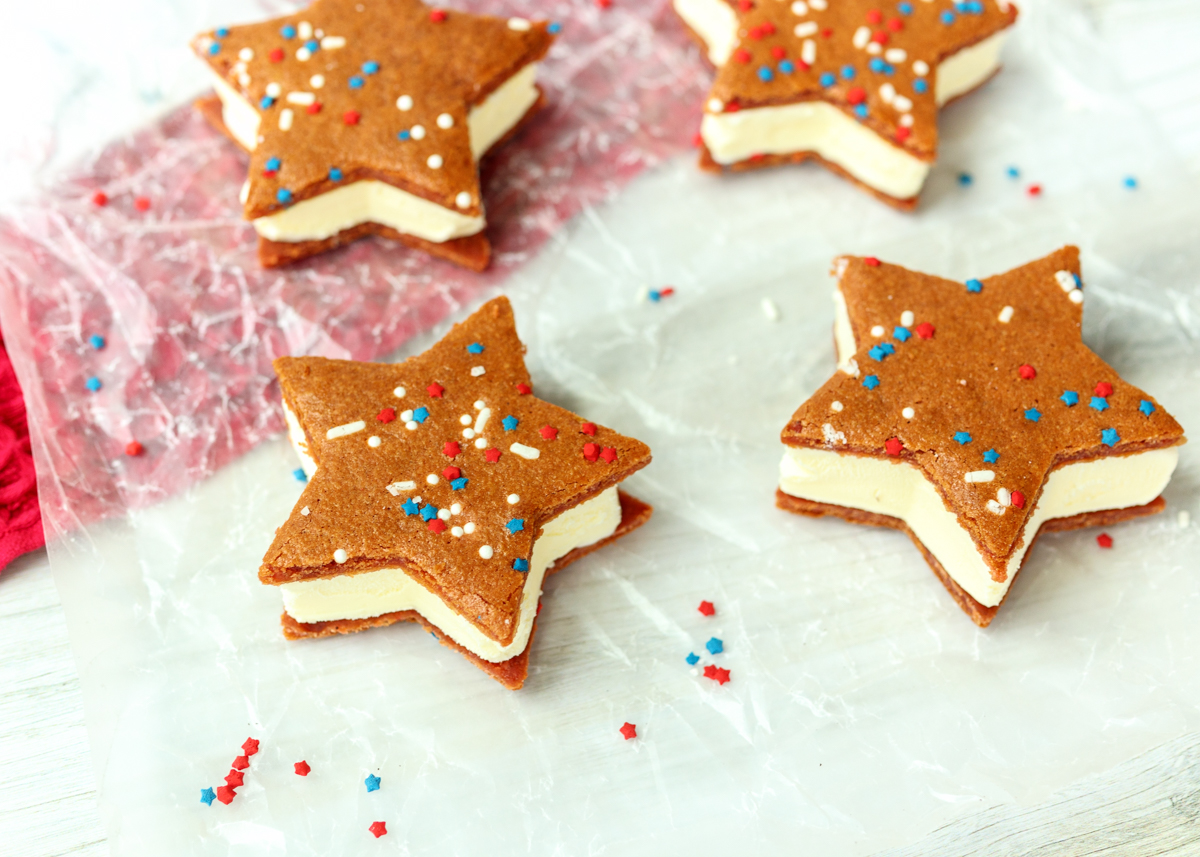
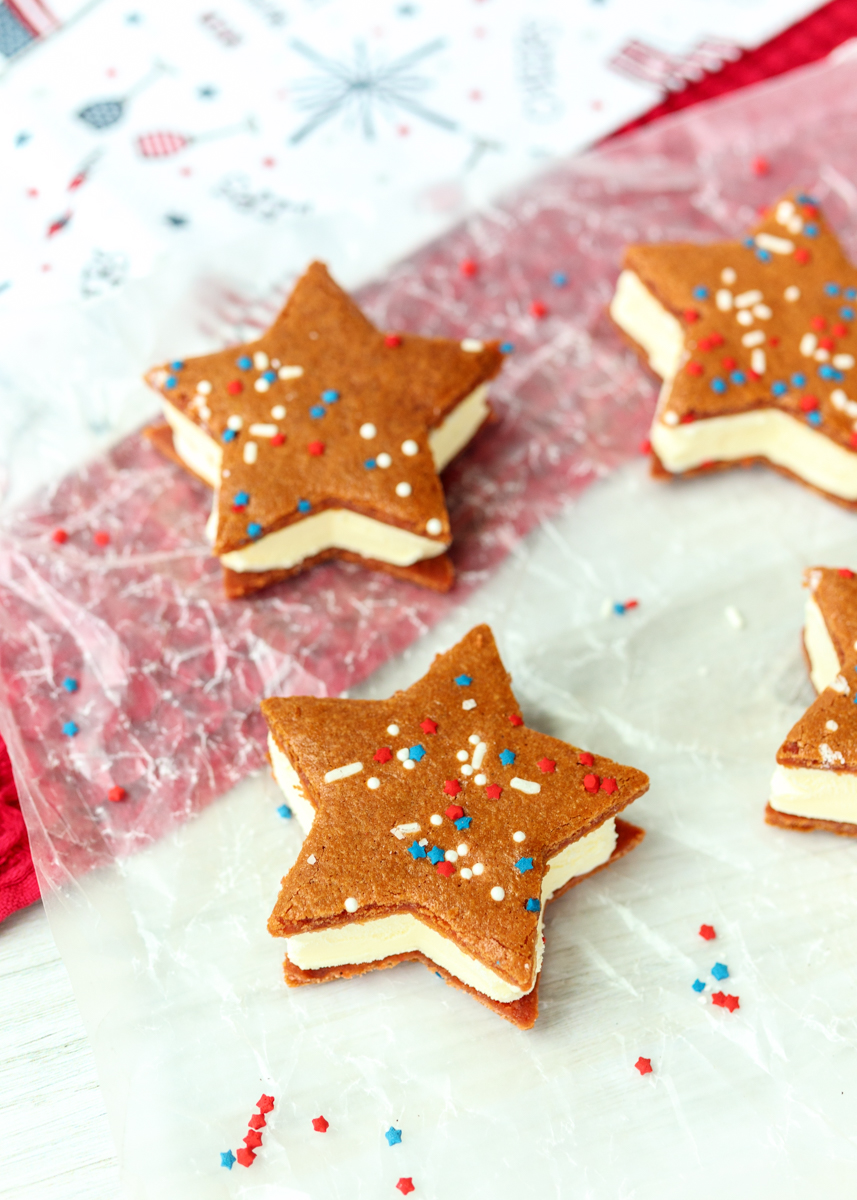
Other than my Perfect Chocolate Chips Cookies and my Perfect Chocolate Cupcakes, ice cream cakes are the dessert I have made the most. I was debating titling this recipe Classic Birthday Ice Cream Cake, but this cake is too delicious and versatile to be relegated to only birthdays. Family cookouts, graduation parties, 4th of July, that random Tuesday when you got an ice cream cake craving – all valid celebrations for this cake.

Classic Ice Cream Cake  |  Lemon & Mocha

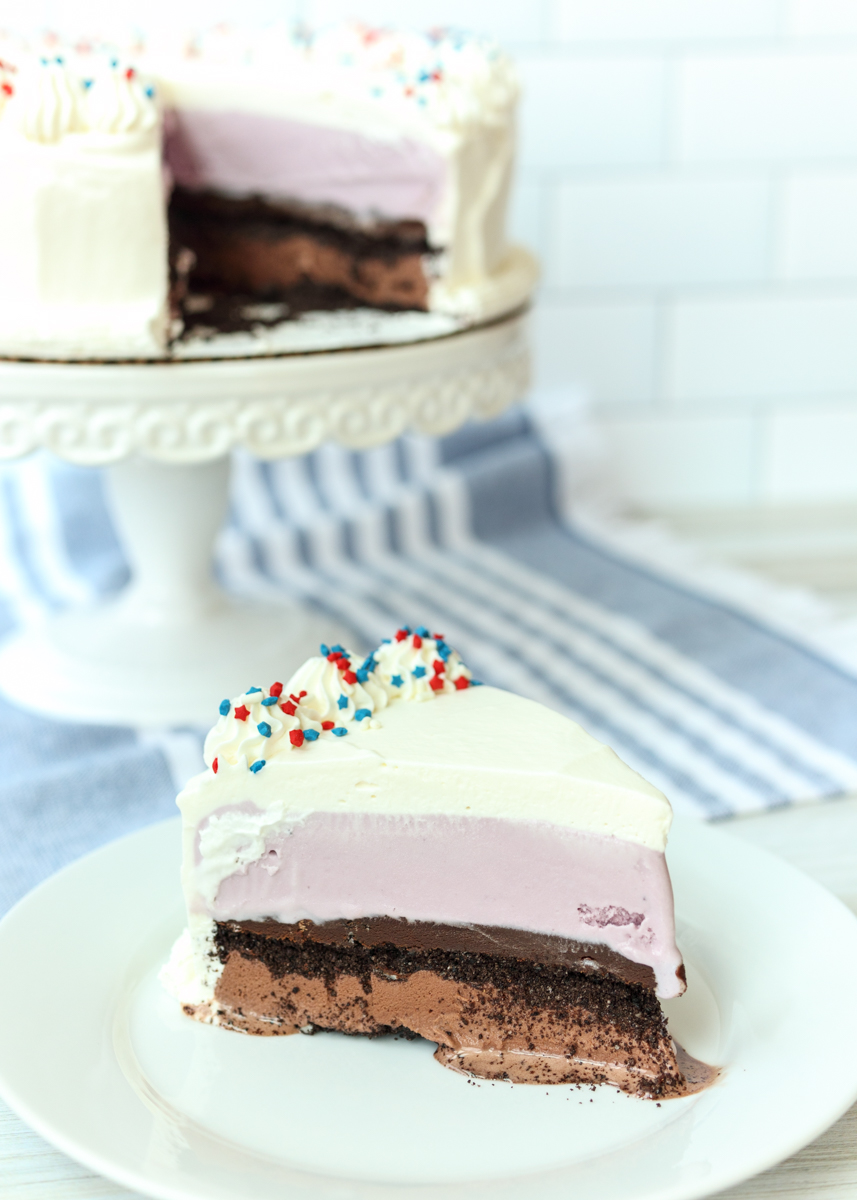
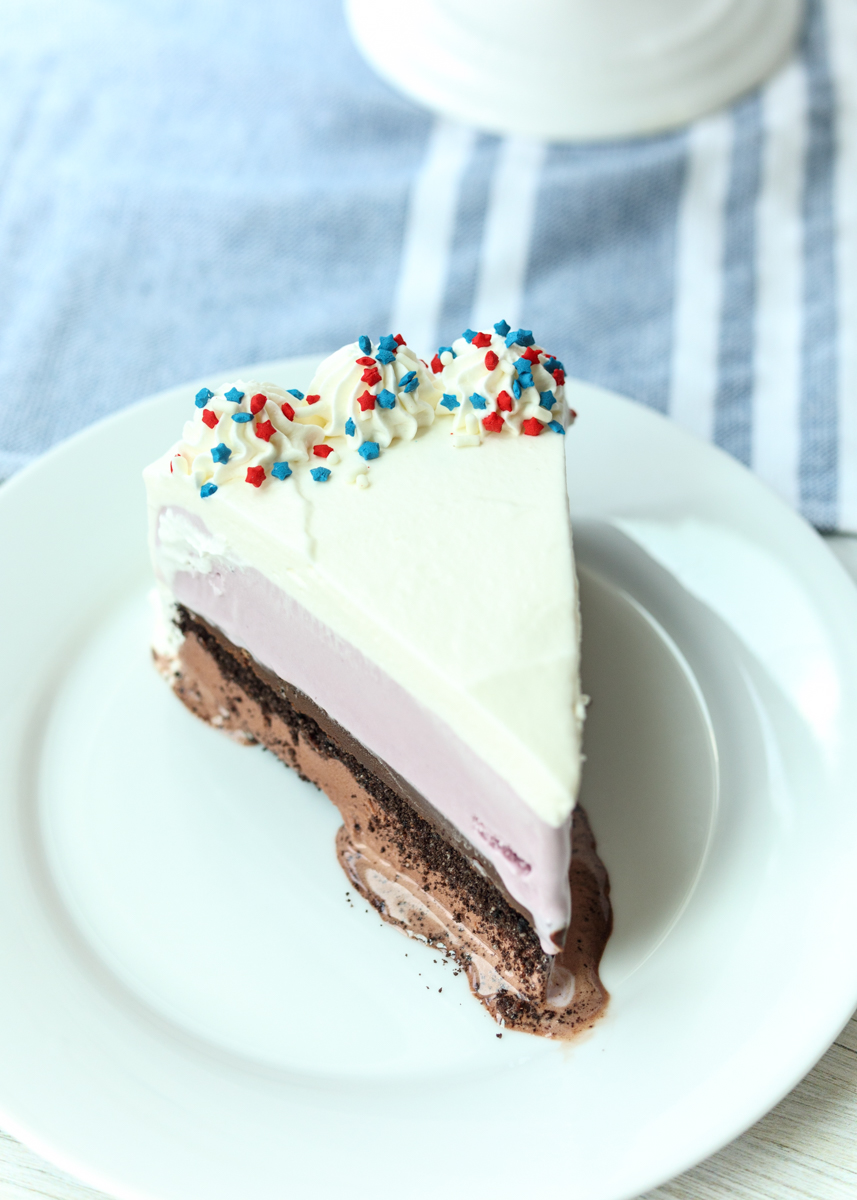
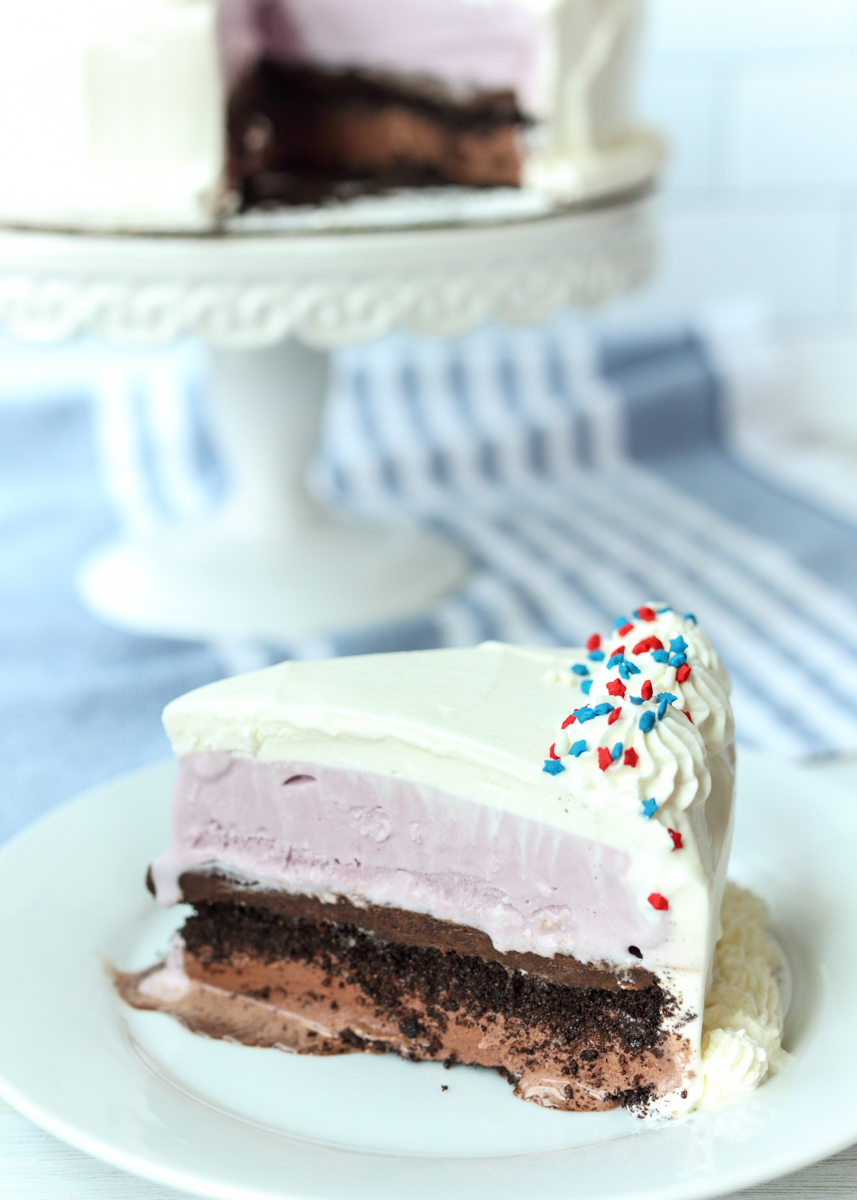
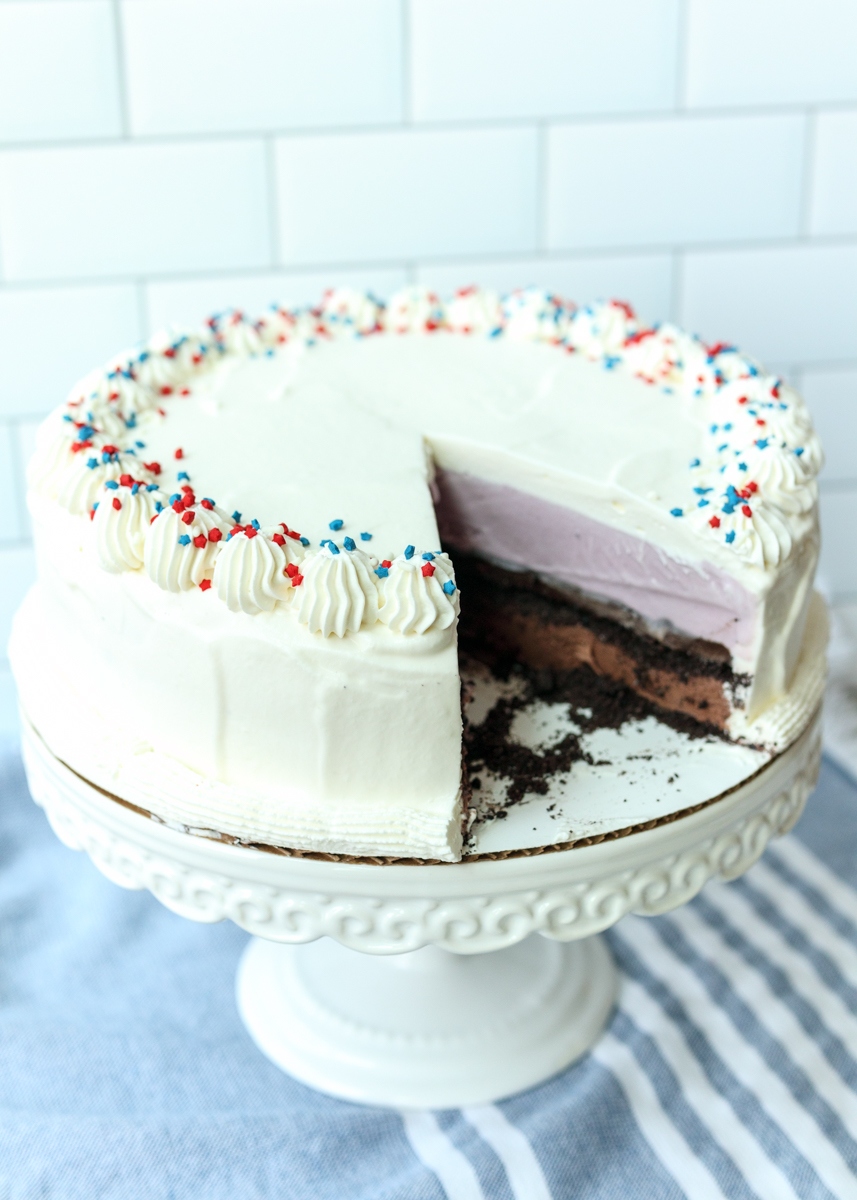
I’ve shared plenty of ice cream pie recipes on here before, from the decadent Hot Fudge Brownie Sundae Ice Cream Pie to the flavor-packed Pumpkin Pecan Ice Cream Pie to the fan favorite Stracciatella Chocolate Hazelnut Gelato Pie, and while those are all great specialty options, this recipe is for a full cake version and is called classic for a reason. We have a bottom crunch layer followed by two layers of ice cream that sandwich together another crunch layer and a sauce layer. The whole cake is then frosted with whipped cream, just like you would get at your neighborhood ice cream shop or Dairy Queen.

Classic Ice Cream Cake  |  Lemon & Mocha

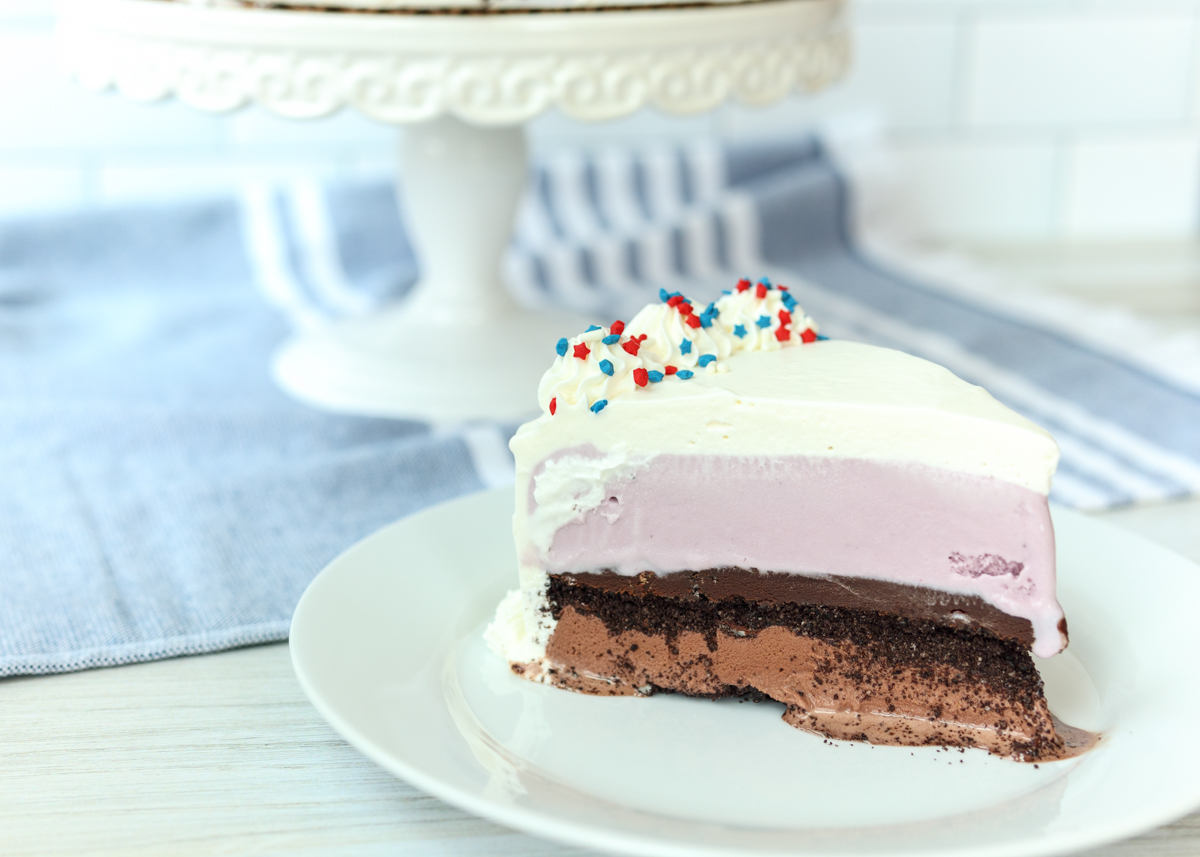
The beauty of this cake, aside from it being a definite crowd-pleaser (although that might be a bad thing if you were expecting leftovers!), is that you can customize it to your favorite ice cream flavors, preferred crunch ingredient and ideal sauce component. My Dad had a big birthday over the weekend (70!) and since he is the ultimate ice cream fanatic I had to bust out this ice cream cake. I went fairly traditional, using Oreo cookie crumbs for the crunch layer, chocolate ganache for the sauce layer and chocolate and black raspberry ice cream. The combination was pure perfection! What is your ideal ice cream cake combination?

Classic Ice Cream Cake  |  Lemon & MochaWhat flavors of ice cream should I use?
Whatever flavors you prefer! You will need 1.5 quarts of each flavor. You could go traditional with vanilla and chocolate or mix it up with cookies and cream and peanut butter cup!

What should I use for the crunch layer?
Oreo cookie crumbs and graham cracker crumbs are my two favorites. I like to use Oreo cookie crumbs when I’m using chocolate in the cake and graham cracker crumbs when I’m having a more vanilla or fruit-forward flavored ice cream cake. Speculoos cookie crumbs, crushed pretzels and chocolate chip cookie crumbs are other great options. This is a great layer to adapt based on the season as well, such as gingersnap cookies in the fall or peppermint cookies in the winter. Whatever you use, make sure they are crumbs and not chunks.

What should I use for the sauce layer?
Chocolate ganache is my go-to since everyone loves it. It has a great fudgy texture in the ice cream cake. Ganache sounds fancy, but it’s easy to make: heat cream then stir in chocolate chips and butter until melted and smooth. You could make a peanut butter version by using peanut butter chips instead. Or go in a completely different direction and use marshmallow topping.

Classic Ice Cream Cake  |  Lemon & MochaWhat size pan should I use?
I use a 9-inch springform pan that I line with two pieces of plastic wrap to make it even easier to take the cake out. The springform pan is nice because it is deep and you’re able to take off the ring for easy removal; a regular 9-inch cake pan will not be deep enough. Alternatively if you use a 9-inch by 3-inch round cake pan then it should be deep enough.

How do I make the ice cream layers smooth?
I was making ice cream cakes for years before I stumbled on this little trick: beat your ice cream to make it spreadable without making it melty. I use the paddle attachment on my stand mixer. If you try to scoop right from the ice cream container into the cake pan you will get a combination of ice cream that is both too melted and too hard to be smoothed and packed in properly. You can certainly do it that way, I just wouldn’t recommend it. Beating the ice cream is the best way to ensure all the ice cream will fit in the pan and you will have smooth and packed ice layers when you cut into the cake.

How do I frost the cake with whipped cream?
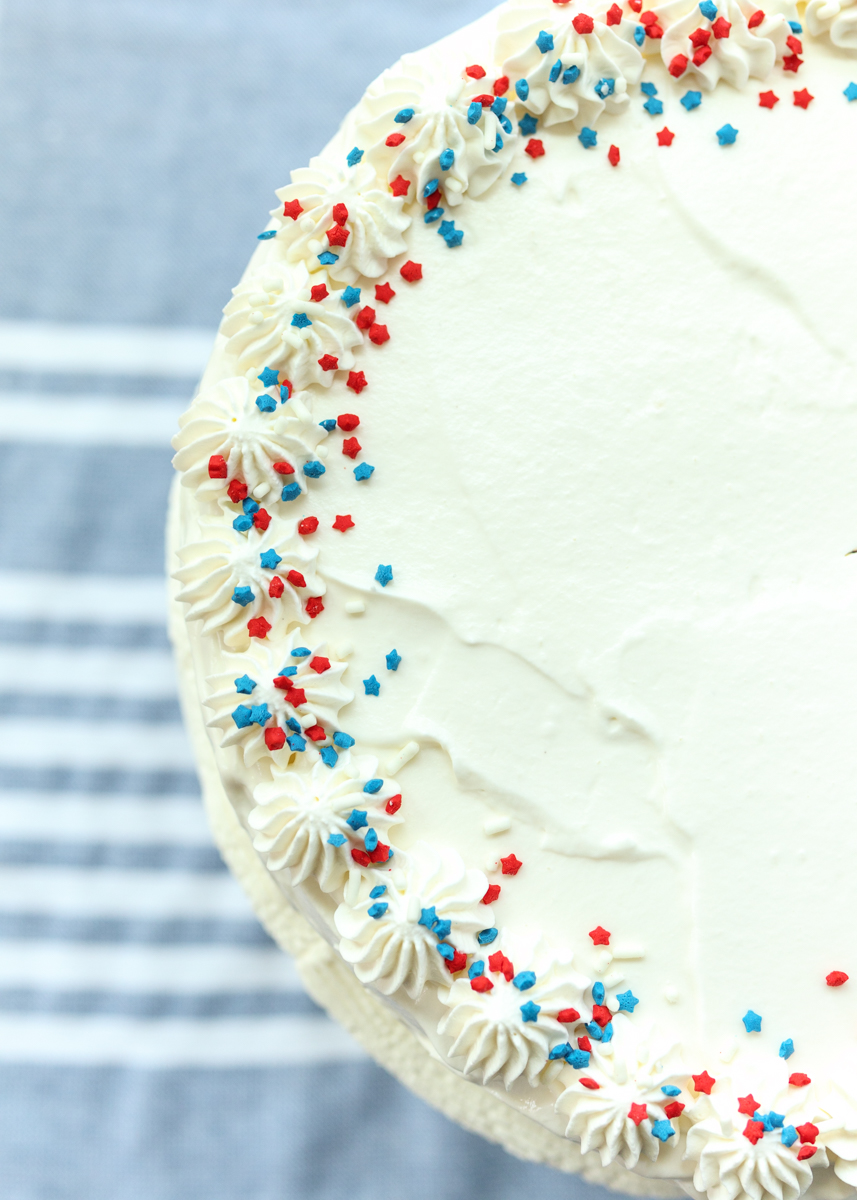
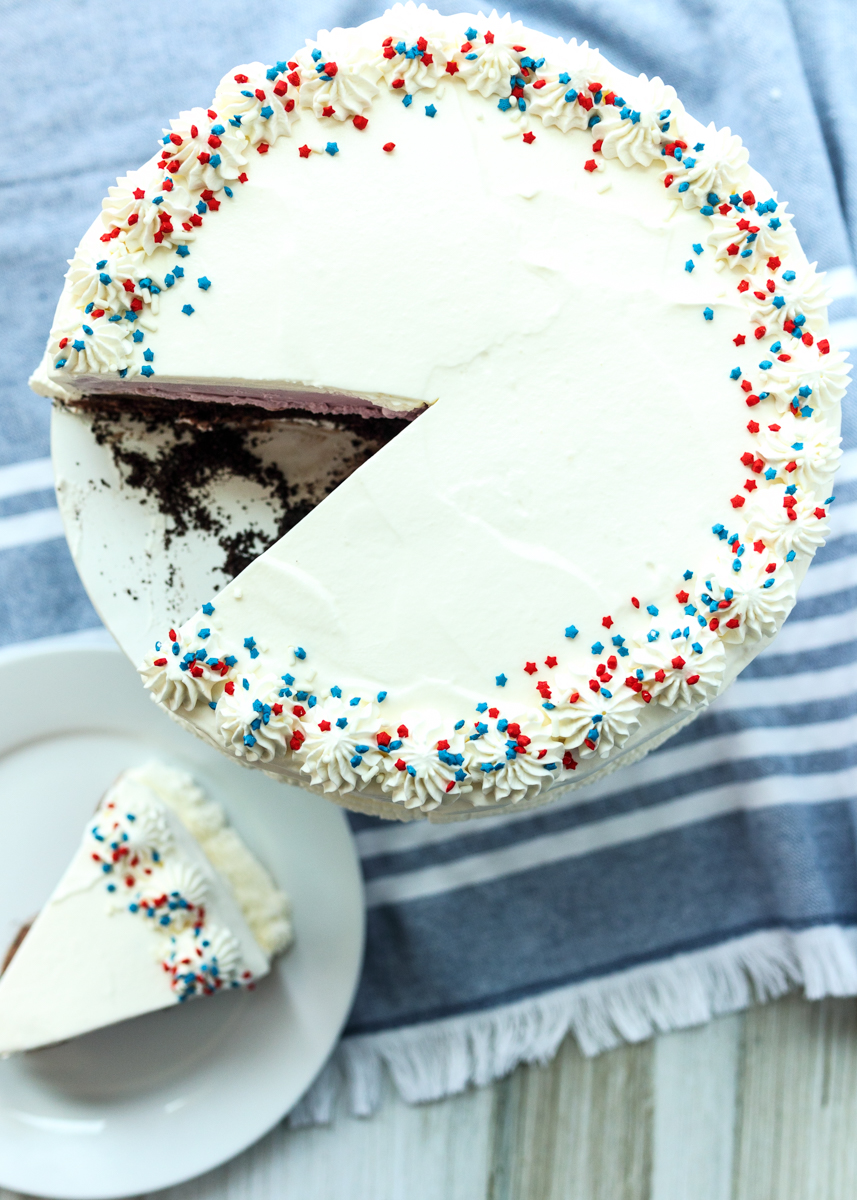
Frosting with whipped cream can be a little fussy so I’ve taken special care to write up a detailed step-by-step in the recipe. It’s not complicated; I’ve just found there are certain steps you need to follow if you want it looking like the ice cream cakes you get at your local shop. After you do it once you will be a pro for life! I used a Wilton #22 star tip for the piping. If you don’t need it looking picture perfect you can skip all those steps and just pile a whole bunch of whipped cream on the top of your cake. It will still taste just as good!

Classic Ice Cream Cake  |  Lemon & Mocha

Classic Ice Cream Cake
 
Yield: 8-10 servings
Ingredients
  • 2⅓ cups Oreo cookie crumbs (about 18 Oreos)
  • 1½ quarts chocolate ice cream
  • 2½ cups heavy cream, divided
  • 1⅓ cups semisweet chocolate chips
  • 2 tablespoons butter
  • 1½ quarts black raspberry ice cream
  • 1 cup powdered sugar
  • 1½ teaspoons vanilla extract
  • Sprinkles, for decorating
Directions
  1. Line a 9-inch springform pan with plastic wrap so it goes up and over the sides. I use 2 pieces. Spread 1 cup of the Oreo cookie crumbs into the lined springform. Use the flat bottom of a small measuring cup to press down firmly into an even layer.
  2. Scoop the container of chocolate ice cream into the bowl of a stand mixer then beat with your paddle attachment until smooth and spreadable. Use a rubber spatula to spoon over the cookie crumb layer and spread into an even layer. Put in the freezer.
  3. Make the chocolate ganache. Heat ½ cup of the heavy cream in a small saucepan over medium heat until just steaming. Reduce heat to low and add the chocolate chips. Stir until melted then add the butter. Stir until the butter has melted and the ganache is smooth and shiny. Remove from the heat and let cool. Once the ganache has cooled (doesn’t need to be room temperature, just not too warm), take the ice cream cake from the freezer and add the remaining 1⅓ cups Oreo crumbs. Spread into an even layer, pressing down slightly. Pour the cooled chocolate ganache over top and return the cake to the freezer.
  4. Once the ganache has mostly set, scoop the container of black raspberry ice cream into the bowl of a stand mixer then beat with your paddle attachment until smooth and spreadable. Use a rubber spatula to spoon over the chocolate ganache layer and spread into an even layer. Put in the freezer and let set until firm, at least 2 hours or overnight.
  5. Make the whipped cream. Place a metal mixing bowl or the metal bowl of a stand mixer in the freezer along with the metal beaters or beater for 5-10 minutes. Remove and add the remaining 2 cups of heavy cream (make sure your cream is cold), powdered sugar and vanilla. Beat on medium-high until stiff peaks form. If you just want to frost the top of the cake, follow the directions in the note at the bottom of the recipe. If you want to frost the cake with the whipped cream like in the photos, keep reading.
  6. Take the cake out of the freezer and open the ring of the springform pan. Use the plastic wrap to lift up the cake; carefully remove the plastic wrap and transfer the cake to a cake board or platter (that will still fit in your freezer). Working quickly, cover the top and sides of the cake with a crumb coat of the whipped cream. This means you put a light layer all over the cake, but there will be ice cream and cookie crumbs in it. This will help give you a smooth surface for the next layer. Return to the freezer until mostly firm (and store the whipped cream, still in the metal bowl, in the fridge). When the crumb coat is firm, remove from the freezer and use an offset spatula to apply a second coat of the whipped cream on the top and sides, smoothing as you go. Return to the freezer. At this point you will probably need to re-whip your whipped cream in order for it to be stiff enough to pipe. Re-whip the whipped cream on medium-high speed until stiff peaks form. Add the whipped cream to a piping bag fit with your preferred piping tip. I used a Wilton #22 star tip. Take the cake from the freezer and pipe stars all along the top border. Then pipe a decorative line around the bottom edge of the cake where it meets the cake board or platter. Decorate with sprinkles and store in the freezer until ready to serve. The cake can usually be cut right out of the freezer with a sharp knife.
Notes
- This recipe calls for the entire Oreo cookie including the creme filling.
- You can make the ganache ahead of time if you prefer. Store in the fridge until ready to use and then gently heat in the microwave until smooth and pourable before using.
- If you just want to frost the top of the cake, follow these directions: Pile the whipped cream on top and leave in the freezer until ready to serve. When ready to serve, open the ring of the springform pan. Use the plastic wrap to lift up the cake; carefully remove the plastic wrap and transfer the cake to a cake board or platter.

Some of the links above are affiliate links, which means I may receive a small commission for my referral if you purchase something. This does not affect the retail cost of the item. Thank you for supporting Lemon & Mocha!

Dirt Fudge

Dirt Fudge  |  Lemon & Mocha

Happy Friday! My week went by extra quickly because Matt and I just got back from a mini vacation in Chicago! Neither of us had been before and it was an awesome food-packed, sites-packed, relaxing whirlwind of a trip. We did so much walking that neither of us can feel our feet and of course we ate all the food. Deep dish pizza, Chicago hot dogs, doughnuts, pierogies, steak; you name it, we probably ate it. Below are just a couple photos from the trip. Maybe one of these days I’ll get around to creating all my travel food posts, but in the meantime let’s talk about this Dirt Fudge.

201907062lemonandmocha201907072lemonandmocha201907091lemonandmocha

Dirt Fudge is chocolate fudge loaded with Oreo cookies and gummy worms. I know, crazy, right?

Dirt Fudge  |  Lemon & Mocha

Normally I only make and think about fudge during Christmastime. In fact, I think before this I had only ever eaten it around the holidays. But smooth and rich chocolate fudge is delicious year-round!

Dirt Fudge  |  Lemon & Mocha

I wanted to make a version that would seem more summer-appropriate so I took inspiration from this summer’s most popular dessert on the blog – Aunt Elaine’s Dirt Cake.

Dirt Fudge  |  Lemon & Mocha

If you want an easy, fun summer treat to make and eat with your kids this summer then this Dirt Fudge is exactly what you need. What is more fun than gummy worms?

Dirt Fudge  |  Lemon & Mocha

I hope you all have a fabulous weekend!

Dirt Fudge  |  Lemon & Mocha

Dirt Fudge
 
Yield: 64 pieces
Ingredients
  • 1 ounce Baker's unsweetened baking chocolate
  • 2 tablespoons unsalted butter
  • One 12-ounce bag semi-sweet chocolate chips
  • 1 14-ounce can Eagle Brand sweetened condensed milk
  • 1 teaspoon vanilla extract
  • 10 Oreo cookies, crushed, plus more for topping
  • 10 gummy worms
Directions
  1. Line an 8" x 8" pan with wax paper with some overhang so it’s easy to pull the fudge out of the pan. It is easier if you crunch up the wax paper in your hands then smooth out into the pan.
  2. Melt the butter and unsweetened chocolate in a medium nonstick saucepan over low heat, stirring regularly with a heatproof spatula to make sure the chocolate doesn’t burn.
  3. Pour in the sweetened condensed milk and stir to combine. Let the mixture get a little warm then pour in half the bag of chocolate chips. Stir to help melt. Once partially melted add the rest of the bag of chocolate chips and stir until fully melted, being sure to scrape the bottom as you stir. Stir in the vanilla extract and remove from the heat. Add the crushed Oreo cookies and stir to combine.
  4. Pour half the chocolate mixture into the prepared pan and smooth the top with the spatula. Top with the gummy worms then pour over the remaining half of the chocolate mixture, smoothing the top. Top with additional crushed Oreos. Refrigerate until the fudge is set; I usually let mine set overnight. Carefully pull the fudge out of the pan using the wax paper overhang, place on a large cutting board and cut into bite size squares with a clean, sharp knife. I usually cut mine into quarters and then cut each quarter into 16 pieces to get 64 pieces. You will need a sharp knife to cut through the gummy worms.


Chocolate Cherry Smoothie Bowl

Chocolate Cherry Smoothie Bowl  |  Lemon & Mocha

Ever since Matt and I went to Seattle in 2013 I’ve been a sucker for any chocolate cherry combination. While we were there on vacation we did a food tour of Pike Place Market and one of the vendors they introduced us to was Chukar Cherries. They source their cherries right in the state of Washington and make all kinds of cherry goodies. It began an instant love affair and Matt and I have ordered deliveries from them several times just to satisfy the occasional craving that still pops up six years later.

Chocolate Cherry Smoothie Bowl  |  Lemon & Mocha

Their chocolate covered cherry treats single-handedly converted me to a fan of the chocolate cherry flavor profile in all forms. Including this easy and healthy Chocolate Cherry Smoothie Bowl. The chocolate flavor hits you first, but then the fresh cherry flavor comes through and you’re in chocolate-cherry heaven. The texture is similar to the Chocolate Tahini Banana “Soft Serve” recipe I posted back in March, which is that it is like partially melted ice cream. This chocolate cherry version is more of a smoothie bowl because I included some nonfat milk, although you can use whichever milk fat or milk alternative you prefer.

Chocolate Cherry Smoothie Bowl  |  Lemon & Mocha

I stumbled upon this Chocolate Cherry Smoothie Bowl recipe last summer while I was trying out different desserts that would satisfy my after-dinner sweet tooth and chocolate craving, but that were still relatively healthy. During one hot week last summer I had it for dessert every night. You can use either a fresh or frozen banana, but I prefer using a fresh banana since it’s easier to blend in my blender, I never remember to put bananas in my freezer and I like the more melty texture of the smoothie bowl. Matt prefers the thicker texture of the smoothie bowl with the frozen banana so it’s totally up to you.

Chocolate Cherry Smoothie Bowl  |  Lemon & Mocha

The frozen cherries and the frozen cauliflower, which I snuck in there for some veggies, provide plenty of frozen goodness to the bowl. I figured this treat might be especially welcome after all the 4th of July hot dog and flag cake consumption so I hope you enjoy!

Chocolate Cherry Smoothie Bowl  |  Lemon & Mocha

Chocolate Cherry Smoothie Bowl
 
Yield: 2 servings
Ingredients
  • ⅔ cup nonfat milk (or milk of your preference)
  • 1 frozen banana (or unfrozen if you like it more melty)
  • 1 cup frozen cherries
  • ¼ cup frozen cauliflower florets
  • 3 tablespoons cocoa powder
  • 1 tablespoon agave (or honey)
  • Fresh pitted cherries, chocolate drizzle and granola, for topping
Directions
  1. Blend the milk, banana, cherries, cauliflower, cocoa powder and agave in a high-speed blender until smooth. Top with desired toppings and eat immediately.

Recipe adapted from Sprouting Zen.

Red, White and Blue Angel Food Cake Platter

Red, White and Blue Angel Food Cake Platter  |  Lemon & Mocha

How fun is this Red, White and Blue Angel Food Cake Platter? As I’ve mentioned in past posts, Babu and I used to make a classic flag sheet cake every Fourth of July. Now my new tradition seems to be coming up with a tasty new alternative every year instead! I really enjoyed putting together last year’s Flag Fruit and Dessert Platter and I wanted to do something similar this year.

Red, White and Blue Angel Food Cake Platter  |  Lemon & Mocha

Just like mini appetizer food, dessert boards encourage informal snacking and eating, which is especially welcome during lazy summer barbecue parties. When it’s hot out and all the yummy fruits are in season during the summertime I find myself craving fruity desserts. Even better if they’re light and refreshing. This red, white and blue platter essentially turns an already simple dessert into a top your own angel food cake bar.

Red, White and Blue Angel Food Cake Platter  |  Lemon & Mocha

The white stripes consist of chunks of fluffy angel food cake. Buy it at the store, bake it from scratch or use a box mix; totally up to you! I went basic with the red stripes and just layered juicy strawberries. Strawberries, raspberries and pitted fresh cherries are all great choices that would pair well with the angel food cake.

Red, White and Blue Angel Food Cake Platter  |  Lemon & Mocha

For the blue section of the flag I have a quick sauce made with blueberries. It was my first time making this easy four-ingredient sauce from Barefoot Contessa and it will definitely not be my last. Striking the perfect balance of sweet and tart, the blueberry sauce tastes so good drizzled all over the angel food cake and fresh berries.

Red, White and Blue Angel Food Cake Platter  |  Lemon & Mocha

Finally, in a bowl nearby since it doesn’t really fit into the flag is some homemade whipped cream because you can’t have summer cake and berries without whipped cream! If you’re going for all simple this holiday then just break out some Cool Whip. I promise no one will complain. However, if you do take the extra few minutes to make the fresh whipped cream then I also promise you will have some extra rave reviews of your top your own angel food cake bar. Enjoy and have a great holiday!

Red, White and Blue Angel Food Cake Platter  |  Lemon & Mocha

Red, White and Blue Angel Food Cake Platter
 
Yield: 1 platter; 2 cups blueberry sauce
Ingredients
for the platter
  • 1 angel food cake, cut into cubes
  • 24 ounces strawberries, hulled and quartered
  • 1 cup heavy cream, cold
  • 2 tablespoons granulated sugar
for the blueberry sauce
  • 1½ pints blueberries
  • ½ cup sugar
  • 1 teaspoon vanilla extract
  • 1 tablespoon lemon juice
Directions
for the platter
  1. Arrange the cake cubes on the platter in stripes, leaving room for the strawberries and a bowl filled with blueberry sauce in the upper left corner. Place the strawberries on the platter right before serving.
  2. In a cold metal bowl of a stand mixer or in a large cold metal mixing bowl with a hand mixer, use cold beaters to beat the heavy cream and sugar until stiff peaks form. Keep refrigerated until you’re ready to serve it. You can make the whipped cream a day ahead, just store it in the fridge until you’re ready to serve then lightly beat with a whisk.
for the blueberry sauce
  1. In a medium saucepan, bring the blueberries, sugar, vanilla, lemon juice and ¼ cup water to a boil. Reduce to a simmer, cover and cook for 15-20 minutes. The sauce should be thickened. Remove from the heat and blend in a blender or with an immersion blender. Alternatively you could strain in a mesh strainer to remove the blueberry chunks. If you prefer the chunks of blueberries in the sauce then you can just leave it as is. Cool to room temperature then store in the fridge until ready to serve.
Notes
I used a box mix and baked it in two square baking pans. I lined the baking pans with parchment paper then made the angel food cake according to the package instructions, baking at 325 degrees (my pans were nonstick) for 35 minutes, or until the tops were dark golden. When they came out of the oven I leaned the pans on their sides and when they were mostly cool I took them out of the pans and cut them into cubes.

Blueberry sauce recipe adapted from Ina Garten.

Ice Cream Sandwich Stars

Ice Cream Sandwich Stars  |  Lemon & Mocha

Even though it’s still June I’m here sharing the Food Network Magazine July cookies because they are perfect for the Fourth of July. Like the May macarons I skipped, these cookies were slightly involved, but there’s also ice cream so of course I stuck it out.

Ice Cream Sandwich Stars  |  Lemon & Mocha

Have you ever made homemade ice cream sandwiches? I have a handful of times, but they can be difficult to get right because the texture of the cookies is so important. The cookies needs to be soft enough that they don’t get too hard in the freezer so you can actually bite through the ice cream treat. They also can’t be too soft that the cookie falls apart when you try to put the ice cream sandwich together.

Ice Cream Sandwich Stars  |  Lemon & Mocha

One thing the Food Network Magazine got right was definitely the texture of the cookies for these Ice Cream Sandwich Stars. I thought they were too soft and underdone when I baked them, but they ended up being just the right texture for ice cream sandwiches. The cookies have a malted milk vanilla flavor that isn’t too sweet, which is another reason they work well for making into ice cream sandwiches. I would not recommend baking and eating these cookies on their own; they seem specifically designed for consuming with creamy vanilla ice cream.

Ice Cream Sandwich Stars  |  Lemon & Mocha

If you get the Food Network Magazine then you know their version of these cookies are bright cherry red. I did run out of red gel food coloring so mine shown here only have half the amount the recipe below calls for, but even with the full amount I’m not sure how the cookies would ever be that color since the cookies get fairly browned by being baked in the top 1/3 of the oven. I’m curious to see if anyone else is able to get the ice cream sandwiches that bright red color or if it was all food styling and editing tricks.

Ice Cream Sandwich Stars  |  Lemon & Mocha

Either way, they still looked cute with all the Fourth of July red, white and blue sprinkles. I have an easy red, white and blue dessert I’ll be sharing next week right before the holiday so stay tuned!

Ice Cream Sandwich Stars  |  Lemon & Mocha

Ice Cream Sandwich Stars
 
Yield: 9 ice cream sandwiches
Ingredients
  • 4 tablespoons unsalted butter, at room temperature, plus more for the pan
  • 2 cups all-purpose flour, plus more for the pan
  • 2 teaspoons vanilla extract
  • 1½ teaspoons red gel food coloring
  • ½ cup whole milk
  • ½ cup malted milk powder (such as Carnation original)
  • ¾ teaspoon salt
  • ¼ teaspoon baking powder
  • ¼ teaspoon baking soda
  • ¼ cup vegetable shortening
  • ¾ cup granulated sugar
  • ¾ cup packed brown sugar
  • 3 large egg yolks
  • Red, white and blue nonpareils or 4th of July sprinkles, for decorating
  • 3 pints vanilla ice cream
Directions
  1. Preheat oven to 325 with the rack positioned in the upper third of the oven. Line a rimmed 13x18-inch baking sheet with parchment paper, buttering the pan so the parchment paper stays put. Butter and four the parchment, tapping out the excess flour.
  2. In a liquid measuring cup, stir together the vanilla, food coloring and milk. Set aside. In a medium bowl, sift together the flour, malted milk powder, salt, baking powder and baking soda.
  3. In the bowl of a stand mixer or in a large bowl with a hand mixer, beat the butter, shortening, sugar and brown sugar on low speed until combined. Beat on medium-high speed until fluffy, about 5 minutes. Add the egg yolks, beating after each addition, until combined, scraping down the sides as needed. Add the flour mixture then beat on low until just combined. Add the milk mixture and beat on medium until smooth. Pour the batter into the prepared pan and then spread until even. Sprinkle the nonpareils or sprinkles over top then bake for 25-30 minutes, or until a toothpick inserted in the center comes out clean and the cake is just set. Cool completely in the pan set on a wire cooling rack. Once cool, use a 3¼-inch star cookie cutter to cut out 18 stars. Let the cookie stars sit in the fridge to firm up until you are ready to sandwich then with the ice cream.
  4. While the cake is baking and cooling, cut out the ice cream stars. Line a baking sheet (that will fit in your freezer) with parchment paper. Take 1 pint of ice cream out of the freezer. Turn it on its side and cut into ½-inch thick slices, right through the cardboard and ice cream, starting with the wide end. You will get 3 to 4 slices out of the pint. Place the pint slices on the parchment and remove then cardboard wrapping then place the baking sheet in the fridge to firm up. Once the slices have firmed up, use a 3¼-inch star cookie cutter to cut the slices into stars, placing the ice cream scraps in a container for another use. Put back in the freezer then repeat with the remaining two pints.
  5. Once the ice cream stars are firm enough to handle, working with a few at a time sandwich the ice cream stars between 2 of the cookie stars. Return to the freezer until ready to eat. If not eating right away, wrap them in plastic wrap after they’ve had a chance to firm up.

 Recipe from January/February 2019 issue of Food Network Magazine.

Some of the links above are affiliate links, which means I may receive a small commission for my referral. This does not affect the retail cost of the item. Thank you for supporting Lemon & Mocha!