Chocolate Dipped Ice Cream Cones

Chocolate Dipped Ice Cream Cones  |  Lemon & Mocha

July is National Ice Cream Month so I’m posting ice cream related recipes all this week! I would have posted ice cream recipes all month long, but you got to have balance, right? Also, my freezer is only so big so there’s that. Did you check out the outrageous dipped cones I had in Monday’s Chocolate Brownie Walnut Ice Cream post? If not, go check it out now!

Chocolate Dipped Ice Cream Cones  |  Lemon & Mocha

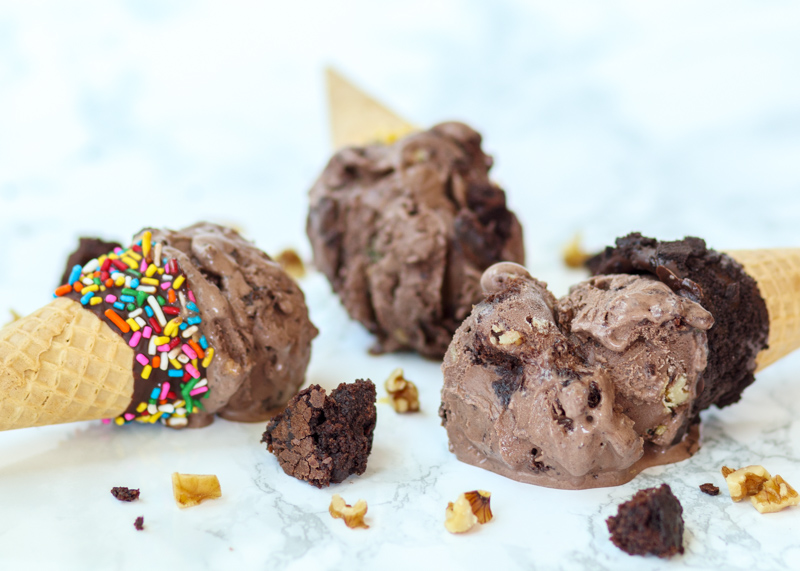
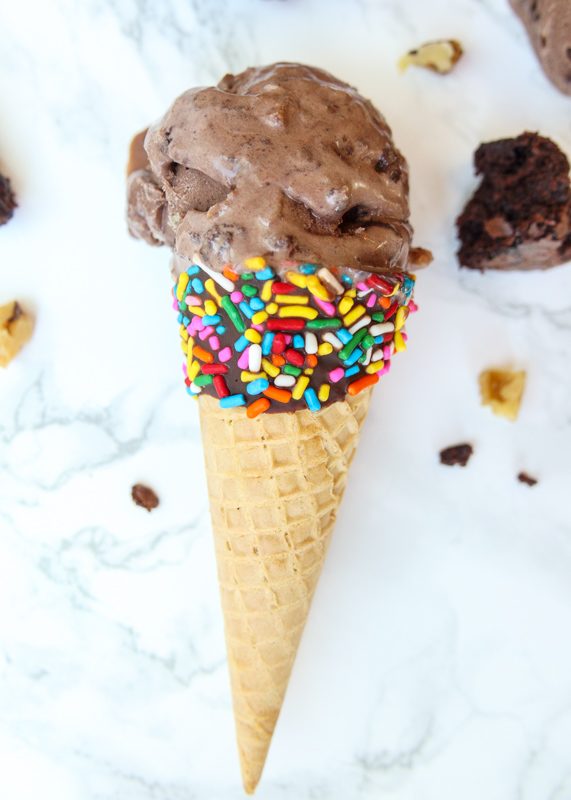
I love getting dipped cones when I go out for ice cream. The problem is usually the only dipped cones are the waffle cones. Those things fit SO much ice cream! So unless I’m feeling super ambitious it’s a plain cone for me. Then when I was thinking about ice cream month I realized that I could just make my own epic cones! It is actually so simple that I debated even posting it as a recipe, but they are so adorable how could I not share?

Chocolate Dipped Ice Cream Cones  |  Lemon & Mocha

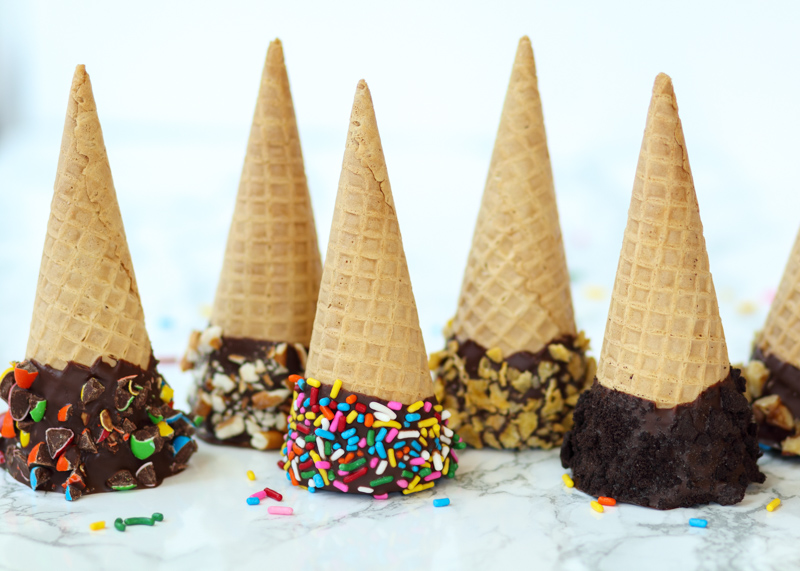
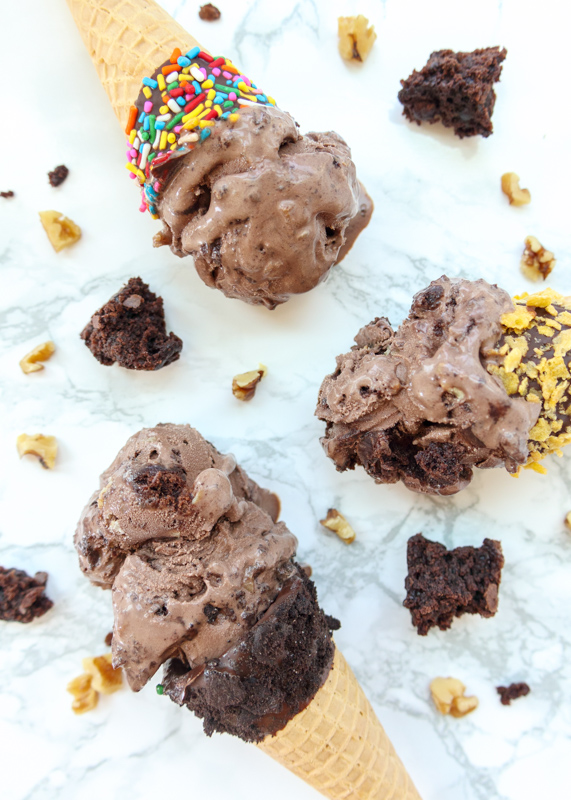
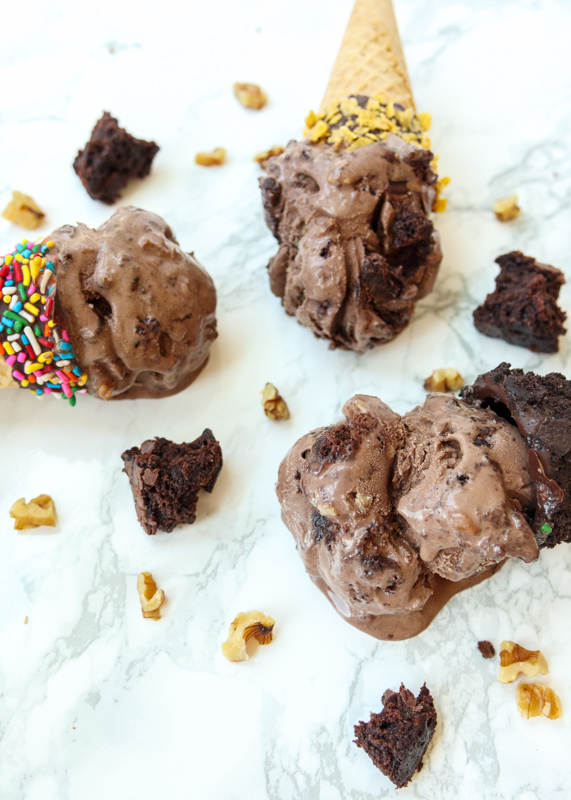
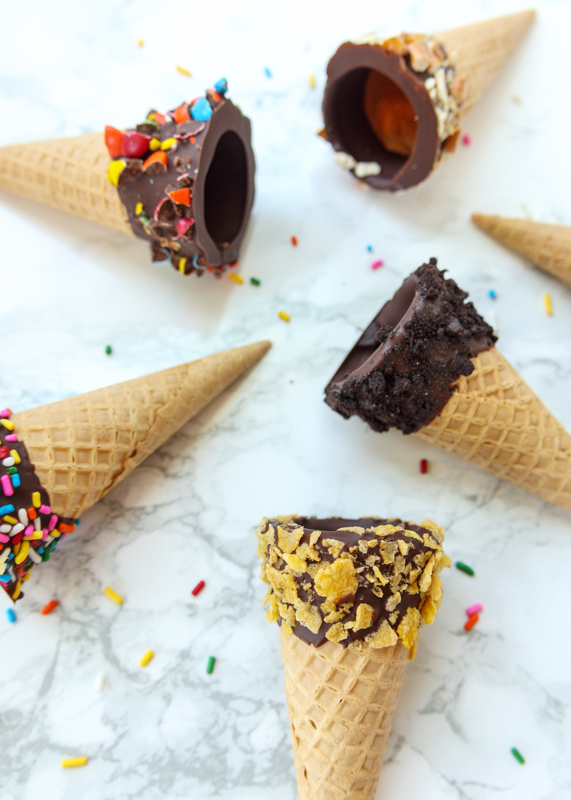
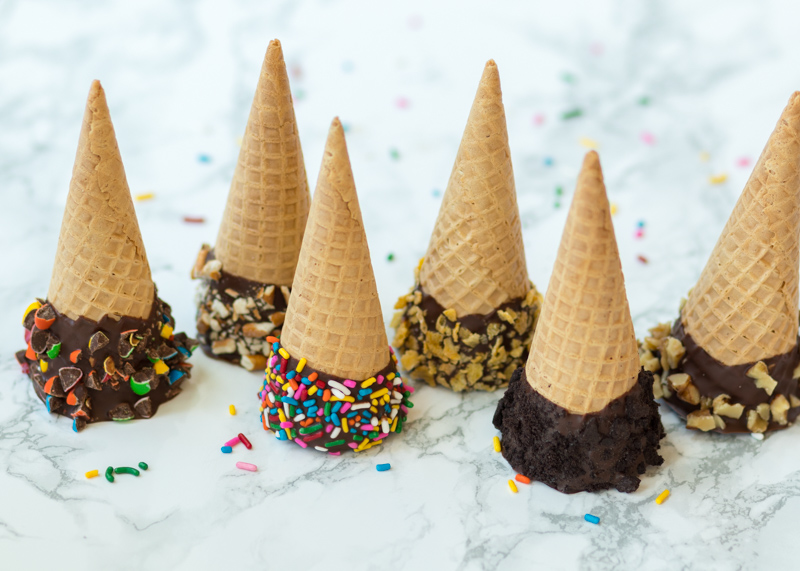
The decoration and topping options are endless, and you all know how I feel about food variation possibilities! I limited myself to just six different varieties with ingredients I already had in my kitchen, but I could have easily kept going. I went with cookie crumbs, walnut pieces (had to pay homage to Monday’s post), crushed M&M’s, pretzel pieces, cornflakes cereal and of course, sprinkles! You could really do any candy, cereal, nut, cookie, or even salty snack. I’m thinking Reese’s Pieces, Fruit Loops, cashews, Chips Ahoy and potato chips – yum!

Chocolate Dipped Ice Cream Cones  |  Lemon & Mocha

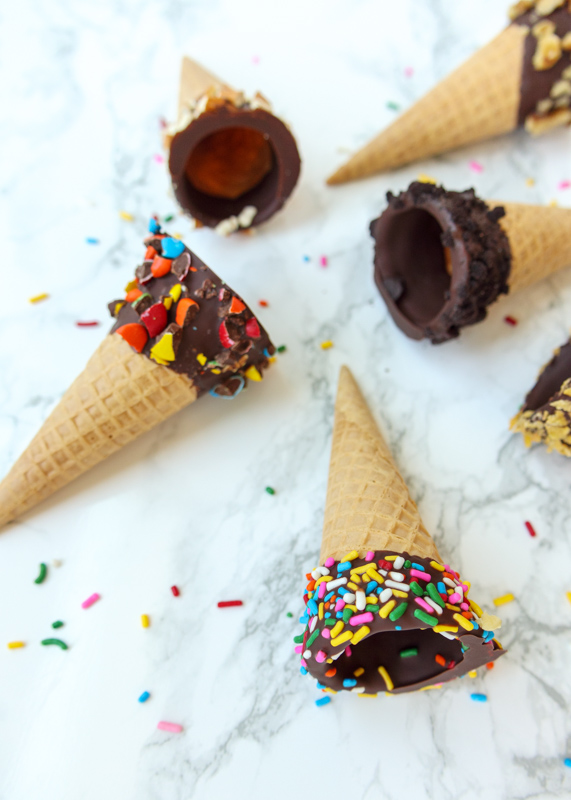
The key, which I learned the hard way, is to keep the pieces small. And I mean very small, like almost crumbs, especially if the items are heavier. See my walnut cone and M&M cone? Those pieces were too big and they started sliding down the chocolate the minute I tried to sprinkle them on. The cookie crumbs and sprinkles worked the best because they were so small and light. That’s why I test it though, then you don’t have to make my same mistakes and can have yours come out perfectly!

Chocolate Dipped Ice Cream Cones  |  Lemon & Mocha

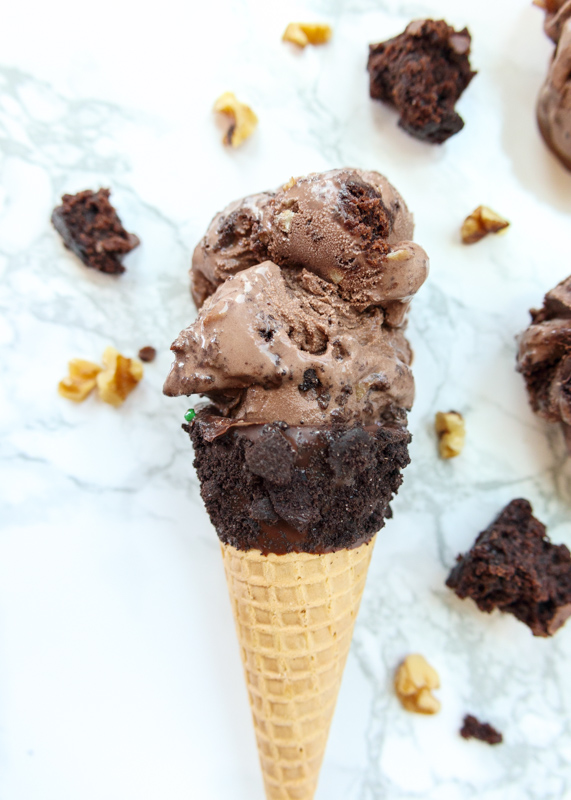
Once you have your toppings picked out and chopped you are ready to melt your chocolate. I like to use my liquid measuring cup because it’s microwave safe while also being narrow and deep. A deep and narrow bowl or cup is better because then you can dip your cone deeper without having to use more chocolate. The dipping bowl or cup only needs to be as wide as your cone. I melt the chocolate chips down in the microwave with a little coconut butter to help keep the chocolate shiny and smooth. I used to use vegetable oil, but now I use coconut butter because it’s healthier, but feel free to use whichever one you would prefer or already have in your kitchen. Once the chocolate is melted down you can start dipping. Dunk the whole mouth of the cone right into the chocolate then let all the excess drip off. And I do mean all the excess! You have to be a bit patient with it and let it drip, rotating and giving it a few shakes to help the dripping along. If you don’t let enough excess drip off then your toppings will be more likely to drip right off your cones.

Chocolate Dipped Ice Cream Cones  |  Lemon & Mocha

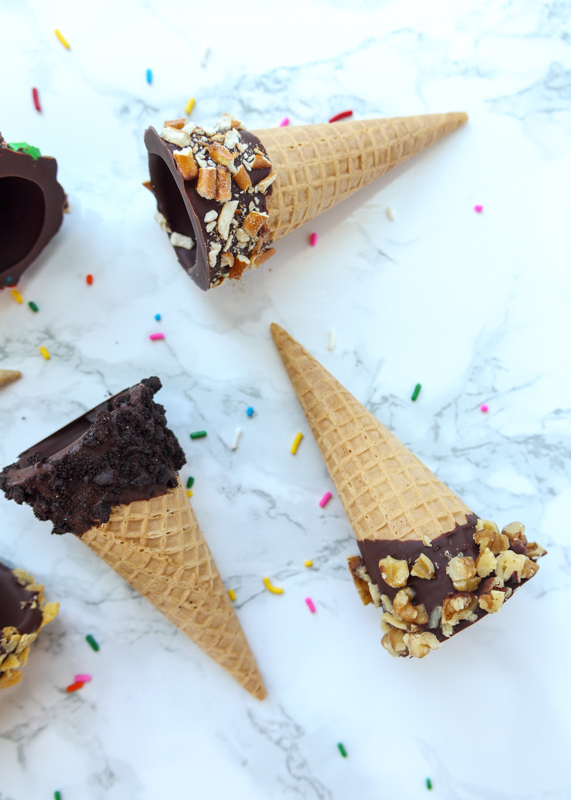
Then, sprinkle all over with the toppings! I would say this is the fun part, but we all know the real fun part is eating them with a scoop (or two) of ice cream! Simply place the topped cones, opening side down, on a wax paper lined small cookie sheet and place in the fridge for twenty minutes. Then time to eat! What toppings would you pick for your chocolate dipped cones?

Chocolate Dipped Ice Cream Cones  |  Lemon & Mocha

Chocolate Dipped Ice Cream Cones
 
Yield: 6 dipped cones
Ingredients
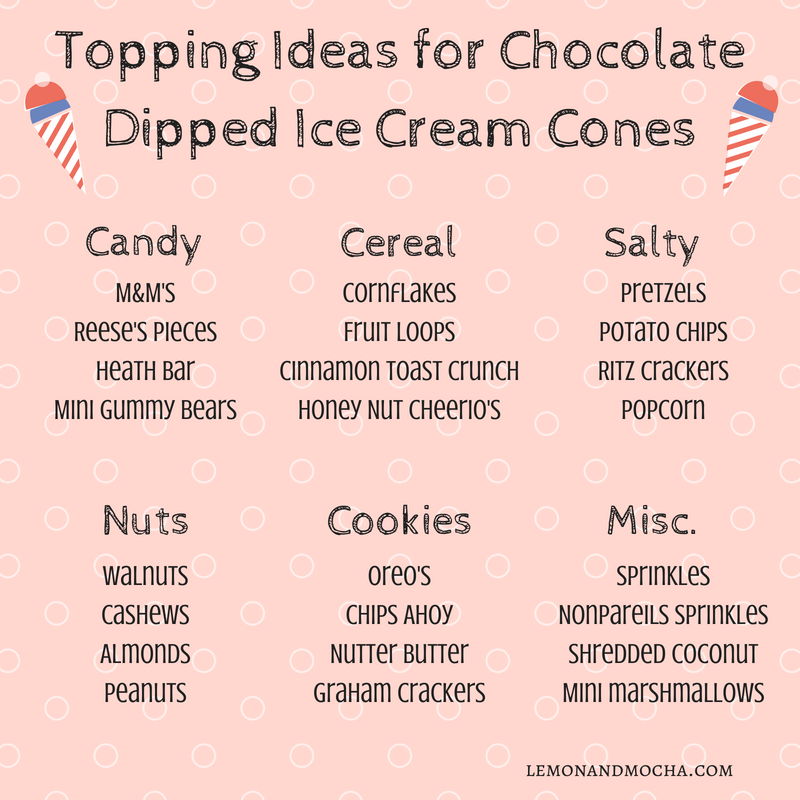
  • Toppings for dipping (see above for ideas)
  • ⅔ cup semisweet chocolate chips
  • 1 tablespoon coconut oil
  • 6 sugar cones
Directions
  1. Make sure your toppings are crushed small and are ready to go. Line a small baking sheet or sturdy cutting board with wax paper or parchment paper. Make sure the baking sheet or cutting board you choose will fit in your fridge with the cones upright.
  2. Pour the chocolate chips and the coconut oil in a microwavable liquid measuring cup or a deep and narrow bowl. Microwave for 30 seconds, stir. Microwave at 20 second intervals, stirring after each interval, until the chocolate is smooth and melted. Be sure not to over-heat.
  3. Dip the open end of your cone into the chocolate. I dipped mine about 1½ inches deep. Let the excess chocolate drip off, rotating and lightly shaking your cone. Be patient! Too much excess will lead to runaway toppings. After the excess chocolate is dripped off, sprinkle on your toppings. I held my cone sideways over a bowl and sprinkled the toppings over the chocolate dipped cone. Once you’ve added your toppings, stand the cone upright, opening faced down, on the prepared baking sheet or cutting board.
  4. Repeat for the remainder of the cones. You may need to tilt the liquid measuring cup as you dip the cones to get enough of the cone dipped. You will have some leftover dipping chocolate. Once all the cones have been dipped and topped, put the baking sheet or cutting board in the fridge for 20 minutes before filling with ice cream and eating. I stored these in the fridge, but if you weren’t worried about the chocolate getting melty you could store them at room temperature.
Notes
If you don’t have coconut oil or cannot use it for dietary reasons, you can substitute the same amount of vegetable oil


Chocolate Brownie Walnut Ice Cream

Chocolate Brownie Walnut Ice Cream  |  Lemon & Mocha

I can’t believe it’s almost August and I haven’t posted a single ice cream recipe this season! I’ve made ice cream a couple times this summer, but I never got around to photographing them for Lemon & Mocha. So today we are going into full ice cream mode! I am a chocolate person through and through and there’s no exception when it comes to ice cream. Chocolate ice cream is delicious on its own, but it’s even better if it has more chocolate in it!

Chocolate Brownie Walnut Ice Cream  |  Lemon & Mocha

Eating at Coldstone Creamery over the years has let me try basically every type of topping in ice cream so I knew brownie would be a perfect addition. Does anyone else put so many toppings in their Coldstone ice creams that they have to put your creation in the next size bowl because it got so big from all the toppings? I can’t be the only topping weirdo out there! Anyways, the brownie adds a chewy and fudge-like texture to the chocolate ice cream. I also love when ice creams have a bit of a crunch so I added in the walnuts as well. My stepmom always makes brownies with walnuts so I was thinking this ice cream is kind of like a play on those brownies. With all my toppings talk, I kept this Chocolate Brownie Walnut Ice Cream fairly simple, but it was still the perfect bite.

Chocolate Brownie Walnut Ice Cream  |  Lemon & Mocha

If you want to make this ice cream, but you don’t have an ice cream maker I definitely suggest you get one! They are relatively inexpensive (under $50) and I’ve had mine for over 14 years! This is the updated version of mine. However, if you wanted to make this ice cream, but didn’t want to wait for all the steps of a homemade custard based ice cream, you could simply fold brownie chunks and walnuts into your favorite chocolate ice cream! Beat the ice cream in the bowl of a stand mixer to make it softer without getting melty then beat or fold in the brownies and walnuts.

Chocolate Brownie Walnut Ice Cream  |  Lemon & Mocha

Did you know this is my 10th ice cream post on Lemon & Mocha? Here are my other ice cream posts if you’re looking for additional flavors: Honey Ice Cream with Pralined Almond Crumble, Orange-Vanilla Frozen Custard, Browned Butter Peach Ice Cream with a Graham Cracker Crumble, Coffee Ice Cream, Vanilla Bean Ice Cream, Double Chocolate Chip Ice Cream, Peanut Butter Cup Ice Cream, Straciatella Chocolate Hazelnut Gelato and Egg Nog Ice Cream.

Chocolate Brownie Walnut Ice Cream  |  Lemon & Mocha

P.S. How adorable are these ice cream cones? I have a fun post going up on Wednesday to show you how to make and customize your own cones. I also cannot wait for you all to see what I use this Chocolate Brownie Walnut Ice Cream for in my Friday post – prepare yourselves to take this chocolately deliciousness to the next level!

Chocolate Brownie Walnut Ice Cream  |  Lemon & Mocha

Chocolate Brownie Walnut Ice Cream
 
Yield: 1 quart
Ingredients
  • 2 cups heavy cream, divided
  • 3 tablespoons unsweetened Dutch-process cocoa powder
  • 5 ounces semisweet (or bittersweet) chocolate chips
  • 1 cup whole milk
  • ¾ cup sugar
  • Pinch of salt
  • 5 large egg yolks
  • ½ teaspoon vanilla extract
  • ⅔ cups chopped walnuts
  • 1⅓ cups brownie pieces
Directions
  1. In a medium saucepan over medium heat warm 1 cup of the cream with the cocoa powder. Whisk until the cocoa is blended then bring to a boil. Once boiling, reduce the heat to simmer for 30 seconds, whisking continuously.
  2. Remove the saucepan from the heat before adding the chopped chocolate and stirring until smooth. Add the remaining cup of cream, stir, then pour the whole mixture into a large bowl. Place a mesh strainer on top of the bowl.
  3. Using the same saucepan combine the milk, sugar and salt over medium heat until warm. In a medium bowl whisk the egg yolks then slowly pour the warm milk mixture into the egg yolks, whisking constantly, to temper the eggs. Pour the milk and egg mixture back into the saucepan. Constantly stir the mixture over medium heat with a heatproof spatula making sure to scrape the bottom and not let any clumps form. Continue stirring until the mixture is thick enough to coat the spatula.
  4. Remove the mixture from the heat and pour it through the mesh strainer into the large bowl with the chocolate mixture. Stir until combined then mix in the vanilla extract.
  5. Insert the bowl into an ice bath and continue stirring until cool.
  6. Chill the mixture in the fridge. Once cold, pour into your ice cream maker following the manufacturer's directions. During the last 5 minutes add the chopped walnuts and brownie pieces. Let firm in the freezer before scooping. If you are using this to make an ice cream pie, you can pour it right from the ice cream maker into your prepared pie crust.
Notes
I find it is easier to cut and incorporate the brownies into the ice cream if they’re already cold so I usually refrigerate a couple brownies before chopping them up and mixing them into the ice cream.
I prefer to use Ghiradelli chocolate.

Some of the links above are affiliate links, which means I may receive a small commission for my referral. This does not affect the retail cost of the item. Thank you for supporting Lemon & Mocha!

Mini Strawberry Balsamic Pizzas with Chicken & Sweet Onions

Mini Strawberry Balsamic Pizzas with Chicken & Sweet Onion  |  Lemon & Mocha

Has anyone else been obsessed with strawberries this season? I got hooked on baking with them after I made the Strawberry Rhubarb Crumble Muffins. That prompted me to bake the Beet Donuts with a Strawberry Rhubarb Brown Butter Glaze and I even made strawberry rhubarb white chocolate chip cookies. The cookies were purely for eating, not blog purposes, but comment below if you want the recipe!

Mini Strawberry Balsamic Pizzas with Chicken & Sweet Onion  |  Lemon & Mocha

Not to mention the large amounts of fresh strawberries Matt and I have consumed so far this summer. I had not done any savory cooking with them though and that needed to change! Enter these Mini Strawberry Balsamic Pizzas with Chicken and Sweet Onion. To say Matt and I loved these mini flatbread pizzas is an understatement. Matt proclaimed he would be okay eating these naan pizzas every night and I would have to agree.

Mini Strawberry Balsamic Pizzas with Chicken & Sweet Onion  |  Lemon & Mocha

We need to dive into these pizzas layer by layer to truly appreciate how much deliciousness I’ve snuck in there for you. First, the base is naan flatbread. Naan is similar to pita bread, but softer and fluffier. I like using naan for this recipe because then everyone can have their own little pizzas and all the work of dealing with fresh dough has already been done for you. Easy! If you don’t have naan at your store you could always use pitas or pizza dough.

Mini Strawberry Balsamic Pizzas with Chicken & Sweet Onion  |  Lemon & Mocha

Next, these pizzas don’t have marinara sauce, pesto or garlic oil. They have something even better – fresh strawberry balsamic spread! This is the only “cooking” part of the recipe and it couldn’t be more simple. Finely chopped strawberries are combined with some honey and balsamic then you let them sit for 15-20 minutes. This is called macerating the berries and letting them sit out with sugar (in our case, honey) releases their juices and softens the strawberries. Once their macerated, you mash them together and ta-da! Strawberry balsamic spread. Look at the strawberry balsamic spread!

Mini Strawberry Balsamic Pizzas with Chicken & Sweet Onion  |  Lemon & Mocha

The acidity from the balsamic balances out the sweetness of the berries and honey making it the perfect base for our other toppings. Next up we have chicken and sweet onion. I used grilled chicken, but you could use rotisserie chicken if you prefer. Chicken pairs well with the strawberries and the onions get nicely softened, which mellows their taste, in the oven. Classic mozzarella is the cheese of choice for these pizzas along with just the right amount of goat cheese to add some extra flavor pockets without overpowering the whole pizza.

Mini Strawberry Balsamic Pizzas with Chicken & Sweet Onion  |  Lemon & Mocha

I wanted these pizzas to really scream strawberry so in addition to the sweet and tart strawberry spread, we also have fresh sliced strawberries nestled into the melty mozzarella. Finally, a drizzle of balsamic glaze and sprinkling of fresh basil to finish the pizzas off once they’re out of the oven. Even though I just took a long time to break down these pizzas – sorry I’m just so excited! – they are incredibly simple to whip up making them ideal for lazy summer nights. I hope you try these soon and make sure to let me know in the comments below if you try them!

Mini Strawberry Balsamic Pizzas with Chicken & Sweet Onion  |  Lemon & Mocha

Mini Strawberry Balsamic Pizzas with Chicken & Sweet Onions
 
Yield: 2 servings
Ingredients
  • ¼ cup finely chopped strawberries
  • 1 teaspoon honey
  • ½ teaspoon balsamic vinegar
  • 2 naan flatbreads
  • ½ cup chopped cooked chicken (either grilled or rotisserie)
  • ⅓ small sweet onion, sliced thin
  • ½ cup plus 2 tablespoons shredded mozzarella
  • ½ cup sliced strawberries
  • 1 ounce goat cheese
  • Chopped basil, for topping
  • Balsamic glaze, for topping
Directions
  1. Preheat the oven to 400 degrees F.
  2. In a shallow bowl, stir together the chopped strawberries, honey and balsamic vinegar. Let sit for 15-20 minutes to let the strawberries soften and release their juices. Once the strawberries have softened, mash with a potato masher and stir together.
  3. Place the naan flatbreads on a baking sheet. Divide the mashed strawberry topping between the two pizzas. Spread the strawberry mixture out, leaving a small border on each pizza for the crust. Top each pizza with ¼ cup chopped chicken and half of the sliced onion.
  4. Top each pizza with ¼ cup of the shredded mozzarella, sprinkling over the chicken and onion. Then top each pizza with ¼ cup of the sliced strawberries. Crumble the goat cheese over the strawberries, dividing between the two pizzas, and sprinkle on the remaining mozzarella as well. Bake for 10 minutes or until the cheese is melted and the crust is browning.
  5. When the pizzas are out of the oven, top with the chopped basil and balsamic glaze before serving.
Notes
You can find balsamic glaze in the grocery store. If you want to make your own: combine ½ cup good quality balsamic vinegar with 2 tablespoons brown sugar in a small saucepan over medium heat. Stir until the sugar has dissolved. Bring to a boil then reduce heat to low and simmer until the mixture is reduced by half, about 10 minutes. The glaze should be thick and syrupy. Let cool before serving. Store in the fridge in an airtight container for up to 2 weeks.


Pizza Hot Dogs

Pizza Hot Dogs  |  Lemon & Mocha

Okay, okay, I know I’m killing you over here with all the hot dogs and pizza, but hear me out! I had the amazing idea for the Elote Hot Dogs. I made them and they were everything I could have imagined. We gobbled them up and everyone was happy. Then I looked in the fridge and saw all the leftover ingredients from the elote and I thought – ah ha! Elote Pizza would be epic! So I made Elote Pizza, it was delicious, we gobbled it up, everyone was happy, yaddy yaddy yada. Then I had a problem because I had leftover hot dogs and leftover pizza ingredients, also known as shredded mozzarella, which to me means pizza, so I had to come up with something to use them both up. I had to! The leftovers made me do it!

Pizza Hot Dogs  |  Lemon & Mocha

I am so happy I did because otherwise I might have never discovered how – insert explicit word here – delicious Pizza Hot Dogs are. Hot Dogs are a summer guilty pleasure and pizza is just plain amazing all the time so together is like something straight out of your food fantasies. The hot dog is smothered in marinara sauce and gooey melted mozzarella.

Pizza Hot Dogs  |  Lemon & Mocha

If that wasn’t enough, the tricked up potato buns are on a whole other level. I love potato rolls because they’re buttery and a little sweet. I brushed the tops of the buns with a combination of melted butter, freshly grated Parmesan, chopped parsley and garlic powder before broiling them until toasty. Basically, giving the bun a whole garlic bread quality that is out of this world.

Pizza Hot Dogs  |  Lemon & Mocha

Matt and I quickly decided that every time we consume a hot dog it needs to be on these buttery, cheesy, garlicky rolls. We also decided that we can’t eat another hot dog for like three years and I’m never allowed to make so many hot dogs and pizza recipes in one week ever again.

Pizza Hot Dogs  |  Lemon & Mocha

Now I’m going to share something equally delicious with you on Friday and when you see it, before you yell at me, just keep in mind that I made and photographed the whole elote – hot dog – pizza trio months ago and I just made Friday’s up-coming post the other week. So my advice to you is to ABSOLUTELY, DEFINITELY make these Pizza Hot Dogs as soon as possible! Unless you just made the Elote Hot Dogs or the Elote Pizza, in which case my advice is wait a couple weeks then ABSOLUTELY, DEFINITELY make these Pizza Hot Dogs. Enjoy!

Pizza Hot Dogs  |  Lemon & Mocha

Pizza Hot Dogs
 
Yield: 4 servings
Ingredients
  • ⅔ cup marinara sauce
  • 4 hot dogs
  • 4 long potato rolls
  • 1 tablespoon butter, melted
  • 1 tablespoon fresh grated Parmesan
  • 1 tablespoon chopped parsley leaves, plus more for topping
  • ¼ teaspoon garlic powder
  • ⅔ cup shredded mozzarella
Directions
  1. In a small saucepan over medium-low heat, heat the marinara sauce and hot dogs until both are warmed through. Set aside.
  2. While the hot dogs and sauce are getting warmed up, prepare the buns. Place the potato rolls upright as if you were about the put the hot dog in them on a baking sheet lined with aluminum foil.
  3. n a small bowl, combine the melted butter, Parmesan, chopped parsley and garlic powder. Generously brush this mixture over the tops of the potato rolls. Place a warmed hot dog in each bun and top with the marinara sauce. Divide the mozzarella between the 4 hot dogs, sprinkling right on top of the sauce. Broil the hot dogs until the cheese is melted and the tops of the buns are golden. Top with more parsley, if desired, and eat warm.


Roasted Vegetable Quinoa Tahini Bowls

Roasted Vegetable Quinoa Tahini Bowls  |  Lemon & Mocha

When I first bought tahini it was to make my Pumpkin Hummus. For those of you that aren’t familiar with tahini, it is made from ground sesame seeds and is one of the main components in hummus, along with chickpeas. After that first experiment with the Pumpkin Hummus, I used it purely to make homemade hummus and never ventured beyond that.

Roasted Vegetable Quinoa Tahini Bowls  |  Lemon & Mocha

Then last year I was Googling healthy lunch ideas for Matt and I and came across a quinoa bowl that called for a tahini dressing. My version of the recipe is incredibly simple – tahini, lemon juice, water and garlic powder. I mixed it up completely skeptical, but as soon as I tried it poured over my bowl of roasted veggies and quinoa I was completely hooked.

Roasted Vegetable Quinoa Tahini Bowls  |  Lemon & Mocha

It was tart, nutty and really creamy. The acidic punch complements the earthy vegetables really well. We have these Roasted Vegetable Quinoa Tahini Bowls all year round and I love that you can swap out the vegetables to your preferences or the season.

Roasted Vegetable Quinoa Tahini Bowls  |  Lemon & Mocha

This version is my favorite, though, because I love the meatiness that the eggplant and mushrooms bring to the bowl. Matt and I are also mushroom obsessed if I haven’t mentioned that before. Then the zucchinis bring some brightness and the bell pepper adds some sweetness. Perfection in a bowl!

Roasted Vegetable Quinoa Tahini Bowls  |  Lemon & Mocha

Roasted Vegetable Quinoa Tahini Bowls
 
Yield: 4 servings
Ingredients
  • 2 zucchinis
  • 1 red bell pepper
  • 1 eggplant
  • 8 ounces whole cremini mushrooms
  • 1-2 tablespoons olive oil
  • ⅛ teaspoon garlic powder
  • ⅛ teaspoon Italian seasoning
  • Salt and pepper
  • 2 cups cooked quinoa
  • ¼ cup tahini
  • ¼ cup lemon juice
  • 2 tablespoons water
  • ¼ teaspoon garlic powder
Directions
  1. Preheat the oven to 400 degrees F. Line a half sheet baking pan with nonstick aluminum foil or lightly spray with nonstick spray. Set aside.
  2. Prep the veggies. Cut the ends off the zucchini then cut it into thick rounds. Slice the rounds in half. Remove the seeds and stem from the bell pepper then chop into a big dice. Remove the ends from the eggplant then cut into a small dice. The eggplant takes the longest to roast so you want the pieces smaller. Remove the stems from the mushrooms then quarter them.
  3. Place the vegetables on the prepared baking sheet then toss with just enough olive oil to lightly coat them. Sprinkle with the garlic powder, Italian seasoning and salt and pepper to taste. Roast for 20 minutes, or until the veggies roasted and lightly browned.
  4. While the veggies are roasting, make the tahini dressing. In a bowl or liquid measuring cup, whisk together the tahini, lemon juice, water and garlic powder until incorporated. Keep separate until ready to eat.
  5. To prepare the bowls, put ½ cup cooked quinoa in each bowl. Divide the roasted veggies between the 4 bowls then divide the dressing between each of the bowls.
Notes
Usually when I make this I will pack the tahini dressing in a separate container so I can shake it up and pour it on after I heat the quinoa and veggies in the microwave. I have tried it with the dressing poured on ahead of time and everything heated in the microwave and it was okay, but the dressing seemed to get absorbed by the other ingredients in the bowl and wasn’t as good as when I pour it on right before eating.
For the quinoa, I used a super grains mix that I picked up at my local Whole Foods. It is a mix of red quinoa, white quinoa, millet and buckwheat. It is actually cheaper than the bag of just quinoa and I like the variety for our quinoa bowls.

Dressing recipe adapted from Martha Stewart.