Recipes

Pomegranate Orange Muffins

Pomegranate Orange Muffins  |  Lemon & Mocha

Back when we were seniors in college Matt bought me a subscription to the Food Network Magazine for my birthday. We had only been dating a year and a half, but Matt was already well-versed in my food obsession. The first official Food Network Magazine issue had only come out a few months before my birthday in 2009 and I’ve been subscribed to the magazine ever since.

Pomegranate Orange Muffins  |  Lemon & Mocha

Every month when it comes in the mail I get so excited and quickly start scouring it from cover to cover; pointing out recipes to Matt and devouring all the latest food news. After going through it multiple times, I tear out all the recipes I want to make and add them to my growing recipe binder collection. The binders have page numbers and even a table of contents (remember, I like to organize and make lists 😉), but then they tend to just sit there. I always want to make something from them, but then I find a new recipe I want to try from a blog I read or a new cookbook or something on Pinterest and I rarely get back to the Food Network Magazine recipes that I just had to try.

Pomegranate Orange Muffins  |  Lemon & Mocha

So this year I have decided I am going to make an active effort to cook from the magazine. When the January issue showed up with a Muffin of the Month section I knew I had found out just where to start! I will be posting each month’s muffin at the start of each month for 2018. 2018 is the year of muffins! Who knew?

Pomegranate Orange Muffins  |  Lemon & Mocha

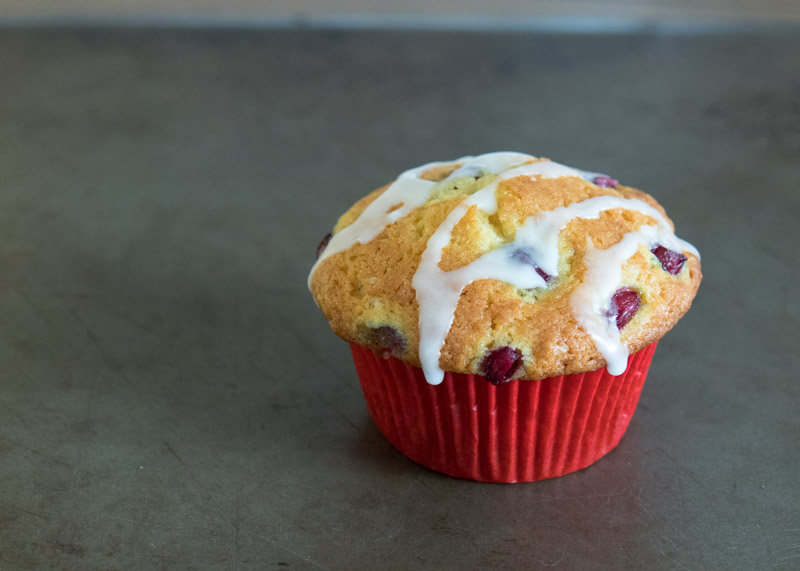
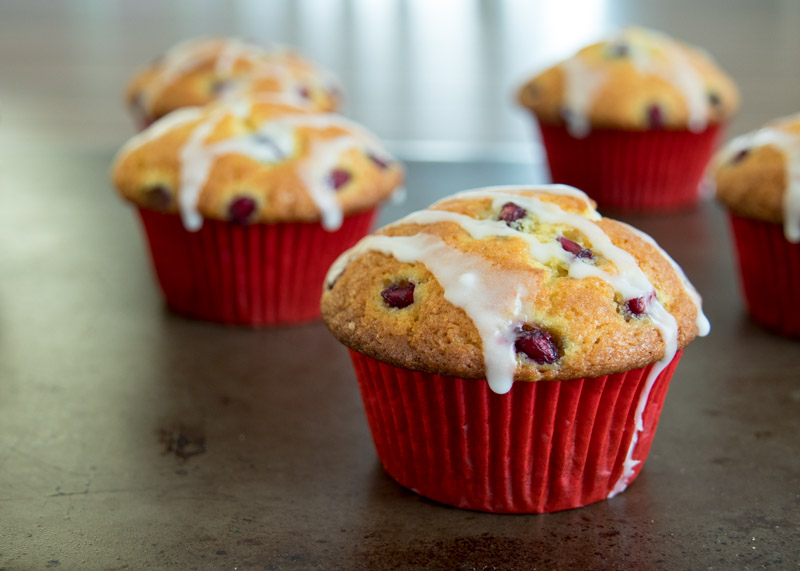
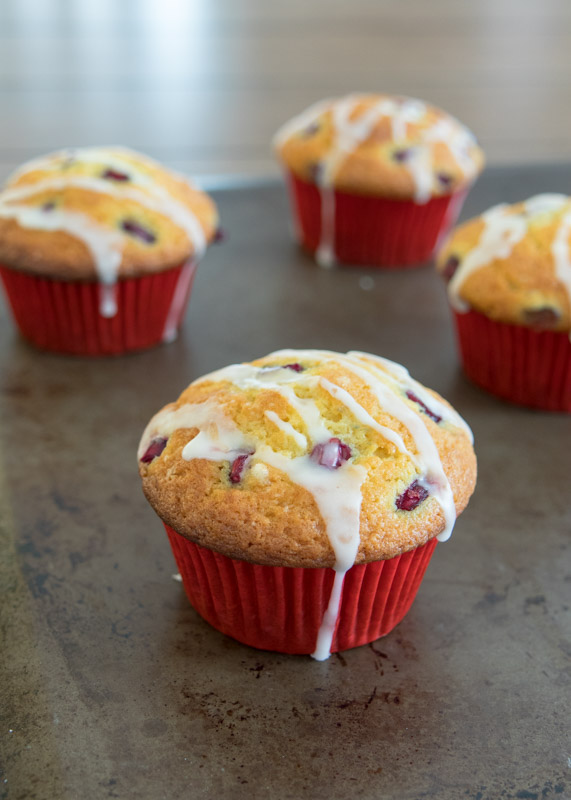
First up, January’s Pomegranate Orange Muffins. I love a good citrus muffin and these did not disappoint! They are moist on the inside, slightly crispy on the outside, and pack the perfect amount of clementine punch. Prettiness and the short prep time also give January’s muffins serious bonus points.

Pomegranate Orange Muffins  |  Lemon & Mocha

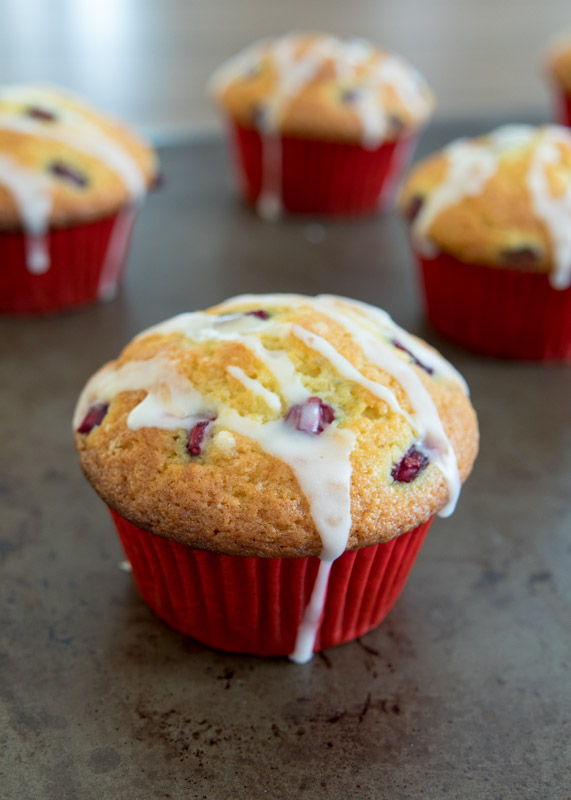
You don’t taste the pomegranate seeds that much since they are just pressed onto the top so feel free to substitute. Matt and I thought raspberries or blueberries would make a nice alternative; I will have to try one of those next time because I will definitely be making these muffins again!

Pomegranate Orange Muffins  |  Lemon & Mocha

Pomegranate Orange Muffins
 
Yield: 18 muffins
Ingredients
  • 3 cups all-purpose flour
  • 1½ cups sugar
  • 1½ teaspoons baking soda
  • 1 teaspoon aluminum-free baking powder
  • ½ teaspoon salt
  • 3 clementines
  • 1 cup whole milk, at room temperature
  • 2 large eggs
  • 2 sticks unsalted butter, melted and cooled slightly
  • ½ cup pomegranate seeds (or raspberries or blueberries)
  • ½ cup powdered sugar
Directions
  1. Preheat the oven to 400 degrees F. Line 2 cupcake pans with 18 paper liners and set aside.
  2. In a large mixing bowl, sift together the flour, sugar, baking soda, baking powder, and salt. Whisk to combine then make a well in the middle of the flour mixture.
  3. Wash 2 of the clementines then cut them into 8 pieces each, leaving the peel on. Blend the 2 cut clementines and the milk in a blender until smooth. Add the eggs and blend until incorporated.
  4. Pour the egg mixture into the center of the flour mixture. Add the melted butter then mix until just combined. You want the batter to still be lumpy, but without any pockets or streaks of flour.
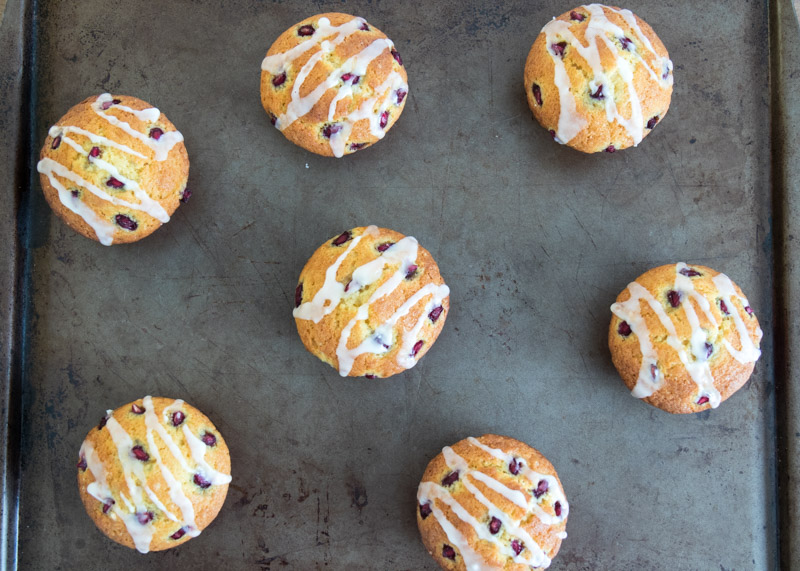
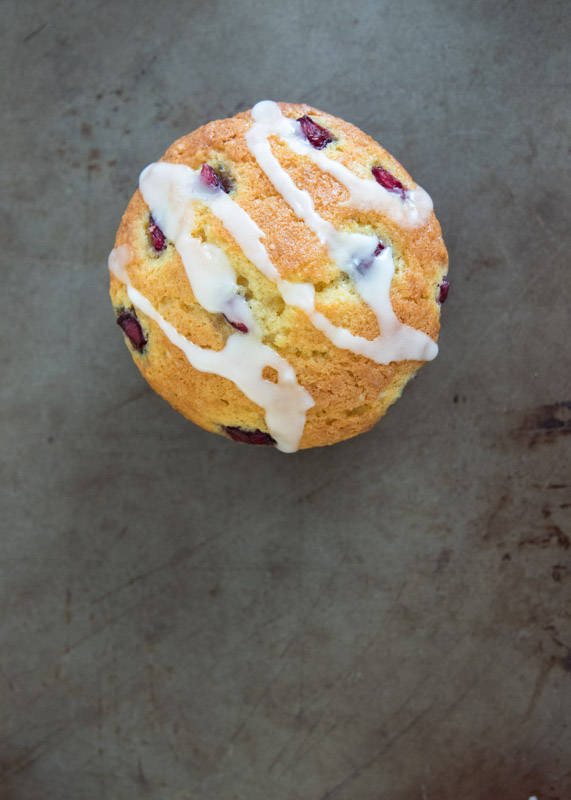
  5. Scoop the batter evenly among the paper liners filling each cup about ¾ full. I found a cookie scoop to be the least messy way to divide the batter. Divide the pomegranate seeds (or raspberries or blueberries) and put some on the top of each. Bake for about 20 minutes, or until a toothpick inserted in the center of the cupcake comes out with no batter on it and the muffins are golden. Let cool in the pan for 5 minutes then move the muffins to a cooling rack until completely cooled.
  6. Cut the remaining clementine in half. In a small bowl, combine the powdered sugar and the juice from half the clementine. Stir until the glaze is thick, but drizzle-able, adding more juice from the other half of the clementine if needed. Drizzle the glaze on the muffins then let the glaze set for 10 minutes.
Notes
If you only have 1 cupcake pan, buy another! Just kidding, put 6 of the liners aside until the first 12 muffins bake and the pan cools.
The original recipe calls for aluminum-free baking powder stating aluminum may react with pomegranate and make the batter blue. I made sure to use aluminum-free baking powder, but I still had a little blue on my muffins around the edges of the pomegranate. I have not yet experimented with non-aluminum-free baking powder to see if the batter would have been even more blue-tinged, but just a word of caution!

Recipe from January/February 2018 issue of Food Network Magazine.

Chocolate Marshmallow Monster Cookie Sandwiches

Chocolate Marshmallow Monster Cookie Sandwiches  |  Lemon & Mocha

Boo! Look at these little monster cookie sandwiches! How cute are they? I’ve been wanting to make some special Halloween treats for a couple years now, but I haven’t made anything since these Witches’ Cauldron Cupcakes or these Leftover Halloween Candy Cookies. We always end up being away on my favorite month of the year – I guess that’s what happens when it’s your birthday month and your anniversary month!

Chocolate Marshmallow Monster Cookie Sandwiches  |  Lemon & Mocha

Even though it seemed like we were away for most of October this year I was determined to finally make a new Halloween treat. I scoured Instagram and Pinterest trying to find a chocolate dessert that wasn’t shaped like a spider, but I had no luck. So after being inspired by the candy monster eyes I had in my baking drawer (doesn’t everyone have candy monster eyes in their baking drawer?) I came up with these cuties.

Chocolate Marshmallow Monster Cookie Sandwiches  |  Lemon & Mocha

The best part is that they taste so good. Or maybe the worst part if you were hoping to not devour five of them and then not fit in your pants. That’s okay, go buy some leggings. Anyways, this is my first time making these sea salt dark chocolate cookies and it will definitely not be my last. I made them smaller so the cookies sandwiches wouldn’t be so big, but if you were making them just for cookie purposes you could double the size to two tablespoons of dough. The marshmallow filling has the right amount of sweetness and the creaminess balances nicely with the dark chocolate.

Chocolate Marshmallow Monster Cookie Sandwiches  |  Lemon & Mocha

So go ahead and make these tasty monster cookie sandwiches – no special decorating skills required! And have a happy Halloween!

201710301lemonandmocha

Also one recipe note that I want to point out in advance – the cookie dough needs to be made ahead of time. It has to chill for at least three hours so definitely plan ahead!

Chocolate Marshmallow Monster Cookie Sandwiches
 
Yield: 12 cookie sandwiches
Ingredients
for the cookies
  • 1 cup all-purpose flour
  • ⅓ cup cocoa powder
  • ⅓ cup Hershey’s Special Dark cocoa powder
  • 1 teaspoon baking soda
  • ⅛ teaspoon salt
  • ½ cup butter (1 stick), room temperature
  • ½ cup sugar
  • ½ cup packed brown sugar
  • 1 large egg, room temperature
  • 1 teaspoon vanilla extract
  • 2 tablespoons milk
  • 1 cup semisweet or bittersweet chocolate chips
  • Sea salt for sprinkling
for the filling
  • 7 ounce jar marshmallow fluff, about 2 ½ cups
  • ½ cup butter (1 stick), room temperature
  • ⅓ cup powdered sugar
  • 1 tablespoon vanilla extract
  • ⅛ teaspoon salt
  • Neon gel food colors
  • Candy monster eyes
Directions
for the cookies
  1. In a medium bowl sift together the flour, both kinds of cocoa powder, the baking soda and salt. Stir to combine and set aside.
  2. In the bowl of a stand mixer or in a large bowl with a hand mixer, mix the butter on medium speed until smooth, about one minute. Add the sugar and mix on medium-high speed until combined and fluffy. Add the egg and vanilla and mix on high speed until combined, scraping down the sides as needed.
  3. On low speed, carefully pour the dry ingredients into the wet ingredients until just combined. On high speed mix in the milk until combined, then the chocolate chips. The dough will be very thick and sticky (and tasty!). Avoid eating it so you have batter to make cookies with and put it in the fridge, covered, to chill for at least 3 hours or up to 3 days.
  4. When you’ve properly chilled the dough, preheat the oven to 350 degrees F and line two cookie sheets with parchment paper and set aside.
  5. Take the dough out of the fridge and let it sit for 20 minutes if it sat in the fridge for longer than 3 hours so it’s easier to scoop.
  6. Scoop 1 tablespoon of dough (I used the Oxo medium cookie scoop) and roll into a ball. Place it on the prepared baking sheet and repeat with the rest of the dough. I had 12 balls on each cookie sheet (maybe could have had more, but some dough got taste-tested). Sprinkle each cookie with a little bit of sea salt.
  7. Bake the cookies for 10 minutes. Cool for 5 minutes on the cookie sheet before moving to a cooling rack. Let cool completely. If not frosting right away, store in an airtight container at room temperature.
for the filling
  1. In the bowl of a stand mixer or a large bowl with a hand mixer, carefully combine the fluff, butter, powdered sugar, vanilla and salt on high speed. Once fluffy divide into smaller bowls depending on how many different colors you want to use. Add the food coloring and mix until the desired color is reached.
  2. Spread about a tablespoon of filling on a cookie then sandwich with another cookie. Continue until all cookies have been sandwiched. The filling is not very thick so do not put too much on or it will ooze out the sides. You could try thickening it with more powdered sugar, but I thought it would make it too sweet. Press monster eyes into the sides.
Notes
I prefer to use Ghirardelli chocolate chips, either their semi-sweet or their bittersweet.

Salted dark chocolate cookies from Sally’s Baking Addiction.
Marshmallow filling from Bakerita.

Christmas Tree Cupcakes

aka Chocolate Cupcakes with Chocolate Almond Ganache Filling and Coconut Buttercream

Christmas Tree Cupcakes  |  Lemon & Mocha

I can’t even with these cupcakes! Just look at their adorableness! Now I haven’t discussed it much on the blog, but I am not a decorator. I love to bake and I love to cook, which is mostly because I really, really (did I say really?) love to eat. But I do not like trying to make my food look pretty. If it ends up looking nice in the end that’s just an added bonus. I do not have the patience for it, although one day I would like to learn how to decorate and style my baked goods and dishes better.

Christmas Tree Cupcakes  |  Lemon & Mocha

In the meantime, I’m just a regular home baker trying to make the best tasting things I can dream up. Where I’m going with all this is that if I can make these cupcakes look this ridiculously adorable that means you can, too. As long as you’re armed with the right ingredients and the right tools then you will be good to go.

Christmas Tree Cupcakes  |  Lemon & Mocha

Now, I’ve been so busy talking about the cute tree decorations that I haven’t even gotten to how amazing the cupcake tastes. I am obsessed with my Perfect Chocolate Cupcakes and my Chocolate Ganache so adding almonds and a coconut buttercream seemed like a fitting and delicious enhancement. The texture of the coconut buttercream is light and fluffy, while still being rich enough to stand up to the chocolate cupcake. You can adjust the intensity of the coconut flavoring based on your personal preference. That chocolate almond ganache is its usual swoon-worthy self amped up with chopped almonds to be the perfect molten surprise. Now have a bit of everything all together and yippee! Damn that’s good!

Christmas Tree Cupcakes  |  Lemon & Mocha

My favorite part about these cupcakes though are the reason I was inspired to make them: they remind me of my Babu. Everyone in my family has ceramic Christmas trees that my grandma painted. I know everyone in my family thinks about Babu everyday, but especially when they turn on their ceramic tree. They are decorated with little colored light “ornaments” and when they light up they remind me of everything that is wonderful and simple about Christmas. They make me think of family and tradition. I’m instantly transported to sitting with Babu at my parent’s house and putting in all the little lights while the smell of her cookies comes from the kitchen. Then suddenly we’re eating the cookies, making Christmas paper chains, putting ornaments on the tree, then snuggled in her bed reading our favorite Christmas stories. She even let me sing her Christmas carols and anyone who knows how, um, interesting, my singing voice is will know what a saint she was for that.

Christmas Tree Cupcakes  |  Lemon & Mocha

Although I loved, and very much miss, our crazy Christmas mornings with all my aunts, uncles and cousins, one of my favorite Christmas mornings with Babu was when I was older. We were at my parents’ house for Christmas morning and since it was just my brother and me, who were both in high school, everyone was sleeping in before present-opening. Babu and I are early risers so the two of us sat by the tree in the still, quiet house and opened a couple of our presents for each other having our very own private mini Christmas morning. It is a memory I will cherish forever. So happy holidays and merry Christmas to all my friends, family and fellow food lovers! Take a moment, or two, throughout all the craziness to enjoy the little things that will mean so much to you for years to come.

Christmas Tree Cupcakes  |  Lemon & Mocha

Christmas Tree Cupcakes
 
Yield: 24 cupcakes
Ingredients
for the cupcakes
for the chocolate almond ganache
  • ¾ cup heavy cream
  • 1- 12 ounce bag of bittersweet chocolate chips
  • 3 tablespoons unsalted butter, softened
  • 1 cup chopped almonds, more or less depending on preference
for the coconut buttercream
  • 2 sticks unsalted butter, room temperature
  • 6 cups powdered sugar
  • ½ cup milk
  • 1 teaspoon coconut extract
  • 1 cup sweetened shredded coconut, more or less depending on preference
  • Additional sweetened shredded coconut for decoration
for the tree decorations
  • 24 pretzel sticks
  • ½ bag green candy melts
  • Nonpareils
Directions
for the cupcakes
  1. Make the Perfect Chocolate Cupcakes according to the instructions then let cool.
for the chocolate almond ganache
  1. Heat the cream over medium heat until steaming, stirring constantly.
  2. Once steaming, remove the cream from the heat. Add the chocolate and stir then let sit for 5 minutes.
  3. Add the butter to the chocolate mixture then stir until smooth. You might have to return to the lowest heat possible while stirring to get it completely smooth.
  4. Add the chopped almonds and stir to combine. Let cool until only slightly warm (I'm not sure if the cooling is completely necessary, but I thought the hot ganache would seep into the cupcake).
for the coconut buttercream
  1. Beat the butter for 3-5 minutes, or until smooth and fluffy, with an electric mixer.
  2. On low speed carefully add the sugar, milk and coconut extract and mix. If the frosting looks too thin slowly add some more powdered sugar, but I didn't need to for this recipe. Add the shredded coconut and stir well to combine.
  3. Spread or pipe a thin layer onto the top of the cupcake. You might find piping easier because of the open hole with the ganache. Top with some shredded coconut for a "snow" effect.
for the tree decorations
  1. Line two baking sheets with wax paper. Use a baking sheet with edges so the nonpareils don't go flying all over your kitchen. Place the pretzel sticks a few inches apart.
  2. Prep a pastry bag with a skinny round tip (I think I used a Wilton round tip #2). Heat the candy melts in a double boiler over medium-low heat, stirring occasionally, until completely melted and smooth. Be sure not to overheat so the chocolate doesn't seize up. Carefully transfer to the pastry bag.
  3. Pipe the chocolate over each pretzel stick in the shape of the a tree. I made single zig-zag lines then went over them two more times. Start up a bit from the base of the pretzel stick so there's room to press the decoration into the cupcake. Do a couple then top with nonpareils or have a sprinkle elf help and sprinkle after you pipe (thanks, Matt!). Let sit at room temperature until firm then carefully pop off the wax paper. To place in the cupcakes I found it easiest to hold and press from the little bit of pretzel at the top - the chocolate is fragile and will break if you press it.
Notes
You can typically find candy melts (sometimes called chocolate or candy wafers) at your local craft store, such as Michaels or A.C. Moore.
This recipe makes enough ganache and buttercream for about 35 cupcakes so you will have leftover unless you make a double batch of cupcakes or reduce the ganache and buttercream recipes.

Chocolate almond ganache adapted from The Curvy Carrot.
Coconut buttercream adapted from Martha Stewart.
Chocolate tree inspiration from Just a Taste.

Babu’s Coffee Cake

Babu's Coffee Cake  |  Lemon & Mocha

It is hard to believe that I am writing this post and it is even harder to write it. One month has passed since my family and I lost my grandma, Babu. For those of you who don’t know me personally or haven’t read my Vanilla Bean Ice Cream Mother’s Day post, Babu and I were incredibly close. These past few weeks without my best friend have felt surreal. As most people who have dealt with loss have experienced, the ache does not get smaller, you just get better at handling it.

Babu's Coffee Cake  |  Lemon & Mocha
Babu loved hearing about my cooking and the food blog. She would always ask me what I was making for dinner and would listen to me read her my latest posts over the phone. Several times I had prints made of the food photos I knew Babu would like and mailed them to her. Babu would share them with her friends in her building and report back to me with which ones everyone wanted to try the most. Not only did Babu encourage me to follow my food passions, but she also helped foster those passions by baking with me and of course our many, many lunch dates.

Babu's Coffee Cake  |  Lemon & Mocha
In my family it is hard to mention coffee cake and not think about Babu. When she lived with us she always made sure there were slices in the freezer. She would make a coffee cake, always waiting to let me help glaze it, then cut it into big slices, wrap them in plastic wrap and pop them in the freezer. I would come home from school, microwave a slice for 30 seconds and it would taste like it just came out of the oven. There would be one slice left and the next day the freezer would be stocked back up with a fresh cake.

Babu's Coffee Cake  |  Lemon & Mocha

After Babu moved back down to Delaware I came to look forward to having some every time I went to visit, especially when we would do our annual beach trip. Since I always knew I would have some on these trips, I never made this cake on my own. When I was thinking of what I could make that would help celebrate Babu on Lemon & Mocha, once beach week started approaching I knew it had to be her coffee cake.

Babu's Coffee Cake  |  Lemon & Mocha

It was difficult knowing I couldn’t ask Babu any questions before I started baking or knowing that this would be my first beach trip without her, but I know she was there with me the whole time- cheering with me when the cake came out of the Bundt pan perfectly and laughing with me when I totally left too much batter for the final layer. I hope that this simple cake can bring you as much joy as it has brought me over the years and that you can share it with someone special, too.

Babu's Coffee Cake  |  Lemon & Mocha

Babu's Coffee Cake
 
Yield: 10-12 servings
Ingredients
for the cake
  • 1 Duncan Hines yellow cake mix
  • 1 package instant vanilla pudding (3.4 ounce size)
  • 4 large eggs
  • ¾ cup vegetable oil
  • ¾ cup water
  • 2 teaspoons vanilla extract
  • ¼ cup sugar
  • 2 teaspoons ground cinnamon
for the glaze
  • 1 cup powdered sugar
  • 3 tablespoons milk
  • 1 teaspoon vanilla extract
Directions
for the cake
  1. Preheat the oven to 350 degrees F. Grease a Bundt pan and set aside.
  2. Combine the cake mix, pudding mix, eggs, vegetable oil, water and vanilla extract with a hand mixer or in the bowl of a stand mixer. Mix until well combined.
  3. In a small bowl, combine the sugar and ground cinnamon.
  4. Evenly pour ⅓ of the batter into the prepared Bundt pan. Use a spatula to even the layer. Sprinkle half of the cinnamon sugar mixture evenly over the batter. Repeat with ⅓ of the batter and the remaining cinnamon sugar. Top with the last ⅓ of batter.
  5. Bake for 40-50 minutes, or until a toothpick inserted in the cake comes out clean. Let cool in the pan for 10 minutes then transfer to a cooling rack. Apply the glaze while still warm, but not hot.
for the glaze
  1. Combine the powdered sugar, milk and vanilla extract until smooth. Spoon or pastry brush the glaze over the warm cake.


No-Bake Red, White & Blue Lemonade Cheesecake Pie

No-bake Red, White & Blue Lemonade Cheesecake Pie  |  Lemon & Mocha

This summer has been slipping away! I had a recipe all planned to share with you for the Fourth of July, but suddenly it was the week before the holiday weekend and I hadn’t cooked or photographed it yet.

No-bake Red, White & Blue Lemonade Cheesecake Pie  |  Lemon & Mocha

I knew I couldn’t let the week pass by without providing some holiday-worthy red, white and blue inspiration so I grabbed everything I needed, whipped it together and snapped some photos. All for you. Don’t you feel special?

No-bake Red, White & Blue Lemonade Cheesecake Pie  |  Lemon & Mocha

I first made this No-bake Red, White and Blue Lemonade Cheesecake Pie back in college. The recipe was actually in a Kraft ad in my Food Network magazine that summer and with my newly discovered lemon obsession I knew I had to make it for Matt and I.

No-bake Red, White & Blue Lemonade Cheesecake Pie  |  Lemon & Mocha

The pie was light, refreshing and super simple to put together.

No-bake Red, White & Blue Lemonade Cheesecake Pie  |  Lemon & Mocha

Somehow I forgot all about it until I was racking my brain for a creative red, white and blue dessert idea.

No-bake Red, White & Blue Lemonade Cheesecake Pie  |  Lemon & Mocha

If you remember my Summer Berry Trifle blog post from the other year I am always looking for new spins on the traditional flag Fourth of July cake I used to make every year with my grandma.

No-bake Red, White & Blue Lemonade Cheesecake Pie  |  Lemon & Mocha

This No-bake Red, White and Blue Lemonade Cheesecake Pie is perfect and will make you the hero of your barbecue! Plus, did I mention that there’s only 8 ingredients and NO BAKING? Enjoy!

No-bake Red, White & Blue Lemonade Cheesecake Pie  |  Lemon & Mocha

No-bake Red, White & Blue Lemonade Cheesecake Pie
 
Yield: 8-10 servings
Ingredients
  • 10 graham cracker squares, crushed into crumbs (about 1.5 cups of graham cracker crumbs
  • ⅓ cup sugar
  • 6 tablespoons unsalted butter, melted
  • 8 ounces cream cheese, softened
  • ½ cup frozen lemonade concentrate, thawed
  • 8 ounces Cool Whip, thawed
  • Halved strawberries, for topping
  • Blueberries, for topping
Directions
  1. Combine the graham cracker crumbs, sugar and melted butter in a medium mixing bowl until they come together and resemble coarse crumbs. Press into the bottom and sides of a lightly greased 9-inch pie pan. Use the bottom of a measuring cup to make sure the crumbs are packed down tightly. Refrigerate for 2 hours before using.
  2. In a medium bowl or the bowl of a stand mixer, beat the cream cheese until whipped and creamy.
  3. Slowly add the ½ cup of lemonade concentrate (be sure not to add the whole can!) and beat after each addition. Once well combined, fold in two cups of the Cool Whip. Pour the mixture into the crust and refrigerate for four hours.
  4. When ready to serve, top with the remaining Cool Whip, strawberries and blueberries. You could top with the fruit beforehand, but the red juice from the strawberries might run on the Cool Whip.
Notes
If you want to skip the first step simply use a pre-made graham cracker crust. I use light cream cheese and light Cool Whip, but regular or light works for this recipe. This pie (and crust) both freeze well.

Recipe slightly adapted from Kraft Recipes.