Recipes

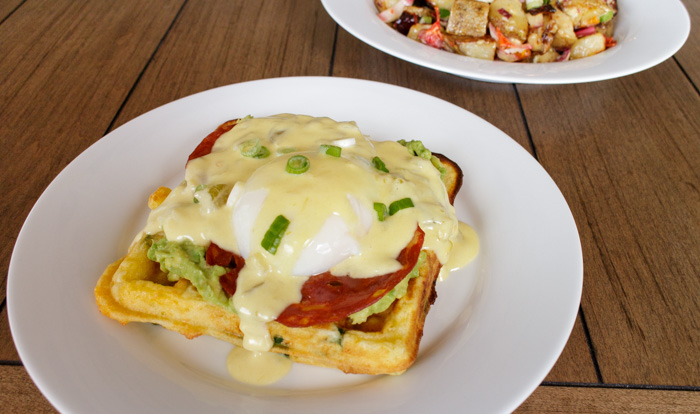
Eggs Benedict Over Cheddar Scallion Waffles with Crispy Chorizo, Smashed Avocado and Green Chile Hollandaise
Eggs Benedict Over Cheddar Scallion Waffles  |  Lemon & Mocha

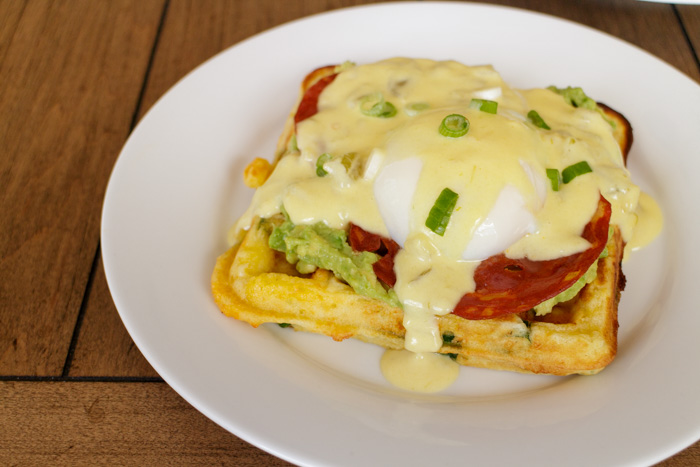
I cannot believe I waited so long to share this dish with you. If you thought I was excited about the waffles, oh baby, that pales in comparison to this creation. A couple months ago my brother-in-law, Nick, and our friend, Kate, came to visit and I wanted to make it a proper foodie weekend. I brainstormed for weeks to come up with the perfect breakfast that would have a variety of textures, bold flavors and most importantly, be creative and inspired. This right here is my ultimate breakfast. Eggs Benedict over Cheddar Scallion Waffles with Crispy Chorizo, Smashed Avocado and Green Chile Hollandaise. I know you were probably expecting something sweet and overflowing with chocolate, but there’s actually a candy bar hidden under that waffle! I’m kidding, that would be gross. Or would it… hmmm…
Eggs Benedict Over Cheddar Scallion Waffles  |  Lemon & Mocha

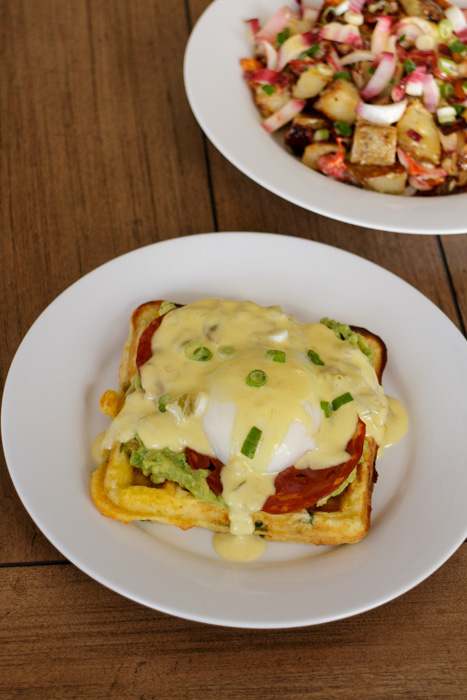
Let’s break down this Southwestern eggs Benedict layer by layer. First, there is the all important base in the form of an outrageously cheesy cheddar and scallion waffle. I took my Perfect Buttermilk Waffle base, omitted the vanilla extract and then loaded it up with sharp cheddar cheese and chopped green onions. Next, I smashed together an avocado with some lime juice and salt to give it a little fresh punch and spread it over the waffle. I found some deli-sliced chorizo at Trader Joe’s so I threw that in a frying pan to make it crispy and crunchy before layering it on top of the smashed avocado.

Eggs Benedict Over Cheddar Scallion Waffles  |  Lemon & Mocha

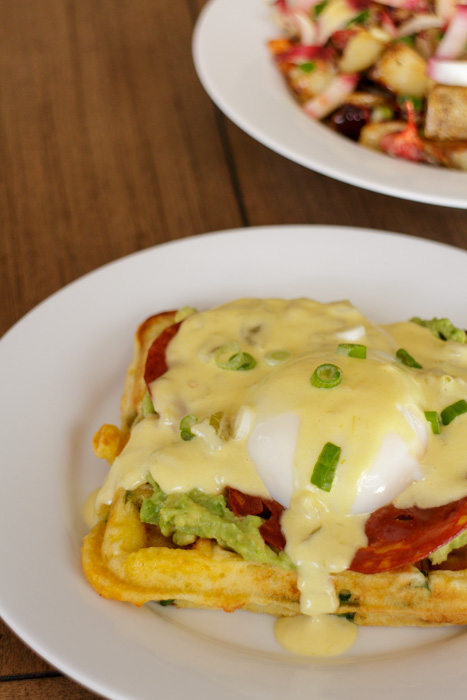
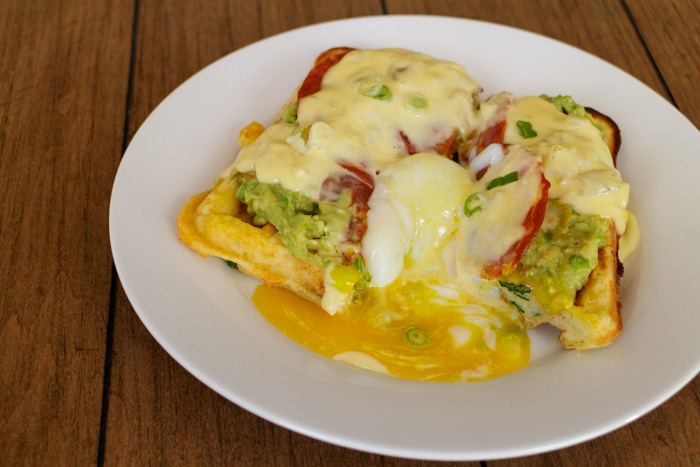
In comes the perfectly poached egg, ready to burst open with its runny yolky goodness. I poached mine sous vide, but we will come back to that in a later post. If you are intimidated about poaching an egg you could always fry up an over easy egg instead.
Eggs Benedict Over Cheddar Scallion Waffles  |  Lemon & Mocha

Finally, the icing on the cake, er the hot fudge on the sundae, er never mind… the sauce on the savory dish! Creamy, luscious, buttery hollandaise sauce mixed with diced green chiles for a very subtle flavor kick. Hollandaise is made using egg yolks, lemon juice and lots and lots of butter (see tutorial here), but I bought mine right from the dairy section of Trader Joe’s. Top with salsa or sour cream and get ready to make inappropriate noises while you devour this dish.
Eggs Benedict Over Cheddar Scallion Waffles  |  Lemon & Mocha

What Nick and Kate didn’t know is that this dish right here single-handedly kick-started my motivation to dive back into Lemon & Mocha after a longer than intended hiatus. And I am so glad to be back! So make this dish and feel inspired. Or just come over for breakfast and we can cook then devour it together.
Eggs Benedict Over Cheddar Scallion Waffles  |  Lemon & Mocha

Eggs Benedict Over Cheddar Scallion Waffles with Crispy Chorizo, Smashed Avocado and Green Chile Hollandaise
 
Yield: 4 servings, plus extra waffles
Ingredients
for the waffles
  • ½ cup unsalted butter, melted and cooled in a medium mixing bowl
  • 1¾ cups all-purpose flour
  • 2 teaspoons baking powder
  • 1 teaspoon baking soda
  • 1 teaspoon sugar
  • ½ teaspoon salt
  • 3 large eggs, room temperature
  • 1½ cups buttermilk, room temperature
  • 1 cup shredded sharp cheddar, more or less depending on how cheesy you want the waffles
  • ½ cup sliced scallions
for everything else
  • 1 avocado
  • Lime juice, to taste
  • 8 thin slices chorizo
  • 4 poached eggs
  • 2-3 tablespoons diced green chiles
  • ¾ cup warm hollandaise, more or less as desired
  • Sliced scallions, for topping
  • Salsa and sour cream, if desired
Directions
for the waffles
  1. Turn on the waffle iron to get it hot and spray with nonstick cooking spray, depending on manufacturer’s instructions.
  2. Sift the flour, baking powder, baking soda, sugar and salt into a large mixing bowl. Stir to combine then create a well in the center for the liquid ingredients.
  3. Add the eggs to the cooled butter mixing bowl and beat until frothy. Add the buttermilk and beat again until well-combined.
  4. Pour the buttermilk mixture into the well in the dry ingredients. Stir with a wooden spoon until just combined. The buttermilk and leavening will create a batter full of air bubbles. Fold in the cheddar and scallions, being sure not to over-mix.
  5. Pour the batter onto your waffle iron in batches and cook according to manufacturer’s instructions. If working in batches, let waffles rest on a cooling rack after they are cooked, or place them directly on the rack of your oven or toaster oven on a low heat to stay warm.
for everything else
  1. Take four plates and place one waffle on each plate. In a small bowl, mash the avocado and sprinkle with lime juice and sea salt to taste. Spread the avocado mixture on each waffle.
  2. In a dry frying pan, heat the chorizo in a single layer over medium heat, until hot and crispy. Remove from the pan and place in between two paper towels to remove some of the grease before placing two slices on each avocado-topped waffle.
  3. Place one poached egg on top of each chorizo-topped waffle.
  4. Stir the diced green chiles into the warm hollandaise then drizzle (or pour if you’re feeling dangerous) over the poached eggs and waffles. Top with sliced green scallions, salsa and sour cream as desired.
Notes
If you cannot find deli-sliced chorizo, crisp up some crumbled chorizo in a pan instead, being sure to drain/pat out the grease.


Mini Broccoli, Ham & Cheddar Quiches

Mini Broccoli, Ham & Cheddar Quiches  |  Lemon & Mocha

Mini food gets lots of love for being cute. Mini cupcakes, mini burgers, mini quiches; it’s all, “Aw, they’re so tiny and cute!” Let’s get to the truth of the matter though. Everyone’s just excited because it means they get to eat a whole bunch of them. What they actually mean to say is, “Aw yeah! They’re so tiny I can eat a whole bushel of them! Let’s go!” Or something like that.

Mini Broccoli, Ham & Cheddar Quiches  |  Lemon & Mocha

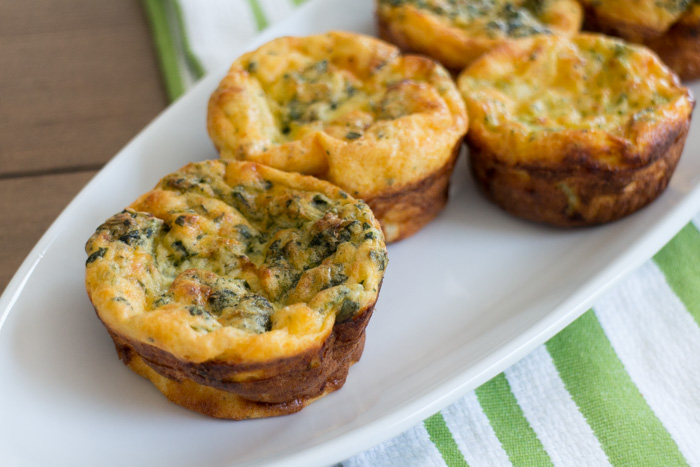
These Mini Ham, Broccoli and Cheddar Quiches are so savory, fluffy and packed with flavor that you are definitely going to want to eat a whole bushel of them.

Mini Broccoli, Ham & Cheddar Quiches  |  Lemon & Mocha

I like to make a batch of these on Sunday so that Matt and I have them for throughout the week. One minute in the microwave and they are good to go for breakfast or a quick snack. Supplement them with a big arugula salad (or some Perfect Buttermilk Waffles!) for a satisfying meal.

Mini Broccoli, Ham & Cheddar Quiches  |  Lemon & Mocha

Not a fan of ham, broccoli or cheddar? Simply swap them out for your favorite veggies, meat or cheese. Some other combinations I love are spinach, sun-dried tomatoes and goat cheese and bell peppers, sausage and provolone. I’ll even let you in on a little secret: I ran out of broccoli while making these so half of the mini quiches photographed here have spinach instead of broccoli. It’s that easy to customize these bad boys! Whip some up this weekend and enjoy!

Mini Broccoli, Ham & Cheddar Quiches  |  Lemon & Mocha

Mini Broccoli, Ham & Cheddar Quiches
 
Yield: 12 mini quiches
Ingredients
  • 4 eggs
  • 1 cup milk, whatever you have in your fridge is fine
  • ½ cup flour
  • 1 tsp baking powder
  • 10 ounces frozen broccoli, thawed, drained and roughly chopped
  • 1 cup shredded cheddar cheese
  • 1 cup diced ham, or 12 slices deli ham, chopped
Directions
  1. Preheat oven to 400 degrees F. Spray a 12-cup muffin pan with nonstick cooking spray and set aside.
  2. In a large bowl whisk together the eggs and milk. Sift in the flour and baking powder, stir to combine.
  3. Add the chopped broccoli, cheese and diced ham. Stir to combine.
  4. Evenly divide into the 12 cups of the muffin pan. Bake for 22-25 minutes or until the edges have browned and a tester inserted into the middle of a muffin comes out clean.
Notes
You can substitute any fillings you would like, just add about 1 cup of veggies, 1 cup of cheese and 1 cup of meat, or another vegetable. If you want to try different flavor combinations in the same batch you can wait to add the fillings until after you have spooned the egg mixture into the muffin cups, then put a tablespoon or two of toppings into each cup and give them a little stir. Just be sure not to overfill!

Recipe slightly adapted from Moneywise Moms.

Perfect Buttermilk Waffles

Perfect Buttermilk Waffles  |  Lemon & Mocha

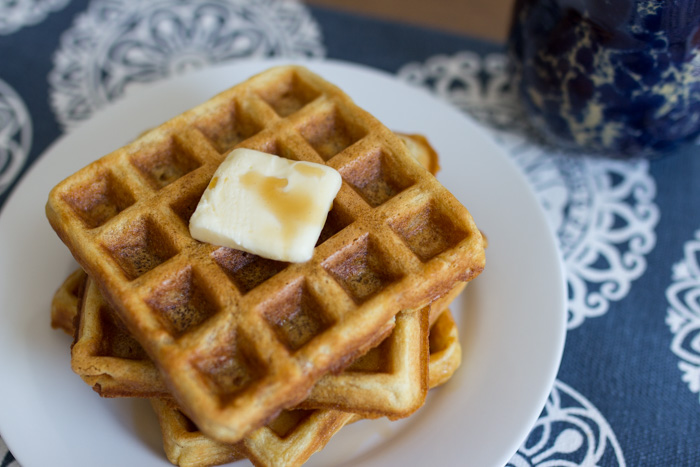
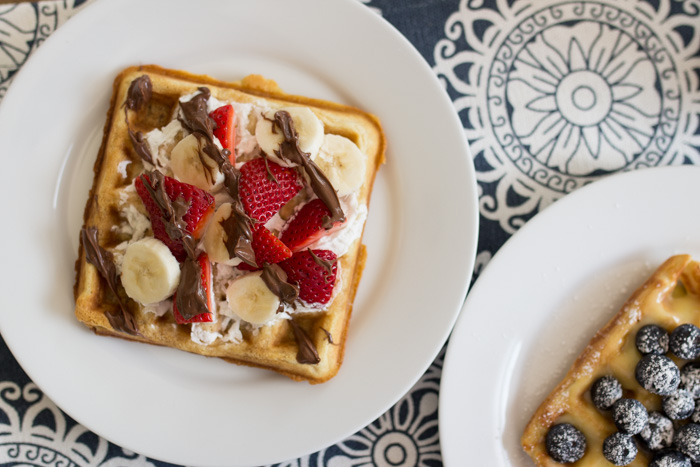
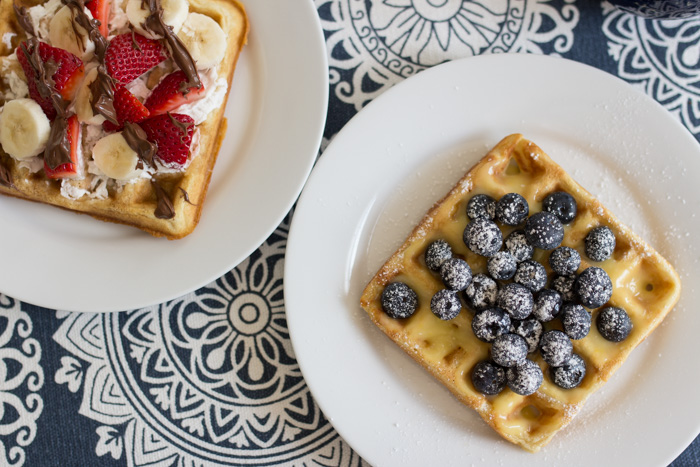
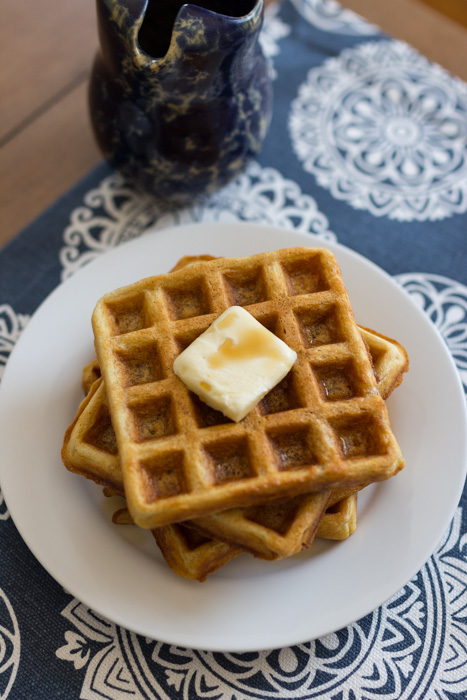
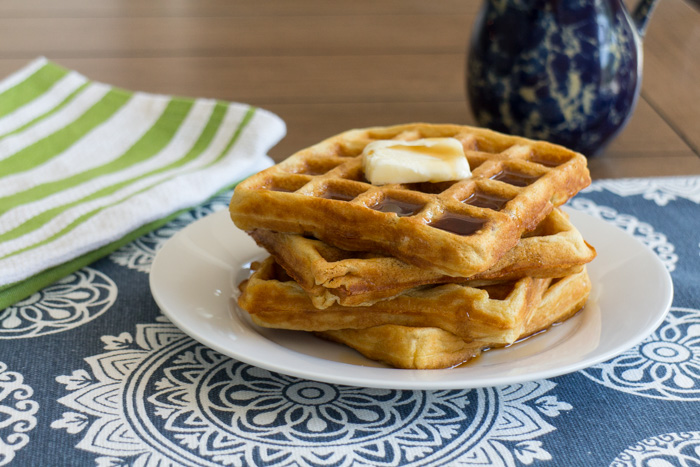
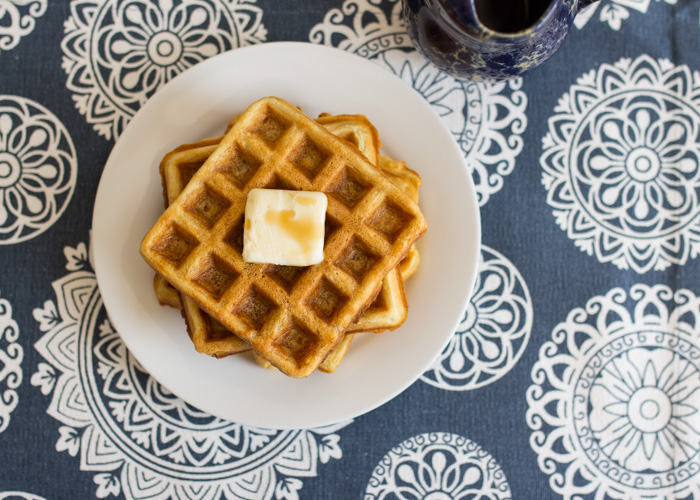
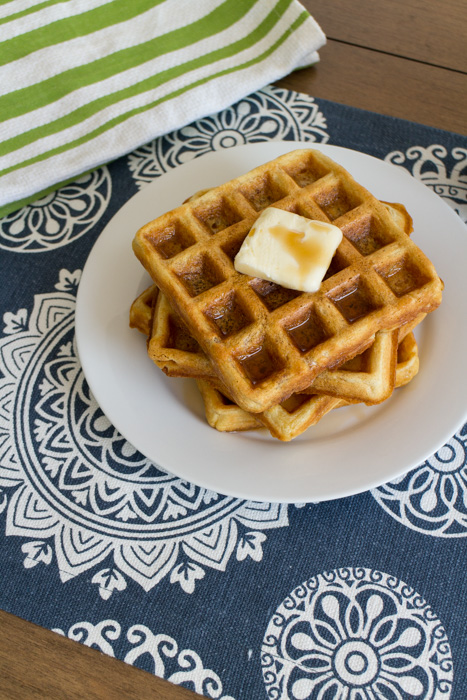
Waffles. Just typing the word makes me want to shout with excitement. WAFFLES! There, that’s better. Great waffles are crispy on the outside with a soft, subtly sweet interior. Who doesn’t love great waffles? Pile them high with butter and maple syrup, layer them with whipped cream and fresh fruit, smother them in melted Nutella and banana slices… the combinations are endless. And you know how I feel about flavor combinations.

Perfect Buttermilk Waffles  |  Lemon & MochaPerfect Buttermilk Waffles  |  Lemon & Mocha

We can all agree that great waffles are, well, great. But what if you want more? What if you want your waffles to overachieve, to be the best of the best, to reach for the stars?! Then you need to be able to strip the waffle platter down, remove all the syrups, fruits and toppings, and be left with just a damn perfect waffle that can stand on its own. As I’m sure you’ve seen from the title, these, my friends, are Perfect Buttermilk Waffles.

Perfect Buttermilk Waffles  |  Lemon & Mocha

My dad shares my waffle love. Breakfast is his favorite meal so whenever we go out we do it right. Over-easy eggs, bacon, toast, sausage, hash browns, omelets, English muffins; we order it all. And yes, I did mean all those items at the same time. No matter what else we order, my dad and I always, always order a waffle to share.

Perfect Buttermilk Waffles  |  Lemon & Mocha

We’ve been questioned on the volume of our breakfast order, we’ve been told we will never finish everything and one surly waitress even made us shift to a larger table, huffing that our food order would never fit! We laugh at their remarks and then dive in, waitstaff eyes wide as we do serious damage on the spread in front of us. We always judge a breakfast place by its waffle and if these Perfect Buttermilk Waffles came out of the kitchen it would go right to the top of our list.

Perfect Buttermilk Waffles  |  Lemon & Mocha

If you don’t have a waffle iron, this Cuisinart is the one we currently have in the Lemon & Mocha kitchen and we use it at least every few weeks. If you aren’t looking to start up Waffle Wednesdays (it’s a thing!) in your kitchen, simply thin the batter slightly with milk to make crispy outside, fluffy inside pancakes.

Perfect Buttermilk Waffles  |  Lemon & Mocha

Perfect Buttermilk Waffles
 
Yield: 8-10 waffle squares
Ingredients
  • ½ cup unsalted butter, melted and cooled in a medium mixing bowl
  • 1¾ cups all-purpose flour
  • 2 teaspoons baking powder
  • 1 teaspoon baking soda
  • 1 teaspoon sugar
  • ½ teaspoon salt
  • 3 large eggs, room temperature
  • 1½ cups buttermilk, room temperature
  • 1 teaspoon vanilla extract
Directions
  1. Turn on the waffle iron to get it hot and spray with nonstick cooking spray, depending on manufacturer’s instructions.
  2. Sift the flour, baking powder, baking soda, sugar and salt into a large mixing bowl. Stir to combine then create a well in the center for the liquid ingredients.
  3. Add the eggs to the cooled butter mixing bowl and beat until frothy. Add the buttermilk and vanilla extract. Beat again until well-combined.
  4. Pour the buttermilk mixture into the well in the dry ingredients. Stir with a wooden spoon until just combined. The buttermilk and leavening will create a batter full of air bubbles.
  5. Pour the batter onto your waffle iron in batches and cook according to manufacturer’s instructions. If working in batches, let waffles rest on a cooling rack after they are cooked, or place them directly on the rack of your oven or toaster oven on a low heat to stay warm.
Notes
If you don’t have buttermilk handy, you can use the following substitution. Put 1 tablespoon of lemon juice in a liquid measuring cup. Fill the measuring cup with milk (I use skim, any milk-fat percentage should work) until it equals 1½ cups. Let sit for 5 minutes before using in the recipe.

Recipe from Food.com.

Chocolate Covered Strawberry Frozen Yogurt

Chocolate Covered Strawberry Frozen Yogurt  |  Lemon & Mocha

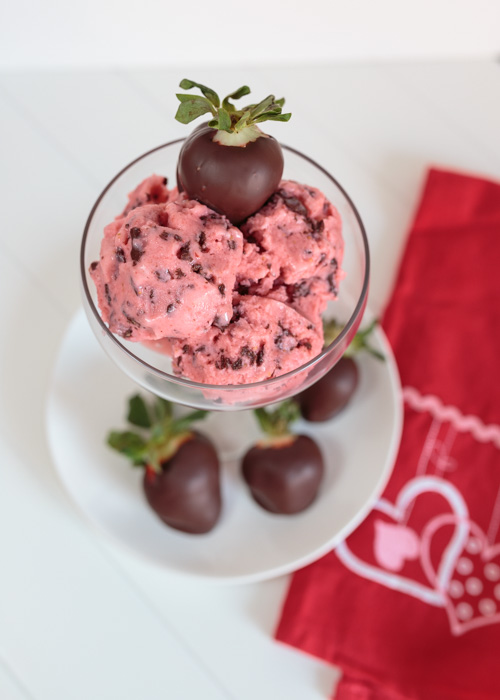
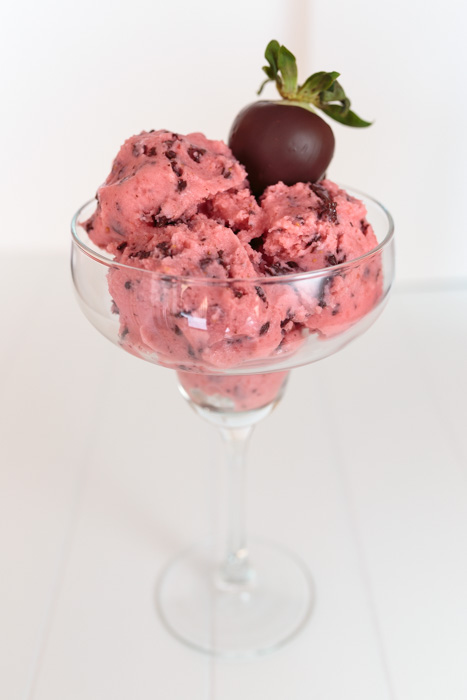
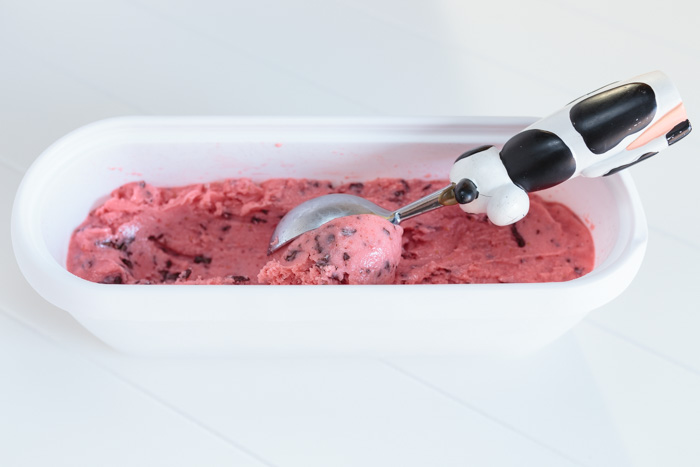
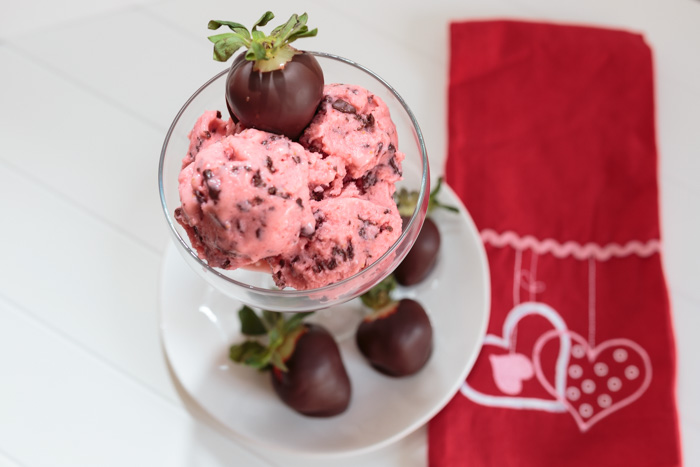
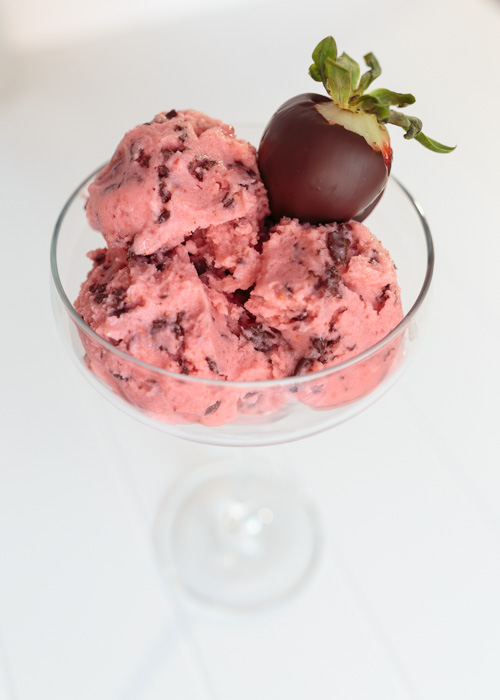
Happy Valentine’s Day! I have a delicious sweet treat for you today. Chocolate covered strawberry frozen yogurt. Also known as strawberry frozen yogurt with stracciatella. This frozen dessert is bursting with strawberry flavor and since it’s on Lemon & Mocha, it is of course also chocolatefied.

Chocolate Covered Strawberry Frozen Yogurt  |  Lemon & Mocha

Valentine’s Day weekend is always especially meaningful for Matt and I because our anniversary is on the 15th! Tomorrow will mark 7 years since we starting dating, woo-wee! I’m going to keep it short and simple today so my Valentine’s Day present to you all sweet readers is this recipe and a bunch of drool-worthy photos. Enjoy!

Chocolate Covered Strawberry Frozen Yogurt  |  Lemon & MochaChocolate Covered Strawberry Frozen Yogurt  |  Lemon & MochaChocolate Covered Strawberry Frozen Yogurt  |  Lemon & MochaChocolate Covered Strawberry Frozen Yogurt  |  Lemon & Mocha

Chocolate Covered Strawberry Frozen Yogurt
 
Yield: 1 quart
Ingredients
  • 1 pound fresh strawberries, rinsed and hulled
  • ⅔ cup sugar
  • 1 cup plain whole-milk yogurt
  • 1 teaspoon lemon juice
  • 5 ounces bittersweet chocolate, chopped
  • Chocolate covered strawberries, for garnish, optional
Directions
  1. Slice the strawberries then toss in a medium bowl with the sugar. Stir until the sugar begins to dissolve then cover and let sit at room temperature for 1 hour. Stir occasionally.
  2. Using a blender or food processor puree the entire contents of the strawberry bowl, the yogurt and the lemon juice. If you would like to get rid of any seeds push the mixture through a mesh strainer.
  3. Refrigerate the mixture for 1 hour then pour into your ice cream maker according to the manufacturer's directions.
  4. While the mixture is in the ice cream maker, melt the bittersweet chocolate over a double boiler and stir until it's smooth. Transfer the chocolate into a measuring cup with a pouring spout.
  5. During the last couple minutes of churning in the ice cream maker pour the melted chocolate into the ice cream maker in a thin stream to create the stracciatella swirl.
Notes
Although this is a frozen yogurt, to me it had more of a sorbet texture. It is still delicious, but just wanted to give a heads up so you weren't surprised by the texture.

Frozen yogurt recipe from The Perfect Scoop.

Red Velvet Oreo Truffle Chocolate Crunch Brownies

Red Velvet Oreo Truffle Chocolate Crunch Brownies  |  Lemon & Mocha

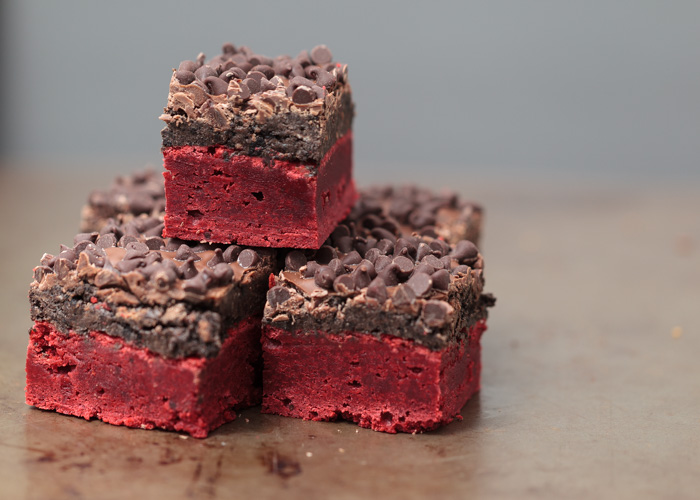
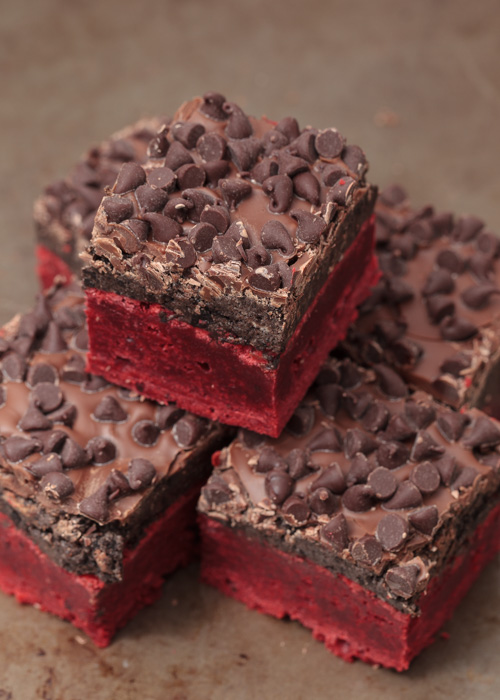
Remember way back when I promised the fifth, final and most outrageous installment of the Lemon & Mocha brownie series just in time for Valentine’s Day? Ta-da! Here it is:  Red Velvet Oreo Truffle Chocolate Crunch Brownies. I am very sorry for keeping these from you for so long,  but aren’t they perfect for Valentine’s Day?

Red Velvet Oreo Truffle Chocolate Crunch Brownies  |  Lemon & Mocha

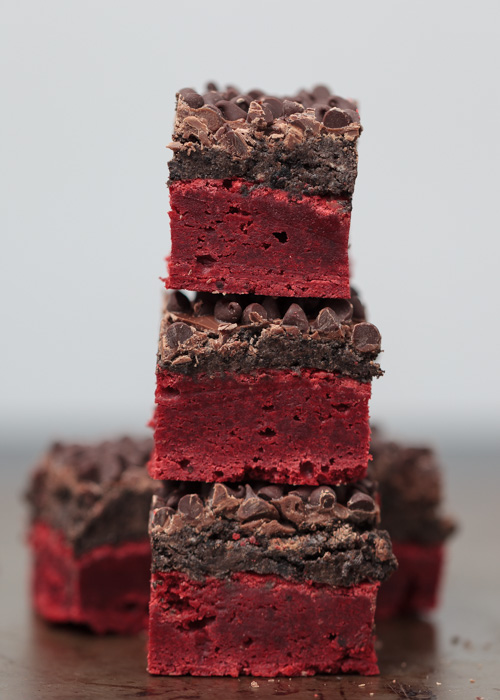
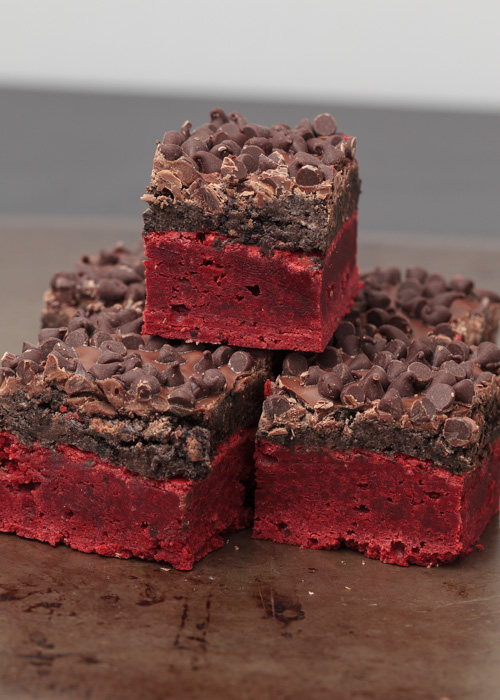
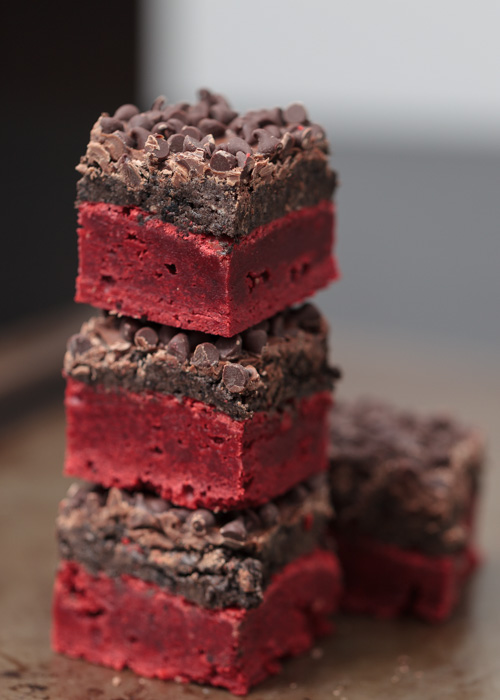
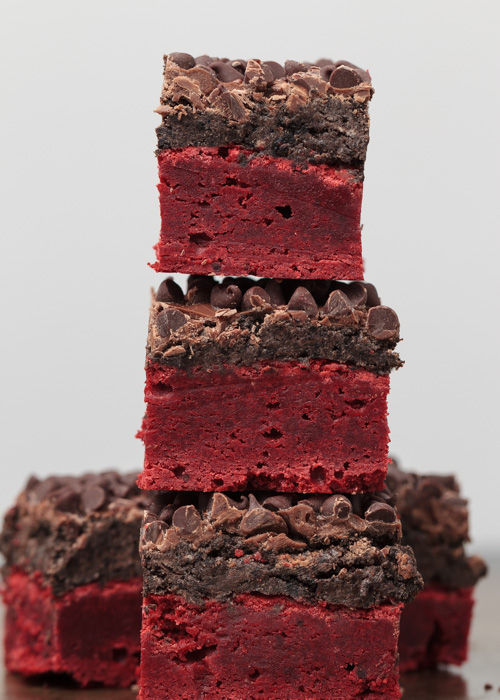
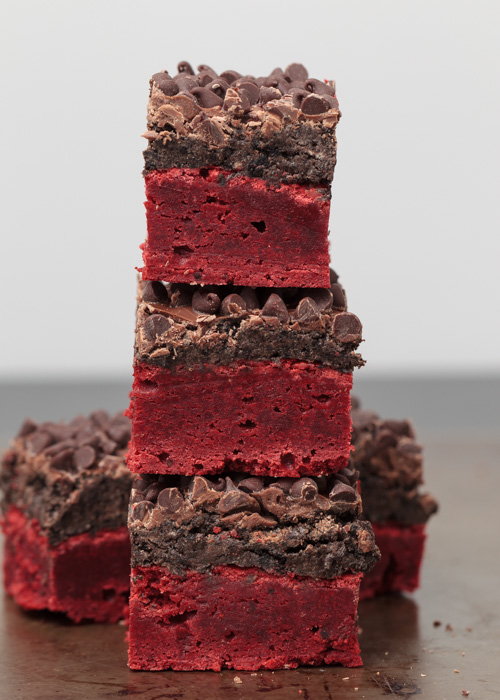
These brownies are the king of all brownies and they are utterly amazing. Lets go layer by layer to give you time to process the amazingness.

Red Velvet Oreo Truffle Chocolate Crunch Brownies  |  Lemon & Mocha

Layer one:  homemade red velvet brownies. Fudgey, moist and with just a hint of chocolate flavoring that red velvet is known for, this is the perfect base.

Red Velvet Oreo Truffle Chocolate Crunch Brownies  |  Lemon & Mocha

Next up, layer two:  Oreo truffle. If these layers were children the Oreo truffle layer would be that favorite child. Have you ever made Oreo truffle balls? This layer is the inside of those truffles. Crushed Oreos and cream cheese are whipped together to create the most perfect balance of sweet, creamy and chocolatey.

Red Velvet Oreo Truffle Chocolate Crunch Brownies  |  Lemon & Mocha

Finally, layer three:  chocolate crunch. Chocolate is melted over the top of the Oreo truffle layer to create a hardened chocolate topping, but oh no, even that is not enough. Before the chocolate has time to harden, mini chocolate chips are sprinkled allover to create chocolate chunks in the hunk of chocolate.

Red Velvet Oreo Truffle Chocolate Crunch Brownies  |  Lemon & Mocha

Yes, I promise you that this is real life and you can actually go make these brownies right now. They are an ultimate texture overload. Fudgey base, creamy Oreo middle and hard crunchy topping come together to make you eat a second, or a third, or a fourth, or a….

Red Velvet Oreo Truffle Chocolate Crunch Brownies  |  Lemon & Mocha

Red Velvet Oreo Truffle Chocolate Crunch Brownies
 
Yield: 32 brownies
Ingredients
for the red velvet brownie layer
  • 2 sticks unsalted butter (1 cup), room temperature
  • 1½ cups sugar
  • 1½ cups brown sugar
  • 4 large eggs, room temperature
  • 1-2 ounces red food coloring
  • 4 teaspoons vanilla extract
  • 2½ cups all-purpose flour
  • 6 tablespoons unsweetened cocoa powder
  • ½ teaspoons salt
for the Oreo truffle layer
  • 1 package Oreos
  • 8 ounces cream cheese, room temperature
for the chocolate crunch layer
  • 1½ cups semisweet chocolate chips
  • 2 teaspoons vegetable oil
  • 1 cup mini chocolate chips
Directions
for the red velvet brownie layer
  1. Preheat oven to 350 degrees F. Grease and flour a 9 x 13 pan and set aside.
  2. Beat the butter, sugar and brown sugar together with the paddle attachment of a stand mixer for 2 minutes, or until fluffy. Add the eggs, one at a time, mixing after each egg is added. Add the food coloring and vanilla extract until the color is completely incorporating and is the desired color.
  3. In a separate medium bowl combine the flour, cocoa powder and salt. Carefully add the flour mixture to the wet ingredients being sure to incorporate completely while trying not to over-mix the batter. The batter will be very thick, but make sure the batter is a uniform color.
  4. Pour the batter into the prepared baking pan and smooth the top. Bake for 35 minutes, or until crunchy on top and gooey underneath. Let cool completely. Once cool you can either leave in the pan or very carefully flip the brownies out onto a large clean surface. I flipped my over onto a clean cutting board that easily fits in my fridge so it would be easier for later refrigerating and cutting.
for the Oreo truffle layer
  1. Turn the entire package of Oreos into crumbs using a food processor or crushing in a large plastic bag. Combine with the cream cheese until blended.
  2. Dollop the Oreo mixture onto the cooled brownies then carefully use your hands and a rubber spatula to create a smooth even layer covering the brownies all the way to the edges. If you try to simply spread you might tear the brownies.
for the chocolate crunch layer
  1. Melt the chocolate chips with the vegetable oil in the microwave. Microwave for 30 seconds, stir, then continue to microwave in 10 second intervals, stirring after each, until melted and smooth. Carefully pour over the Oreo truffle layer and smooth with a rubber spatula. Sprinkle with the mini chocolate chips then refrigerate until the chocolate crunch layer has hardened.

Red velvet brownies from Newlyweds.
Bar recipe from Pizzazzerie.