Recipes

Avocado Toast

Avocado Toast  |  Lemon & Mocha

Have you heard of avocado toast? This simple breakfast dish has been trending all over Pinterest and Instagram for the past year. It’s been blogged about, tweeted, favorited, snapped, and of course consumed like crazy. Even with the flurry of social media, I first heard of avocado toast at a work breakfast potluck last spring. Side note:  work breakfast potluck is the absolute best way to start a workday. Between all the bacon, waffles and egg casseroles, the person doling out slices of avocado toast seemed more than a little bizarre to me.

Avocado Toast  |  Lemon & Mocha

My love for avocado and my foodie curiosity led me to try some and wow. Just wow. Why had I never thought of this before? The crunchiness of the toast, the creaminess of the avocado, the slight tanginess of the teeniest bit of mayonnaise and the saltiness from the sea salt flakes… wow, oh wow. Those of you who have experienced avocado toast before are currently nodding your heads and walking to their kitchen to pop some bread in the toaster. Those of you who haven’t experienced this simple phenomena should take note and go do the same so you can add a new breakfast staple to your routine.

Avocado Toast  |  Lemon & Mocha

Avocado Toast
 
Yield: 1 serving
Ingredients
  • 1 piece of whole wheat bread
  • 1 schmear of mayonnaise, roughly 2 teaspoons
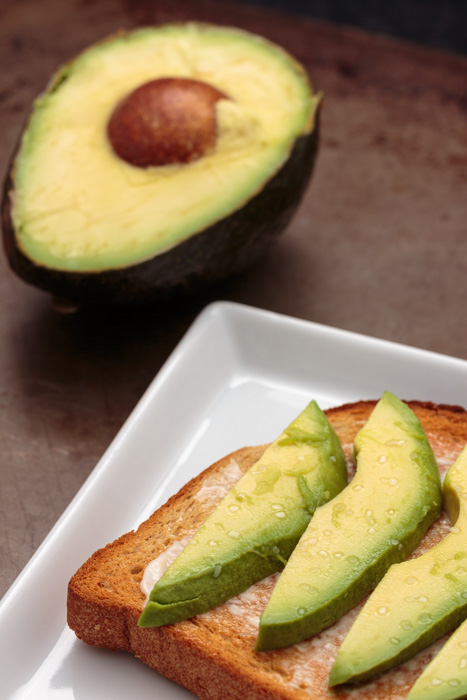
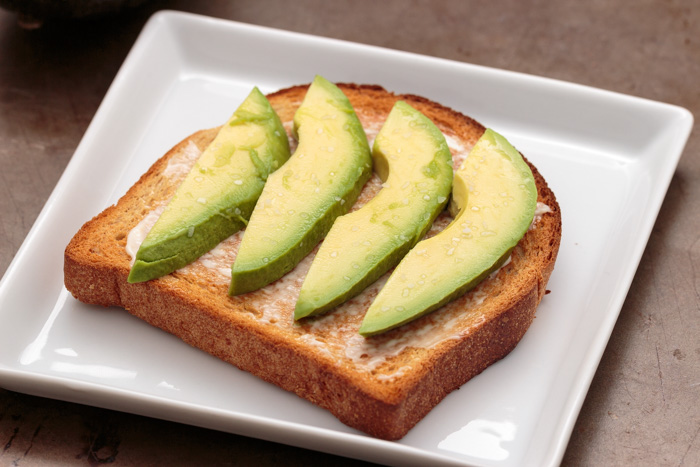
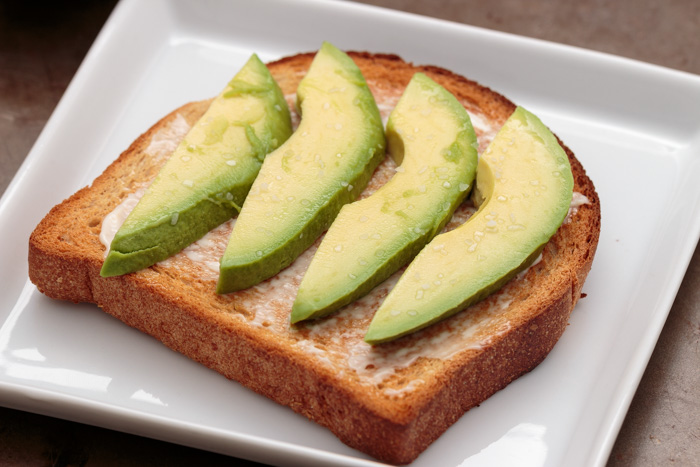
  • ½ avocado, sliced
  • Maldon Sea Salt Flakes, or coarse sea salt
Directions
  1. Toast the bread. Spread a very thin layer of mayonnaise on the toast. Top with the sliced avocado and a very generous sprinkling of sea salt flakes.


Marshmallow Crunch Chocolate Brownies

Marshmallow Crunch Chocolate Brownies  |  Lemon & Mocha

It was negative 1 degrees when I woke up in Boston this morning. Negative 1! Oh, and the “feels like” with wind chill was negative 19 degrees. Sounds toasty right? With cold temperatures across most of the country and countless reminders from your Facebook friends about how cold it is I figured we could all use a pick-me-up.

Marshmallow Crunch Chocolate Brownies  |  Lemon & Mocha

And what could bring a smile to your face better than a picture of decadent, gooey, chocolately brownies? Well, probably the actual brownies, but now you have the recipe for them!

Marshmallow Crunch Chocolate Brownies  |  Lemon & Mocha

These brownies are nearly identical to the peanut butter crunch brownies I posted last month, but peanut butter is replaced with marshmallow. I had just finished baking the peanut butter crunch brownies when I spotted the big tub of marshmallow fluff in my baking cabinet and got inspired.

Marshmallow Crunch Chocolate Brownies  |  Lemon & Mocha

I love the way the Special K cereal gives the brownies a nice crunchy topping.

Marshmallow Crunch Chocolate Brownies  |  Lemon & Mocha

Also, just to make sure we are keeping count, this is part four of the Lemon & Mocha brownie series. Expect the fifth, final and most outrageous installment next month just in time for Valentine’s Day. In the meantime, treat yourself to some marshmallow crunch chocolate brownies!

Marshmallow Crunch Chocolate Brownies  |  Lemon & Mocha

Marshmallow Crunch Chocolate Brownies
 
Yield: 32 brownies
Ingredients
  • 1 batch brownie batter, enough for a 9 x 13 pan
  • 1 ½ cup marshmallow fluff
  • ¼ cup corn syrup
  • 4 cups Special K, or similar cornflake cereal
  • 1¾ cup chocolate chips, semisweet or milk, divided
  • 2 teaspoons vegetable oil
Directions
  1. Preheat the oven to 350 degrees F. Grease a 9x13” pan and set aside.
  2. Prepare the brownie batter according to package directions. Pour half the brownie batter into the prepared pan.
  3. Put the Special K in a large bowl and set aside.
  4. Combine the marshmallow fluff and corn syrup in a small bowl. Heat in the microwave for 30 seconds. Stir and continue to heat in 30 second increments until the marshmallow mixture is smooth. Pour the marshmallow mixture over the Special K and carefully toss to fully coat.
  5. Evenly distribute ¾ of the marshmallow crunch mixture onto the brownie batter in the pan by dropping small clumps of the marshmallow crunch mixture right onto the batter. Pour on the other half of the brownie batter being sure to cover as much of the marshmallow crunch mixture as possible. It is okay if it doesn’t all get covered.
  6. Bake according to package directions. Be sure not to overbake as brownies will continue to cook once you remove them from the oven. I usually pull mine out 3-5 minutes before the package’s minimum baking time.
  7. As soon as the brownies are out of the oven, run a knife around the edges then evenly sprinkle 1 cup of the chocolate chips on top before covering the pan with tin foil so the chocolate can melt.
  8. Meanwhile, place the remaining chocolate chips and vegetable oil in a small bowl. Microwave for 30 seconds on half power then stir. Heat for 15 seconds on half power then stir. Continue until the chocolate is smooth.
  9. Remove the tin foil from the brownies and carefully spread the melty chocolate chips with a spatula in an even layer on top of the brownies. Top with the remaining marshmallow crunch mixture then drizzle with the melted chocolate. Refrigerate until the chocolate has hardened. Cut and serve.
Notes
I highly recommend using 2 packages of Ghiradelli Triple Chocolate Brownie Mix to make these.

Recipe adapted from Half Baked Harvest.

Cheesy Corn & Chorizo Dip with Green Chiles

Cheesy Corn & Chorizo Dip with Green Chiles  |  Lemon & Mocha

I love bringing desserts to parties, dinners and potlucks. I know I have a lot of outrageously tasty treats in my repertoire and are sure to have everyone swooning. But for some reason I always get a little panicky when someone asks me to bring an appetizer. There are so many different directions you can go in with an appetizer. Is it going to be hot? Cold? Cheesy? Meaty? Rich? Healthy? Crunchy? Creamy? Spicy? Does everyone like seafood? Are they averse to spinach? Doesn’t someone not like goat cheese? Is it going to pair well with what’s being served for dinner?

Cheesy Corn & Chorizo Dip with Green Chiles  |  Lemon & Mocha

My mind runs on overdrive and I end up exhausted without being even a step closer to what I’m going to bring. Well, ladies and gentlemen, I have found the solution. Cheesy corn dip with chorizo and green chiles. It is an instant favorite and is just so stinking good I can’t even stand it.

Cheesy Corn & Chorizo Dip with Green Chiles  |  Lemon & Mocha

Creamy and gooey, this dip has sweetness from the corn and a slight spiciness from the chorizo. The green chiles do not provide any heat and their flavor is similar to sauteed green bell peppers. You can make this dish as spicy or not spicy as you or your guests would like. I also made it with Portuguese sausage, linguica, which is not spicy at all. If your guests like it hot you can always add a few shakes of hot sauce. Serving with tortilla chips adds a salty and crunchy element.

Cheesy Corn & Chorizo Dip with Green Chiles  |  Lemon & Mocha

The best part? This dip is done after 7 minutes in the microwave. No wondering if there’s going to be space in the oven or if you’re going to have enough time to make it before all the guests arrive. Make it ahead, pop it in the microwave when you’re ready to eat it and you’re all set. This is perfect for New Year’s Eve, especially for those of you who are like me and have to work on New Year’s Eve and will most likely be sitting in traffic on the way home. Fun! So stop your appetizer stressing and make this addictive dip!

Cheesy Corn & Chorizo Dip with Green Chiles  |  Lemon & Mocha

Cheesy Corn & Chorizo Dip with Green Chiles
 
Yield: 6-8 servings
Ingredients
  • ½ pound ground chorizo or linguica (Portuguese sausage)
  • 2 cups frozen corn, cooked
  • 1 4-ounce can diced green chiles, drained
  • 1 ¾ cups shredded Monterey jack or pepper jack cheese
  • ½ cup grated Parmesan cheese
  • ½ cup mayonnaise
Directions
  1. Cook the ground meat in a frying pan over medium-high heat until cooked through and sizzling. Drain well on paper towels.
  2. In a medium bowl combine the cooked sausage, chiles, corn, 1 ½ cups of the shredded monterey jack or pepper jack cheese, Parmesan cheese and mayonnaise.
  3. Scoop the mixture into a 9” pie dish or an 8x8” baking dish. Sprinkle with the remaining ¼ cup of cheese. Cover and refrigerate until ready to serve. When ready to eat, uncover the dish, heat in the microwave for 7 minutes then serve with tortilla chips.
Notes
If you have a block of Monterey jack instead of shredded cheese you can take about 8 ounces of it and cut to a rough small dice.

Recipe slightly adapted from Averie Cooks.

Maple Walnut Blondies

Maple Walnut Blondies  |  Lemon & Mocha

Today is part three of Lemon & Mocha’s holiday brownie extravaganza series! After this we are going to take a minor break from the brownies, but they will be back soon, I promise!

Maple Walnut Blondies  |  Lemon & Mocha

When I was looking over my brownies that I had dipped, drizzled, dunked and doused in chocolate I realized the brownies were missing their tasty counterpart: the blondie. A blondie is basically a chocolate-less brownie and I love them equally. Ok, maybe the chocolate lover in me likes brownies more, but blondies are also extremely tasty. Especially when they have chocolate chips.

Maple Walnut Blondies  |  Lemon & Mocha

But I am excited to say that these 100% chocolate-free blondies were one of my favorites from my brownie baking bonanza. Maple walnut blondies. They are chewy, with a bit of crunch from the walnuts, and have a very subtle maple flavor.

Maple Walnut Blondies  |  Lemon & Mocha

The recipe I used mentioned that using real maple syrup would have a more mild maple taste, while using maple flavored syrup would produce a pronounced maple blondie. I only had the real stuff in my fridge so that’s what I went with and a lot of people told me that they were pleasantly surprised by the subtly of the maple. So step away from the chocolate and make these delicious maple walnut blondies!

Maple Walnut Blondies  |  Lemon & Mocha

Maple Walnut Blondies
 
Yield: 16 blondies
Ingredients
  • 11 tablespoons unsalted butter, half melted
  • 1 cup packed light brown sugar
  • 1 teaspoon salt
  • ½ cup plus 2 tablespoons maple syrup, divided
  • 1 large egg
  • 2 teaspoons vanilla extract
  • 2 cups all-purpose flour
  • ¼ teaspoon baking soda
  • 1 ¾ cups walnuts, chopped and divided
Directions
  1. Preheat oven to 375 degrees F. Grease a 9x9” baking pan and set aside.
  2. In a large bowl combine the butter, brown sugar and salt.
  3. Add ½ cup of the maple syrup and the egg, then stir to combine.
  4. Add the flour and baking soda, then stir to combine. Once completely combined, stir in 1 ½ cups of the walnuts.
  5. Spread the batter into the prepared pan and use a spatula to smooth the top. Drizzle the remaining 2 tablespoons of maple syrup over the batter then swirl into the batter with the spatula. Evenly sprinkle the remaining ¼ cup of walnuts onto the top.
  6. Bake about 30 minutes, or until the blondies are golden and just set in the center. Be sure not to overbake. Let blondies cool in the pan completely on a wire rack. Cut and serve.
Notes
For a subtle maple flavor, use real maple syrup. For a pronounced maple flavor, use maple flavored syrup.

Recipe from Serious Eats.

Dark Chocolate Peppermint Brownies

Dark Chocolate Peppermint Brownies  |  Lemon & Mocha

Ever since I experimented with chocolate peppermint fudge last year, dark chocolate and peppermint has been added to my list of favorite dessert flavor combinations. Of course there is a list.

Dark Chocolate Peppermint Brownies  |  Lemon & Mocha

The decadent chocolate paired with the refreshing peppermint aftertaste is a nice break from all the rich desserts of the holiday season. Packing a triple peppermint punch, these fudgy brownies are for true peppermint lovers.

Dark Chocolate Peppermint Brownies  |  Lemon & Mocha

First, peppermint extract is baked into the brownies. Second, when the hot and gooey brownies come out of the oven, peppermint bark is layered on top to melt in a thin layer. Third, crushed candy canes are sprinkled on the top to add a nice crunch, to make them look festive and of course to add extra peppermint flavor.

Dark Chocolate Peppermint Brownies  |  Lemon & Mocha

Thankfully Matt is all pepperminted out this season so I have our batch of these all to myself, lucky me!

Dark Chocolate Peppermint Brownies  |  Lemon & Mocha

The best part of these brownies, other than their deliciousness, is how fancy they look, but how simple they actually are to bake. So bake some up this holiday season, and remember to keep some for yourself!

Dark Chocolate Peppermint Brownies  |  Lemon & Mocha

Dark Chocolate Peppermint Brownies
 
Yield: 16 brownies
Ingredients
  • 1 batch brownie batter
  • 1 teaspoon peppermint extract
  • 6-8 squares peppermint bark, broken into chunks
  • 3 candy canes, crushed
Directions
  1. Preheat the oven to 350 degrees F. Grease an 8x8” brownie pan and set aside. If you want thin brownies like mine then use a 9x13” pan instead with the same amount of brownie batter. This will give you 32 brownies instead of 16.
  2. Add the peppermint extract to the prepared brownie batter then pour into the prepared pan. Bake according to the package instructions, being sure not to overbake as brownies will continue to cook once you remove them from the oven. I usually pull mine out 3-5 minutes before the package’s minimum baking time.
  3. As soon as the brownies are out of the oven, run a knife around the edges then evenly top with the chunks of peppermint bark before covering the pan with tin foil so the chocolate can melt.
  4. After a few minutes, remove the tin foil then carefully spread the melty peppermint bark with a spatula in an even layer on top of the brownies. Sprinkle the crushed candy canes over the top then refrigerate until the chocolate has hardened. Cut and serve.
Notes
I highly recommend using 1 package of Ghiradelli Triple Chocolate Brownie Mix to make these.