Sandwiches & Burgers

Halloween Monster Turkey Burger Sliders
Halloween Monster Turkey Burger Sliders  |  Lemon & Mocha

Halloween is tomorrow! Yay! As I’ve mentioned on Lemon & Mocha numerous times before, I love Halloween! I have so many fun childhood memories of Halloween and I can’t wait to start making Halloween memories with our little guy on the way.
Halloween Monster Turkey Burger Sliders  |  Lemon & Mocha

We went back and forth on whether we should put up Halloween decorations with me being just a couple weeks away from my due date, but ultimately I just couldn’t not put them up, even though I felt a little crazy for doing it. Do you decorate your house for Halloween?
Halloween Monster Turkey Burger Sliders  |  Lemon & Mocha

I usually post a chocolatey treat for Halloween, but since Matt and I are up to our eyeballs with all the desserts I’ve been baking I busted out a cute savory treat instead.
Halloween Monster Turkey Burger Sliders  |  Lemon & Mocha

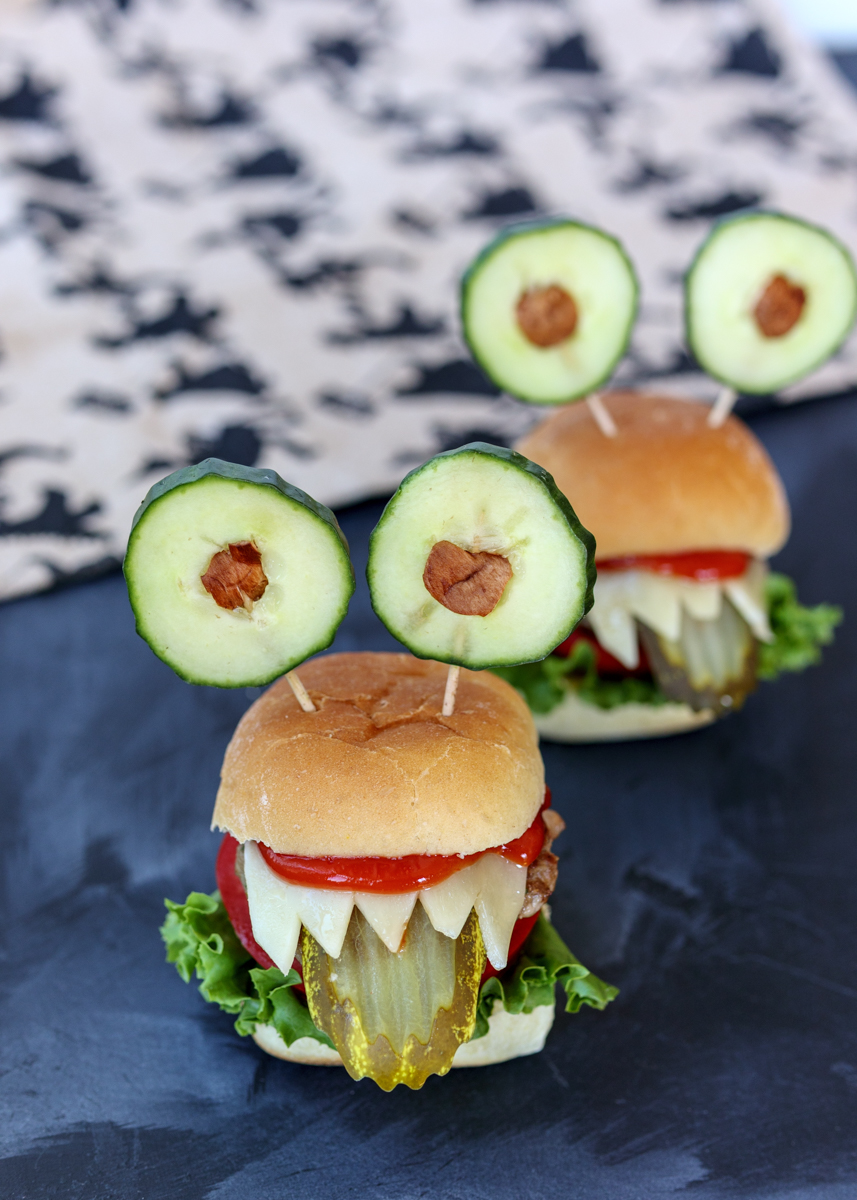
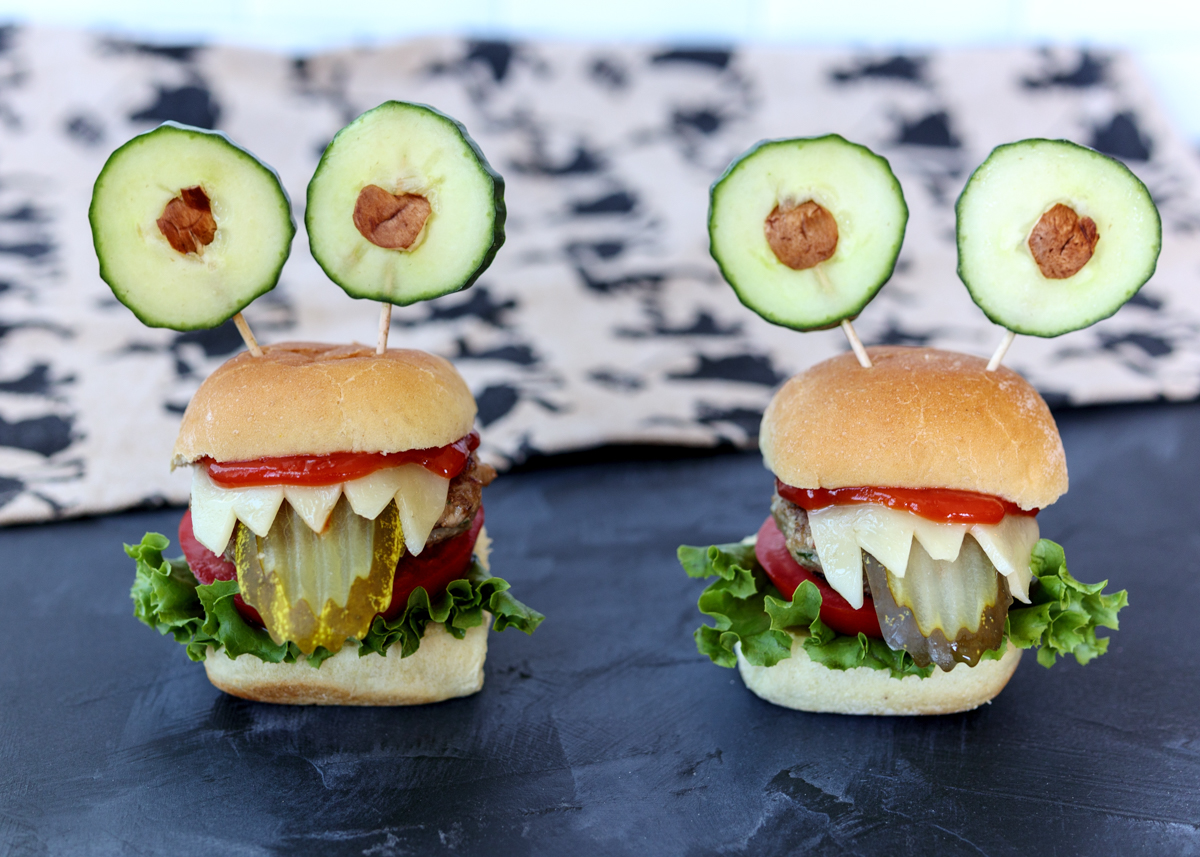
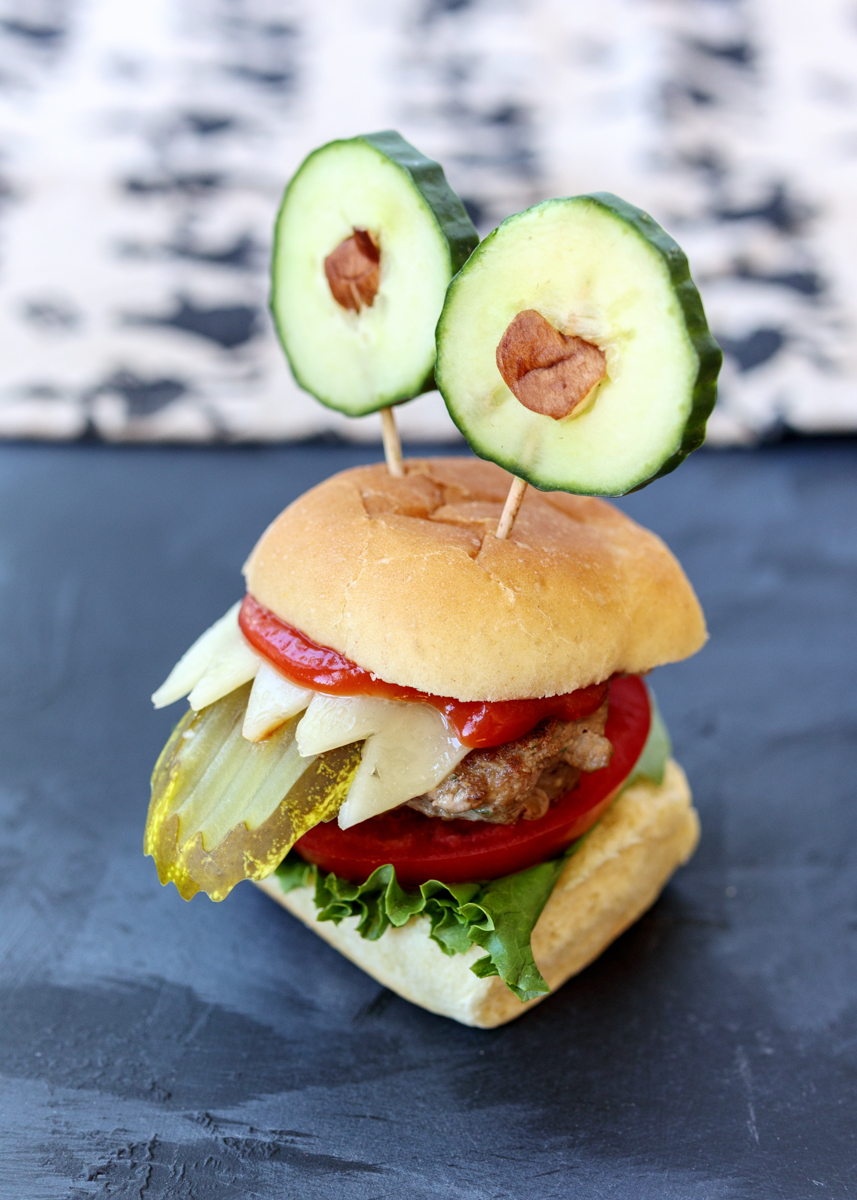
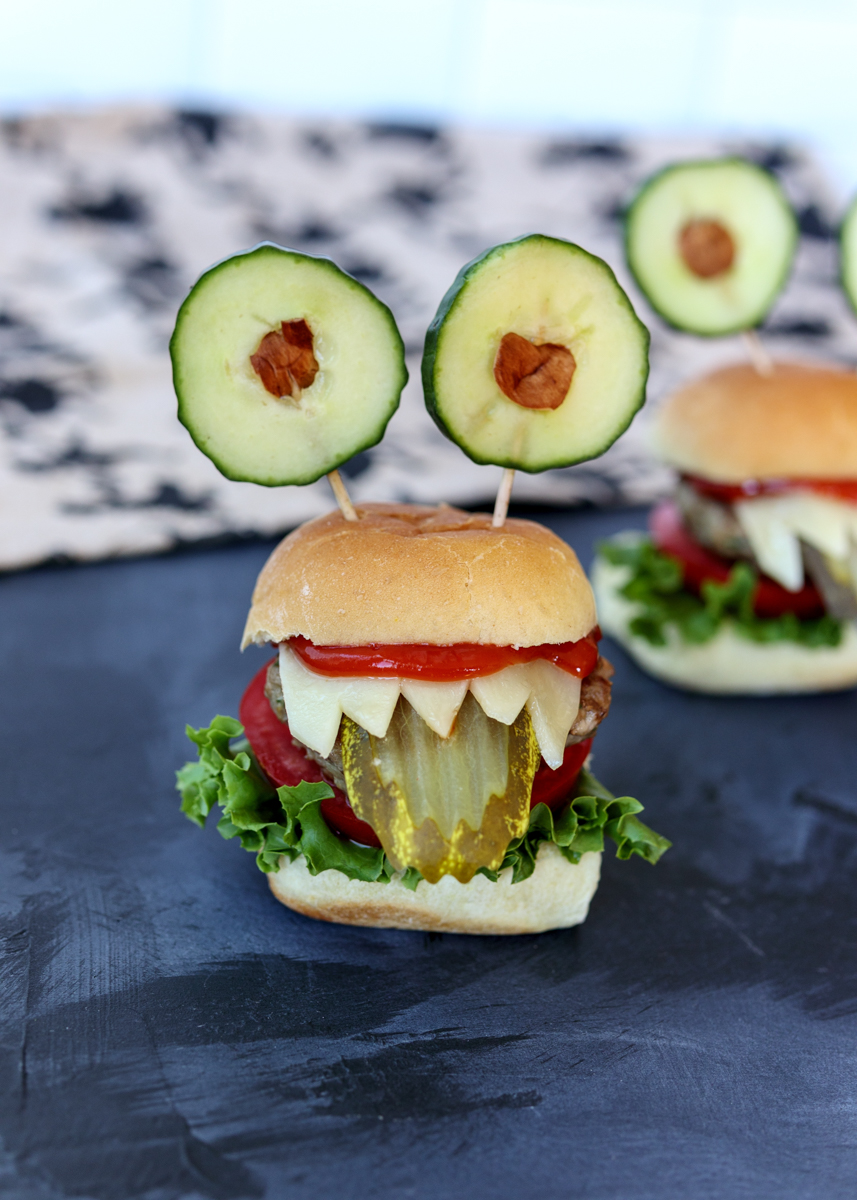
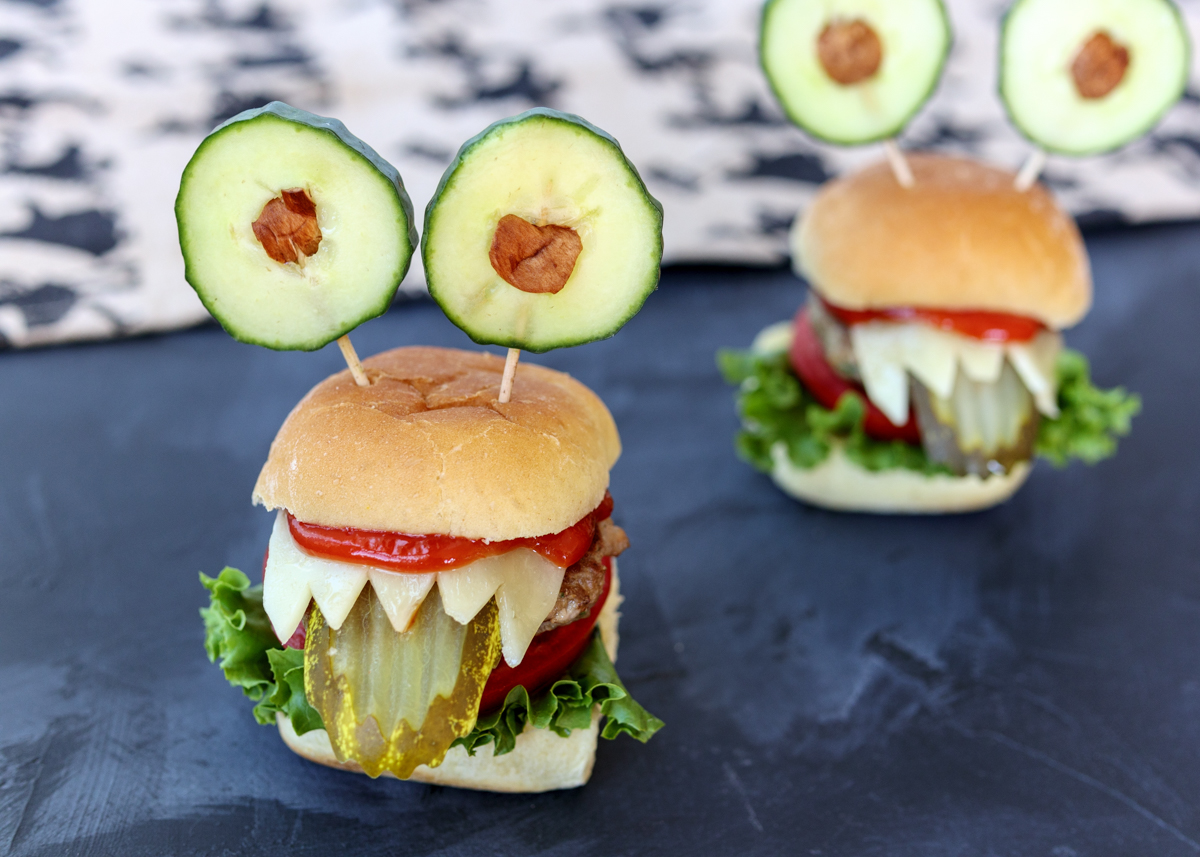
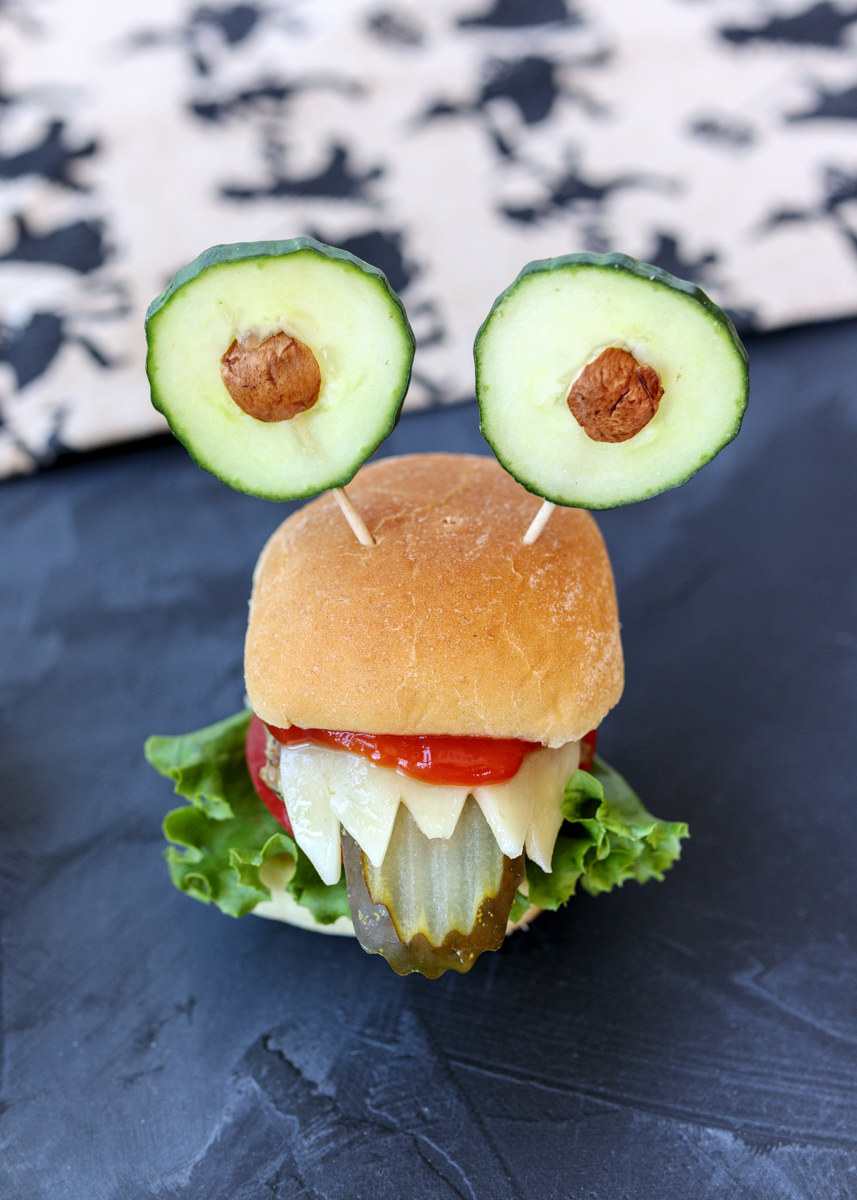
Turkey sliders have been fashioned into silly Halloween monsters, complete with cucumber eyeballs and pickle tongues! As fun as these Halloween Monster Turkey Burger Sliders are, they’re also so good! The turkey patties are juicy and packed with flavor because we’ve added a minced mixture of mushrooms, shallot and parsley to the ground turkey.
Halloween Monster Turkey Burger Sliders  |  Lemon & Mocha

Throw in a little olive oil, Worcestershire sauce and seasoning and then they are grilled or pan-seared to perfection. Since they’re so tiny they cook really quickly; just about four minutes on each side. Top it all off with some melty cheese and fresh veggies for a delicious dinner the whole family will love. Just don’t forget to cut pointy teeth marks into your sliced cheese! Happy Halloween, everyone!
Halloween Monster Turkey Burger Sliders  |  Lemon & Mocha

Looking for some more Halloween treat inspiration? I have a few recipes below to get you started:

Boozy Pumpkin Nutella Hot Chocolate  |  Lemon & Mocha

Boozy Pumpkin Nutella Hot Chocolate

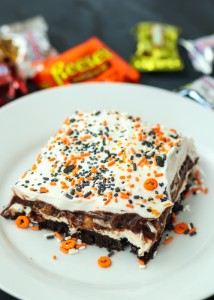
Leftover Halloween Candy Chocolate Lasagna

Leftover Halloween Candy Chocolate Lasagna

Halloween Witch Chocolate Cupcakes

Halloween Witch Chocolate Cupcakes

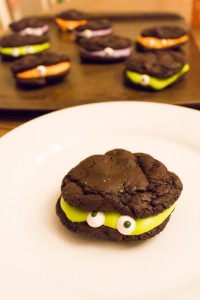
Chocolate Marshmallow Monster Cookie Sandwiches

Chocolate Marshmallow Monster Cookie Sandwiches

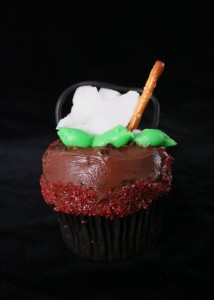
Halloween Witches' Cauldron Cupcakes

Halloween Witches’ Cauldron Cupcakes

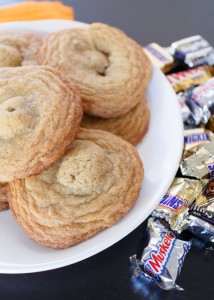
Leftover Halloween Candy Cookies

Leftover Halloween Candy Cookies

Halloween Monster Turkey Burger Sliders
 
Yield: 4 servings
Ingredients
  • 5-6 cremini mushrooms, stems removed, plus more for eyes
  • ½ shallot
  • 3 tablespoons fresh parsley
  • 1 pound ground turkey, 90% lean
  • 2 tablespoons olive oil
  • 1 teaspoon Worcestershire sauce
  • 1 teaspoon salt
  • ¼ teaspoon ground black pepper
  • 1 English cucumber
  • 16 toothpicks
  • 4 slices deli cheddar or American cheese
  • 8 slider buns
  • 8 small pieces of romaine lettuce
  • 8 small slices of tomato
  • 4 pickle sandwich slices, cut in half
  • Ketchup
Directions
  1. Add the cremini mushrooms, shallot and parsley to a food processor. Process until finely chopped. If you don’t have a food processor, finely chop by hand.
  2. In a large bowl, combine the mushroom mixture, ground turkey, olive oil, Worcestershire, salt and pepper, being sure not to over-mix. Divide the mixture into 8 even portions and form into slider patties, roughly a little bigger than the size of your slider buns. Let patties set in the fridge, covered, for 30 minutes.
  3. While the patties are in the fridge, prep your monster eyes and cheese teeth. Slice the English cucumber so you have 16 rounds. The slices can be thin, but not so thin that you’ll have difficulty securing them with a toothpick. Use extra cremini mushrooms to cut out little circles that will be the center of the eyes. Carve a little round out of the center of an English cucumber slice the size of one of your mushroom eye centers. Stick the mushroom center into the hole in the cucumber and stick a toothpick up through the cucumber and the mushroom piece securing it in place. Repeat for the remaining 15 eyes. For the cheese teeth, cut each slice of cheese in half then cut little teeth points at the edge of each slice. Repeat until you have 8 cheese teeth slices.
  4. Lightly spray a grill pan or nonstick sauté pan with olive oil cooking spray and heat over medium-high heat. Cook the slider patties for 4 minutes on each side, or until they reach an internal temperature of 165 degrees F. Remove from the heat and add a cheese teeth slice to each slider so that the teeth prongs overhang a little.
  5. To assemble a slider, place a piece of lettuce on the bottom slider bun. Top with a tomato slice then the cheese-topped patty. Lift up the cheese a little to tuck the pickle half underneath so it sticks out like a tongue. Top with some ketchup then the top slider bun. Stick two cucumber toothpick eyeballs into the top. Repeat for the remaining sliders.


Freezer Burritos #2: Slow Cooker Pork and Roasted Sweet Potato Freezer Burritos

Freezer Burritos #2: Slow Cooker Pork and Roasted Sweet Potato Freezer Burritos

I’m back with round two of these easy, make-ahead freezer burritos! If you missed my first post, Freezer Burritos: Chicken Verde, Mushroom, Kale and Brown Rice Burritos, make sure you go read it. It’s essentially part one of this post and it goes through all the tips and tricks for making your own healthy freezer burritos at home.

Freezer Burritos #2: Slow Cooker Pork and Roasted Sweet Potato Freezer Burritos

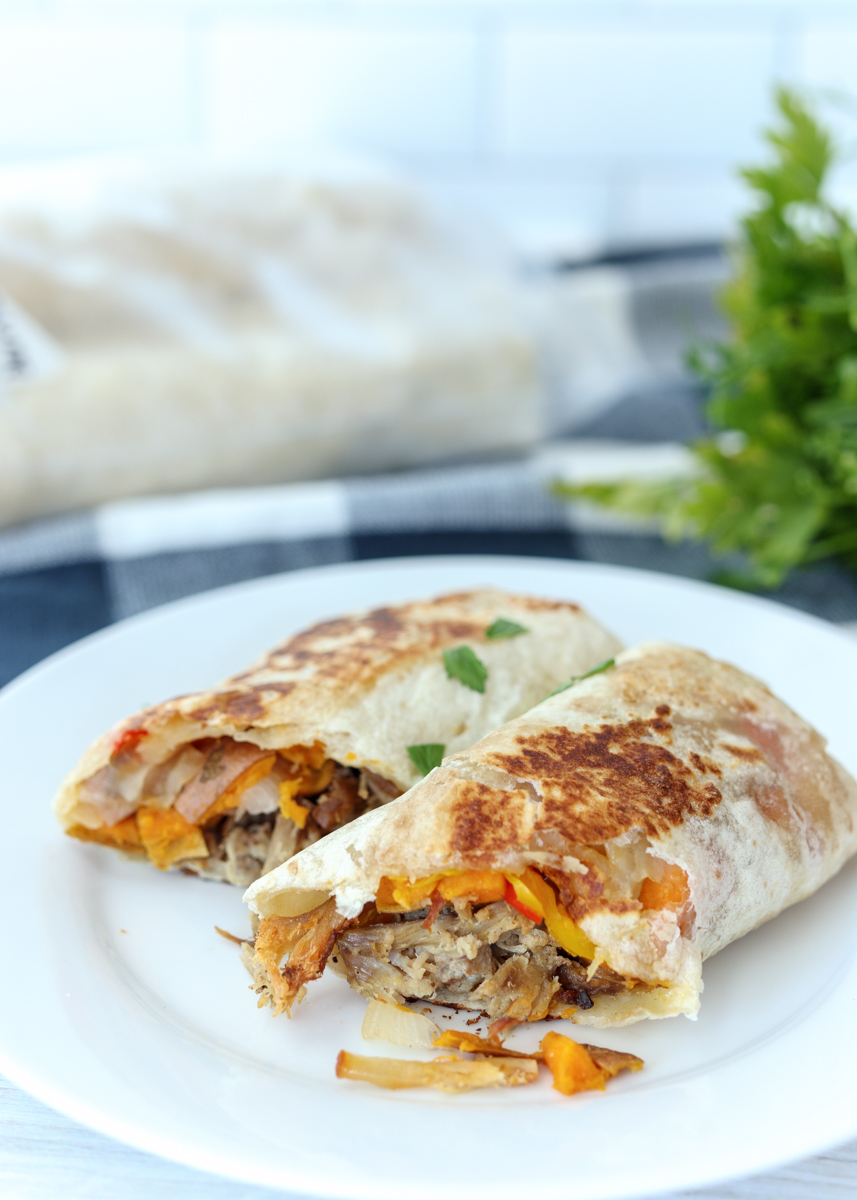
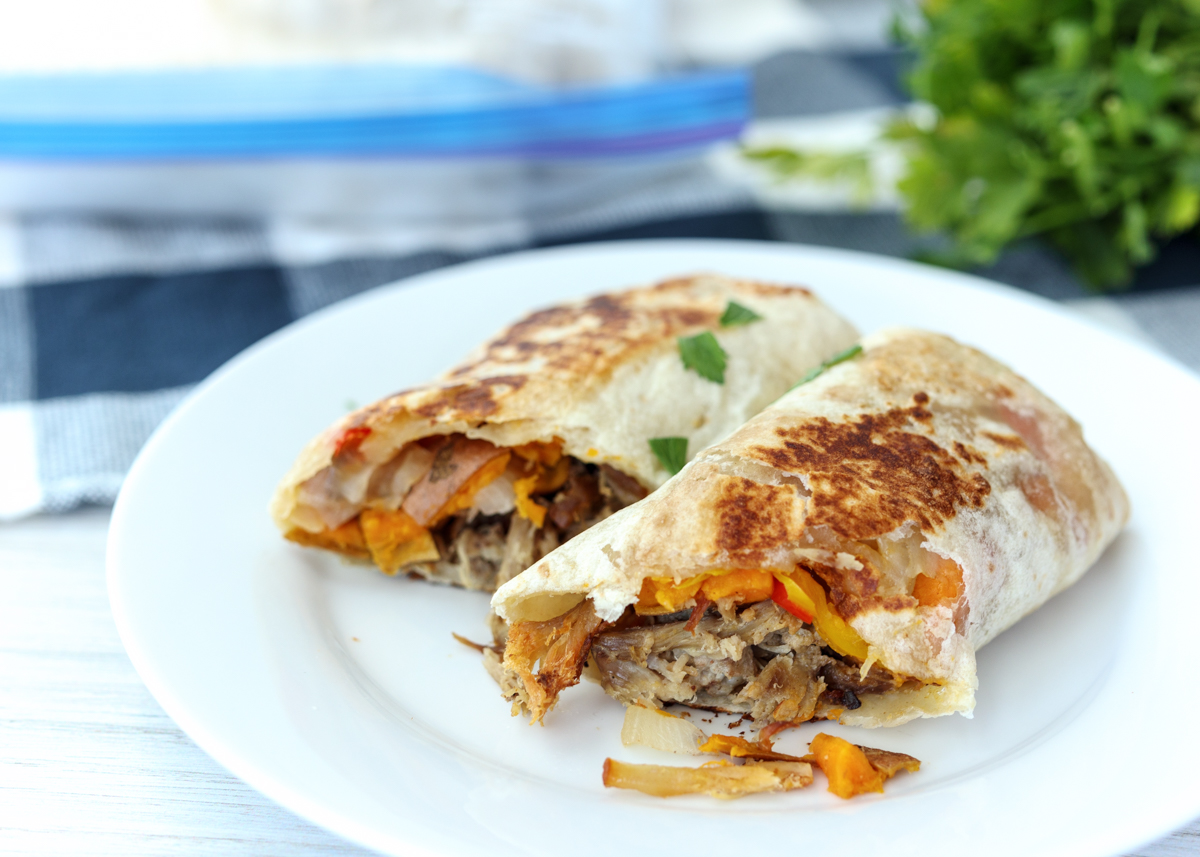
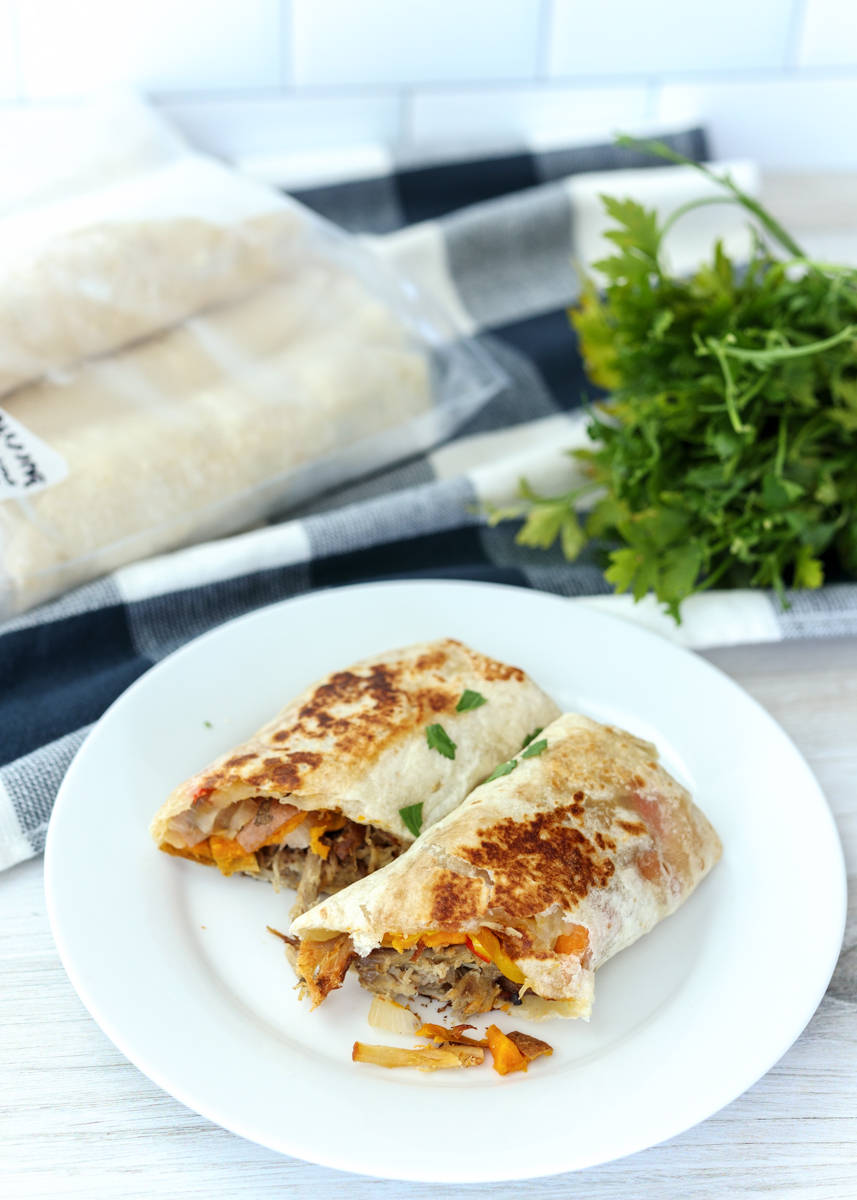
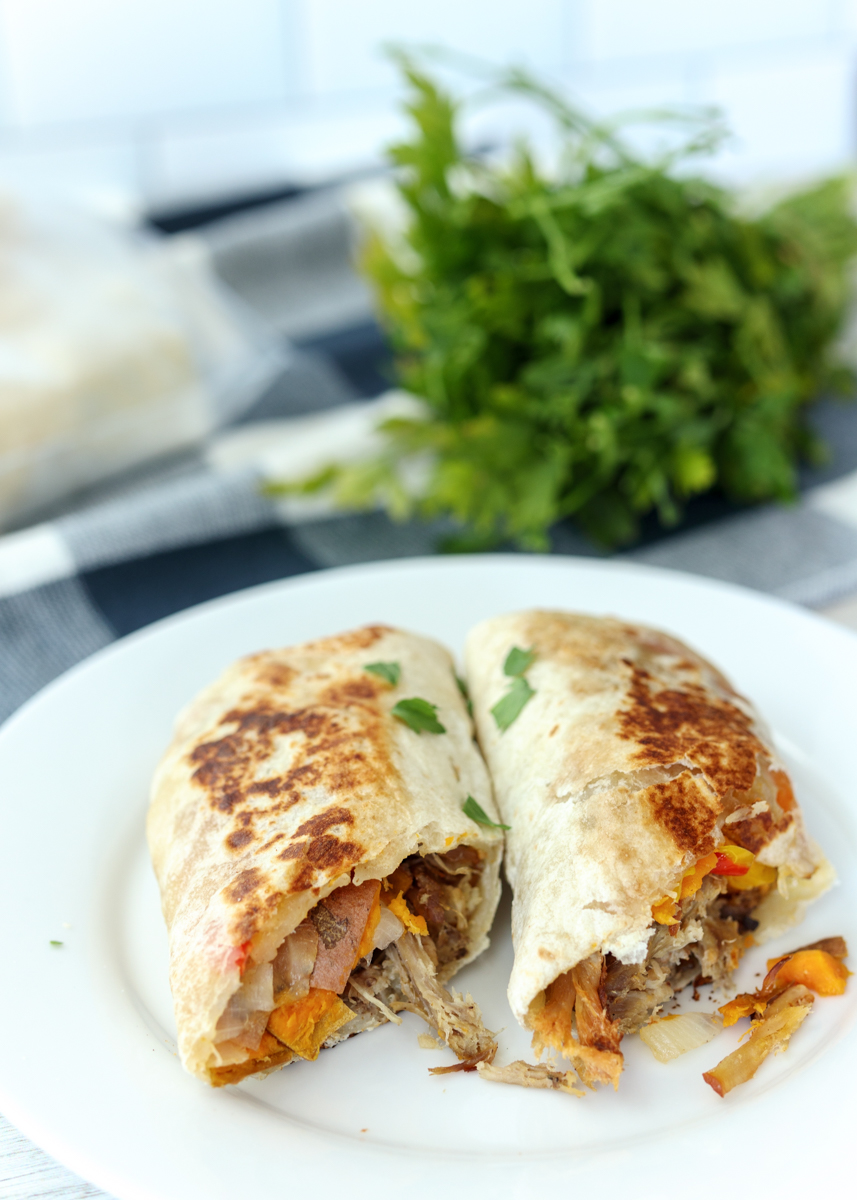
Today I’m sharing another variation that Matt and I have enjoyed: Slow Cooker Pork and Roasted Sweet Potato Freezer Burritos. They are stuffed with tender roasted pork and sautéed peppers and onions. I’ve also substituted spiced roasted sweet potatoes in place of the traditional rice. The pork and the sweet potatoes pair really well together. As promised, below are some protein, grain and filling ideas so you can mix and match to make your ideal freezer burritos. Do you have any favorites that I didn’t include below?

Freezer Burritos #2: Slow Cooker Pork and Roasted Sweet Potato Freezer Burritos

Protein

Shredded chicken
Sliced steak
Shredded salsa verde chicken
Slow cooker pulled pork
Seasoned taco meat
Refried beans
Drained black or pinto beans
Crumbled sautéed chorizo or sausage, drained
Scrambled eggs (breakfast burritos!)

Grain/Starch

Cooked brown or white rice
Lime cilantro rice
Cooked quinoa
Roasted sweet potatoes
Fire roasted corn, drained
Cooked lentils, drained

Filling

Sautéed peppers and onions
Sautéed mushrooms
Cooked kale or spinach greens, drained
Roasted broccoli
Roasted chiles, drained
Caramelized onions
Sautéed zucchini
Shredded cheese

Freezer Burritos #2: Slow Cooker Pork and Roasted Sweet Potato Freezer Burritos

Freezer Burritos #2: Slow Cooker Pork and Roasted Sweet Potato Freezer Burritos
 
Yield: 8 burritos, plus extra shredded pork
Ingredients
  • 2 pounds pork shoulder roast
  • 2 onions
  • ½ teaspoon dried oregano
  • 2 large sweet potatoes, scrubbed clean
  • ¼ teaspoon garlic powder
  • ¼ teaspoon ground cumin
  • ¼ teaspoon paprika
  • ⅛ teaspoon chili powder
  • 1 tablespoon olive oil
  • 2 red bell peppers, stems removed
  • 8 tortillas
  • ⅓ cup shredded mozzarella or colby jack cheese, optional
  • Salt and pepper
  • Cooking spray
  • Salsa, for serving
Directions
  1. Season the pork all over with salt and pepper. Add to the slow cooker. Chop one of the onions and add to the slow cooker, along with the dried oregano. Add 3 tablespoons water then slow cook on low for 8 hours or high for 4 hours. When the pork is done and cooked through, remove from the slow cooker to a cutting board. Leave the onion and juices behind, discard. When the pork is cool enough to handle, shred. Let cool completely or put in the fridge to use later. You will have leftover pork after making the burritos - eat or freeze in a freezer bag for later.
  2. Roast the sweet potatoes. Preheat the oven to 425 degrees. Line a baking sheet with nonstick aluminum foil and set aside. You can peel the sweet potatoes if you prefer; I always leave them unpeeled. Cut the sweet potatoes into ½-inch rounds then cut each round into pieces so you have roughly ½-inch diced pieces. Place the sweet potato pieces on the prepared baking sheet in an even layer and spray with cooking spray. Sprinkle the garlic powder, ground cumin, paprika and chili powder over top. Season with salt and pepper and toss to coat. Bake until tender and slightly caramelized, about 28-35 minutes, tossing about every 15 minutes. Let cool completely or put in the fridge to use later.
  3. Cut the remaining onion in half then cut into slices. Slice the bell peppers. Heat 1 tablespoon of the olive oil over medium-high heat in a large sauté pan. Add the sliced onions and peppers, season with salt and pepper. Sauté until soft and lightly charred, about 7-8 minutes. Remove from the heat and let cool completely or put in the fridge to use later.
  4. When you’re ready to make the burritos, make sure all your ingredients are room temperature or cold. Place the first tortilla on a plate. Add some shredded pork in a lengthwise strip towards the bottom of the tortilla closest to you. Top with some sweet potatoes and then some peppers and onions. Top with some cheese, if using. Fold in each side then take the bottom of the tortilla closest to you and tightly roll it up and over the filling. Continue to roll up the burrito, tightly, tucking in the sides additionally as needed. Wrap in plastic wrap or aluminum foil. Set aside and repeat for the remaining tortillas and fillings. Place all the rolled burritos in a labeled gallon freezer bag and place in the freezer.
  5. To heat: Remove the burrito from the freezer. Remove and discard the plastic wrap or aluminum foil. Place the burrito on a microwave safe plate and microwave at 70% power for 3 minutes. Sear the burrito in a sauté pan lightly sprayed with cooking spray over medium-high heat for 1 minute on each side, until lightly browned. If you don’t want to sear your burrito, microwave for a total of 5 minutes instead of 3. Serve with salsa.


Goat Cheese Spinach Pesto Egg Sandwiches

Goat Cheese Spinach Pesto Egg Sandwiches  |  Lemon & Mocha

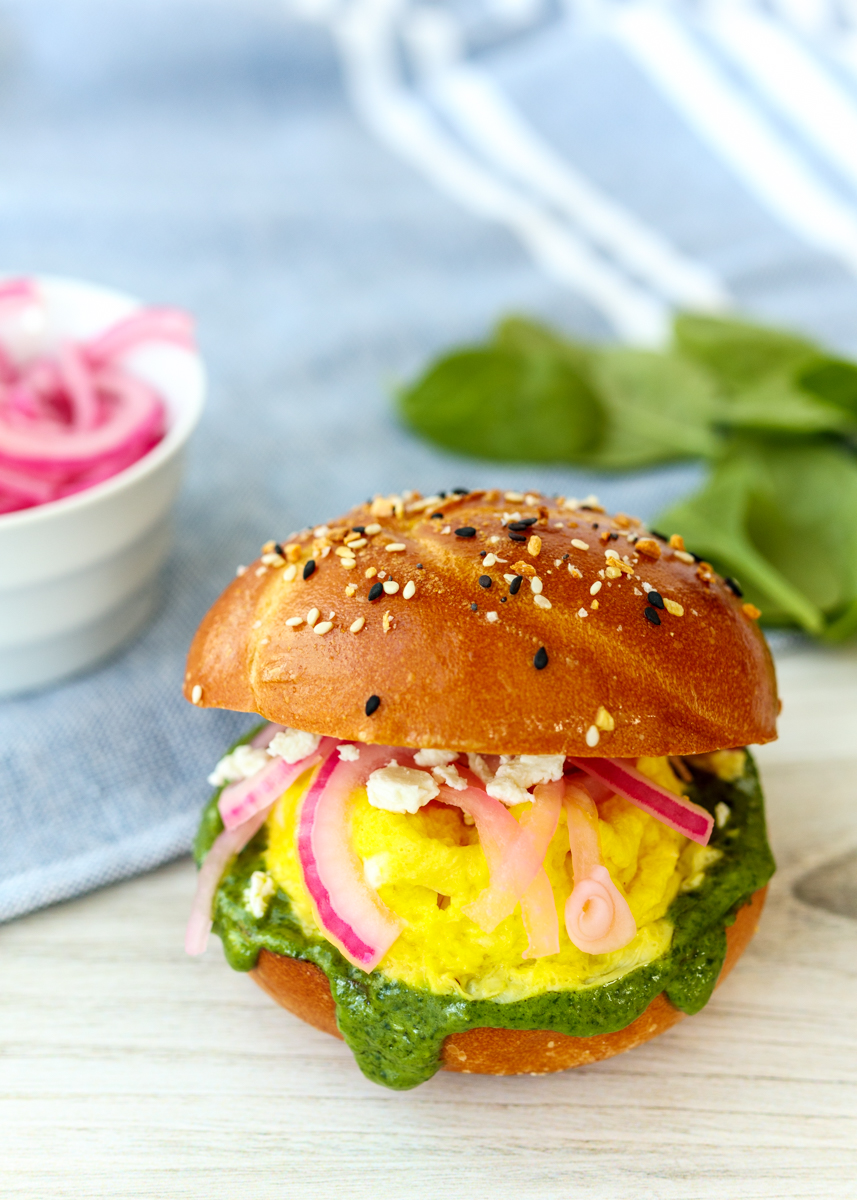
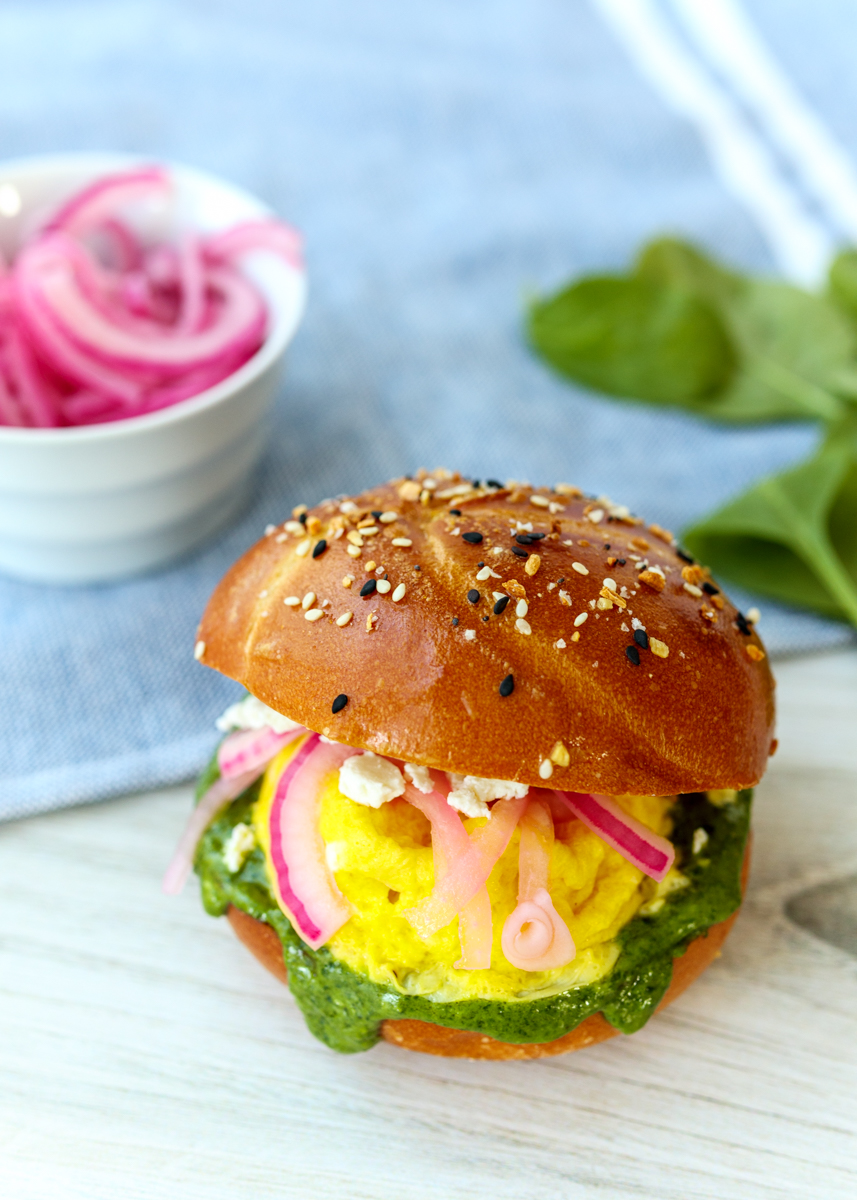
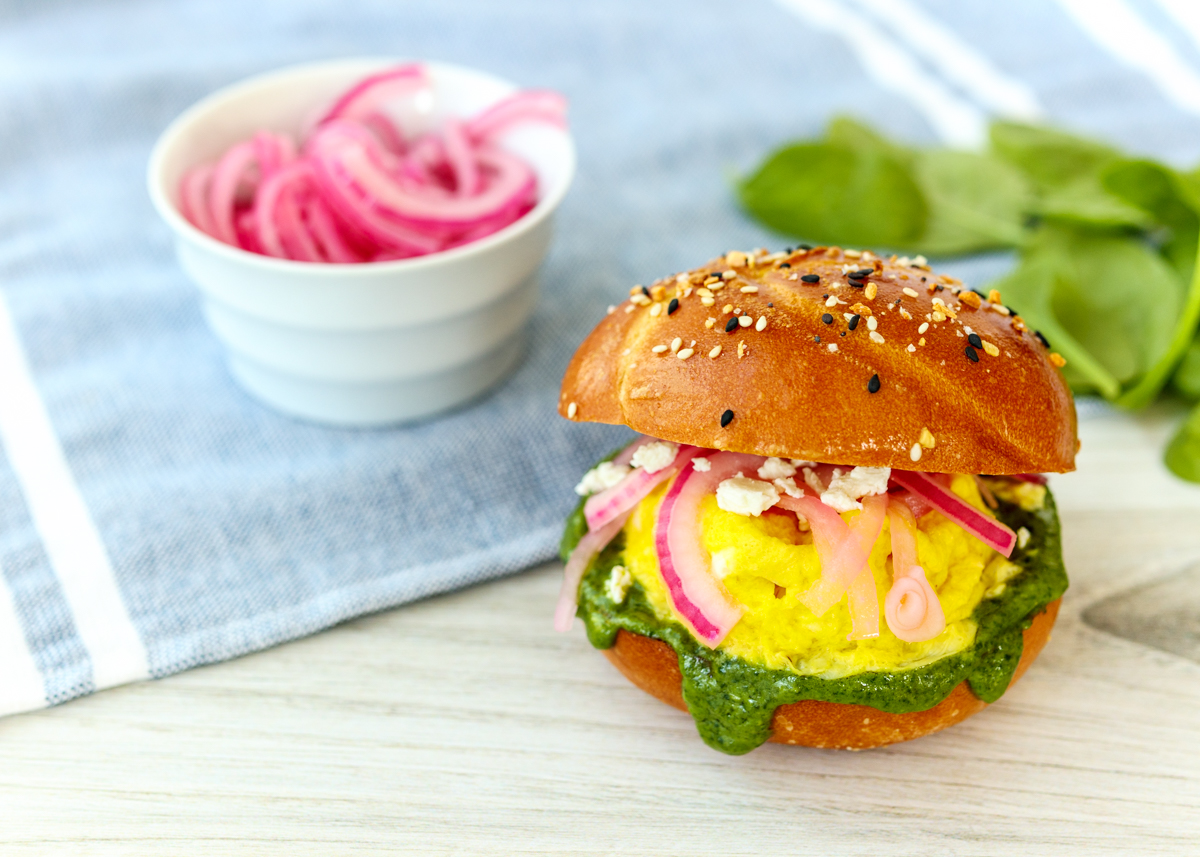
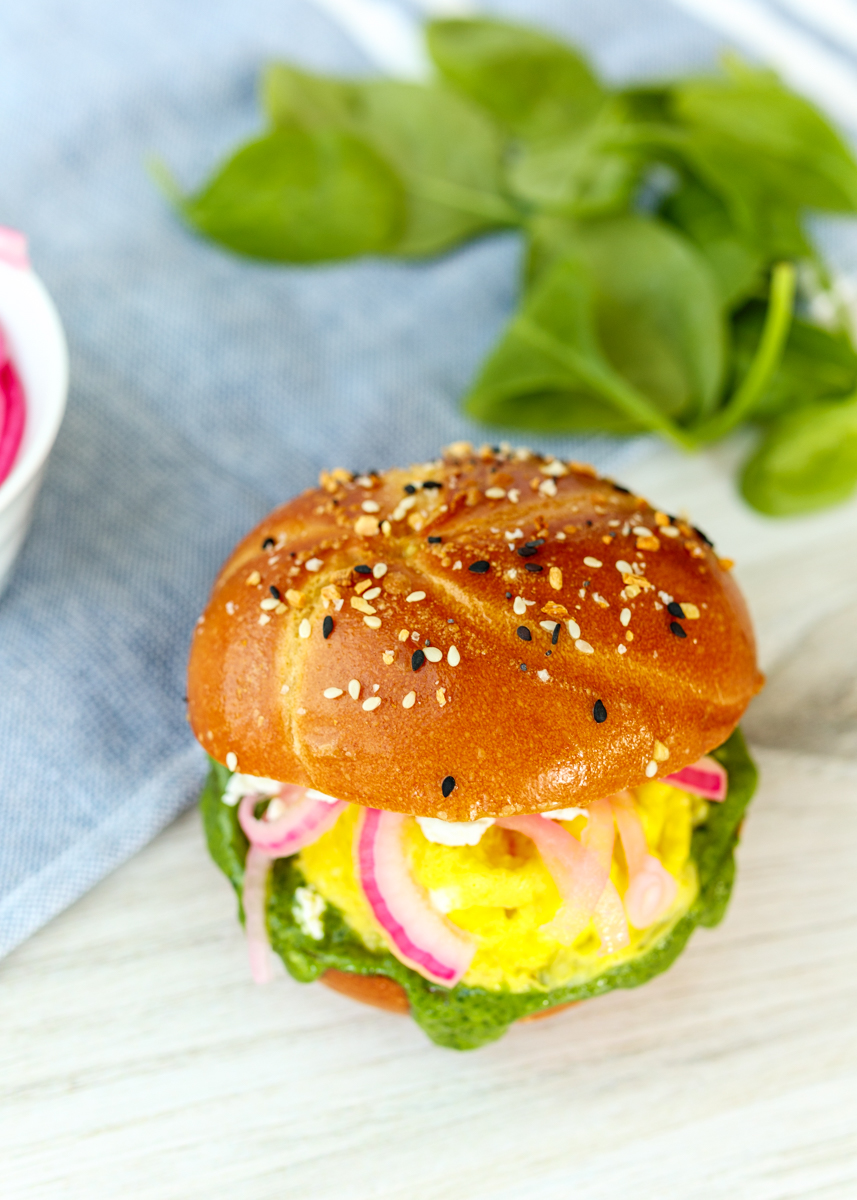
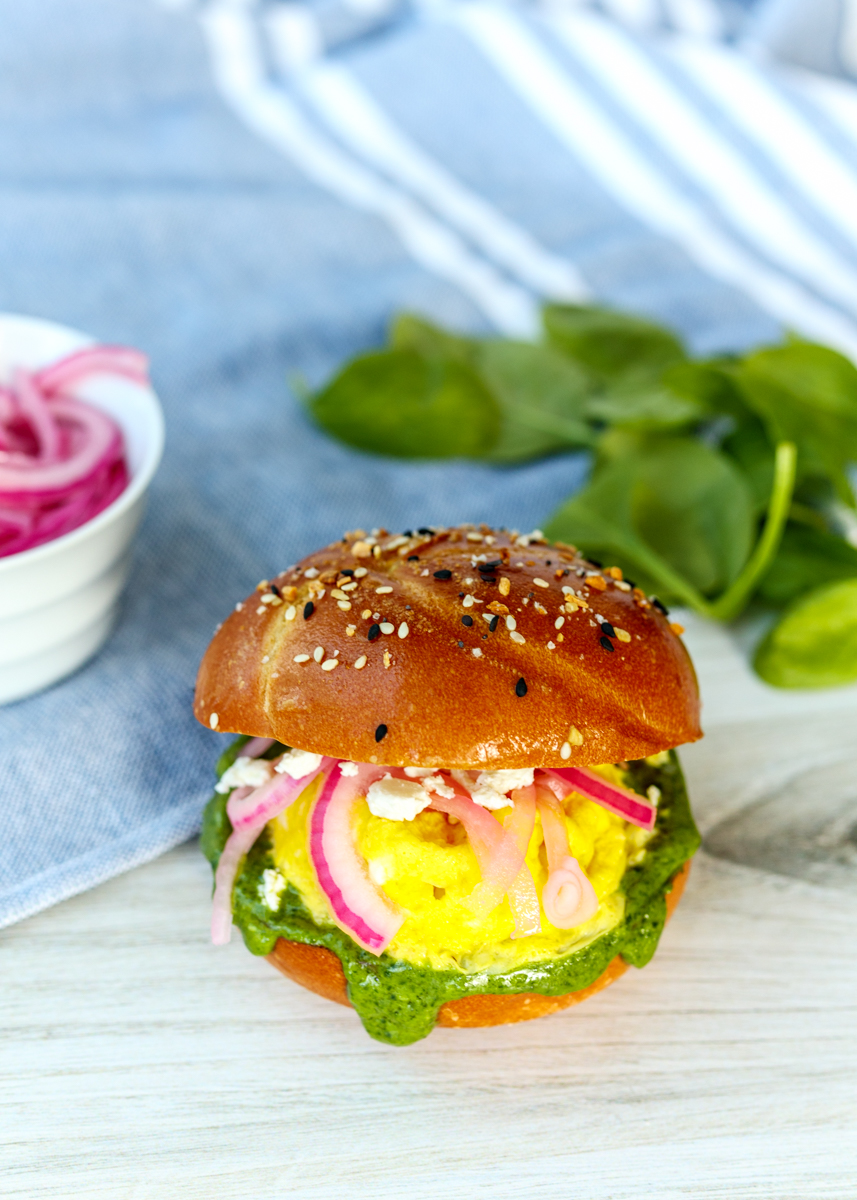
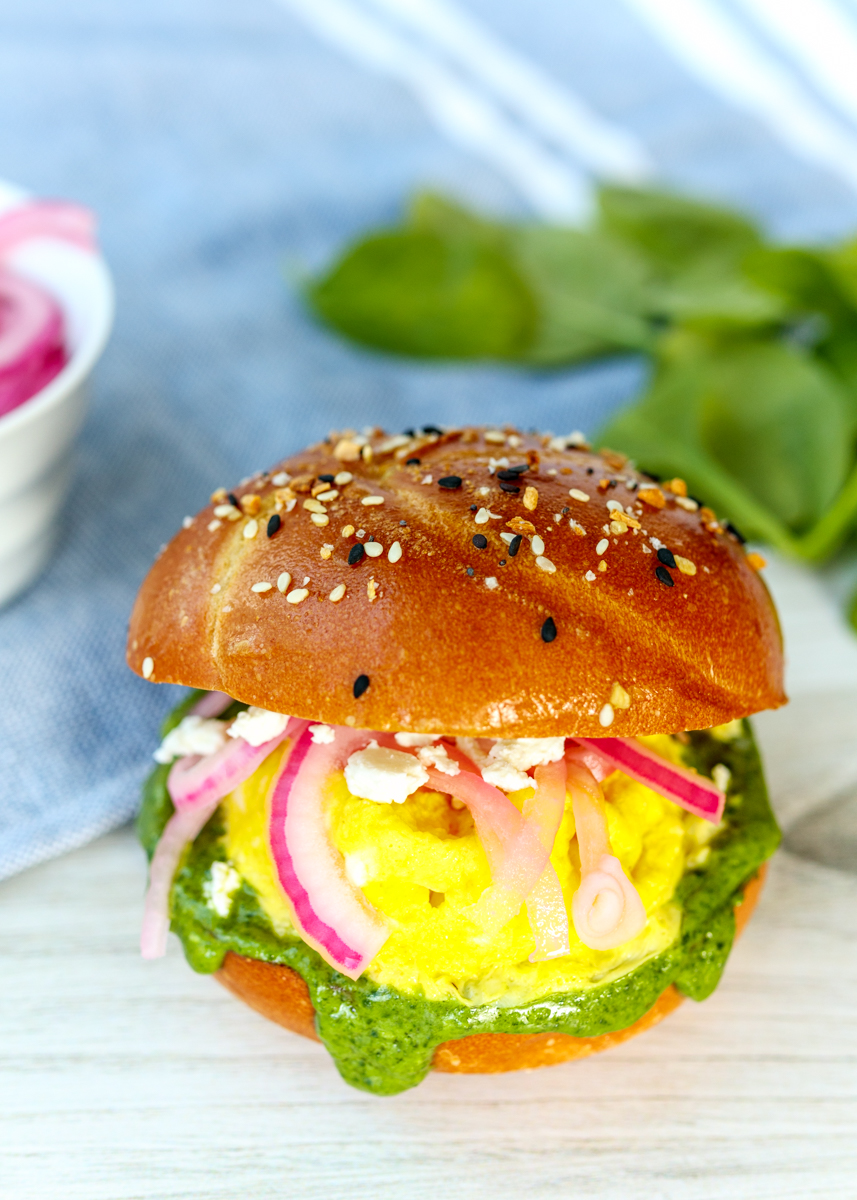
Friends, we have another epic sandwich on our hands and I’m having trouble containing myself yet again. This little breakfast sandwich is savory, creamy, tangy and a whole lot of deliciousness.

Goat Cheese Spinach Pesto Egg Sandwiches  |  Lemon & Mocha

My inspiration for this sandwich came from a little weekday date Matt and I had. There is a cafe near Matt’s office and a couple months ago we had lunch there together. I got this crazy delicious egg sandwich with spinach, pesto, goat cheese and pickled red onions on a buttery roll. I’ve been craving it ever since so I decided to re-create my own.

Goat Cheese Spinach Pesto Egg Sandwiches  |  Lemon & Mocha

Instead of keeping all the components separate I made the pesto with spinach and goat cheese. I’ve made spinach pesto before, but I’ve never used goat cheese in my pesto. Oh my goat cheese heavens! It made the pesto so creamy and gave it the consistency of almost a pesto spread. Which could not be more perfect since it gets spread right onto these toasted kaiser rolls. These are the same rolls from the Barbecue Meatloaf Sandwiches with Caramelized Onions and I used the same egg wash method with everything but the bagel seasoning since I’m channeling breakfast. You really could eat this sandwich for any meal, but I wanted to include some of those breakfast flavors since we’re working with eggs.

Goat Cheese Spinach Pesto Egg Sandwiches  |  Lemon & Mocha

Next, we have the scrambled egg patty. You could scramble your eggs in a pan, but if you cook the egg in a ramekin in the microwave then it will be the perfect shape for egg sandwiches. Finally, after being slathered with goat cheese spinach pesto, it gets topped with some tangy Quick Pickled Red Onions and some additional creamy goat cheese. Yum!

Goat Cheese Spinach Pesto Egg Sandwiches  |  Lemon & Mocha

Okay, back to the goat cheese spinach pesto because I’m still not done talking about it. The recipe below makes more pesto than you will need for the sandwiches, which is amazing because then you can either a) make even more sandwiches with it or b) use it on everything for the next few days. I had the pesto on chicken, mixed in with rice, on turkey sandwiches and stirred into pasta with shrimp. I couldn’t get enough of it and was very sad when we used it all up. I guess that just means I have to make it again soon!

Goat Cheese Spinach Pesto Egg Sandwiches  |  Lemon & Mocha

Goat Cheese Spinach Pesto Egg Sandwiches
 
Yield: 2 sandwiches
Ingredients
  • 4 cups spinach leaves
  • ⅓ cup nuts, see note
  • 1 clove garlic
  • ½ teaspoon salt
  • ½ cup olive oil
  • 1 ounce goat cheese, plus more for topping
  • 2 kaiser rolls
  • 3 eggs
  • Everything but the bagel seasoning
  • Pickled red onions, for topping
  • Cooking spray
Directions
  1. Puree the spinach, nuts, garlic and salt in a food processor. Add the olive oil and continue to pulse until smooth. Add the goat cheese and pulse until smooth. Set aside.
  2. Beat 1 of the eggs in a small bowl then add 1 tablespoon water. Brush the tops of the buns then top with everything but the bagel seasoning. Toast in your toaster oven or oven.
  3. Spray 2 small ramekins or microwave-safe bowls with cooking spray. Beat each of the remaining 2 eggs in their own ramekin and season with salt and pepper. I usually add a splash of milk. Lightly cover and microwave for 1 minute.
  4. To make the sandwiches, spread the bottom of each bun with some of the goat cheese spinach pesto. Carefully remove the egg from the ramekin and place on top along with the pickled red onions and additional goat cheese, if desired.
Notes
You can use whichever type of nut you prefer in pesto; I would recommend toasted pine nuts, almonds or walnuts. Alternatively, you could use 3 tablespoons of pumpkin seed butter instead as that is what I used for this recipe.


Barbecue Meatloaf Sandwiches with Caramelized Onions

Barbecue Meatloaf Sandwiches with Caramelized Onions  |  Lemon & Mocha

Before I dive into these epic meatloaf sandwiches, I forgot to tell you all last week how the February cookbook recipe went! Matt and I made the Angel Hair Frittata from the Half Baked Harvest Cookbook. It was loaded with broccolini, roasted red peppers, sun-dried tomatoes and pesto. The flavor was really good and I think we’ll make it again, but we weren’t one hundred percent sold on the angel hair pasta in it. We love pasta and we wanted to be able to taste it more so since we couldn’t really taste it we might just make it without the pasta next time.

Barbecue Meatloaf Sandwiches with Caramelized Onions  |  Lemon & Mocha

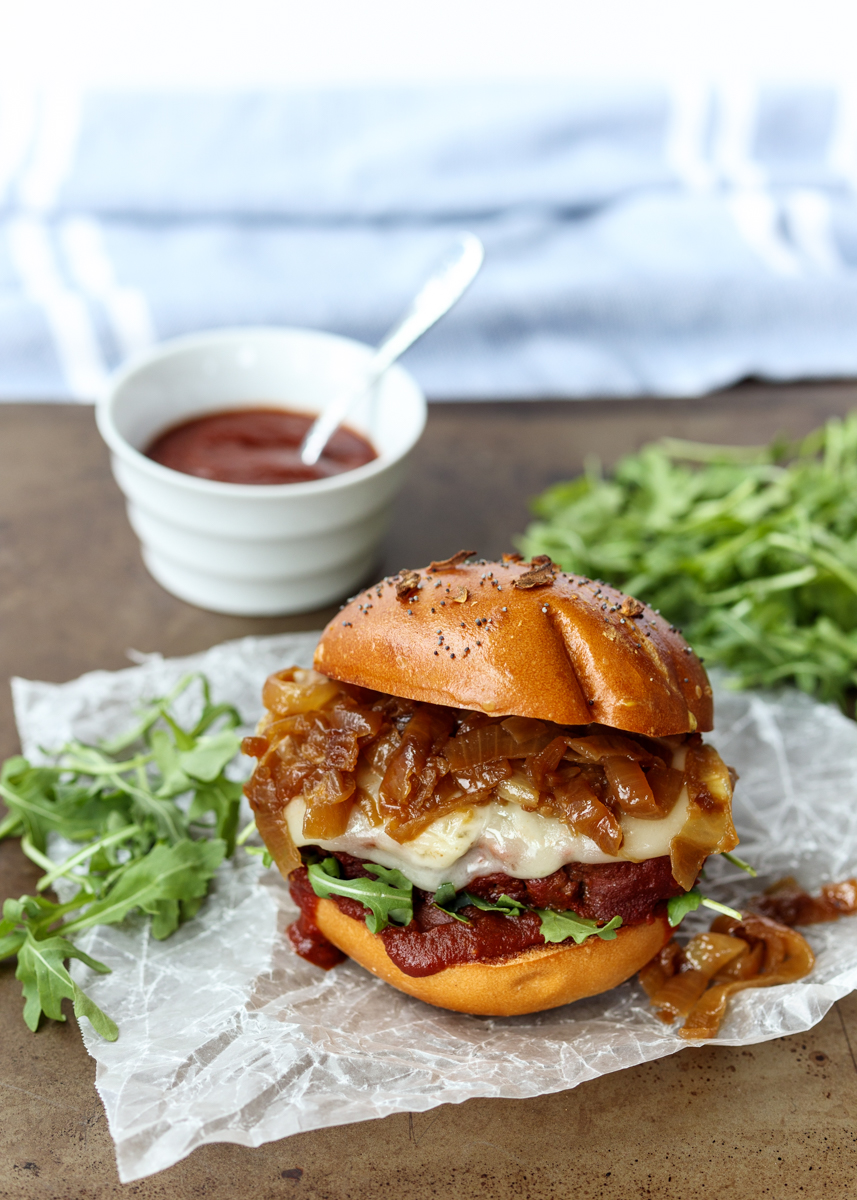
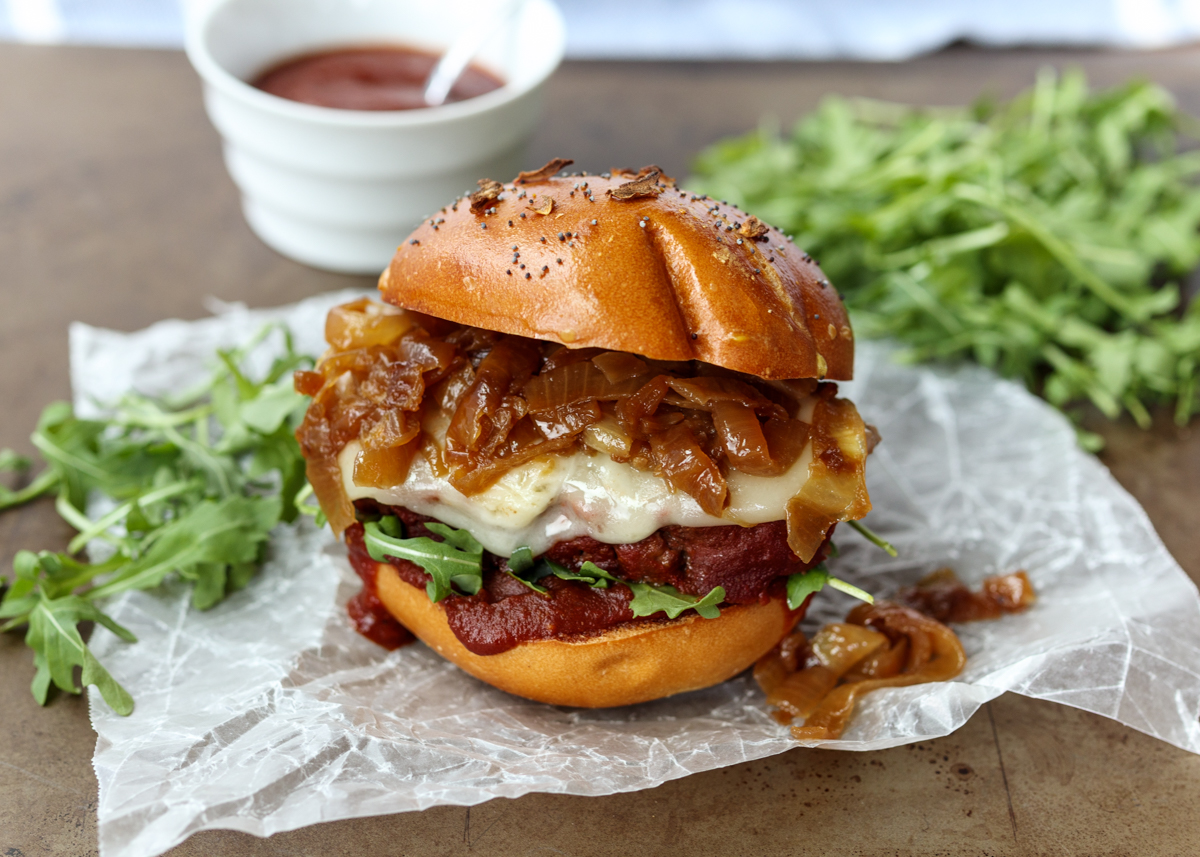
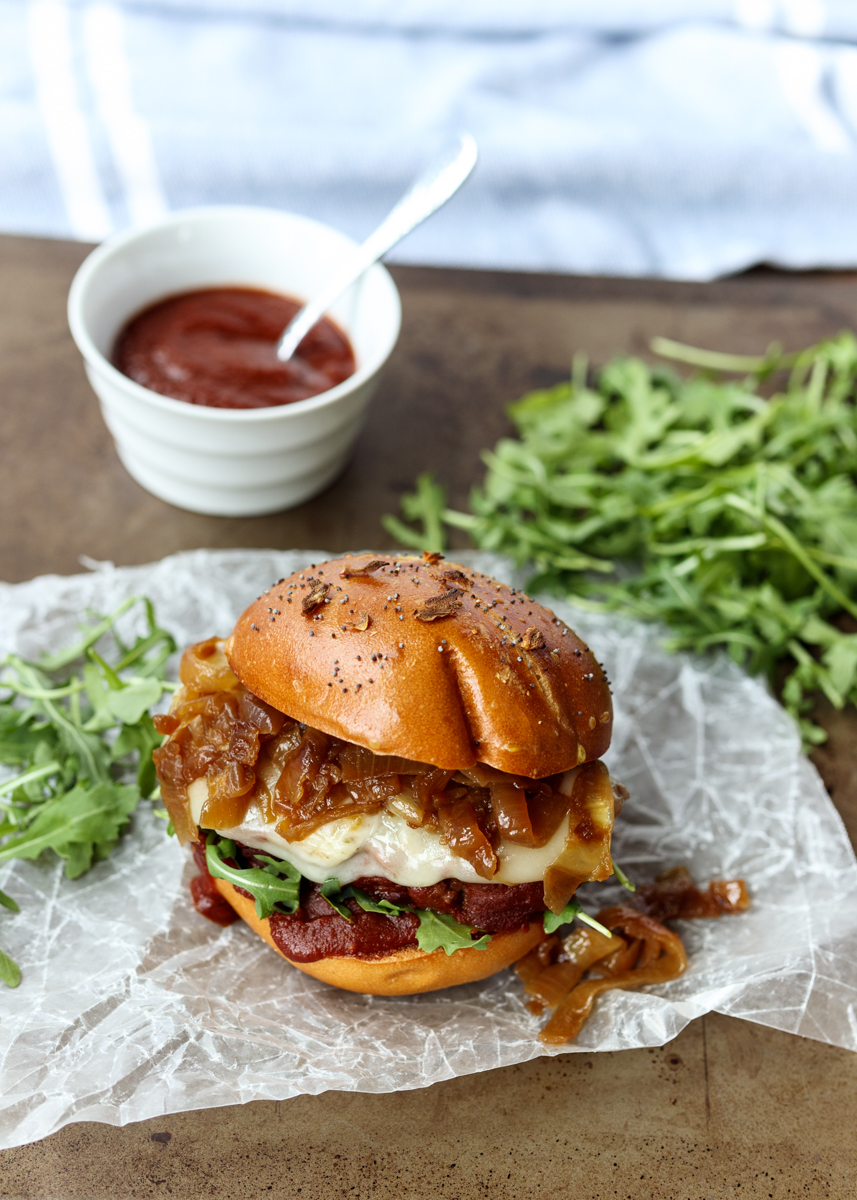
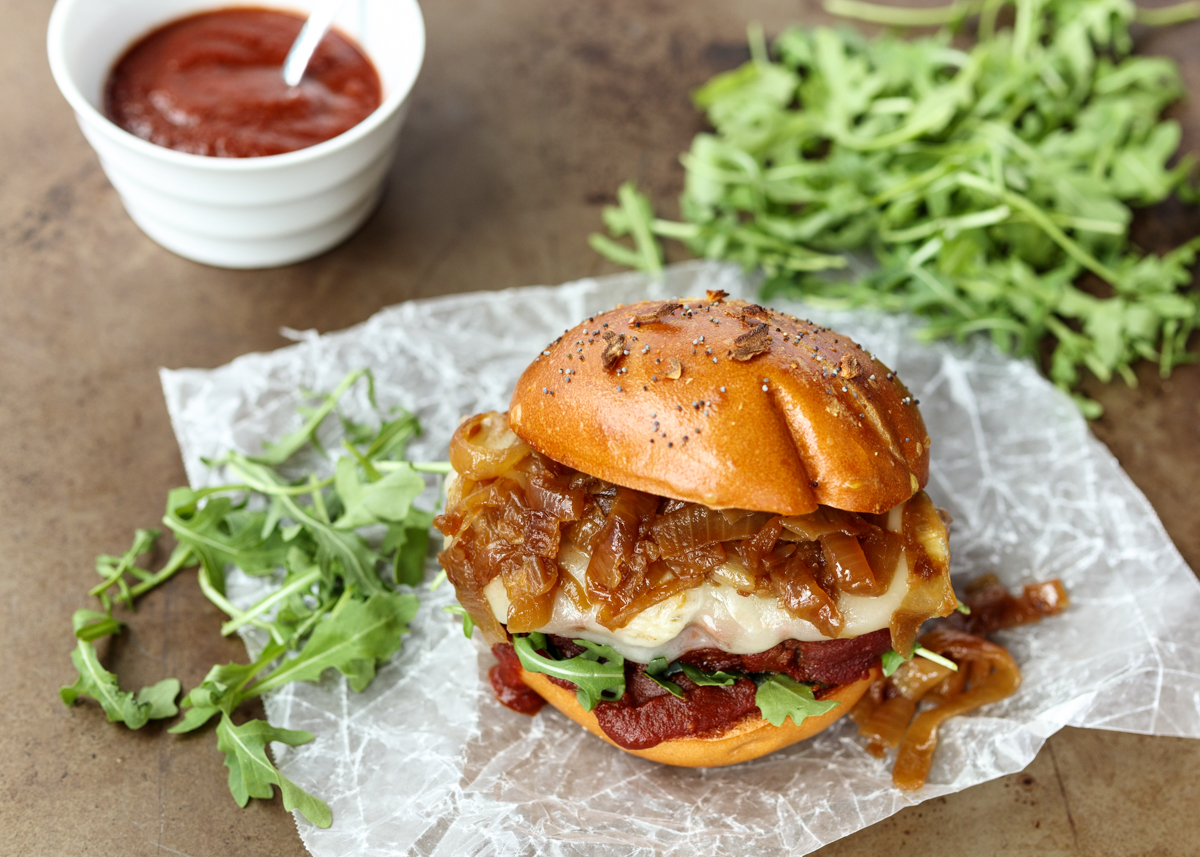
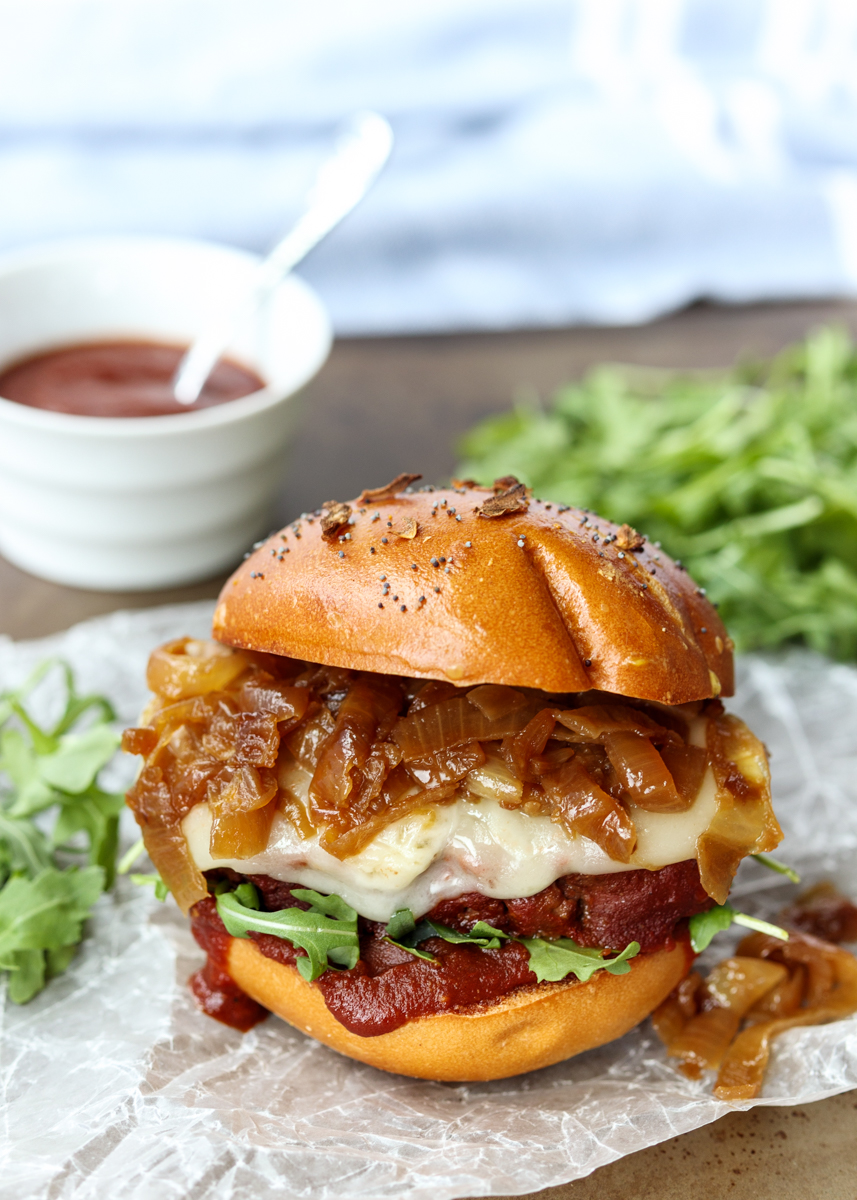
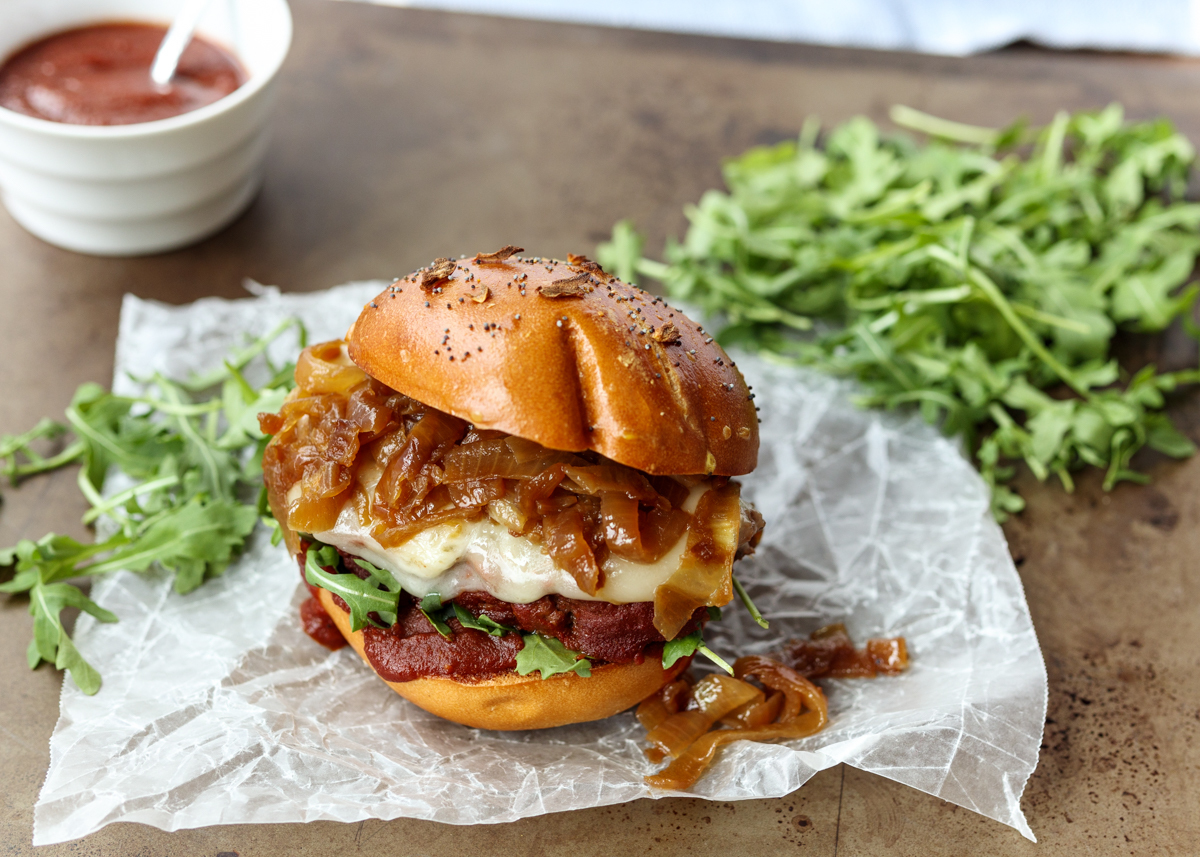
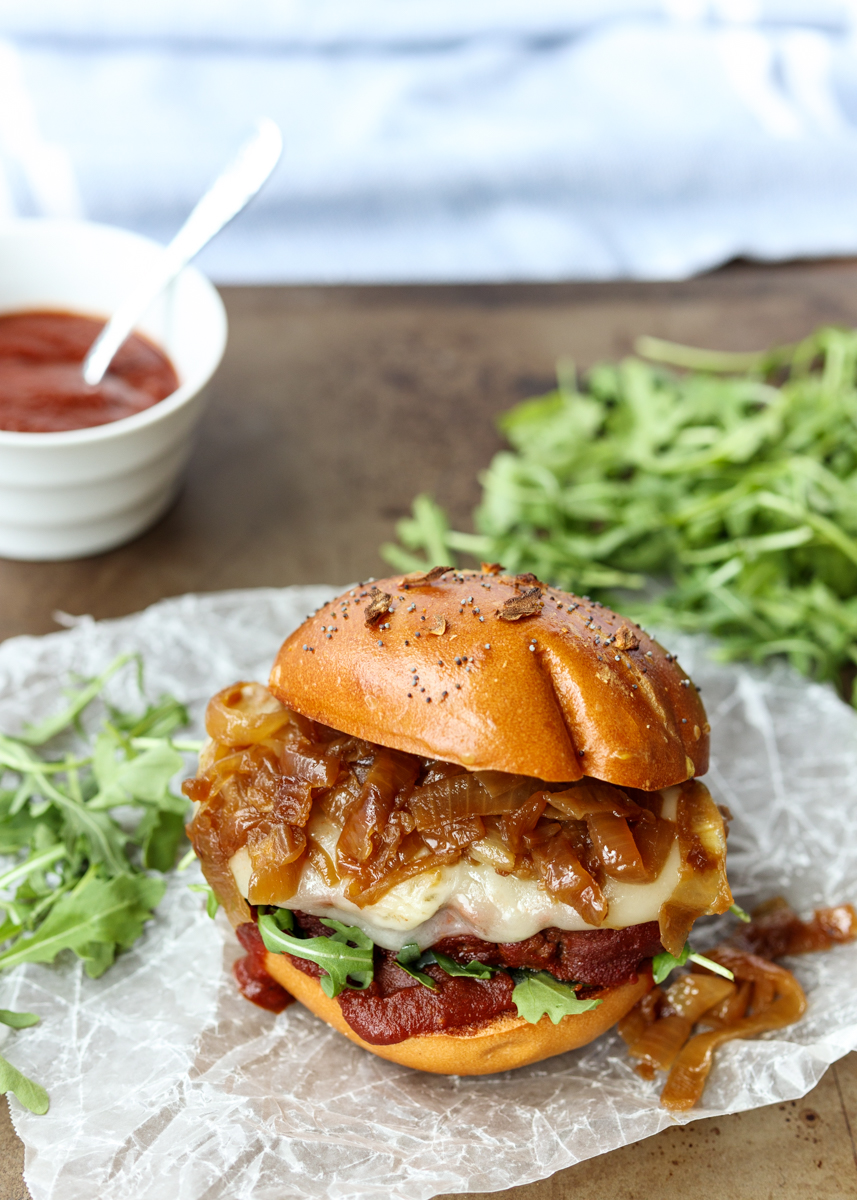
Now, back to these Barbecue Meatloaf Sandwiches with Caramelized Onions. Matt’s birthday is tomorrow so I wanted to make him a special meal last week to celebrate. Yes, a week early because that’s what happens when you’re a food blogger! Matt loves meatloaf and while this meatloaf on its own is amazing I knew I needed to kick it up a notch to make it birthday meal worthy. Enter toasted bun, melted provolone cheese, fresh arugula and rich caramelized onions!

Barbecue Meatloaf Sandwiches with Caramelized Onions  |  Lemon & Mocha

These sandwiches ate like a burger except multiply the tender factor and the flavor level by at least ten. Trust me, it’s a scientific fact. The key to a tender meatloaf is making sure you have enough fat and enough moisture. I used 80% lean ground beef and added moisture with barbecue sauce, an egg, Dijon, and balsamic. To take it even further, I added bread that had been soaked in beef broth. If you add bread crumbs all they will do is take moisture away from the meat.

Barbecue Meatloaf Sandwiches with Caramelized Onions  |  Lemon & Mocha

To get an even richer flavor I added some sautéed mushrooms and onions. Raw veggies are great, but anytime you get a chance to sauté them it really brings out an unbeatable depth of flavor. Finally, cook the meatloaf low and slow freeform on a rimmed baking sheet so that all the barbecue sauce slathered sides get a chance to caramelize. Yum!

Barbecue Meatloaf Sandwiches with Caramelized Onions  |  Lemon & Mocha

Every time I’ve ever made meatloaf I’ve made it slightly differently because I’ve used whatever I have on hand in the fridge and I always add ingredients by feel. If the meatloaf is sticking to the bowl then it needs more liquid ingredients. Now that I finally wrote down a recipe I can recreate it exactly next time Matt says make that really good meatloaf again! I will definitely be making it for these sandwiches again because this has got to be the most ultimate way to eat meatloaf for dinner.

Barbecue Meatloaf Sandwiches with Caramelized Onions  |  Lemon & Mocha

Also, I normally dread taking photographs of burgers and sandwiches because they’re really hard to make look appetizing, but I’m so excited with how my photos came out and they’re really doing justice to these epic sandwiches! Enjoy!

Barbecue Meatloaf Sandwiches with Caramelized Onions  |  Lemon & Mocha

Barbecue Meatloaf Sandwiches with Caramelized Onions
 
Yield: 10 sandwiches
Ingredients
for the meatloaf
  • 1 tablespoon olive oil
  • ½ small onion, small diced
  • 4 ounces sliced cremini mushrooms, roughly chopped
  • Salt, pepper and Italian seasoning
  • 1 egg
  • 1 slice bread (I used potato bread), torn into pieces
  • ½ cup beef broth
  • 1 cup barbecue sauce, divided
  • 1 tablespoon balsamic vinegar
  • 1 tablespoon Dijon mustard
  • 1 teaspoon garlic powder
  • ½ teaspoon salt
  • ¼ teaspoon ground black pepper
  • 2 pounds 80% lean ground beef
for the sandwiches
  • 4 medium onions, halved then sliced
  • 1 tablespoon plus 1 teaspoon olive oil
  • Salt
  • 10 kaiser or brioche buns, cut in half
  • 10 slices provolone cheese
  • Arugula, for topping
  • Barbecue sauce, for topping
Directions
for the meatloaf
  1. Preheat oven to 325 degrees F. Line a rimmed baking sheet with nonstick aluminum foil and set aside.
  2. Heat the olive oil in a medium skillet over medium-high heat. Add the onions and mushrooms then season with salt, pepper and Italian seasoning. Cook until tender and slightly caramelized, about 7 minutes. Remove from the heat.
  3. Beat the egg in a large mixing bowl. Soak the bread pieces in the beef broth for a few minutes then add the soaked bread pieces to the mixing bowl; they will be really mushy. Add ½ cup barbecue sauce, balsamic vinegar, Dijon, garlic powder, salt and black pepper. Add the sautéed onions and mushrooms then mix everything together. Add the ground beef then use your hands to incorporate everything together, being sure not to over-mix (see note). It will come together more on the baking sheet. Scoop the meatloaf mixture onto the prepared baking sheet and form it into a long log, making it roughly the width of your kaiser buns, a couple inches high and then however long it needs to be. Mine was about 12-inches long. Cover the outside of the meatloaf completely with the remaining ½ cup of barbecue sauce.
  4. Bake until it reaches an internal temperature of 165 degrees F, about 1 hour and 5-10 minutes. Let it rest for a couple minutes before taking the temperature of the meatloaf. Once it’s 165 degrees F, let rest for 10 minutes before slicing.
for the sandwiches
  1. Caramelize the onions. Heat the oil in a large saucepan over medium-low heat. Add the onion slices then toss to coat. Season with salt. Cook the onions, stirring every few minutes for 35-40 minutes. Towards the last 20 minutes if they start getting burnt in spots add a little more water (no more than a tablespoon at a time). If you want them really caramelized, you can continue cooking for an additional 10 minutes, but you will want to stir very frequently to make sure they don’t burn. Remove from the heat when done.
  2. Toast the buns. If desired, brush the tops of the buns with an egg wash (1 beaten egg with 1 tablespoon water) then top with poppy seeds and dried onion flakes before toasting.
  3. Melt the provolone over the meatloaf slices then place on the toasted burger buns along with some caramelized onions, arugula and barbecue sauce.
Notes
I recommend using one of the following methods to help keep the meatloaf mixture from sticking to your hands (because you’re able to better incorporate everything without over-mixing if you use your hands): coating your hands with cold water, lightly coating your hands with olive oil or using disposable gloves.

Some of the links above are affiliate links, which means I may receive a small commission for my referral if you purchase something. This does not affect the retail cost of the item. Thank you for supporting Lemon & Mocha!

Leftover Turkey Pull-apart Sliders with a Maple Mayo and Cranberry Barbecue Sauce

Leftover Turkey Pull-apart Sliders with a Maple Mayo and Cranberry Barbecue Sauce  |  Lemon & Mocha

Hi everyone! Matt and I got back from our Japan vacation early Sunday morning. I’m a few days behind, but I’m finally checking in with you all! We had an amazing time – the sites were unreal and the food was beyond delicious! I am planning to eventually put together a food guide so I’m looking forward to sharing more of our trip with you all. In the meantime, I’m going to be posting a few pictures on Instagram over the next few weeks so make sure you’re following me! Now, let’s dive into today’s recipe in preparation for the day after Thanksgiving.

Leftover Turkey Pull-apart Sliders with a Maple Mayo and Cranberry Barbecue Sauce  |  Lemon & Mocha

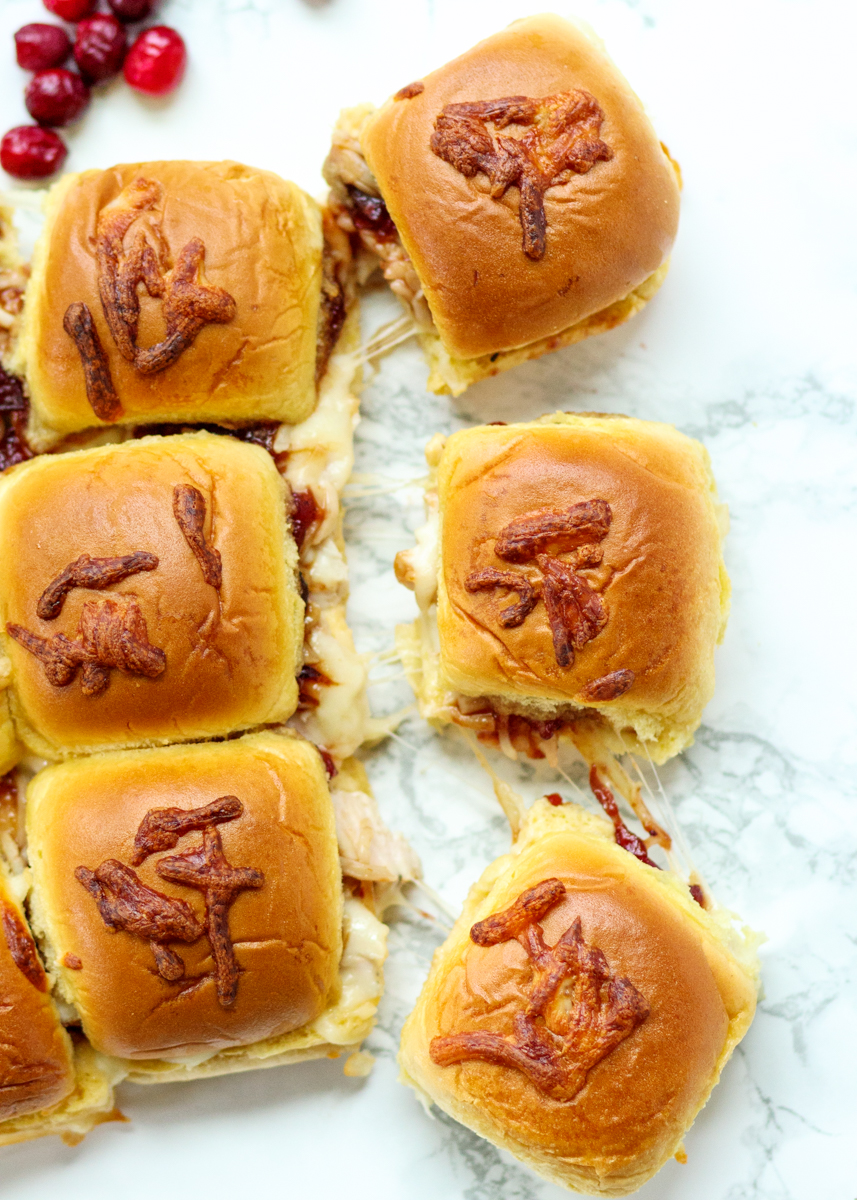
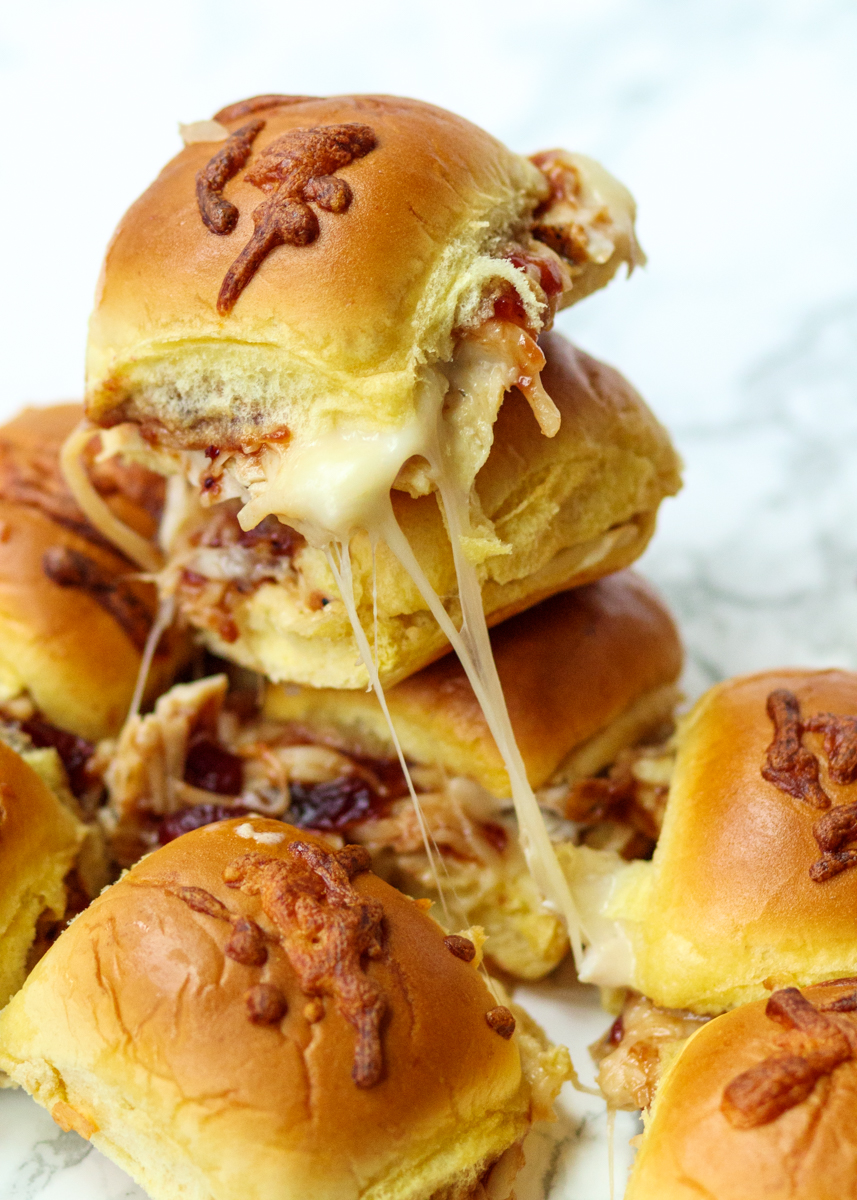
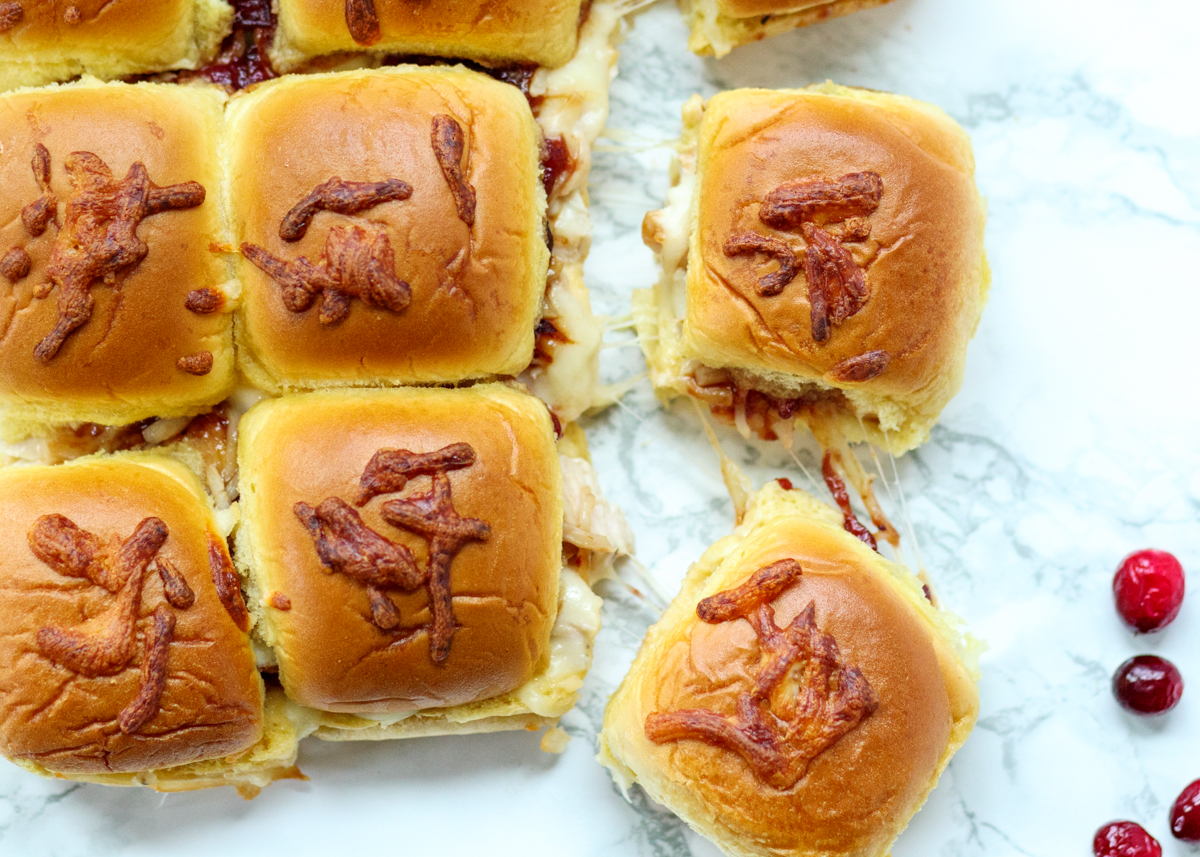
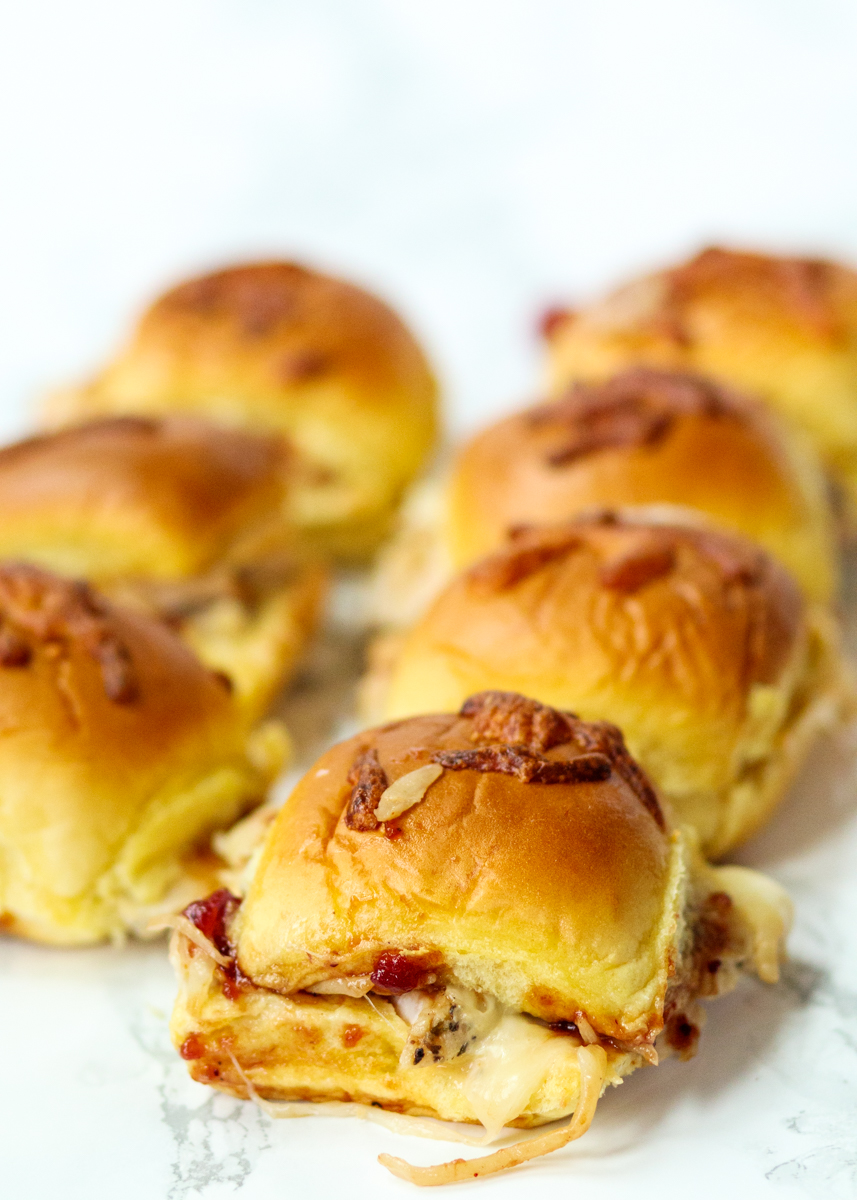
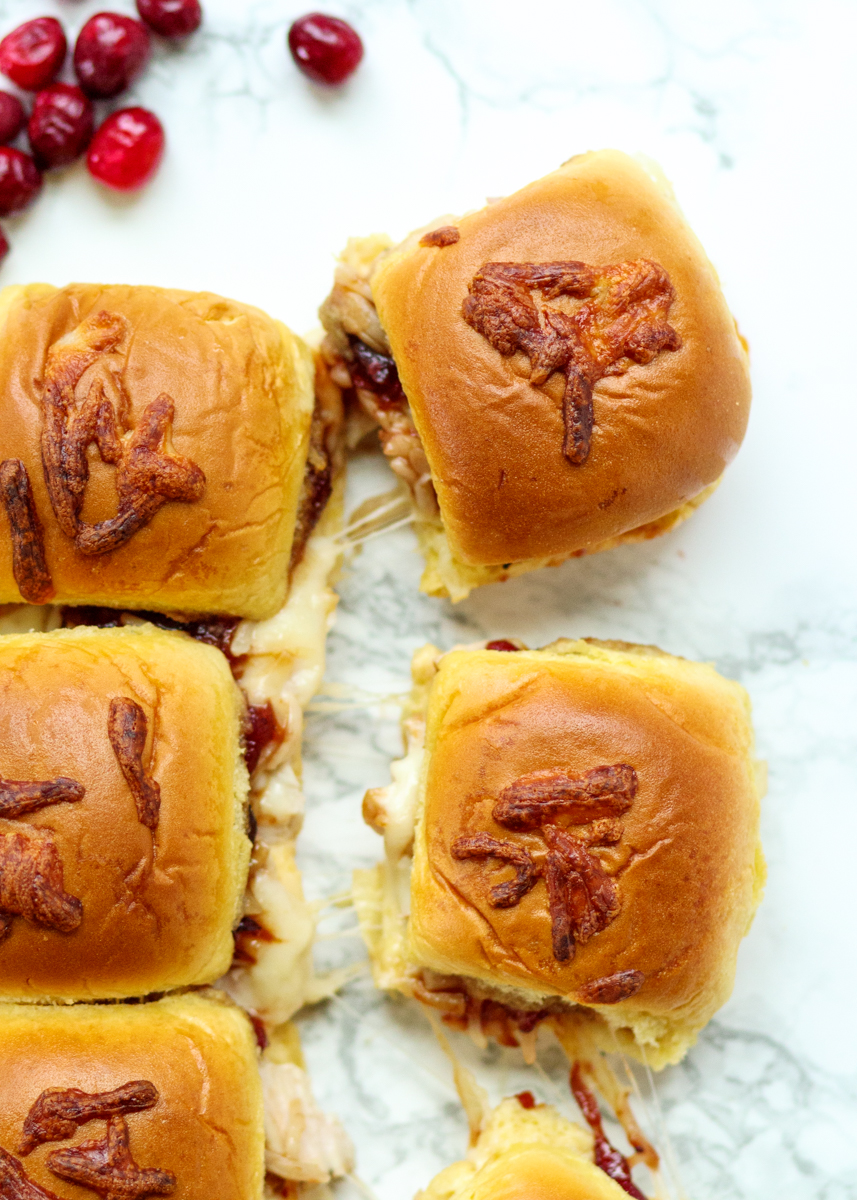
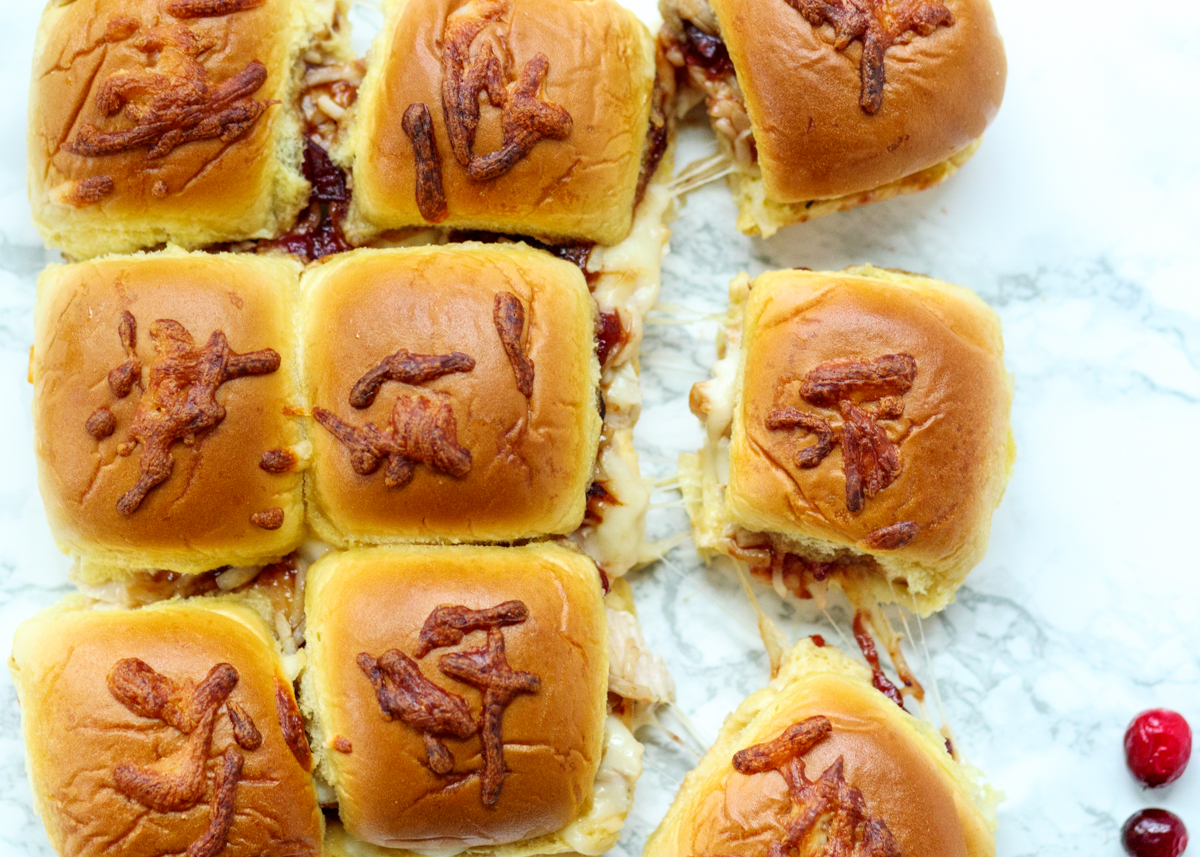
These, my friends, are Leftover Turkey Pull-apart Sliders with a Maple Mayo and Cranberry Barbecue Sauce. Fluffy potato rolls are stuffed with leftover turkey, tangy cranberry barbecue sauce, a quick maple mayo and gooey cheese. You bake them in the oven so the tops get golden with just a bit of crispy cheese on top. I may have made these sliders with Thanksgiving in mind, but they would also be perfect for tailgating, Super Bowl parties or an everyday Friday night.

Leftover Turkey Pull-apart Sliders with a Maple Mayo and Cranberry Barbecue Sauce  |  Lemon & Mocha

Have you made pull-apart sliders before? They are one of my favorite ways to serve an easy, casual meal. You cut a set of rolls open and lay them flat in a baking pan. Then you add your toppings like it is one big piece of bread before adding the top half of the roll set. They get baked away and then it’s time to eat! I usually let them cool for a minute then cut them in the pan so the sliders are easier to actually pull-apart without the filling getting yanked out every time someone grabs one.

Leftover Turkey Pull-apart Sliders with a Maple Mayo and Cranberry Barbecue Sauce  |  Lemon & Mocha

These are designed to use up you leftover Thanksgiving turkey and cranberry sauce since having those two dishes meal after meal can get a little boring. Gooey, cheesy sliders are definitely not boring and the sweetness of the maple mayo with the tanginess of the cranberry sauce balances perfectly. You can really use any kind of rolls for these, but I love potato rolls since they are so buttery and fluffy. I was only going to eat one or two of these sliders, but I couldn’t help gobbling them up with Matt over the next couple days.

Leftover Turkey Pull-apart Sliders with a Maple Mayo and Cranberry Barbecue Sauce  |  Lemon & Mocha

I hope you enjoy these sliders! What Thanksgiving leftovers are you looking forward to the most?

Leftover Turkey Pull-apart Sliders with a Maple Mayo and Cranberry Barbecue Sauce  |  Lemon & Mocha

Leftover Turkey Pull-apart Sliders with a Maple Mayo and Cranberry Barbecue Sauce
 
Yield: 9 sliders
Ingredients
  • 2 tablespoons mayonnaise
  • 1 teaspoon maple syrup
  • 2 tablespoons barbecue sauce
  • 2 tablespoons cranberry sauce
  • 9 dinner rolls, cut in half
  • 1½ cups roasted turkey pieces
  • ¾ cup shredded mozzarella, plus more for topping
  • 1 tablespoon butter
Directions
  1. Preheat the oven to 350 degrees F.
  2. In a small bowl, combine the mayonnaise and maple syrup. Set aside.
  3. In another small bowl, combine the barbecue sauce and cranberry sauce. Set aside.
  4. Place the bottom halves of the dinner rolls into an 8 x 8” square baking pan. Evenly spread on the maple mayo. Top with the turkey pieces, then the shredded mozzarella. Spoon the cranberry barbecue sauce over top. Put the top half of the rolls on.
  5. Melt the butter. Spread the butter over the tops of the rolls then sprinkle some extra shredded mozzarella on top. Bake in the oven for 15 minutes, or until the tops are golden brown and the cheese is melted.