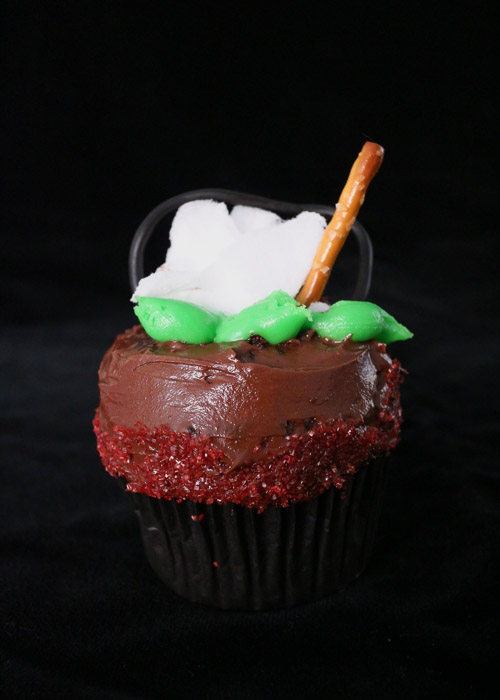
Halloween Witch Chocolate Cupcakes
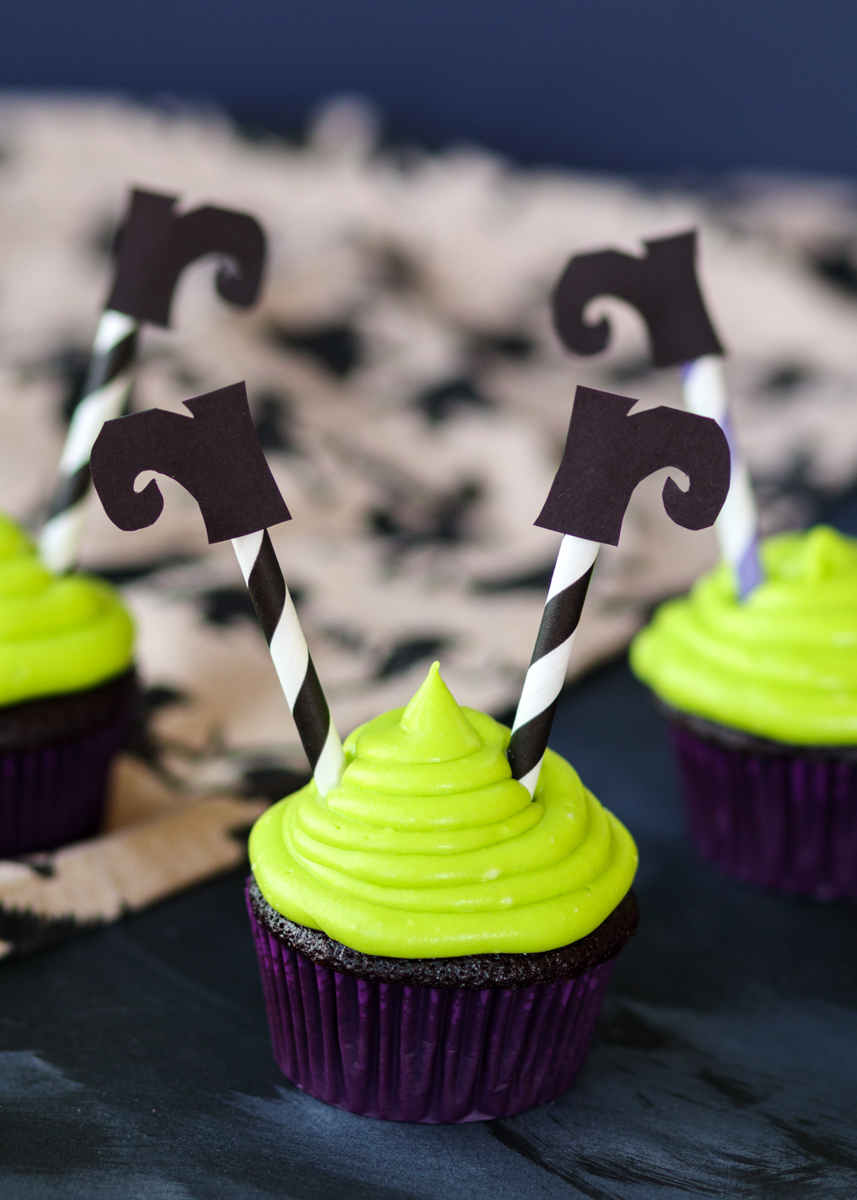
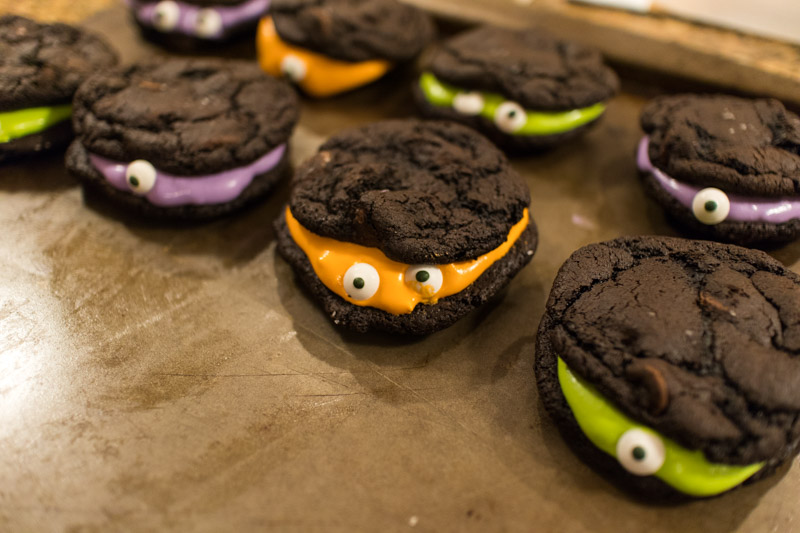
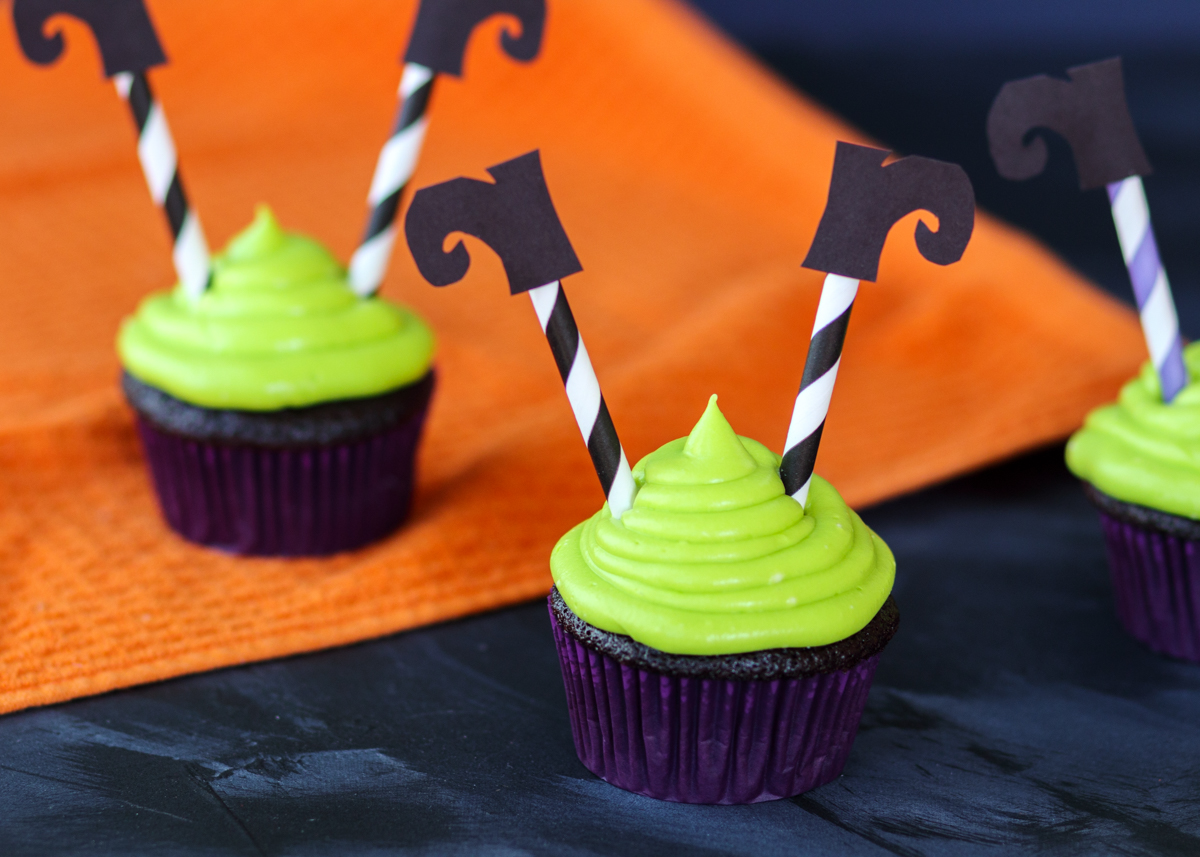
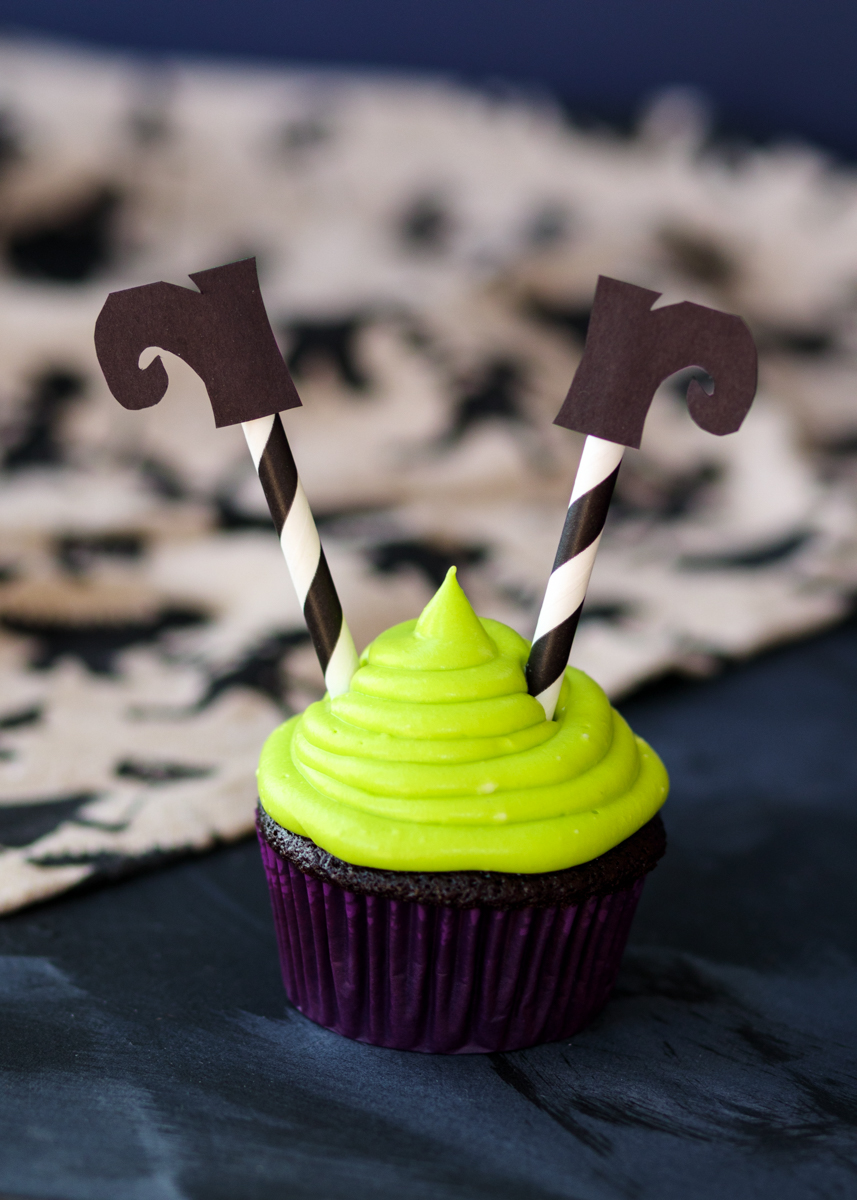
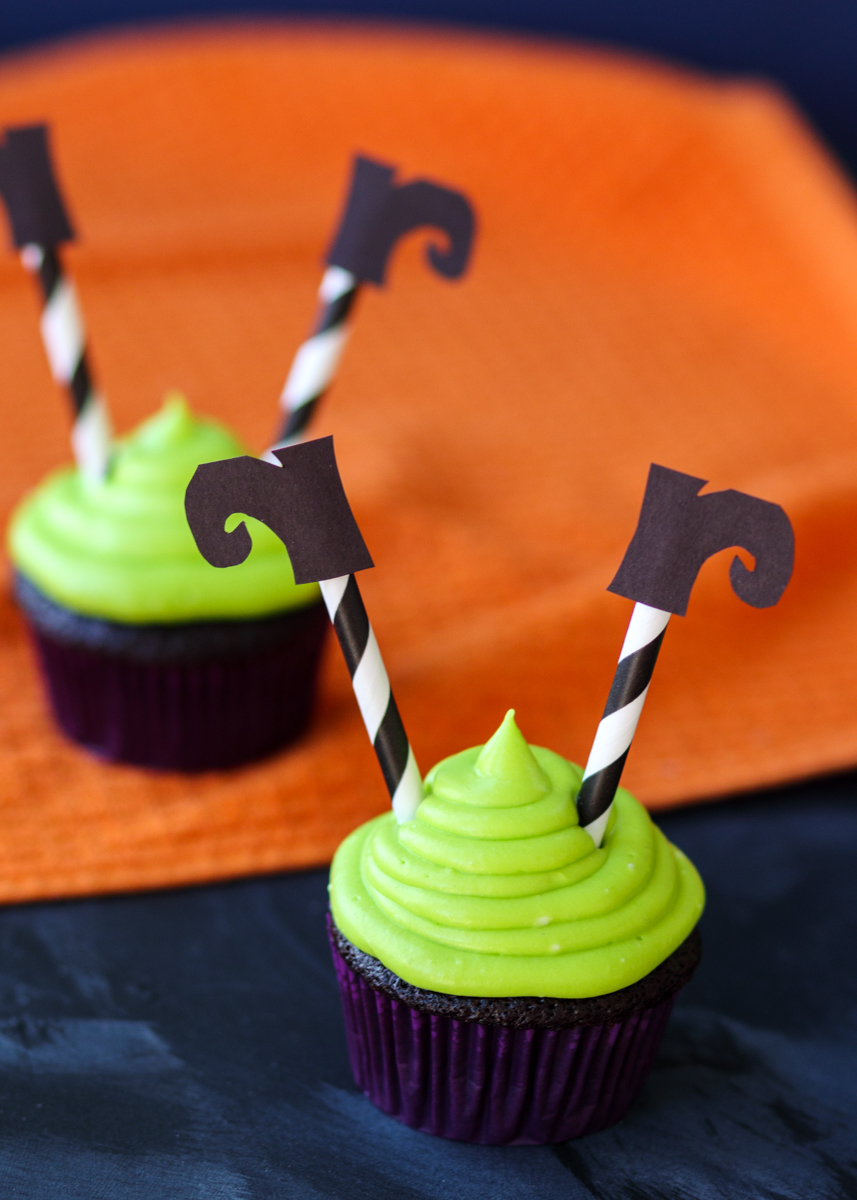
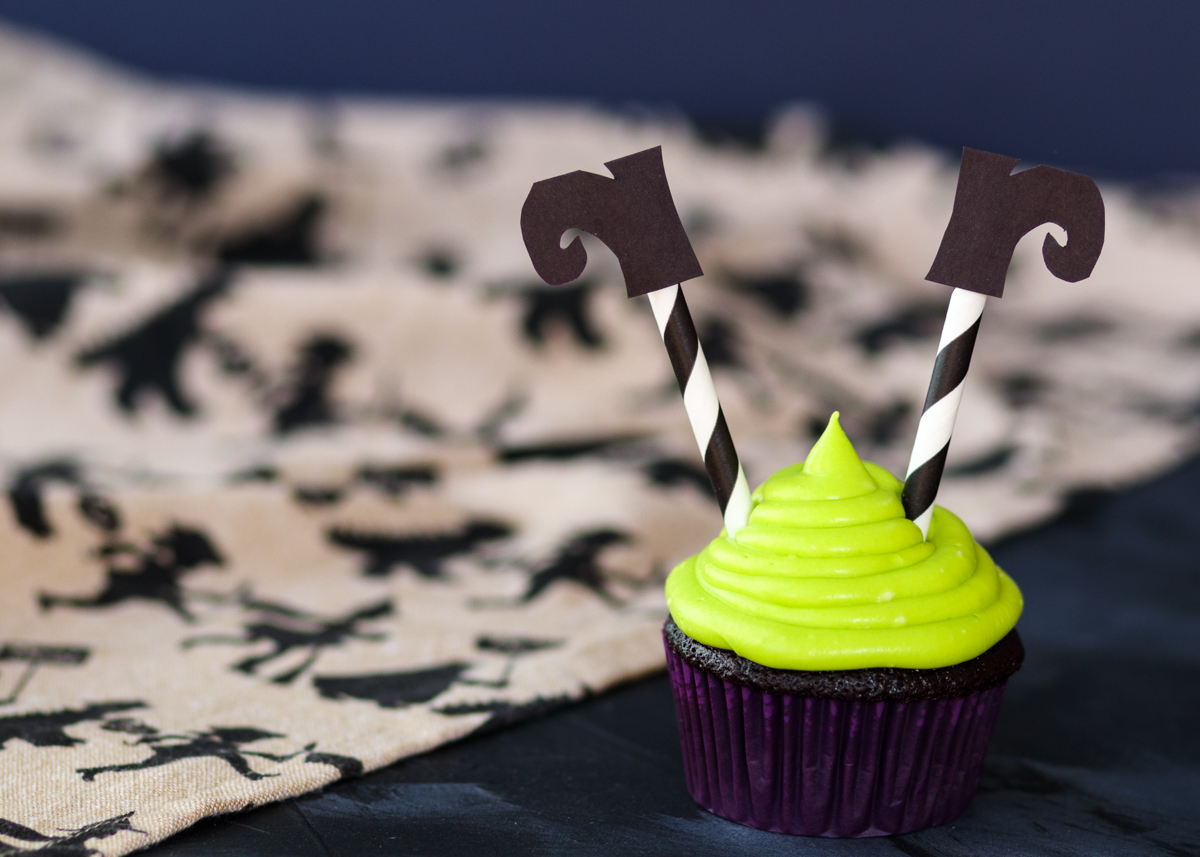
Halloween is next week! I love Halloween and I’m so excited to be sharing another festive Halloween treat with you. Last year I shared the Chocolate Marshmallow Monster Cookie Sandwiches and before that there were some Halloween Witches’ Cauldron Cupcakes. This year, we have Halloween Witch Chocolate Cupcakes. Notice a theme? I’m clearly a chocoholic! These are moist chocolate cupcakes with a cream cheese frosting and easy DIY witch leg cupcake toppers. I saw these all over Pinterest and decided they were too cute not to make. I’ve added a link to download a handy free printable I made for you all to the bottom of this post so all you’ll have to do is print and cut out the little witch boots.
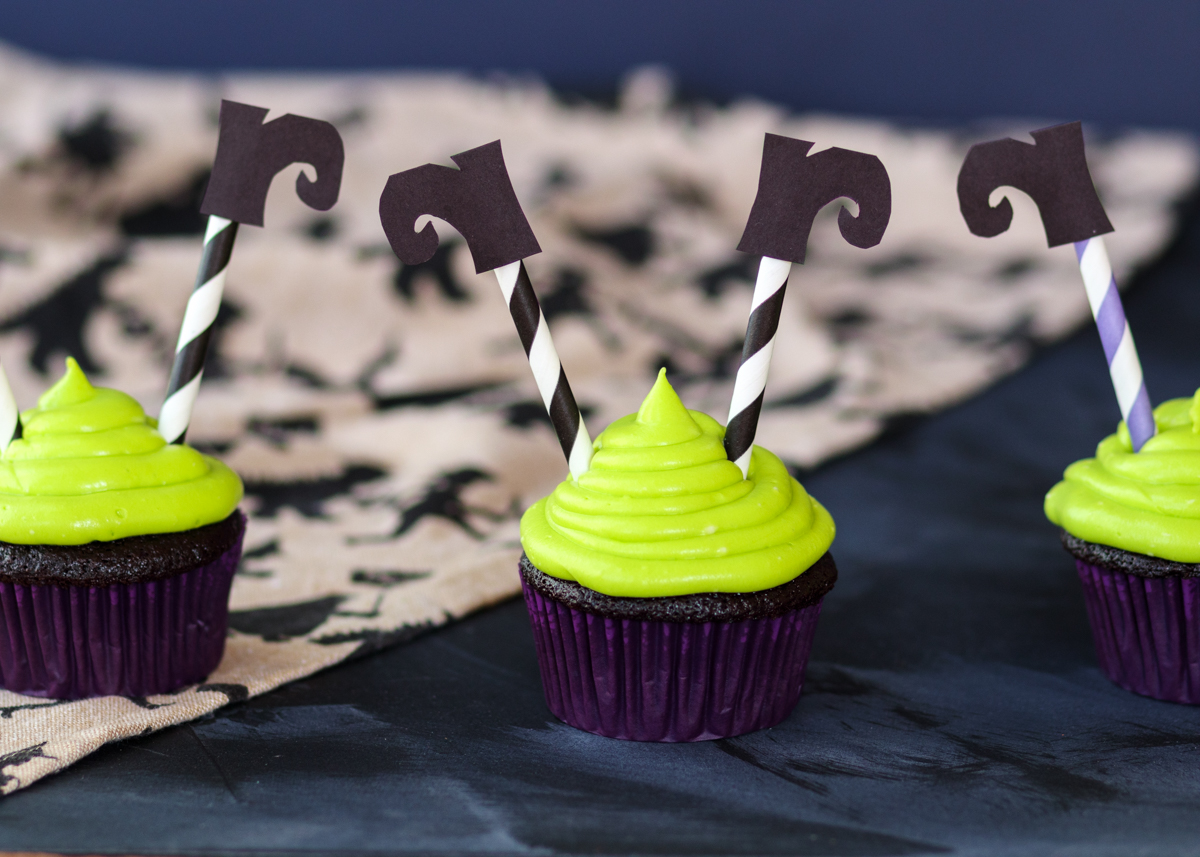
The cupcakes are my Perfect Chocolate Cupcakes and they really are the best chocolate cupcakes. I topped them with a neon green cream cheese frosting that’s not too sweet before adding the witch leg toppers. I’ve linked to the supplies I used below as well.
When I was growing up, my brother and I loved making haunted houses. If our family was having a party with family friends we would set up the haunted house in the basement. When we got older and no longer went trick-or-treating, my brother and I set up the haunted house in our garage so the trick-or-treaters could walk through it. We would go all out with the decorations and everyone in the family had a role, whether you were supposed to hide under a table and grab people’s legs as they walked by (usually me) or whether you were dressed up like a zombie (usually my brother). My brother was the creative one and my favorite design element was always the soundtrack tapes he would make. One year without my Dad knowing, my brother recorded my Dad bench pressing weights. My Dad’s grunting and the clanking of the metal weights made the best spooky sounds!
The funny part about all this is that I hate being scared. I don’t like going in haunted houses, going on spooky hay rides or watching scary movies. There is a haunted house ride at the boardwalk where we have our family beach week every summer and my cousin, who is six years younger than me, would try to reassure me during the ride and tell me to open my eyes! Apparently I love everything about haunted houses, except actually going in them! Do you love haunted houses or are they not your thing?
Matt and I are doing something a little different this year for Halloween – we will be flying to Tokyo, Japan! I’m so excited! Japan has been on our travel bucket list so we are heading to Tokyo, Osaka and Kyoto. Don’t worry; I have plenty of posts scheduled while we’re away, but my access to internet and email will be limited so I may not respond to comments or emails until I return. In the meantime, I have some cozy dinner recipes coming for you this week so stay tuned!
Printables
Option 1: Print out a pair of witch boots and cut them out. Trace the pair of witch boots onto black construction paper, one pair traced for each cupcake, then cut out the pairs of witch boots. Get that printable here. The boots I made for these photos were made using black construction paper.
Option 2: Print out solid black witch boots with black ink from your printer. Cut them out. Get that printable here (print two copies).
Supplies Used:
Paper straws
Neon gel food dye
Cupcake liners
Round piping tip
- 24 paper straws
- 24 sets of witch boots, using printable and either black printer ink or black construction paper
- Tape
- 2 cups granulated sugar
- 1¾ cups all-purpose flour
- ¾ cup cocoa powder
- 1½ teaspoons baking powder
- 1 teaspoon baking soda
- 1 teaspoon salt
- 2 large eggs
- 1 cup buttermilk, see note
- ¼ cup butter, melted
- ¼ cup vegetable oil
- 1 tablespoon vanilla extract
- 1 cup hot coffee, see note
- 12 ounces cream cheese, room temperature
- 12 tablespoons butter, room temperature
- 6 cups powdered sugar, sifted
- 1½ teaspoons vanilla extract
- Neon gel food dye
- Cut the straws in half.
- Cut out the witch boots. Use a small piece of tape that’s been rolled up to stick each boot to a straw half. Make sure the straw is coming out of the ankle of the boot. Make sure you have a left and right boot pointing out in opposite directions for each cupcake.
- Preheat the oven to 350 degrees F. Line two cupcake pans with cupcake liners so you have enough for 24 cupcakes.
- In a large mixing bowl or in the bowl of a stand mixer, sift together the sugar, flour, cocoa powder, baking powder, baking soda and salt.
- In a medium mixing bowl, whisk together the eggs, buttermilk, melted butter, vegetable oil and vanilla extract. Pour the liquid ingredients into the dry ingredients and mix together until smooth.
- Pour the hot coffee into the batter and stir until combined. The batter will be extremely liquidy. Divide the batter between the 24 cupcake liners, filling them slightly more than half full. Bake for 18-20 minutes, or until a toothpick inserted in the center comes back mostly clean. Alternatively, they are done when you gently press your finger on the center of a cupcake and it lightly springs back. I find mine to be done at exactly 19 minutes.
- Let cool in the pan for a couple minutes then remove to a wire cooling rack to cool completely before frosting.
- In the bowl of a stand mixer or in a large mixing bowl with a hand mixer, beat together the cream cheese and butter until fluffy, scraping down the sides as needed. Slowly beat in the powdered sugar and vanilla extract until combined. Add the food dye and mix, continue to add until the desired color is achieved.
- Pipe onto the cooled cupcakes and stick a pair of witch legs into each cupcake. Frosted cupcakes require refrigeration since cream cheese frosting has to be refrigerated. You may want to wait to put the toppers in until you are ready to serve them in case they get soggy or the coloring on the straw runs.
If you don’t want to use coffee you can use hot water, but the flavor of the chocolate won’t be as pronounced. You can use decaffeinated coffee if you prefer.
The cupcakes, unfrosted, freeze very well if you want to make them ahead of time.
Some of the links above are affiliate links, which means I may receive a small commission for my referral. This does not affect the retail cost of the item. Thank you for supporting Lemon & Mocha!