Dessert

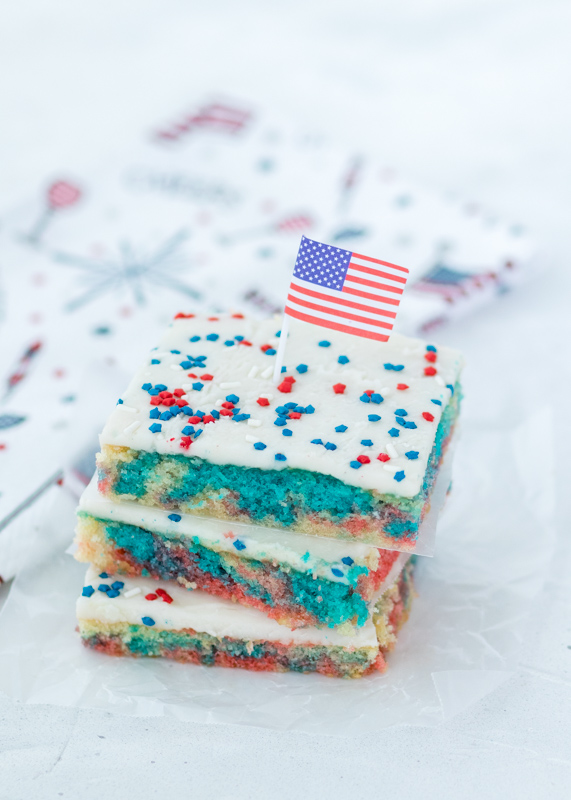
4th of July Tie-Dye White Texas Sheet Cake
4th of July Tie-Dye White Texas Sheet Cake

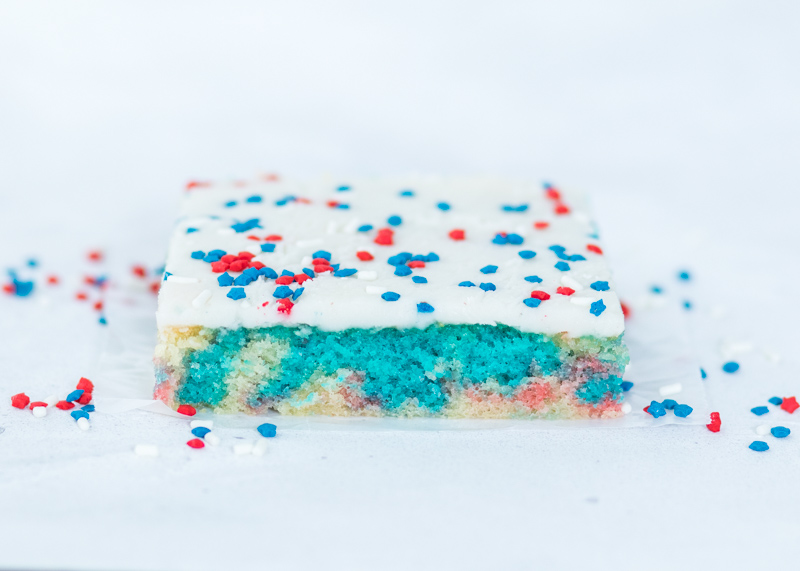
I’m back with my annual 4th of July red, white and blue dessert! This year I decided to switch it up. As much as I love berries, they can get expensive, especially if you are cooking for a crowd. Also, berry desserts can sometimes be tricky to make ahead. Instead, I made a tie-dye white Texas sheet cake loaded with red, white and blue batter and tons of festive sprinkles.
4th of July Tie-Dye White Texas Sheet Cake

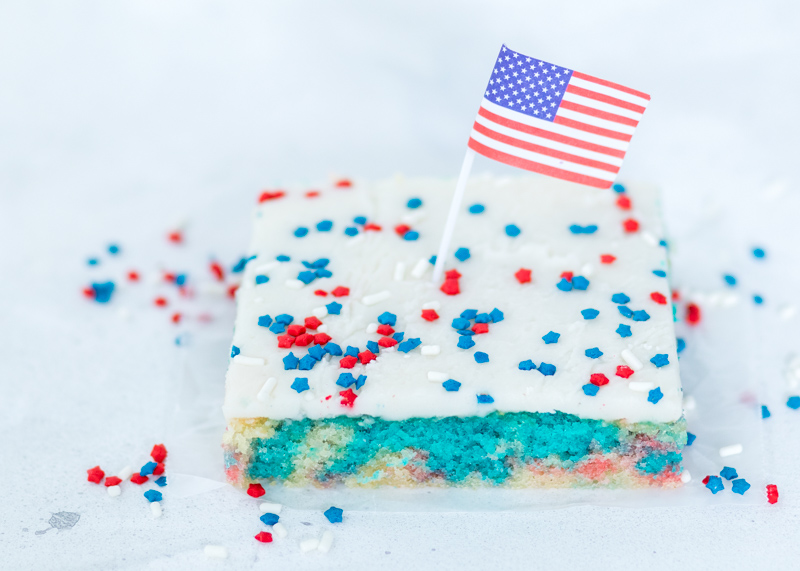
I’m surprised I’ve kept it together this far into my post because I am SO EXCITED about this cake! I will try to explain to you how buttery and moist this vanilla cake is, but I know I won’t be able to do it justice. It tastes like funfetti box mix cakes, but with no box mix involved. Check out the photos and look at those big crumbs! Yum!
4th of July Tie-Dye White Texas Sheet Cake

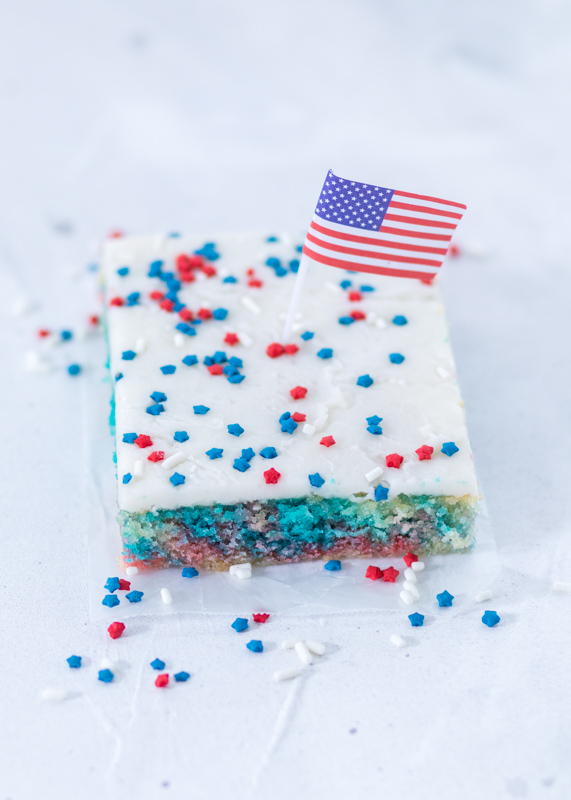
The vanilla icing slightly hardens on top and the thin layer of icing creates the perfect frosting to cake ratio since the cake is also very thin. The thin layer of icing is also good because it is definitely sweet. This cake is for all the butter and sugar lovers out there! Any baked good is dangerous around me, but this sheet cake was especially addictive.
4th of July Tie-Dye White Texas Sheet Cake

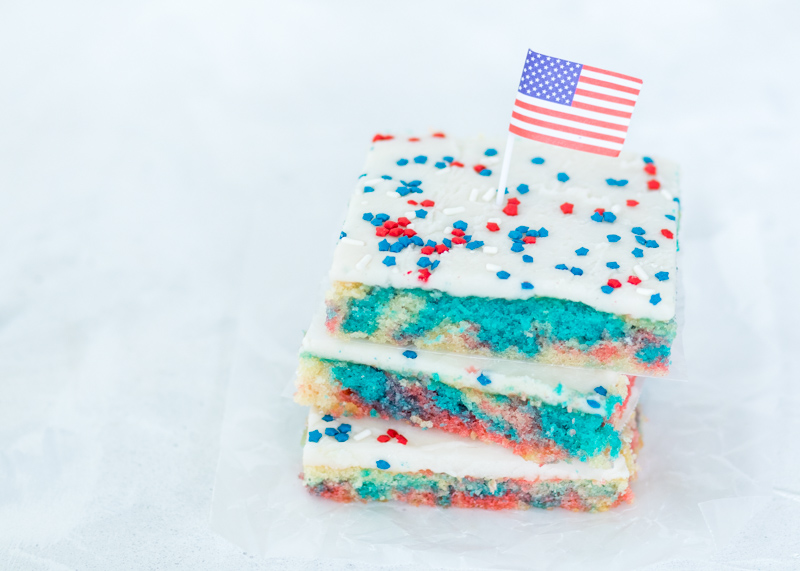
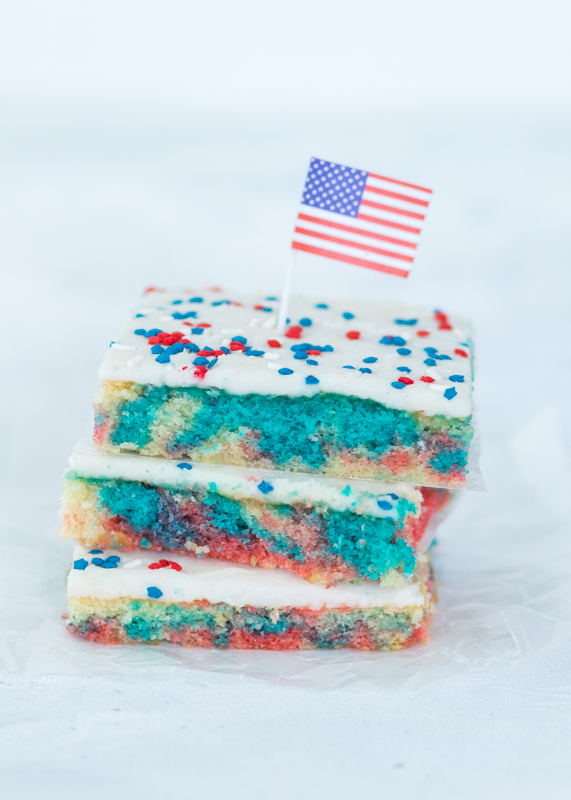
This is the best type of cake to make for a crowd because the cake is the size of a standard jelly roll pan or half sheet pan. Matt and I ate some, then I gave away multiple slices each to six of my girl friends and I STILL had a whole bunch that I packaged for the freezer! If you do have leftovers it does freeze well, but if you bring this cake to a big party I promise you there will be nothing left!
4th of July Tie-Dye White Texas Sheet Cake

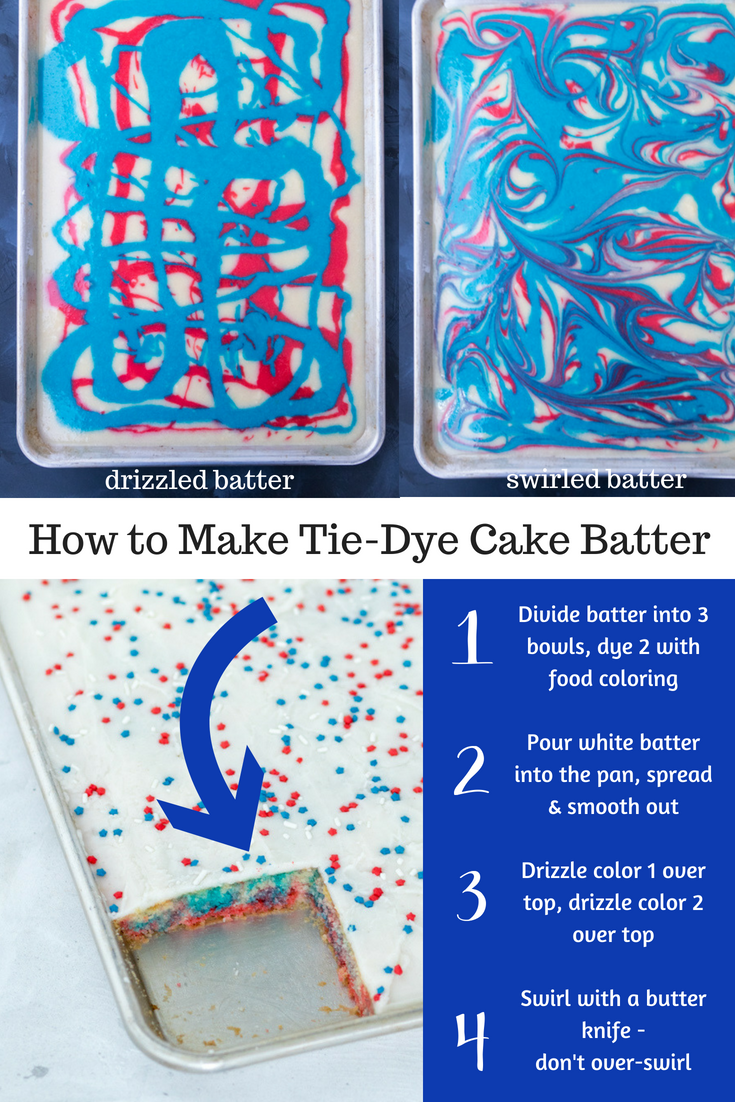
The tie-dye batter was really easy and didn’t add much extra time. I divided the batter into three bowls and left one white while dying the other two red and blue. I then poured the white batter into the prepared sheet pan and smoothed it out. Then I drizzled the red batter followed by the blue batter and swirled it all around with a butter knife. Ta-da! Red, white and blue tie-dye cake batter!
4th of July Tie-Dye White Texas Sheet Cake

The 4th of July sprinkles and mini flags definitely give it that extra patriotic look though – you can find those here and here. I cannot wait for you all to try baking this cake! Make sure to save me a slice ;-).
4th of July Tie-Dye White Texas Sheet Cake

4th of July Tie-Dye White Texas Sheet Cake
 
Yield: 16-20
Ingredients
for the cake
  • 2 cups flour
  • 2 cups sugar
  • 1 teaspoon baking soda
  • 2 large eggs, beaten
  • ½ cup yogurt, see note
  • 1 teaspoon vanilla extract
  • 1 cup unsalted butter
  • 1 cup buttermilk
  • ½ teaspoon salt
  • Red and blue food coloring
for the frosting
  • 4½ cups powdered sugar
  • ¼ teaspoon salt
  • ½ cup unsalted butter
  • ¼ cup milk
  • ½ teaspoon vanilla extract
Directions
for the cake
  1. Preheat the oven to 375 degrees F. Grease a half sheet pan, 13” x 18”. Set aside.
  2. In a large bowl, sift together the flour, sugar and baking soda. Add the beaten eggs, yogurt and vanilla then stir until just combined.
  3. In a small saucepan, melt the 2 sticks of butter over medium heat. Add the buttermilk and salt. Bring to boil, removing from the heat as soon as it starts to boil. Let cool slightly then pour into the flour mixture. Stir until just combined and smooth.
  4. Pour ⅓ of the batter in a bowl, ⅓ of the batter in a second bowl and leave the remaining ⅓ in the original bowl. Use food coloring to dye the batter in one bowl red and the other bowl blue. Leave the third one as is. Pour the batter you didn’t dye into the prepared sheet pan. Smooth into an even layer. Pour the blue batter over the white batter. I zigzagged back and forth. Repeat with the red batter. Using a butter knife, lightly swirl the batters around. Don’t over-mix or they will be one color instead of tie-dye.
  5. Bake for 20-22 minutes, or until a toothpick inserted in the center comes out clean. Let cool in the pan on a wire cooling rack for 20 minutes. Meanwhile, while the cake is cooling make the frosting (the frosting needs to be added when the cake is still a little warm).
for the frosting
  1. Sift the powdered sugar into a medium mixing bowl then mix in the salt.
  2. Melt the butter in a small saucepan over medium heat. Once melted, add the milk and bring to a boil, removing from the heat as soon as it starts to boil. Stir in the vanilla extract. Pour the butter mixture into the bowl with the powdered sugar. Stir until smooth. If it’s too thick, add a little more milk. Pour over the cake as soon as it has cooled for 20 minutes and spread in an even layer. Try to do this quickly as the frosting will start to set as soon as you start spreading it.
Notes
You can use any plain yogurt. Vanilla might also be okay, but I haven’t tried it with that. I used nonfat plain Greek yogurt. If you do not want to use yogurt you could also substitute sour cream.
To make your own buttermilk pour 1 tablespoon of lemon juice or vinegar (I like to use lemon juice) in a liquid measuring cup then add enough milk to equal 1 cup. The fat percentage of the milk does not matter - I use nonfat milk. Let sit for 5-10 minutes before using in the recipe.
The fat percentage of the milk in the frosting does not matter. I used nonfat milk.

Recipe adapted from Genius Kitchen.

Some of the links above are affiliate links, which means I may receive a small commission for my referral. This does not affect the retail cost of the item. Thank you for supporting Lemon & Mocha!

Pistachio Semifreddo with a Nutella Magic Shell Topping

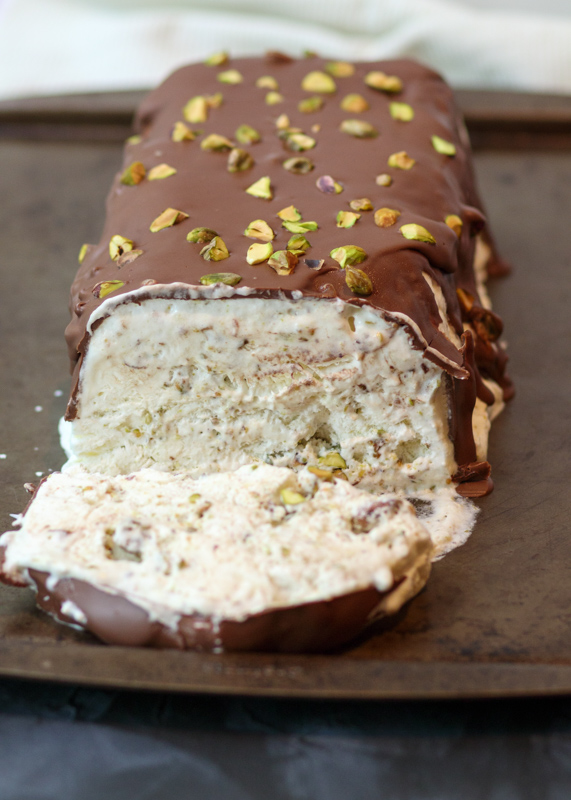
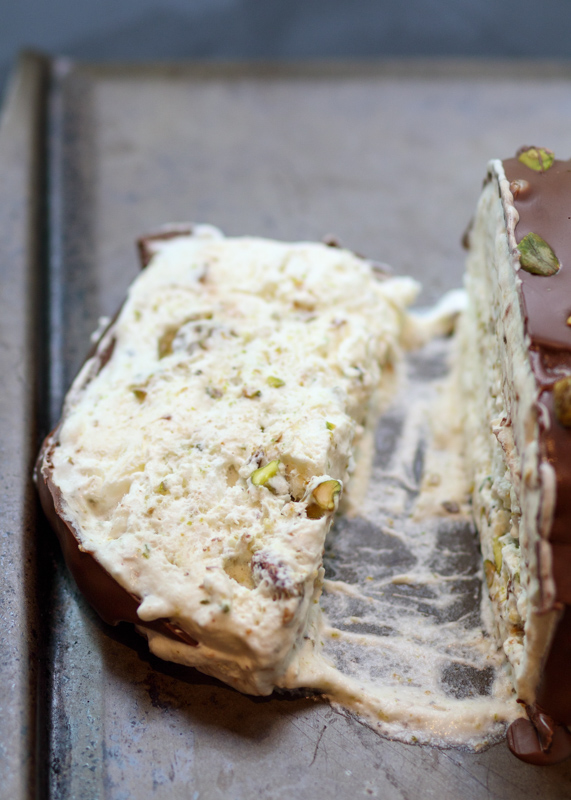
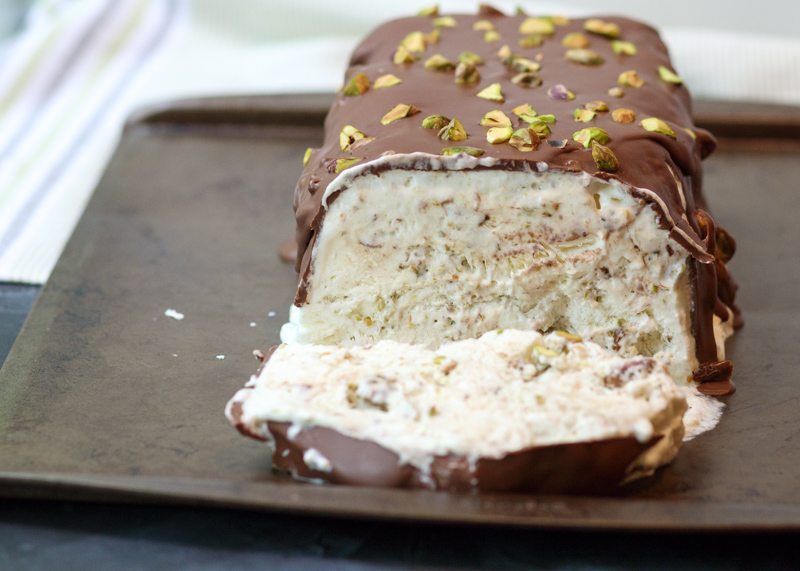
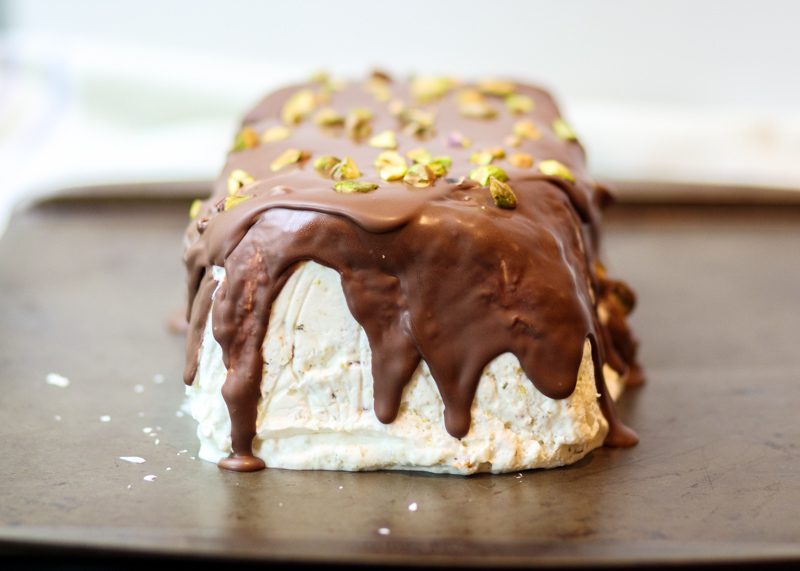
Pistachio Semifreddo with a Nutella Magic Shell Topping  |  Lemon & Mocha

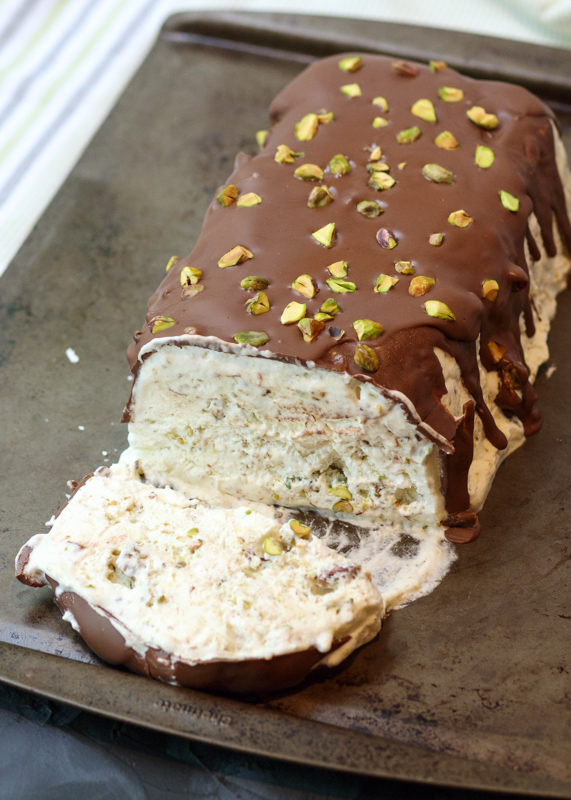
I know, I know. It’s early in the morning and you’re already drooling over a dessert. I’m sorry, but I had to share this one, especially just in time for Father’s Day on Sunday! I kind of consider this an all-parent dessert since I actually made and photographed it for Mother’s Day with the intention of posting it for Father’s Day. I have to work ahead over here so I’m often doing odd things like celebrating 4th of July in June or Christmas in September. This Pistachio Semifreddo with Nutella Magic Shell Topping would be good for any occasion, but I made it with my Dad in mind.

Pistachio Semifreddo with a Nutella Magic Shell Topping  |  Lemon & Mocha

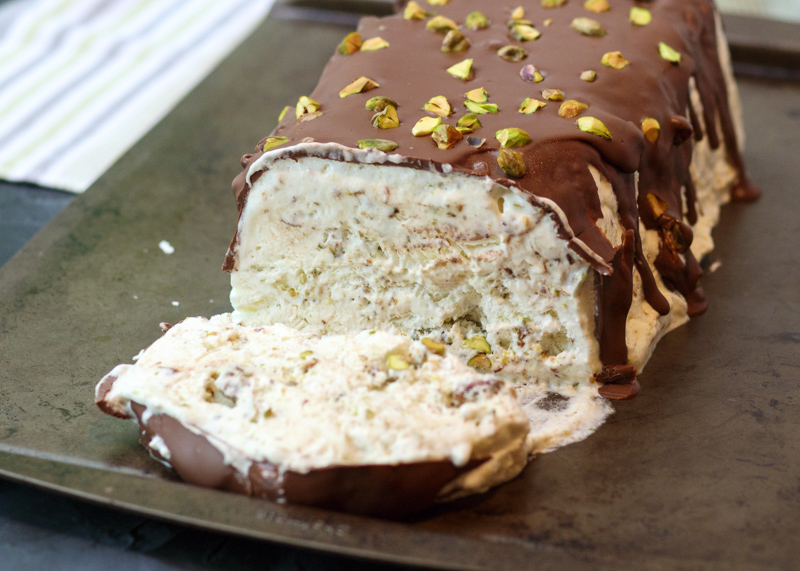
My Dad loves ice cream, but I’ve made him so many ice cream desserts over the years that I wanted to try something different. I’ve also always wanted to try a semifreddo, which to me tastes like ice cream mixed with whipped cream that’s been semi-frozen. The creaminess of the semifreddo with the crunch from the pistachios was an addictive combination. It would be delicious if you just left it at that. But I could never, ever in good conscience discourage you from topping the pistachio semifreddo with this Nutella magic shell! Adding coconut oil to the Nutella makes it act like that amazing magic shell topping you can buy in the bottle where the topping hardens when it touches the ice cream. This Nutella topping starts to harden as soon as you pour it over the semifreddo and will harden to completion if you just pop it in the the freezer for a little bit. Whacking off big hunks of the hardened Nutella to eat with the creamy semifreddo felt downright sinful. And so, so good.

Pistachio Semifreddo with a Nutella Magic Shell Topping  |  Lemon & Mocha

The recipe seems like a lot of steps, but it’s actually fairly simple. A lot of the comments on the original recipe were from people who said they don’t cook or bake often and they were surprised at how easy it actually was to make. You are basically whipping a meringue base, whipping a whipped cream and folding them together with the chopped pistachios. Then it goes into the freezer for at least eight hours so you will definitely want to plan ahead.

Pistachio Semifreddo with a Nutella Magic Shell Topping  |  Lemon & Mocha

You all know I love my food memories so of course I have some to share about my Dad and pistachio ice cream. The first is that my Dad’s company always had an ice cream sundae party every summer – and still do! My Dad is retired, but they still do the ice cream parties. Back when there weren’t as many people they would have everyone vote on the flavors by marking their vote on a printout of the flavors from the local ice cream shop. My Dad and another guy who worked there loved the pistachio ice cream and somehow that flavor would always win even though everyone else made fun of them for liking an “old man” flavor. I will always think of it as an “old man” flavor even though now I love it. I guess that makes me an old man? Anyways, my second memory I want to mention is when I got accepted to Boston College my Dad and I went to visit the campus that weekend. Of course we had to check out the closest ice cream shop, which is White Mountain Creamery. Funny enough, I don’t remember what flavor I got, but I remember my Dad got the pistachio ice cream. I was so happy in that moment being on a high from excitement to go to Boston College sitting there eating ice cream with my Dad.

Pistachio Semifreddo with a Nutella Magic Shell Topping  |  Lemon & Mocha

Now even though I made this dessert with my Dad in mind it kind of backfired on me. For those of you that don’t know, my Dad can be very picky. He’ll eat everything, but he will finish the meal saying that it was good, but he prefers his classic favorites. This was one of those times. He liked it, but thought it was a little too sweet for him and wanted it to be ice cream – haha – but everyone else had seconds so I think it’s safe to say that 98% of your guests will go nuts for it. I hope you all have a wonderful weekend and make lots of delicious food memories with your loved ones! Happy Father’s Day to all the awesome Dads out there, especially my Dad, Lee, and my father-in-law, Floyd!

Pistachio Semifreddo with a Nutella Magic Shell Topping  |  Lemon & Mocha

Pistachio Semifreddo with a Nutella Magic Shell Topping
 
Yield: 8-10 servings
Ingredients
for the semifreddo
  • 1½ cups shelled pistachios
  • ½ cup granulated sugar, divided
  • 6 egg whites
  • 2 cups heavy cream, kept in the fridge until ready to use
  • ¼ teaspoon almond extract
for the Nutella magic shell
  • 1 cup Nutella
  • ⅓ cup coconut oil
Directions
for the semifreddo
  1. Line an 8½” by 4½” loaf pan with plastic wrap so it hangs over all the sides then set aside. Roughly chop ¼ cup of the pistachios and set aside.
  2. Pulse ¾ cup pistachios with 2 tablespoons of the sugar until the pistachios are finely chopped. Add the remaining ½ cup pistachios and pulse a few times until the pistachios are very roughly chopped and large chunks still remain. Set aside.
  3. Whip the egg whites in the bowl of a stand mixer or in a large bowl with a hand mixer on medium speed until there are soft peaks. This mean the peak is just barely holding its shape and would flop if you lifted the beater. Increase the speed to high and add ¼ cup plus 2 tablespoons of the sugar a little at a time. Once the sugar has been added continue to beat until the egg whites are holding stiff peaks. This means the peaks hold their shape completely straight even when beaters are lifted.
  4. In a different bowl of a stand mixer or in a large bowl with a hand mixer, beat the cold cream and the almond extract on medium speed. Carefully increase the speed to high and beat until you have stiff peaks. Carefully fold the egg white mixture into the cream mixture, then gently fold in the pistachio mixture. Pour and scoop into the prepared loaf pan. It will probably go over the top of the pan. Just keep adding and smooth to create an even surface on top. Lightly cover with plastic wrap and freeze for 8 hours.
  5. Remove the semifreddo from the freezer. Invert onto a serving dish (or plate/container that will fit in your freezer if you aren’t serving right away) and carefully remove the pan and plastic wrap. Top with the Nutella magic shell. Look harden slightly then sprinkle the reserved chopped pistachios on top. Return to the freezer until ready to serve. Let soften slightly before serving
for the Nutella magic shell
  1. Microwave the Nutella and coconut oil in a small microwave safe bowl until melted. I start at 30 seconds, stir then continue microwaving and stirring at 15 second intervals. Once the mixture is melted and smooth let cool slightly at room temperature before using.
Notes
This recipe contains uncooked egg whites, which may be a concern if salmonella is a problem where you live.
Using a metal mixing bowl for the egg whites and heavy cream makes a big difference, especially if you can chill them in the freezer, along with the metal beaters, before using. If your egg whites or cream isn’t coming to peaks it may be that your ingredients or bowl wasn’t cold enough so I always chill mine.

Semifreddo recipe slightly adapted from Epicurious.

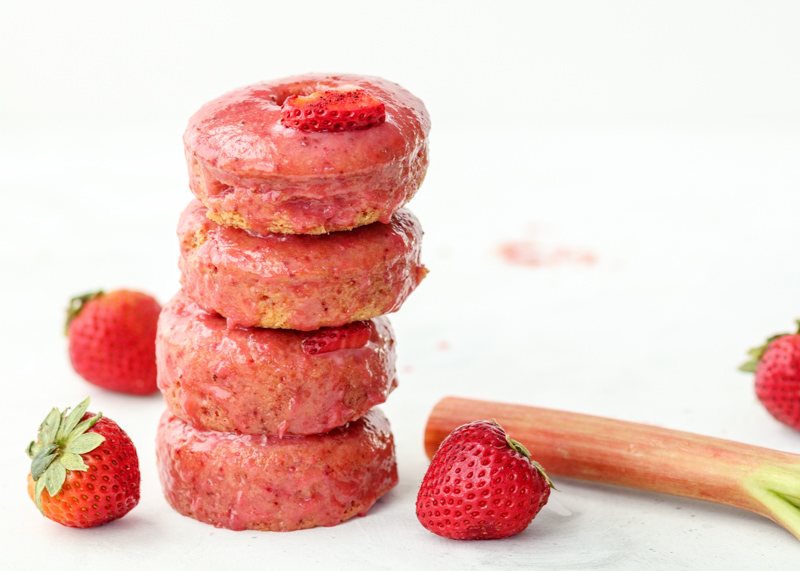
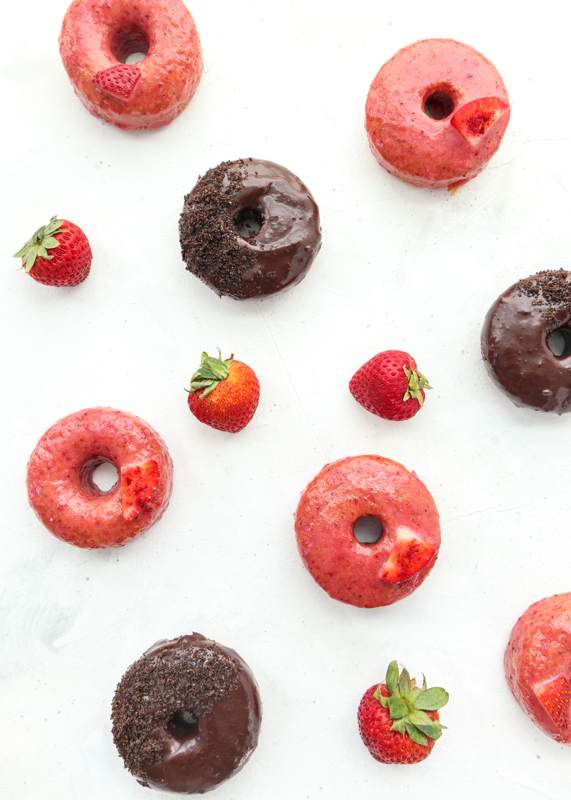
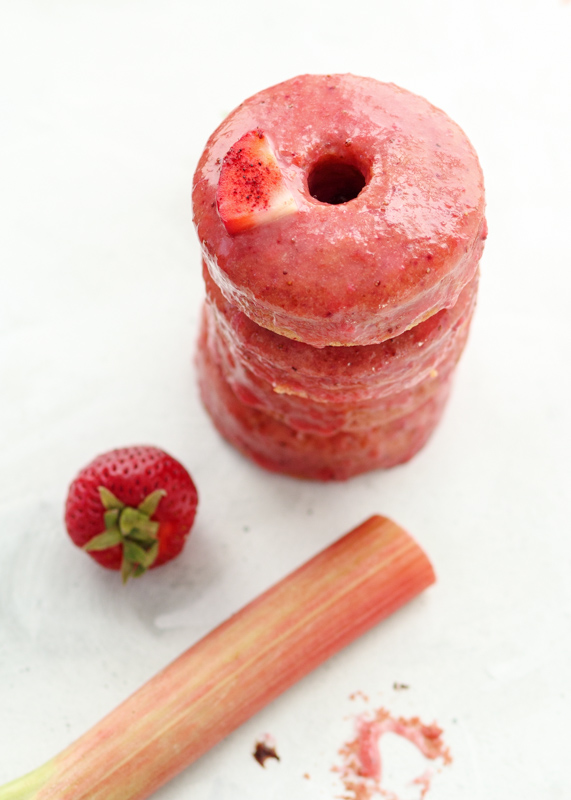
Beet Donuts with a Brown Butter Strawberry Rhubarb Glaze

Beet Donuts with a Brown Butter Strawberry Rhubarb Glaze  |  Lemon & Mocha

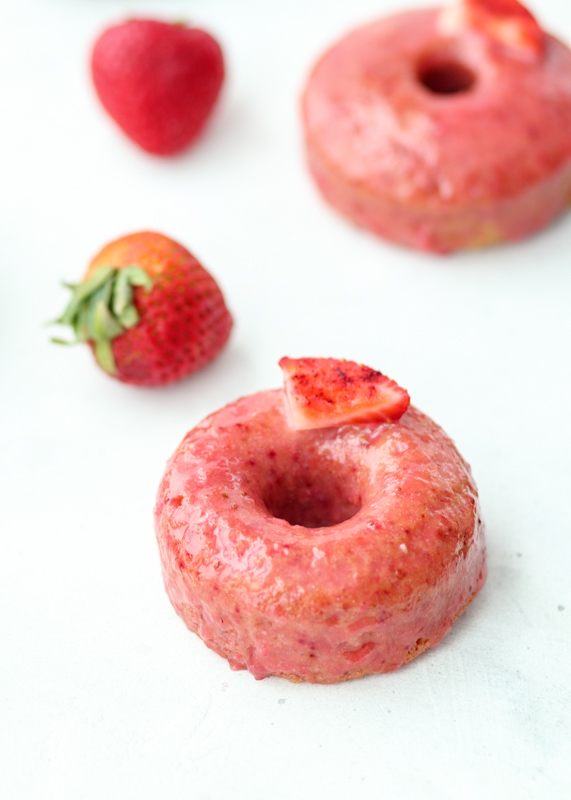
You guys (and gals)! I made donuts! Cute, little, glazed baked donuts! This was my first time making baked donuts and I am so happy with how they came out. When I go to a donut shop I prefer the fried old fashioned donuts over the cake ones, but if I’m making them myself I would rather not fry them. I was skeptical of baked donuts, but they are so delicious I can’t believe I waited so long to try them. These are light, spongey and a perfect breakfast, or anytime, treat.

Beet Donuts with a Brown Butter Strawberry Rhubarb Glaze  |  Lemon & Mocha

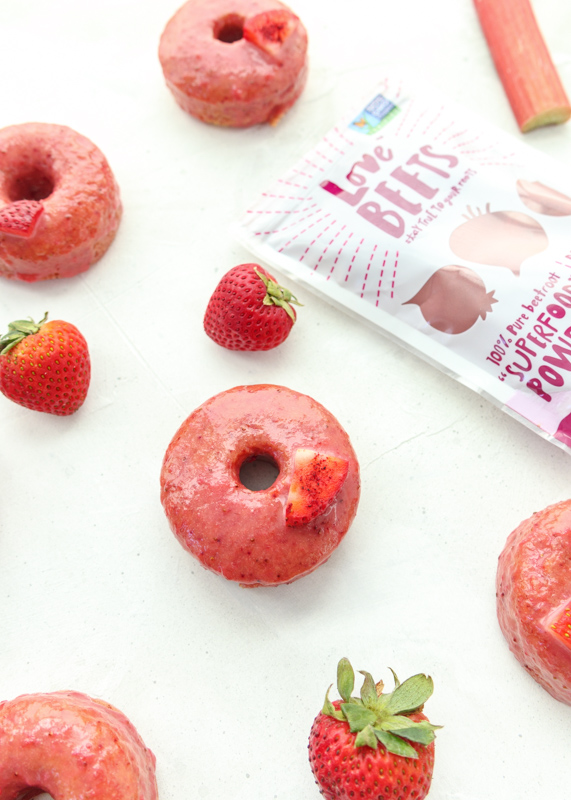
The inspiration for these donuts came from two places. The first is that I have been obsessing over strawberry rhubarb ever since I made the Strawberry Rhubarb Crumble Muffins so I’ve been trying to come up with another recipe to put them in before rhubarb’s short season is over. The second source of inspiration was beets! Love Beets to be exact. I won a giveaway on Instagram a few weeks ago and one of the brands sponsoring the giveaway was Love Beets. Matt and I were super excited since we know the brand and have purchased their roasted beets quite a few times. When I found out I won and would be getting some beet powder sent my way, I started brainstorming how I could use it. I had never tried using beets in a sweet recipe before so I knew that’s what I wanted to try. After giving it a lot of thought, I decided on beet donuts and ended up on the version you see in these photos.

Beet Donuts with a Brown Butter Strawberry Rhubarb Glaze  |  Lemon & Mocha

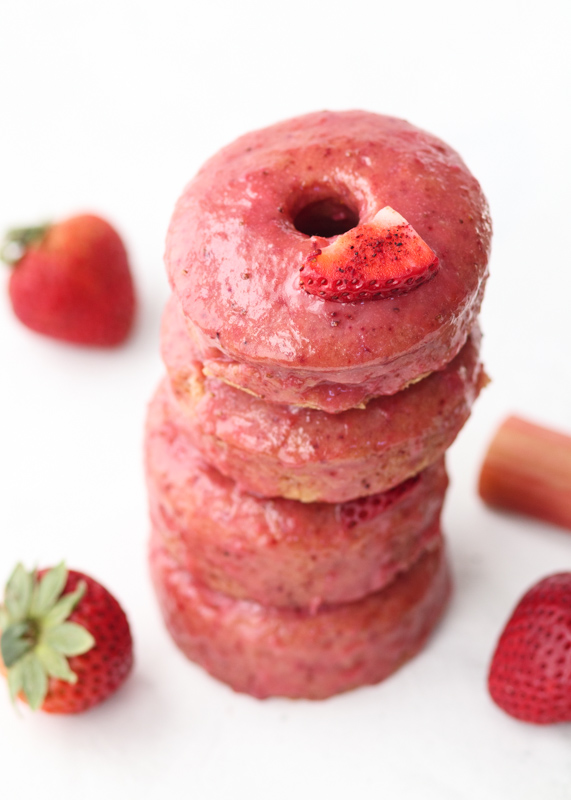
I love using the beet powder for this recipe because it gives the donuts a beautiful pink color and all of the added superfood benefits of beets without the actual taste of beets. No, this is not sponsored as I won the giveaway randomly (one of those like this page and that page then tag a friend in the comments), but I love Love Beets and I’m excited to share their products with you if you aren’t already familiar with them!

Beet Donuts with a Brown Butter Strawberry Rhubarb Glaze  |  Lemon & Mocha

The donuts are moist vanilla cinnamon donuts, but the sweet and tart brown butter strawberry rhubarb glaze makes them. The glaze is fruity, sweet and has the right amount of punch to it from the rhubarb. It also has a deep richness from the browned butter, just like in my Perfect Chocolate Chip Cookies. Plus, how beautiful does that rich pink color look?

Beet Donuts with a Brown Butter Strawberry Rhubarb Glaze  |  Lemon & Mocha

If you don’t have a donut pan, I highly recommend these silicone pans. I did a bunch of research on the regular metal nonstick pans versus the silicone and while people had good things to say about both, I ultimately went with the silicone for ease of storing and ease of removing the donuts from the pan. The cute colors of the silicone pans also didn’t hurt. Have you ever tried baking donuts?

Beet Donuts with a Brown Butter Strawberry Rhubarb Glaze  |  Lemon & Mocha

Beet Donuts with a Strawberry Rhubarb Glaze
 
Yield: 6 donuts
Ingredients
for the donuts
  • 1 cup all-purpose flour
  • ⅓ cup granulated sugar
  • 1 teaspoon baking powder
  • 1 teaspoon beet powder, optional
  • ½ teaspoon salt
  • ¼ teaspoon ground cinnamon
  • ⅓ cup plus 1 tablespoon milk
  • 2 tablespoons unsalted butter, melted
  • 1 teaspoon vanilla extract
  • 1 large egg
for the glaze
  • 1½ tablespoons butter
  • ½ cup quartered fresh strawberries
  • ¼ cup diced rhubarb
  • 2 tablespoons milk
  • ½ cup powdered sugar
Directions
for the donuts
  1. Preheat the oven to 350 degrees F. Lightly spray a donut pan with nonstick cooking spray and set aside.
  2. Sift together the flour, sugar, baking powder, beet powder, salt and cinnamon in a large bowl.
  3. In a small bowl, whisk together the milk, melted butter, vanilla extract and egg. Add to the flour mixture and stir until just combined.
  4. Using a pastry bag or a plastic sandwich bag with a corner snipped off, pipe the batter into the donut pan cavities. Fill each cavity about ¾ full and be sure to wipe any off that gets dripped onto the center stems. Bake for 12-14 minutes. The tops should be set. When they’re cool enough to handle, remove them from the donut pan and let them cool completely on a wire cooling rack.
for the glaze
  1. Melt the butter in a medium saucepan over medium heat. Continue to cook and swirl your pan to lightly brown the butter. Once the butter has started to foam and is a light golden color, add the chopped strawberries and rhubarb. Cook until soft, about 5 minutes, stirring occasionally.
  2. Puree the fruit mixture with the milk in a food processor or blender. Stir in the vanilla extract then let sit until the mixture has cooled.
  3. Once cooled, whisk in the powdered sugar until smooth. Dip the donuts in the glaze then let them sit on the cooling rack or plate for a couple minutes.
Notes
The glaze won't completely set because it is more of a syrup. If you want the glaze to set, you can melt 2 tablespoons of white chocolate chips into the pureed fruit mixture before letting cool. I made it both ways and thought it tasted good without the white chocolate so I didn't feel the need to add them just to make the glaze set more.

Donut recipe adapted from As Easy as Apple Pie.
Glaze recipe adapted from Pillsbury.

Some of the links above are affiliate links, which means I may receive a small commission for my referral. This does not affect the retail cost of the item. Thank you for supporting Lemon & Mocha!

Aunt Elaine’s Dirt Cake

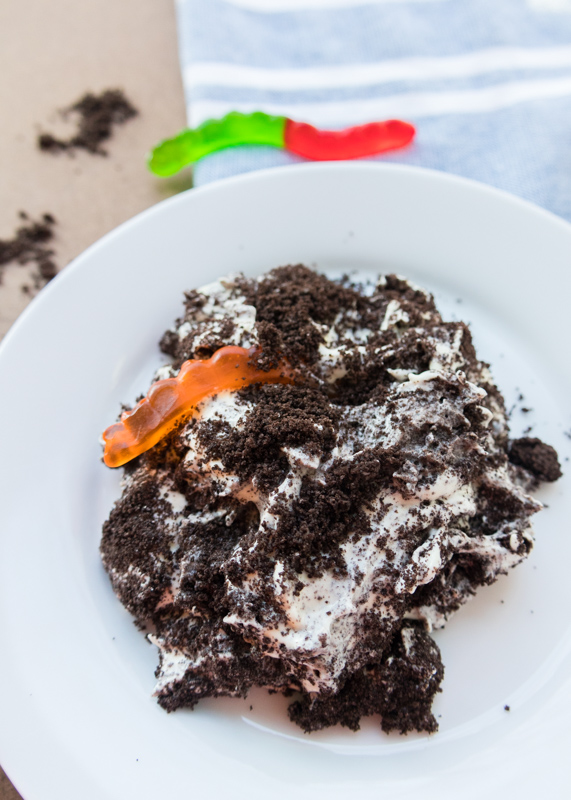
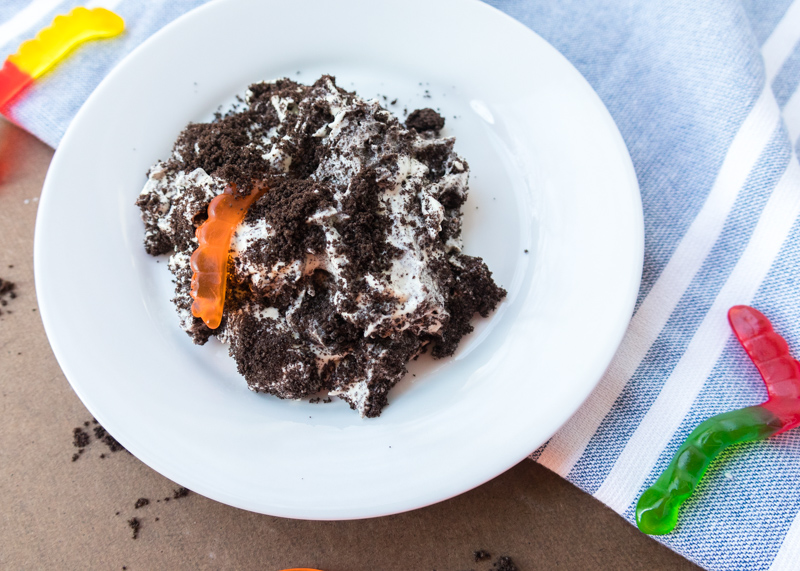
Aunt Elaine's Dirt Cake  |  Lemon & Mocha

My Aunt Elaine’s birthday is tomorrow and I wanted to post a special recipe to celebrate. When I was younger I would visit my Dad’s older sister during the summer. Aunt Elaine was a teacher making summer the perfect time to get some girl time in. Although I certainly loved visiting or having her visit during the school year as well so I could help grade papers!

Aunt Elaine's Dirt Cake  |  Lemon & Mocha

I have so many food memories with my Aunt Elaine. First of all, she was the person who brought me to my first ever Chik-Fil-A! Thank you for that, Aunt Elaine! It was years before I could have Chik-Fil-A anywhere other than visiting my aunt in Maryland. She also bought me my first ever Dippin’ Dots when we were at a Science Museum. And yes, Dippin’ Dots still exists, and yes, I’m still obsessed with them.

Aunt Elaine's Dirt Cake  |  Lemon & Mocha

I also have so many dishes she makes that I associate with visits to her house or family beach weeks, including her breakfast casserole, coffee cake, potatoes gratin and her famous Heath Bar ice cream cake. However, the one dish that I will always, always think about when I think about my Aunt Elaine is this Dirt Cake.

Aunt Elaine's Dirt Cake  |  Lemon & Mocha

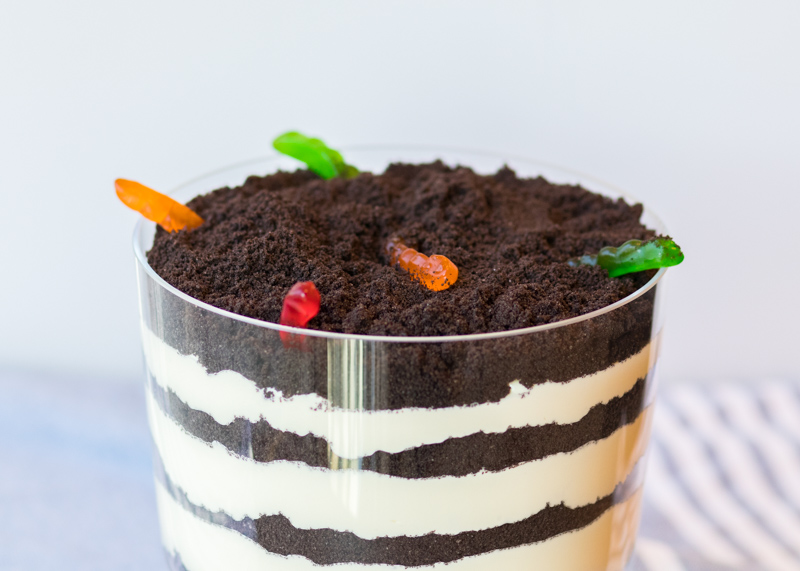
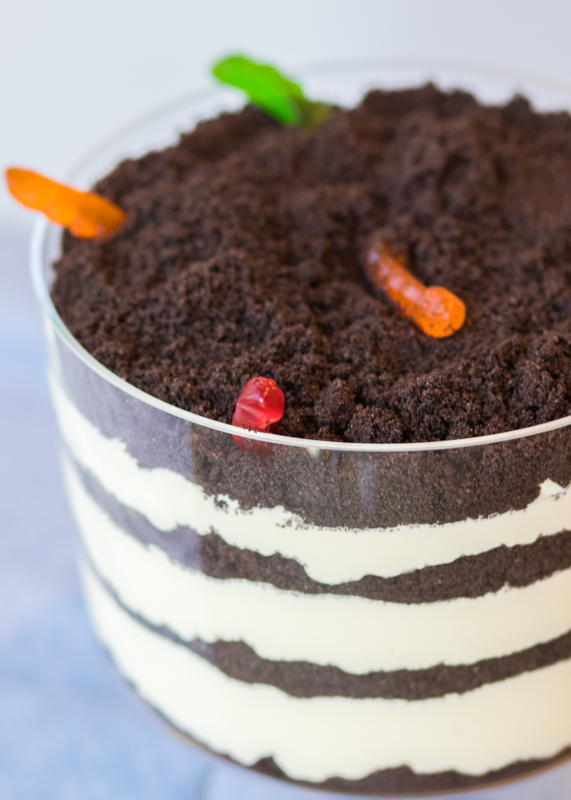
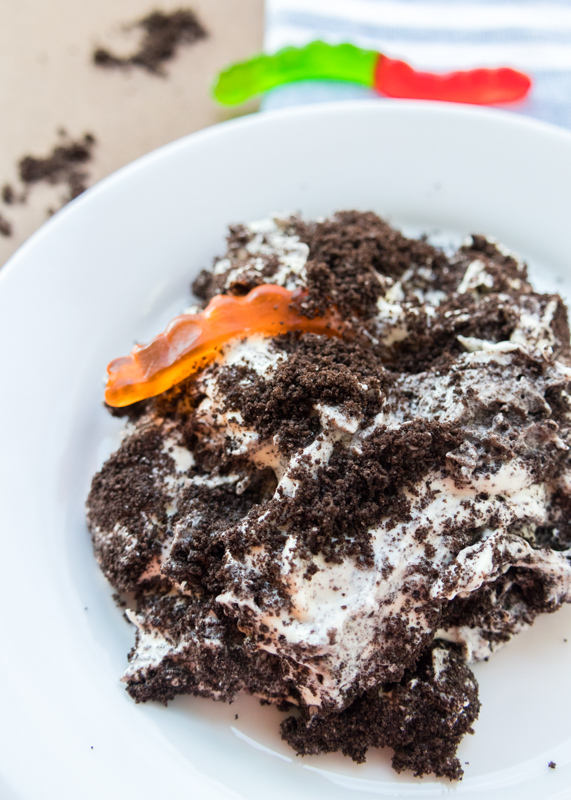
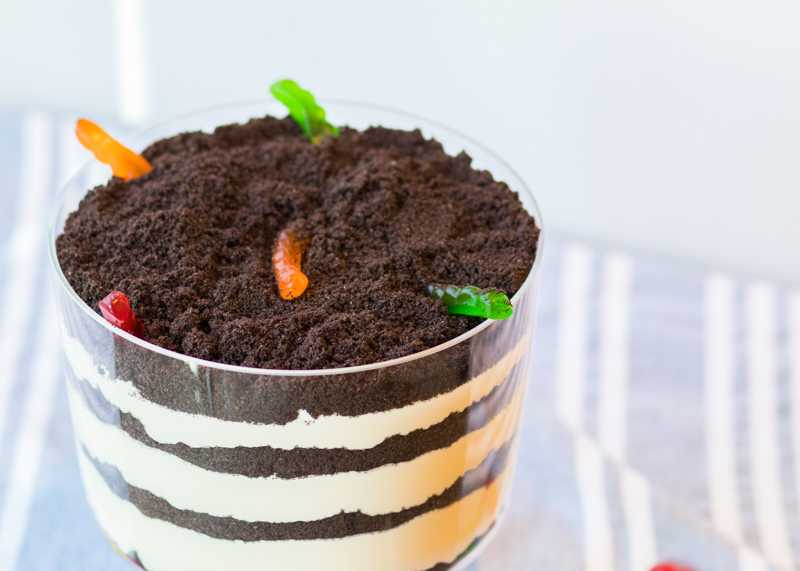
The first time my aunt made it for me she served it in a big flowerpot complete with a mini spade and fake flowers in the center. I thought it was the coolest dessert I had ever seen and I still get a kick out of it being served like that. I don’t have all those fun tools so I layered mine in a trifle bowl instead, but go all out if you want the full Dirt Cake experience.

Aunt Elaine's Dirt Cake  |  Lemon & Mocha

I’m sure most, if not all, of you have had something similar to this. It is vanilla pudding that has been made even better by being mixed in with a cheesecake-like mixture and whipped cream. The creamy pudding layer is layered with Oreo cookie crumbs and gummy worms to live up to its Dirt name. When you scoop some of it into a bowl and mix the Oreo cookie crumbs into the vanilla cream layer you will definitely find yourself going back for seconds!

Aunt Elaine's Dirt Cake  |  Lemon & Mocha

Aunt Elaine's Dirt Cake
 
Yield: 10-12 servings
Ingredients
  • 1 family pack size of Oreos (1 pound 3.1 ounces)
  • ½ cup butter, room temperature
  • 8 ounces cream cheese, room temperature
  • 1 cup powdered sugar
  • 2 3.4-ounce small packs of instant vanilla pudding
  • 3½ cups milk
  • 12 ounces Cool Whip, thawed
  • Gummy worms
Directions
  1. Process the cookies in a food processor until they are fine crumbs. Alternatively you could smash them in a freezer bag with the meat mallet or rolling pin, but they won’t be as fine.
  2. In the bowl of a stand mixer or in a large bowl with a hand mixer beat the butter, cream cheese and powdered sugar until fluffy and smooth, scraping down the sides as needed. Set aside.
  3. In a large bowl, whisk together the pudding mixes and milk. Continue to whisk for several minutes until the mixture has thickened. Add the pudding mixture to the cream cheese mixture and stir to combine. Fold in the Cool Whip.
  4. Make a layer of cookie crumbs in the bottom of your trifle bowl or flower pot. Make a layer of the pudding mixture on top. Continue alternating the layers, making sure you end on a cookie crumb layer. If you want gummy worms throughout your dirt cake make sure you are adding them as you go. If you just want the gummy worms on top, I added mine on the last pudding layer and then sprinkled the last “dirt” cookie layer around them to make it look like they were coming out of the dirt. Cover and refrigerate if not serving right away. Decorate with fake flowers and mini “garden spade” as desired.
Notes
I used reduced fat cream cheese, fat free milk and reduced fat Cool Whip. You can use whatever you have on hand or prefer.

Over the years I have seen many versions of my aunt’s cake online. Some people say you can leave out the butter without a big taste difference. I haven’t tried that so I can’t personally suggest it, but if you try it without the butter let me know how it turns out.


S’mores Muffins

S'mores Muffins  |  Lemon & Mocha

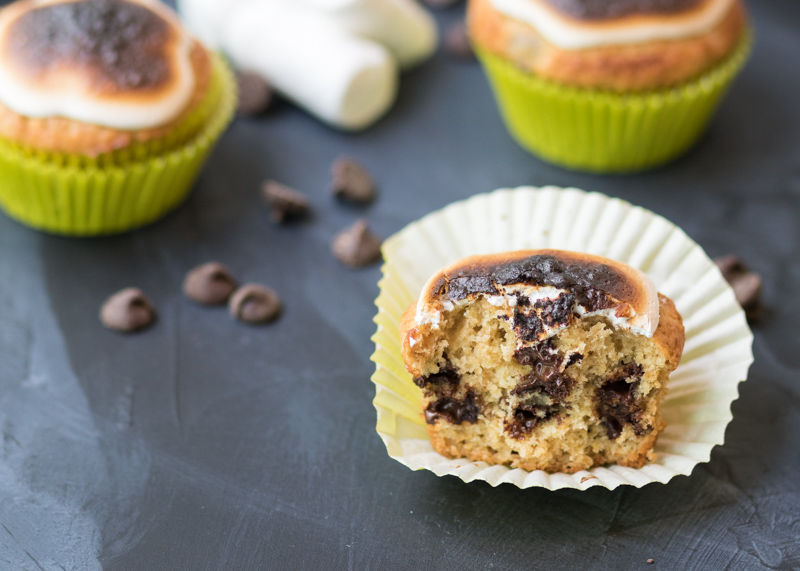
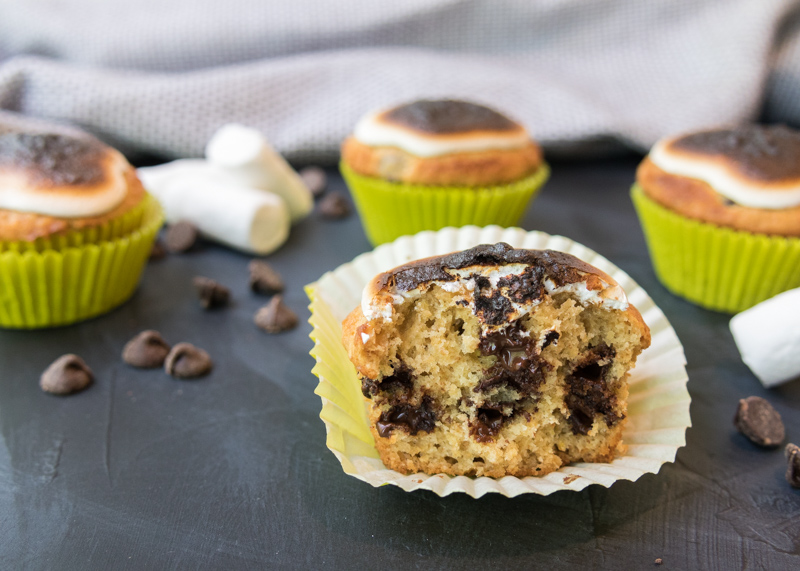
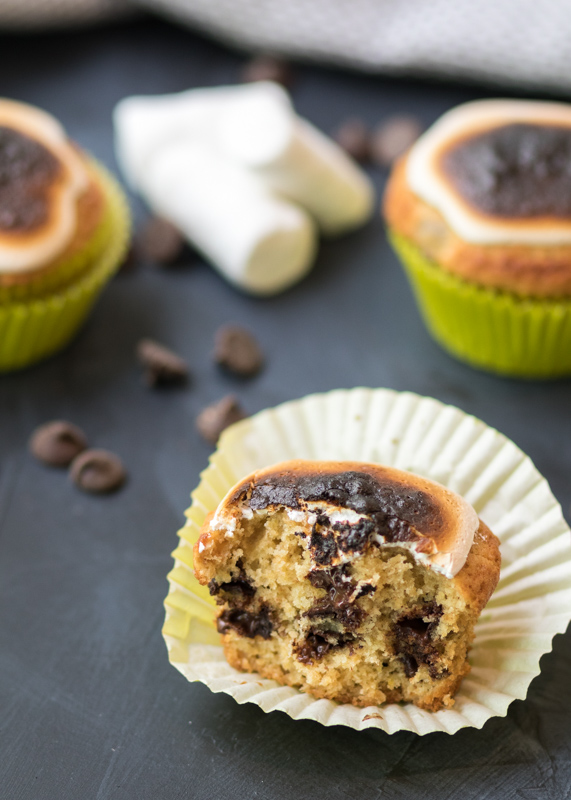
We have made it halfway through the Food Network Magazine’s Muffin of the Month recipes and we are being rewarded with these outrageous, gooey and chocolately S’mores Muffins. Yes! When I first saw all the Muffin of the Month recipes the s’mores one caught my eye. Because s’mores are amazing. Obviously. And so is chocolate. Duh. I looked at them and thought, “I can’t wait for June!”

S'mores Muffins  |  Lemon & Mocha

In addition to thoughts of me stuffing my face with s’mores muffins, the other part of my brain was seriously confused as to how the Food Network could let something called a S’mores Muffin into their magazine without toasted marshmallow. I would understand if the marshmallow was a middle layer or inside the muffin, but a layer of marshmallow right on top sitting completely un-toasted? Unacceptable!

S'mores Muffins  |  Lemon & Mocha

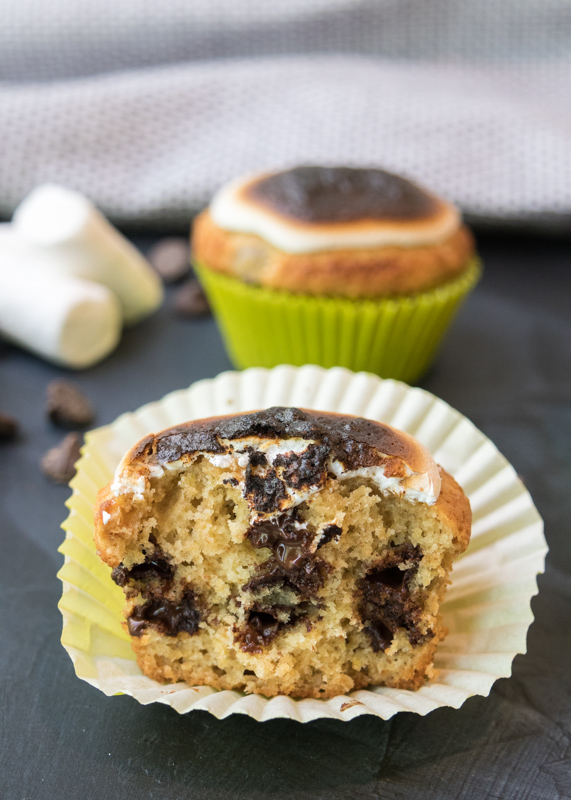
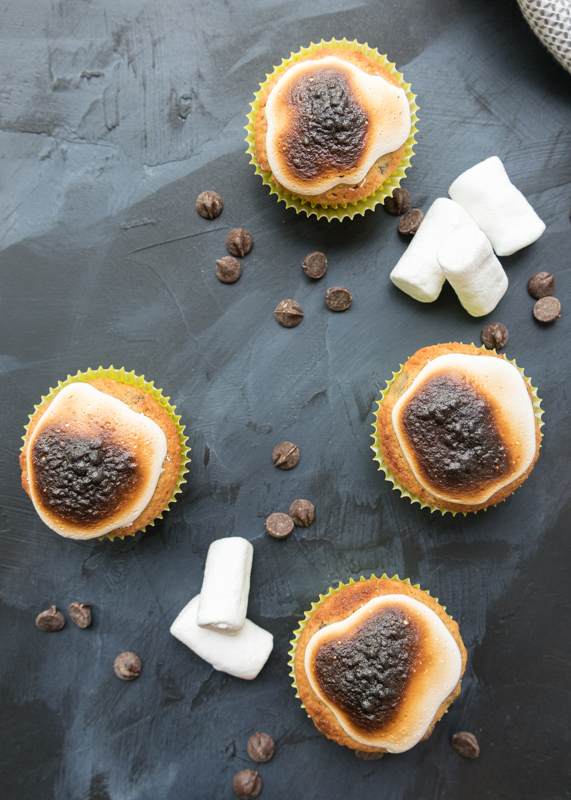
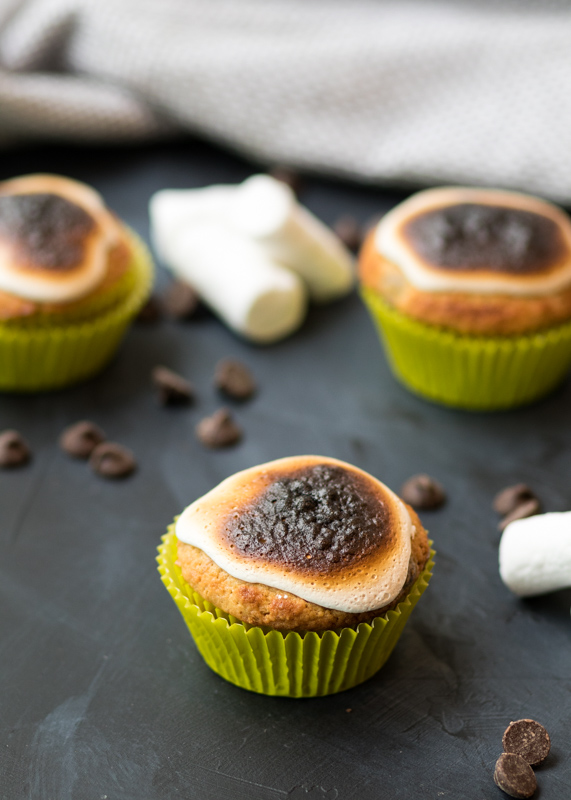
If you’re confused because I’m going on and on about un-toasted marshmallow while the photos on your screen clearly have crispy gooey marshmallow I will let you know that I rectified this horrific oversight. I know I said I wasn’t going to change these Food Network muffin recipes so I could properly review them (other than my food allergy last month), but I couldn’t not toast this marshmallow. Too much was on the line- I’ve been thinking about these muffins since January!

S'mores Muffins  |  Lemon & Mocha

These S’mores Muffins did not disappoint. In fact, they exceeded my expectations of deliciousness. I love how they swapped some of the flour for graham cracker crumbs to give the muffin base a hint of that spiced cookie taste. I did use semisweet chocolate chips instead of milk chocolate chips because that’s what I keep in our house, but I’m kicking myself because they would have tasted even more authentically s’mores if I had stuck with the milk chocolate.

S'mores Muffins  |  Lemon & Mocha

The melted chocolate and roasted marshmallow fluff probably pull these into the dessert category, but I’m going to stick with they are called muffins so I’m allowed to eat them for breakfast. No judgement allowed, just a quiet breakfast table except for the occasional “mmmm” because everyone is busy indulging in these crave-worthy S’mores Muffins.

S'mores Muffins  |  Lemon & Mocha

S'mores Muffins
 
Yield: 12 muffins
Ingredients
  • 1 cup milk chocolate chips
  • 1 cup all-purpose flour
  • 1½ cups graham cracker crumbs, from about 15 full-size crackers
  • 2 teaspoons baking powder
  • ½ teaspoon salt
  • ¾ cup sugar
  • 1 stick unsalted butter, melted and cooled slightly
  • ½ cup whole milk
  • 1 teaspoon pure vanilla extract
  • 2 large eggs
  • ¾ cup marshmallow cream, or 1 tablespoon per muffin
Directions
  1. Preheat the oven to 350 degrees F. Line a 12-cup muffin pan with paper liners and set aside. In a small bowl, combine the chocolate chips with 2 teaspoons of the flour and set aside.
  2. In a large bowl, combine the flour, graham cracker crumbs, baking powder and salt.
  3. In a separate medium bowl, whisk together the melted butter, sugar, milk, vanilla and eggs until smooth. Pour into the flour mixture and stir until just combined. Add the chocolate chip mixture and stir.
  4. Divide the muffin batter among the lined cups. They should fill the liners ¾ full. Lightly tap the bottom of the pan on a hard surface so the top of the batter smooths out slightly. Bake the muffins for 20-25 minutes, or until a toothpick inserted in the center comes out clean and the tops are lightly browned. Cool the muffins for 5 minutes in the pan then remove to a wire cooling rack. Once completely cool, top each muffin with a tablespoon of the marshmallow cream. To toast your marshmallow cream, use a kitchen torch or place them under a broiler for 5-10 minutes, making sure to watch them carefully.

 Recipe from January/February 2018 issue of Food Network Magazine.

Some of the links above are affiliate links, which means I may receive a small commission for my referral. This does not affect the retail cost of the item. Thank you for supporting Lemon & Mocha!