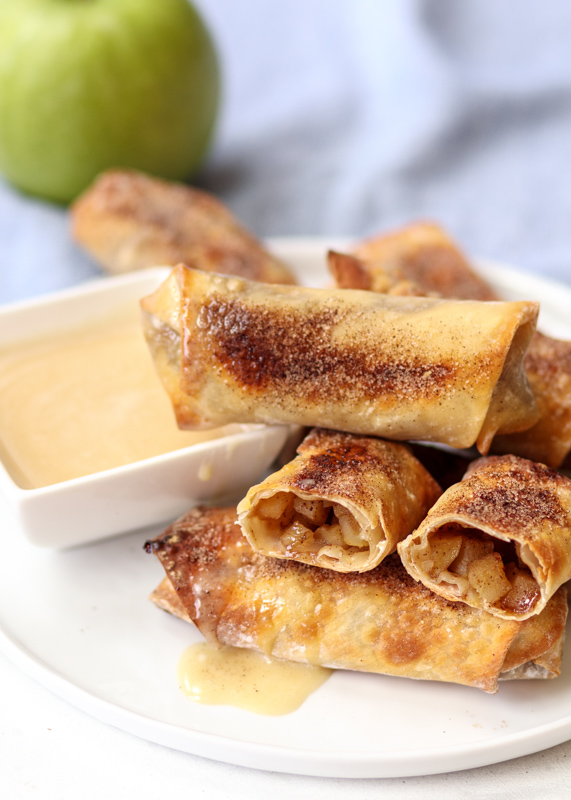
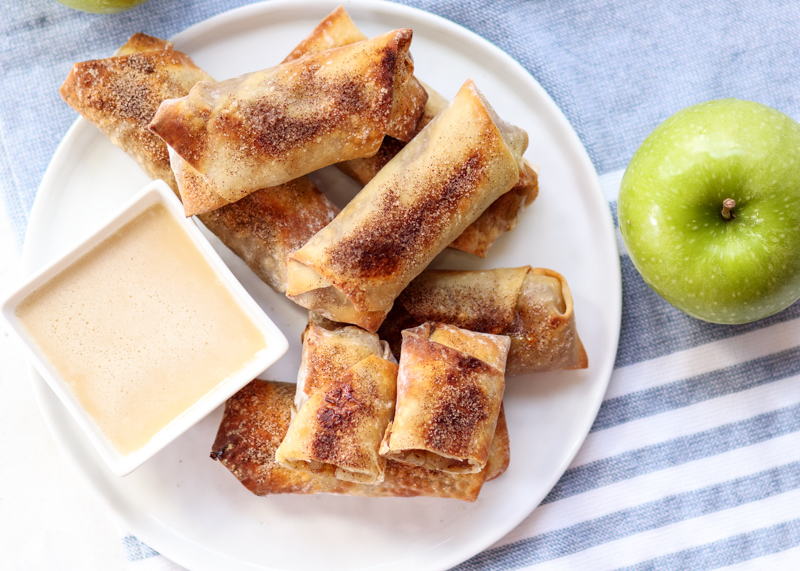
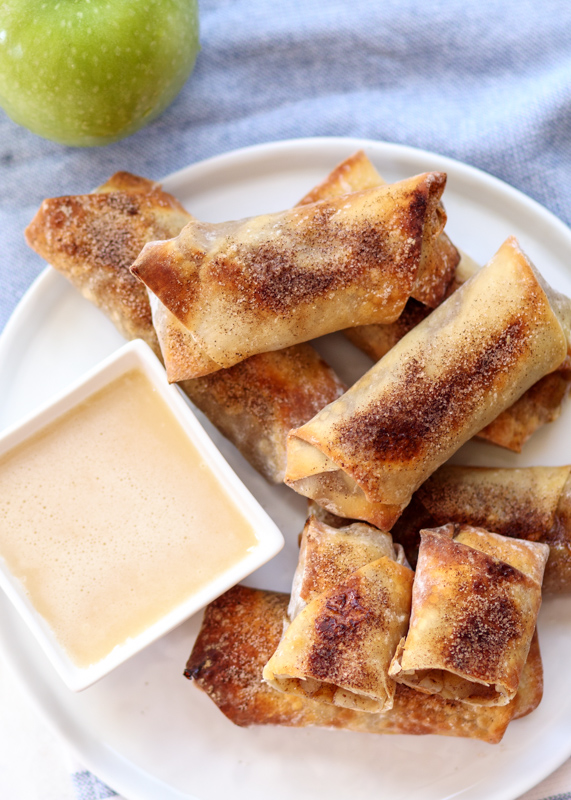
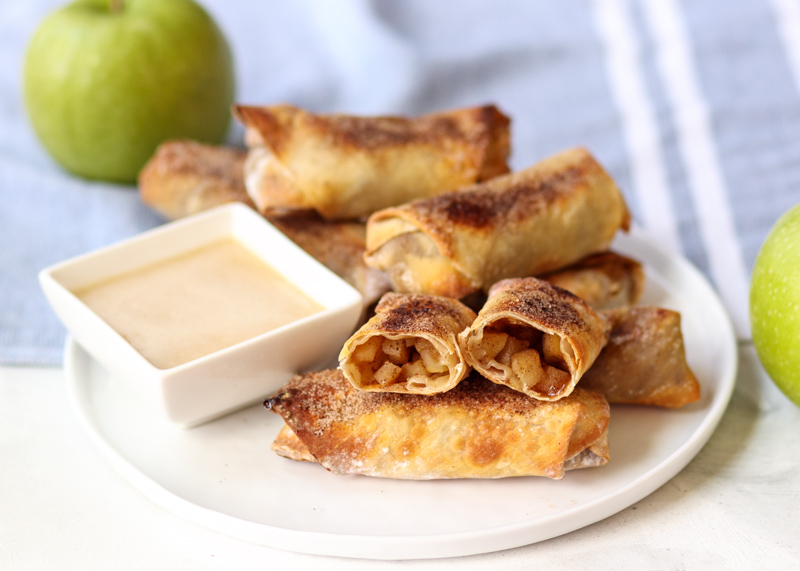
Crispy Baked Apple Pie Bites with a Chai Vanilla Dipping Sauce
It’s peak apple picking season! Oftentimes it doesn’t feel like fall here until September is almost over so I’ve always associated apple picking with October. However, a few years ago Matt and I went apple picking with Matt’s parents at an orchard by them in Connecticut during the second week of October only to find that there were almost no apples left! Apparently while we were waiting for it to start feeling like fall we had missed peak season for apples. So today I’m sharing some apple goodness so you can join in while there’s still plenty of apples to be picked, stuffed into cinnamon sugar egg roll wrappers and eaten.
I wanted to make an easy apple dessert that would be quick to whip up so I started thinking about apple dumplings. There’s a lot of recipes on Pinterest that combine apples with crescent dough and while that sounds delicious I was looking to make something slightly less indulgent. Then I remembered my Southwest Turkey Baked Egg Rolls. I loved how crispy the baked egg rolls got that I had already started brainstorming other variations, but what about a sweet dessert variation?
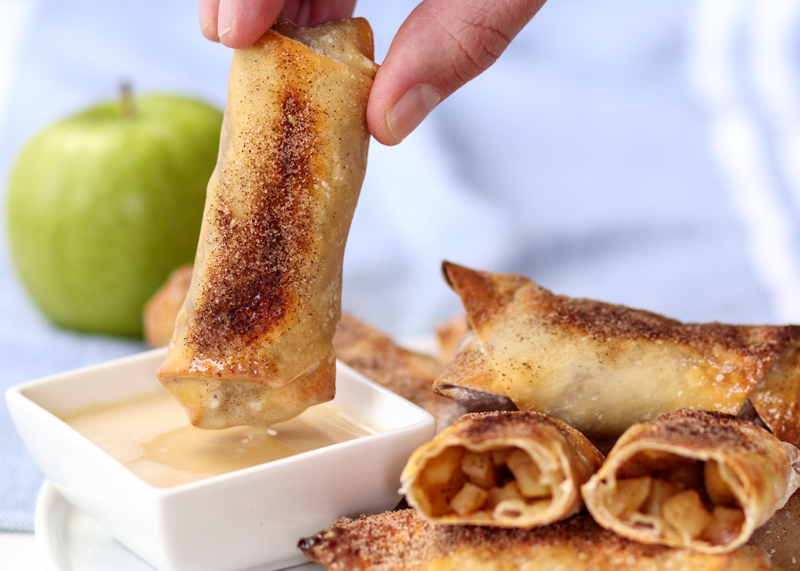
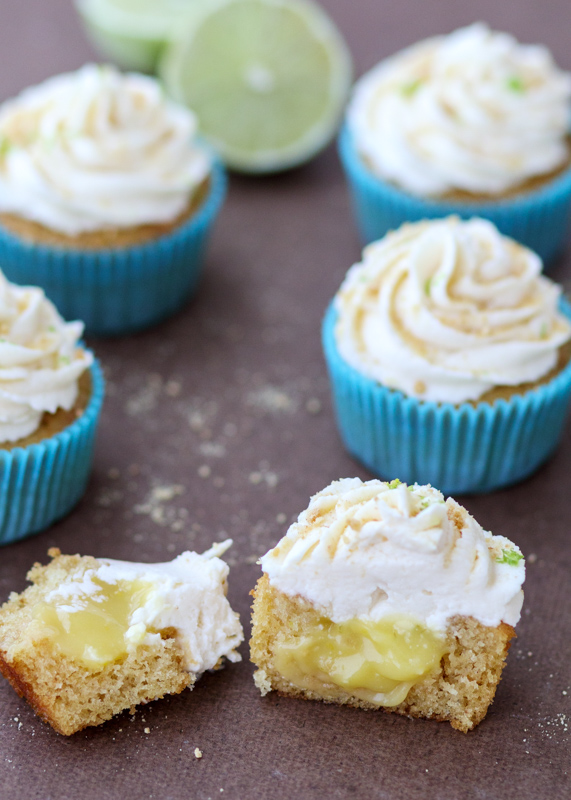
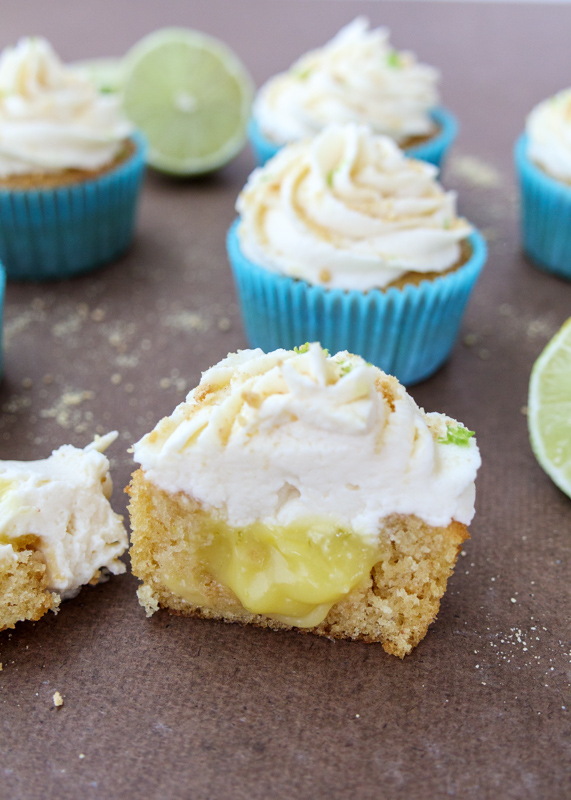
When I tried one of these Crispy Baked Apple Pie Bites out of the oven they tasted even more outrageous than I was imagining. The spiced apples cooked down just the right amount so the soft apples contrast perfectly with the crunchy cinnamon-sugar coated outside. They’re also so easy to put together! There’s no cooking required except for letting them bake in the oven and as I talked about in my Southwest Turkey Baked Egg Rolls post, folding the filling up into these egg roll wrappers is way easier than you would think.
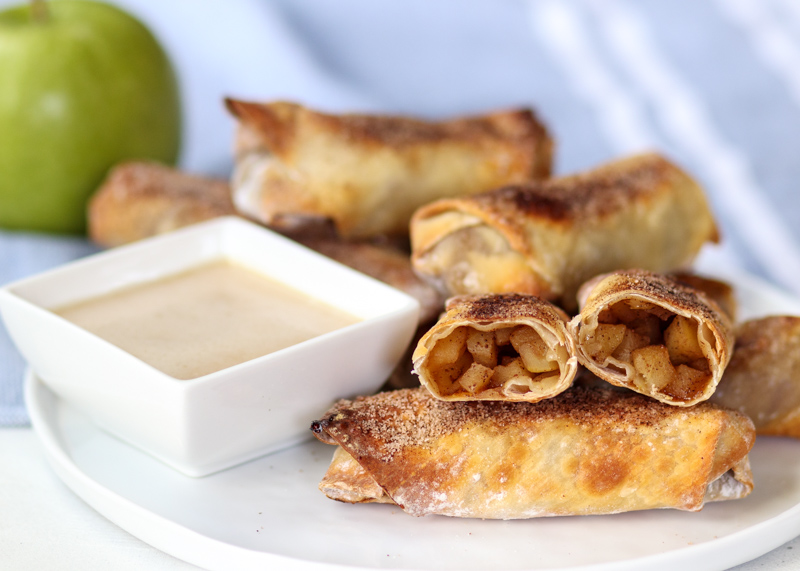
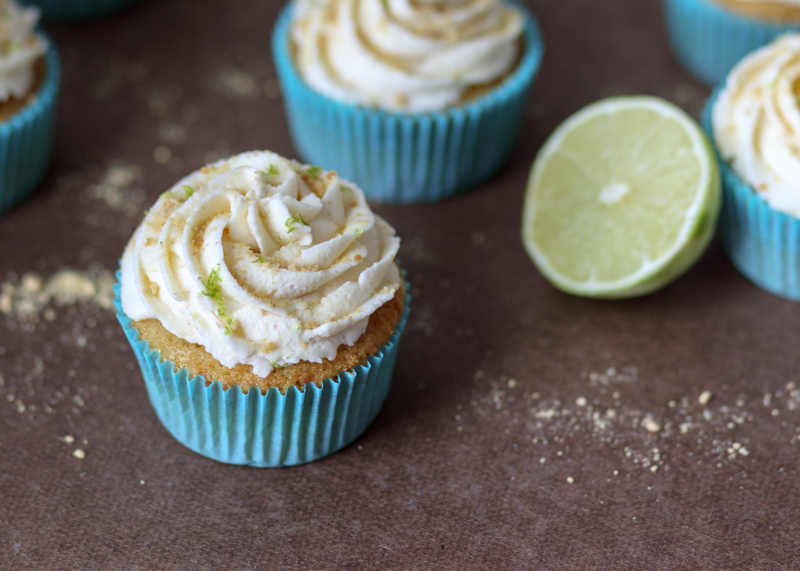
Once they are done cooking you get to indulge in the best part – dipping them in the vanilla chai dipping sauce. Simply powdered sugar, brewed chai tea and vanilla extra, this dipping sauce complements the Crispy Baked Apple Pie Bites really well. Chai tea is full of warming spices that are reminiscent of fall bringing a nice depth of flavor to a traditional vanilla glaze.
Also, by using brewed tea instead of the traditional milk or cream we are keeping the entire recipe dairy free, dipping sauce included, if that sort of thing is important to you. So between the fruit, the baking instead of frying, only using cooking spray and keeping them dairy free we totally have a healthy dessert on our hands right?! Okay, maybe not “healthy”, but definitely healthier than other desserts I’ve posted here so I’m going to go with just a eat a whole bunch of them and have no regrets, friends!
Looking for some more apple recipe inspiration? Check out a few of my favorite apple recipes below!
Caramelized Onion & Apple Dip

Baked Apple Chips
Spiced Sweet Potato & Apple Soup
Peanut Butter Apple Bars
- 3 medium granny smith apples, about 1 pound
- ⅓ cup brown sugar
- 1 teaspoon ground cinnamon, plus ½ teaspoon
- ¼ teaspoon ground nutmeg
- 15 egg roll wrappers, see note
- 2 teaspoons sugar
- Cooking spray
- 1 cup powdered sugar
- 1 tablespoon strongly brewed chai tea
- ½ teaspoon vanilla extract
- Preheat the oven to 400 degrees F. Line a baking sheet with nonstick aluminum foil or coat with cooking spray and set aside.
- Peel the apples then cut them into a small dice. You do not want the pieces too big or it will be difficult to roll the wrappers. In a medium mixing bowl, toss the apples with the brown sugar, 1 teaspoon of the cinnamon and the ground nutmeg.
- Before filling the egg roll wrappers, make sure you have a little bowl or cup of warm water and a clean work surface. Place the egg roll wrapper down so that a corner is facing you. Scoop 2½ tablespoons of the apple mixture and place it in a horizontal strip in the middle (closer to the bottom corner than the top corner). I like to adjust the mixture so it’s more of a log shape then a big mound. Now you are about to fold and make sure you fold gently and carefully so they don't break although if it breaks a little that's okay. Take the bottom corner of the wrapper and fold it up and over the mixture so it’s completely covering it then continue to roll it one more time. Fold in the left and right corners so they create a little envelope then continue to roll it until it’s 1 roll away from the top corner. Wet your finger with the water and use it to moisten the whole exposed top corner. Fold the corner down to close up and seal the roll. Place it on the baking sheet. Repeat for the remaining rolls.
- In a small bowl combine the remaining ½ teaspoon ground cinnamon with the 2 teaspoons of sugar. Coat all the rolls with cooking spray then sprinkle the cinnamon sugar over top. Bake the rolls for 8 minutes, then flip them over and bake for another 8 minutes. They should be crispy and golden brown. Serve warm with the dipping sauce.
- Sift the powdered sugar into a small mixing bowl. Add the chai tea and vanilla extract then whisk to combine. If it’s too thin, add more powdered sugar.