Dessert

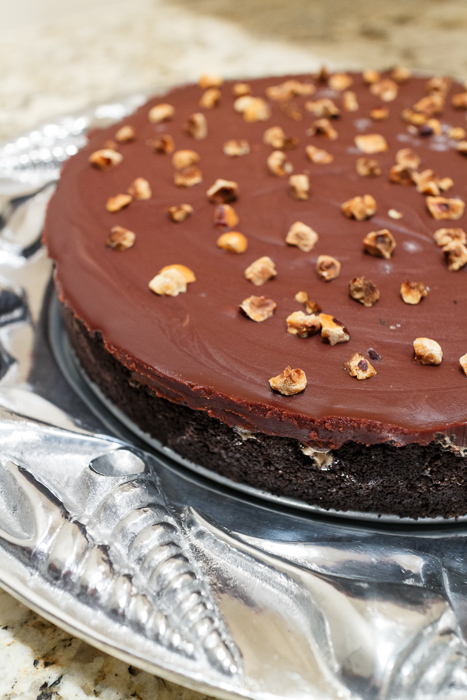
Stracciatella Chocolate Hazelnut Gelato Pie

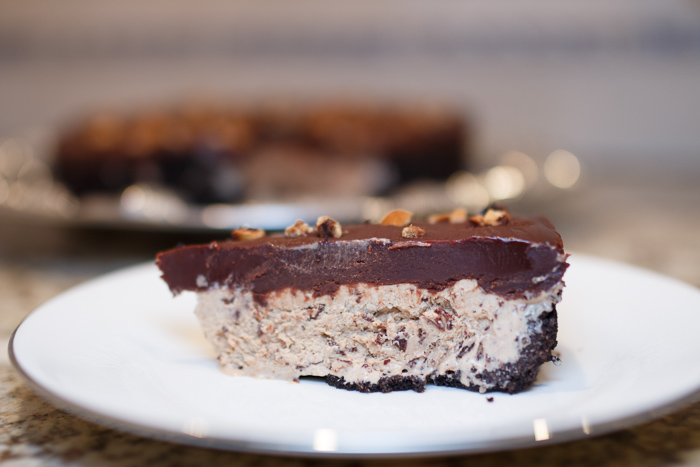
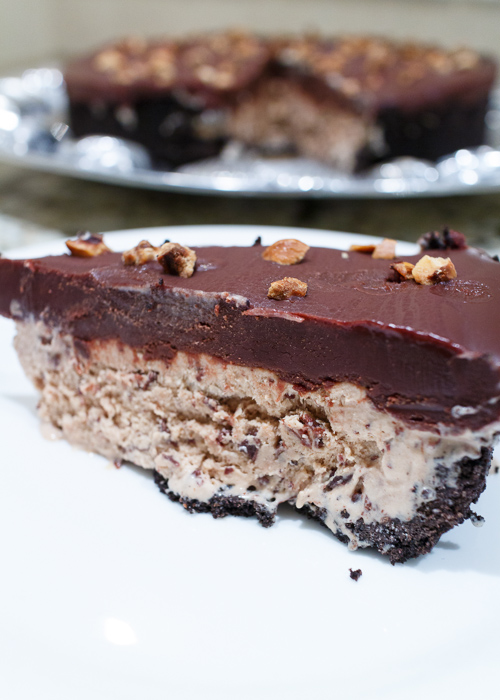
“What is this vision of deliciousness I see before me?” you ask? A chocolate hazelnut gelato pie in name, but it is so much more than that. There are layers involved and layers make things scrumptiously complex. The base of this pie is a lightly sweetened chocolate cookie crust. Resting on top of the crust lies a creamy stracciatella chocolate hazelnut gelato. Stracciatella is the Italian version of chocolate chip ice cream except there are no chips or chunks, just wispy bits of hardened chocolate throughout the gelato. The subtle hazelnut flavors breaks through the richness of the rest of the pie and brings it to a new level of decadence and addictiveness. Finally, the fudgey ganache topping speckled with toasted hazelnuts. Since my keyboard is still recovering from drooling on it while describing this ganache on Tuesday I’ll just say yum.

A couple months ago I brought this pie to a barbecue at my parents’ house. Having sampled the gelato I was excited to try the pie. The dessert received rave reviews, which I’m sure you guessed based on the uncharacteristically long description of it in the beginning of the post. The surprise of the night was that my dad claimed, and continues to claim to this day over two months later, that this was the best dessert he has ever eaten. That’s right, not one of the best, but the best.

Now my dad has a healthy ice cream obsession as is family tradition so you might be thinking well of course he liked it, it’s gelato. But you have to know that my dad is a creature of habit. Yes he might eat ice cream every single night and yes there were 12 half gallons of ice cream in his house on my last count, but they were all of the same three flavors. God forbid he run out ;-). He also has this extraordinary skill to pick through a dessert and consume only the ice cream portion, so the fact that he ate this pie in entirety and claimed it as the best dessert ever? That is what we call a food victory.

Chocolate Hazelnut Gelato Pie
 
Yield: 10 servings
Ingredients
for the crust
  • 6 ounces chocolate wafers
  • 4 tablespoons unsalted butter, melted
  • 2 tablespoons sugar
  • Pinch of salt
for the gelato
  • 1½ cups toasted hazelnuts
  • 1 cup whole milk
  • 2 cups heavy cream
  • ¾ cup sugar
  • ¼ teaspoon salt
  • 4 ounces milk chocolate, chopped
  • 5 large egg yolks
  • ⅛ teaspoon vanilla extract
  • 5 ounces bittersweet chocolate, chopped
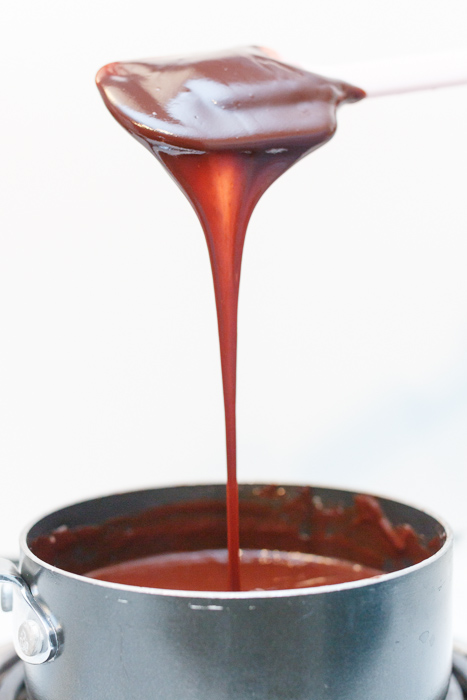
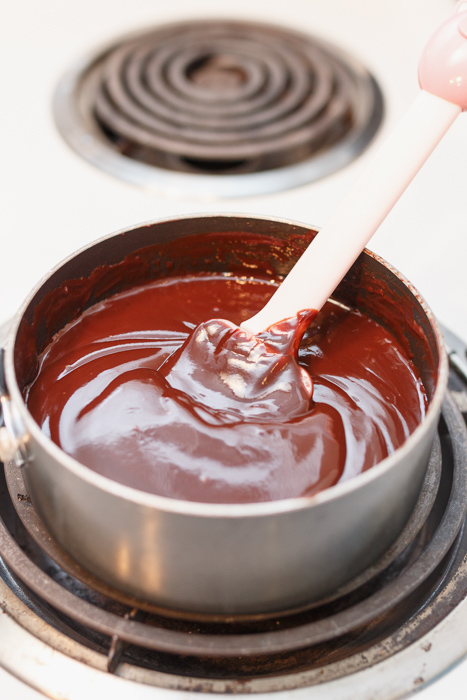
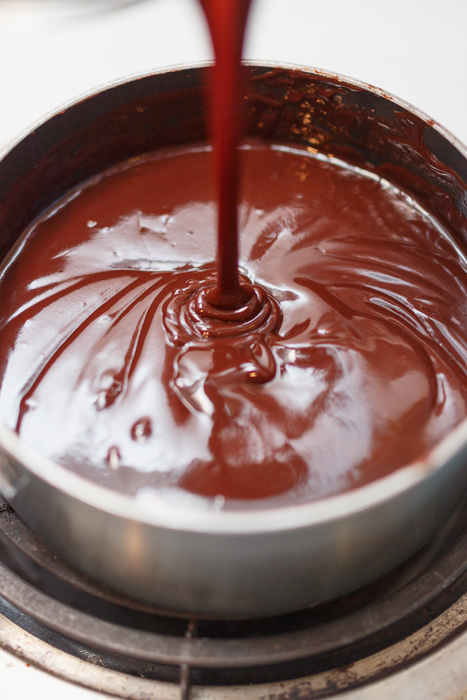
for the topping
Directions
for the crust
  1. Preheat the oven to 350 degrees F.
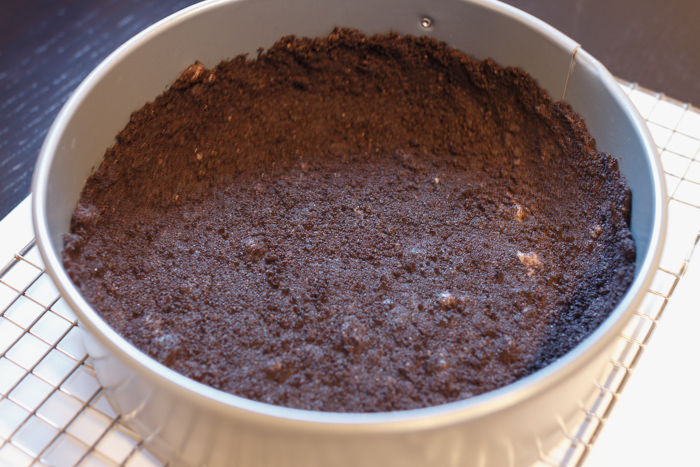
  2. Pulse the chocolate wafers in a food processor until fine crumbs. Add the butter, sugar and salt pulse until well combined.
  3. Press into the bottom and up the sides of a springform pans.
  4. Bake for 10 minutes then cool on a wire rack.
for the gelato
  1. If the hazelnuts are not toasted, bake them in an even layer on a baking sheet at 350 degrees F for 10-12 minutes. Let cool.
  2. Rub the hazelnuts to try and get rid of as much of the skins as possible. Use a food processor to finely chop the toasted hazelnuts.
  3. In a medium sauce pan heat the milk, 1 cup of the cream, sugar and salt until warm. Once warm remove from the heat.
  4. Add the chopped hazelnuts to the warmed mixture, cover and let sit at room temperature for 1 hour.
  5. Place the milk chocolate in a large bowl.
  6. In a medium saucepan heat the remaining 1 cup of cream until it starts to boil. Remove from the heat and pour over the milk chocolate.
  7. Stir the chocolate and cream until the chocolate is melted and smooth.
  8. In the medium saucepan used to heat the cream, place a mesh strainer over top then pour the hazelnut mixture through the strainer into the medium saucepan. Push on the hazelnuts with a wooden spoon to try and get as much liquid as possible. Discard the hazelnuts.
  9. Rewarm the hazelnut liquid over medium heat. While the liquid is heating whisk together the egg yolks in a medium bowl. Once the hazelnut liquid is warm, slowly pour the liquid into the bowl with the egg yolks, whisking constantly, to temper the eggs. Pour the warmed eggs and liquid back into the saucepan.
  10. Still on medium heat, stir constantly until the mixture thickens and coats the spatula.
  11. Place the bowl with the melted milk chocolate mixture over an ice bath and set a mesh strainer on top. Pour the egg mixture through the mesh strainer into the large bowl. Add the vanilla and stir until cool.
  12. Once the mixture is cool chill in the refrigerator completely. Once cold, pour into your ice cream maker following the manufacturer's directions.
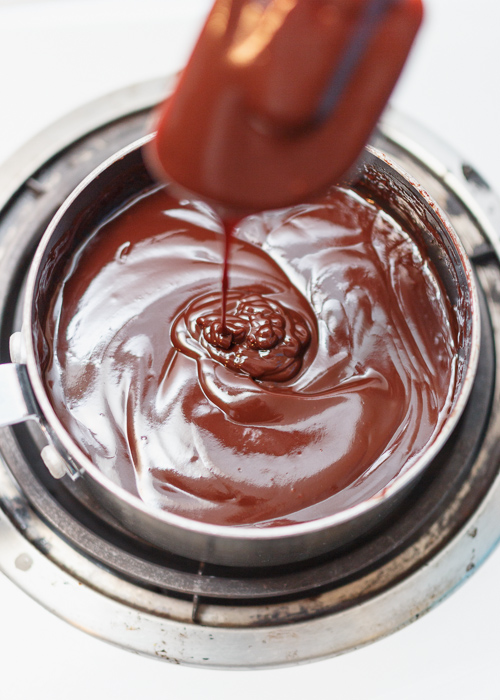
  13. While the mixture is in the ice cream maker, melt the bittersweet chocolate over a double boiler and stir until it's smooth. Transfer the chocolate into a measuring cup with a pouring spout.
  14. During the last couple minutes of churning in the ice cream maker pour the melted bittersweet chocolate into the ice cream maker in a thin stream to create the stracciatella.
  15. When the gelato is done churning carefully spoon it into the prepared crust and smooth the top. Freeze until no longer soft.
for the topping
  1. Take the pie out of the freezer and carefully pour the prepared ganache over the top of the gelato. Smooth the top with a spatula then sprinkle with the toasted hazelnuts.
  2. Freeze for several hours or overnight. Remove from the freezer 15-20 minutes before serving.
Notes
I use Ghiradelli chocolate bars.

Crust from Martha Stewart.
Gelato from The Perfect Scoop.

Chocolate Ganache

This recipe is life changing. Now I know I have been throwing a lot of bold words around on Lemon & Mocha lately, but there are so many recipes out there that I can’t afford to be meek. If I let you live your life even just one more day without tasting this chocolate ganache I could never forgive myself. And if I withheld this deliciousness from you for months before suddenly sharing, well, I shudder to think about the angry mobs.

Chocolate ganache is just a fancy way of saying a sauce of chocolate and heavy cream, or a fancy way of saying “mmm.” You heat heavy cream until it’s steaming, add in the chocolate then voila- the ganache is complete. This ganache has been known to bring people to their breaking point. I have even heard someone utter that they were ready to smack a ganache-topped cupcake out of child’s hand because they thought it was the last one! Don’t worry, I won’t name names ;-).

Now this photo is deceiving because once you have poured, dipped or drizzled the ganache it hardens into a glistening chocolate shell and develops a fudge-like quality. The beauty of this recipe other than the rich chocolate taste and smooth velvety texture is its versatility. Originally used to make faux Hostess cupcakes, I have since used the ganache for a wide variety of chocolate sinfulness. Topping chocolate cupcakes? Check. Coating brownies? Check. Eating with a spoon? Check. Matt likes to heat leftover ganache in the microwave then drizzle over ice cream. Now is that a boy after my own heart or what? You better make sure your computer screen is clean because when you see what I make with the ganache on Friday you might find yourself licking your monitor. It’s ok, I won’t judge.

Chocolate Ganache
 
Ingredients
  • ¾ cup heavy cream
  • 1- 12 ounce bag of bittersweet chocolate chips
  • 3 tablespoons unsalted butter, softened
Directions
  1. Heat the cream over medium heat until steaming, stirring constantly.
  2. Once steaming, remove the cream from the heat. Add the chocolate and stir then let sit for 5 minutes.
  3. Add the butter to the chocolate mixture then stir until smooth.
  4. Dip, pour or drizzle as directed in your recipe.
Notes
Any leftover ganache will keep in an airtight container in the fridge for up to 4 weeks.

Recipe from The Curvy Carrot.

Homemade Brown Sugar

I am about to reveal a secret that will blow your mind. If you already are aware of the fact I am about to share, I am obviously very excited so the least you can do is play along. So here it is: you can make your own brown sugar. Are you still there or did your head explode with that knowledge? That is how I felt when I stumbled across this nugget of information. Brown sugar is simply granulated sugar with molasses added. Who knew?! Well, maybe you did. But shh! Don’t spoil the moment.

When you buy a fresh box of brown sugar at the store, bring it back and open it up, it’s so soft and fluffy. You measure out your necessary amount with ease and since no recipe exists that calls for an entire pound of brown sugar you always store the rest of it. A few weeks later you have a cookie craving so you go to take your brown sugar out of the pantry and it looks like this:

Look familiar? You chip off a chunk and follow the “re-softening” directions on the box. Somehow after putting it in the microwave with a wet paper towel over top it is now both syrupy and still hard. How is that combination of qualities even possible?

It’s time to say goodbye to your brown sugar woes forever. You can simply make your own fresh brown sugar whenever you need it. Just mix one cup of granulated sugar with one tablespoon of molasses. That’s it! For dark brown sugar use two tablespoons of molasses.

Homemade Brown Sugar
 
Yield: 1 cup
Ingredients
  • 1 cup granulated sugar
  • 1 tablespoon molasses, 2 tablespoons for dark brown sugar
Directions
  1. Pour the sugar in a medium mixing bowl. Add the molasses.
  2. Stir with a fork. This takes some time. After the first five minutes it will look barely any different and you will think there’s no way this is going to look like the picture. You will want to give up, but you can’t! All good things come to those who wait so keep stirring and fluffing with the fork. Stir and fluff until no molasses clumps remain. Suddenly, ta-da! Brown sugar.
Notes
*No need to lift weights after this recipe. Your bicep will grow a whole ¼ inch from this recipe workout!
*Sometimes I have had some excess brown sugar and have stored it in a plastic container. I used it in the next couple weeks and it was still soft enough to measure out perfectly.

Recipe from Joy the Baker.

Leftover Halloween Candy Cookies

Happy Halloween! I wanted to post a recipe that would utilize leftover Halloween candy and I came across this idea in a magazine. Cookies are delicious, but what makes them even more decadent? Candy! Most people usually have leftover Halloween candy so you may find yourself in this very situation tomorrow. Maybe you didn’t get that many trick-or-treaters this year or you bought too much because you were worried about running out. Or maybe you live in an apartment building with no kids, but bought a bag of Halloween candy anyways because you have serious chocolate addiction problems that you should really see someone about.

For all you leftover candy havers it’s time to reinvent your candy. Sick of all those miniature Milky Ways? Transform them into cookies! Suddenly it’s a whole new food group. For all those less fortunate folks who got picked clean from those neighborhood rascals, don’t pout just yet. Now all the Halloween candy is on sale; unless they already replaced it with Christmas candy, which is both extremely possible and incredibly ridiculous. So go buy some so you can put it in these cookies.

I used miniature candies for these, but if you’re one of those houses that hands out the full size candy bars, first of all kids everywhere thank and applaud you. Second, you can just add an extra step and cut your large candy bars into one inch squares to use in this recipe.

The cookies are soft and chewy, which nestles the gooey candy center perfectly. I used a chocolate chip cookie base without the chocolate chips, but if you’re feeling extra devilish this Halloween you can always add one cup of chips to the batter. Muhahaha!

Leftover Halloween Candy Cookies
 
Yield: 16 cookies
Ingredients
  • 14 tablespoons unsalted butter
  • 1 ¾ cups all-purpose flour
  • ½ teaspoon baking soda
  • ¾ cup dark brown sugar
  • ½ cup sugar
  • 2 teaspoons vanilla extract
  • 1 teaspoon salt
  • 1 large egg
  • 1 large egg yolk
  • 16 unwrapped miniature chocolate candies
Directions
  1. Preheat the oven to 375 degrees. Line 2 baking sheets with parchment paper.
  2. Melt 10 tablespoons of the butter in a small saucepan over medium-high heat.
  3. While the butter is melting, whisk together the flour and baking soda in a medium mixing bowl.
  4. When the butter has melted, keep it on the heat and swirl the pan until the butter is a golden brown. This should take 2-3 minutes. Remove the saucepan from the heat and stir in the remaining 4 tablespoons of butter. Continue to stir until completely melted then transfer to a large mixing bowl.
  5. Add the brown sugar, sugar, vanilla and salt to the bowl with the butter. Whisk to combine.
  6. Add the egg and egg yolk to the butter mixture. Whisk until the mixture is smooth.
  7. Let the mixture sit for 2 minutes then whisk again for 30 seconds. Repeat this 1 more time so that the mixture is smooth and shiny.
  8. Using a rubber spatula carefully stir the flour mixture into the butter mixture until just combined. If you were including chocolate chips you would add 1 cup of them to the batter after this step.
  9. Scoop out about 3 tablespoons of batter and press one of the unwrapped candies into the center. Carefully form a ball with the batter and the candy in the center with your hands then place on the baking sheet.
  10. Continue this process until you have 16 cookies total, 8 per baking sheet.
  11. Bake 1 tray at a time for 8-10 minutes or until the edges have begun to set and the cookies are golden. Rotate the baking sheet halfway through the baking time.
  12. Set the baking sheet on a wire rack and let sit for a few minutes then transfer cookies to the wire rack using a spatula to cool.

Recipe slightly adapted from May & June 2009 issue of Cook’s Illustrated.
Inspiration from October 2011 issue of Everyday Food.

Halloween Witches’ Cauldron Cupcakes

Halloween is my favorite holiday, right after Christmas and my birthday. Just kidding about the birthday part… maybe. A day where it’s equally acceptable to gorge on candy, dress up in a ridiculous costume and watch Disney Channel Halloweentown movie marathons? Count me in! My love of Halloween also comes from my dad. Anyone who knows my dad is aware of how infectious his excitement and enthusiasm is, and since Halloween is his number one favorite holiday the fondness rubbed off on me throughout the years. From helping my brother and I with haunted house creations to every year faithfully taking us to the neighborhood with the best candy to embarrassing me by showing up at my college dorm in a full clown suit, my dad has always made sure I associated Halloween with fun and laughter.

These cupcakes may take a bit of work, but they are cute, fun and will definitely put a smile on everyone’s face this Halloween. I saw these cauldron cupcakes in last year’s Halloween issue of Food Network Magazine and have been counting down to Halloween so I could make them. The cupcakes look spooky and taste delightful so it’s win-win!

Halloween Witches' Cauldron Cupcakes
 
Yield: 16 cupcakes
Ingredients
  • 24 chocolate cupcakes in black or dark brown wrappers
  • 1 batch chocolate frosting
  • Red sugar sprinkles
  • Bright green decorator’s icing
  • 16 thin pretzel sticks
  • 1 bag cotton candy
  • Black licorice laces
  • 1 toothpick or skewer
Directions
  1. Unwrap 8 of the cupcakes and cut them in half horizontally (the top of the cupcake will be one half and the bottom of the cupcake will be the other).
  2. To assemble the cauldron, spread a thin layer of frosting on top of one of the still wrapped cupcakes. Top with 1 cupcake half and try to line the edges up as well as you can. They won’t match up exactly because of the rounded cupcake tops.
  3. Seal the cupcake half to the rest of the wrapped cupcake by covering the entire extra-tall cupcake with frosting.
  4. Pour some sprinkles onto a small plate and pile them together. Slowly press the edge of the cupcake nearest the wrapper into the sprinkles. I did this by holding the bottom of the wrapped cupcake in my right hand, slowly turning and re-pressing into the sprinkles, while pressing the index finger of my left hand into the top center of the cupcake to keep it steady. This is the trickiest part.
  5. Press your finger into the top center of the cupcake to make a small indent about half an inch deep and the size of a nickel.
  6. Fill the indent with the green decorator’s icing and squeeze it over the sides of the indent so it looks like it’s oozing out.
  7. Place a pretzel stick in the indent so it looks like a witch’s broom sticking out of the cauldron.
  8. Carefully place some of the cotton candy behind the green decorator’s icing. I used a fork to grab it from the bag and fluff it since it tended to lose its airiness if I pressed too hard with my fingers.
  9. Break off about a 3-4 inch piece of black licorice. Poke two holes into opposite sides of the cupcake with the toothpick. Carefully place one end of the licorice into the first hole then arch the licorice to create the cauldron’s handle and place the other end in the other hole.
  10. Repeat for the remaining 15 wrapped cupcakes.
Notes
Do not put these cupcakes in the fridge as it will cause the cotton candy to dissolve and shrivel. I found cotton candy in the candy section of my grocery store. I had to go to quite a few different candy stores to find black licorice laces, but you could always use red laces if you are unable to find black laces.

Inspiration from October 2012 issue of Food Network Magazine.
Find the chocolate cupcake and frosting recipe here.