


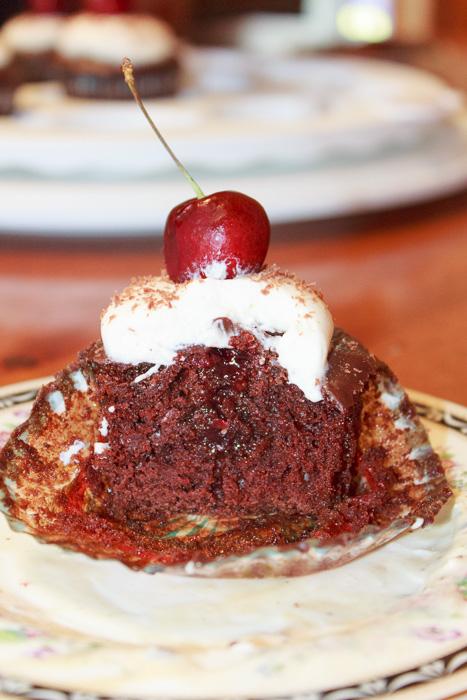
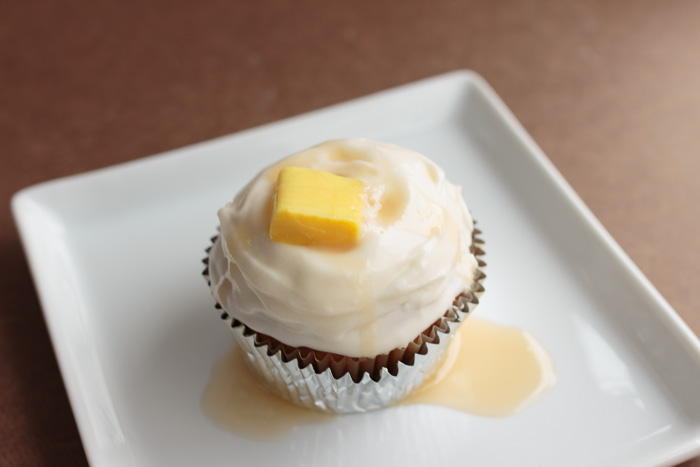
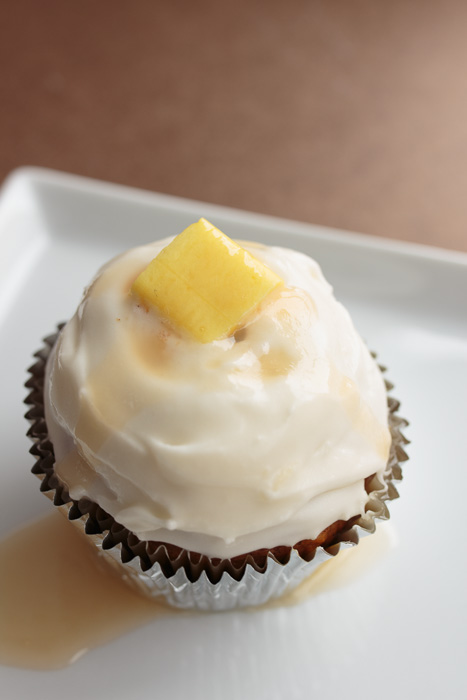
Black Forest Cupcakes
Ever since I discovered how simple it is to fill cupcakes I have become obsessed with creating multi-component mini cakes. The added layers of complexity take an already delicious treat from a “yum” moment to a “wow” moment. Or, if you’re lucky, a “wow-I-can’t-breath-because-I’m-too-busy-shoving-this-amazing-cupcake-in-my-mouth” moment.
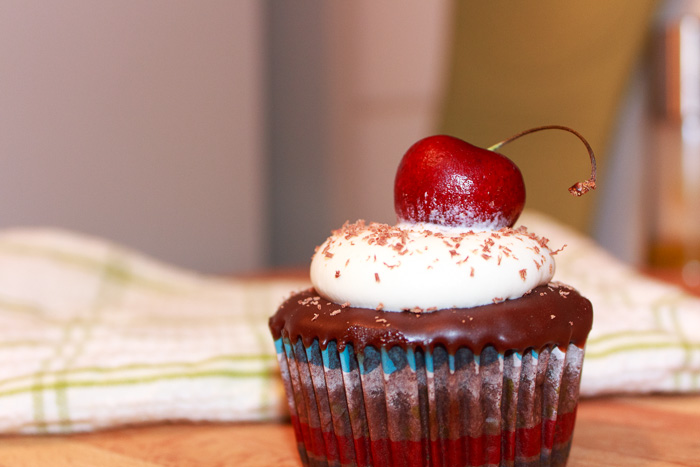
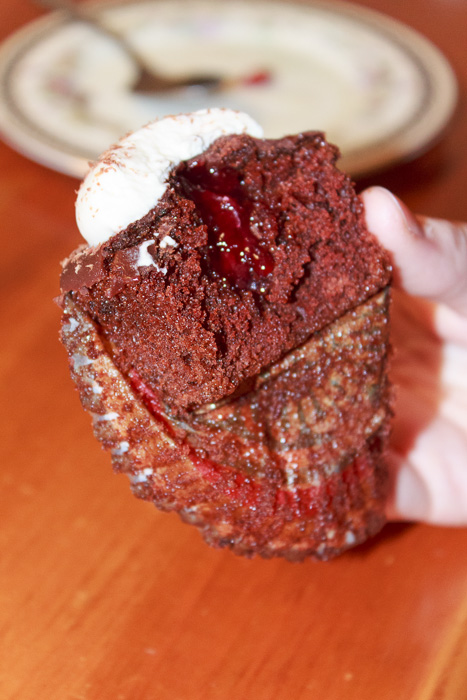
When I was challenged with creating a cupcake rendition of the German classic Black Forest cake I set right to work. The essential makings of a Black Forest cake are chocolate cake, whipped cream and cherries. The chocolate cake aspect was easy as I already have my perfect chocolate cupcake recipe memorized. I decided to keep the filling simple by using pre-made cherry preserves to give me more time to focus on the whipped cream, but you can certainly make the cherry preserves yourself if you are feeling extra ambitious.
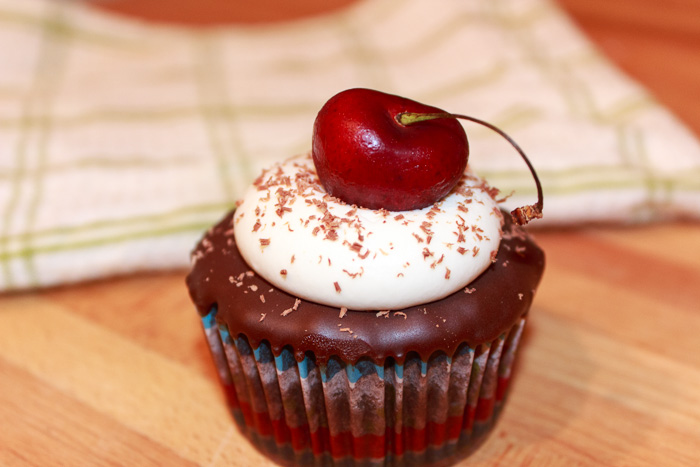
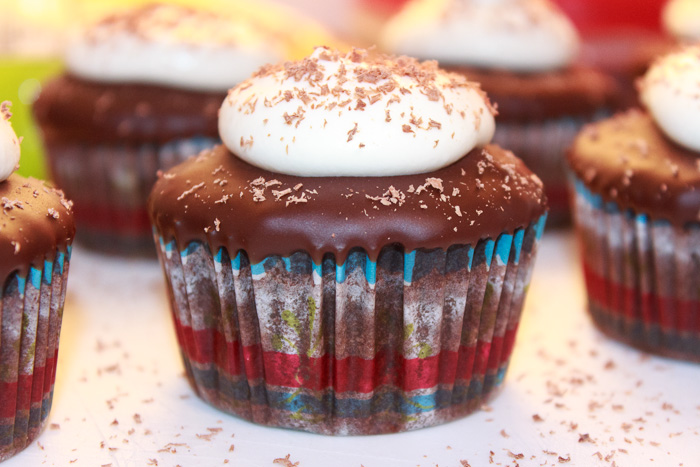
Before getting to the whipped cream topping I knew these cupcakes had to have a little something extra. Although the cupcakes are chocolate I wanted something additional since more chocolate is always better. The most delightful chocolate ganache was hardened on the top of each cupcake to create a wonderful hard shell to contrast the lightness of the fluffy frosting, while also helping cover up the incision marks from filling the cupcakes.
Then onto the final piece: the whipped cream. The whipped cream would have to be light and airy, while still being sturdy enough to act as a frosting for the cupcake. With a bit of tinkering I achieved the perfect texture and was soon piping it into my mouth. I mean onto the cupcakes. Topped with some shaved chocolate and a fresh cherry the Black Forest cupcakes were completed. When you make these cupcakes be sure to admire their beauty before serving them as they won’t last very long!
- 1 batch Perfect Chocolate Cupcakes
- 1½ cups cherry preserves
- 1 cup chocolate ganache
- 1 ounce chocolate
- 24 cherries
- 1 8-ounce package reduced fat cream cheese, softened
- ¾ cup powdered sugar
- 1 teaspoon vanilla extract
- ½ teaspoon lemon extract
- 2 cups heavy cream, chilled
- Using a cupcake corer, apple corer, or knife create a large cavity in the center of each cupcake. Reserve the top of the removed cupcake piece. Fill the cavity with a tablespoon of the cherry preserves. Place the top of the removed cupcake piece on top of the cherry preserves to seal the cupcake back up. Place the cupcakes in the fridge to chill.
- Remove the cupcakes from the fridge and carefully pour chocolate ganache over the top of each cupcake to coat it. It’s okay if it doesn’t look pretty because it’s going to be topped with frosting. Place it in the fridge for the ganache to harden.
- Whip the cream cheese, powdered sugar, vanilla extract and lemon extract in a metal bowl of a stand mixer until fluffy. Transfer to medium bowl then chill in the fridge.
- Clean out the bowl of the stand mixer and chill with the whisk attachment in the freezer for 10 minutes. Once the bowl has had a chance to chill, whip the heavy cream on high speed until stiff peaks start to form, but be sure not to over-beat the cream or it will break. Remove the bowl of cream cheese mixture from the fridge and gently fold in the whipped cream.
- Remove the ganache-topped cupcakes from the fridge. Fill a pastry bag fitted with a round thick tip with the frosting. Hold the pastry tip over the center of a cupcake and squeeze until a large dollop covers most of the cupcake. Using a microplane, shave some chocolate over the whipped cream frosting and top with a cherry. Repeat for the remaining cupcakes. Store in the fridge until serving.
Frosting adapted from allrecipes.
 Last week was the first day of spring! Not that you would notice here in Boston where the lows sank into the 20’s this week. It’s okay, us New Englanders don’t expect much out of spring. Everyone says that unlike some other parts of the country New England experiences all four seasons and that is true, but not how you imagine it. We get all four seasons except sometimes we can go from fall to summer to winter… in one week. And usually the year feels like a really long winter, a decent summer, with the teeniest smallest amount of spring and fall in between. But, as the song goes, “Boston, you’re my home,” and I wouldn’t change it for anything.
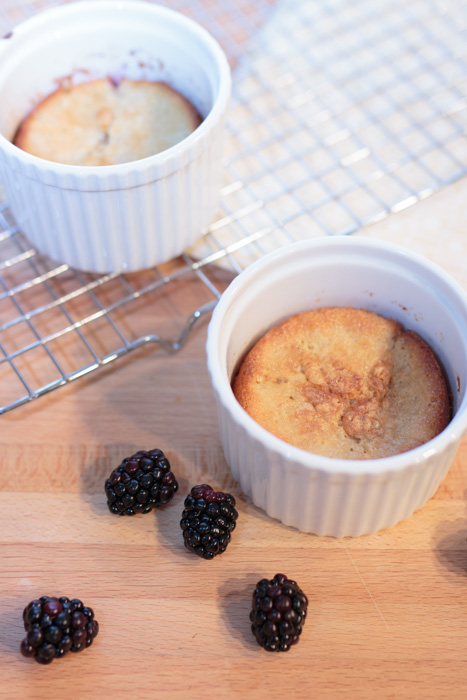
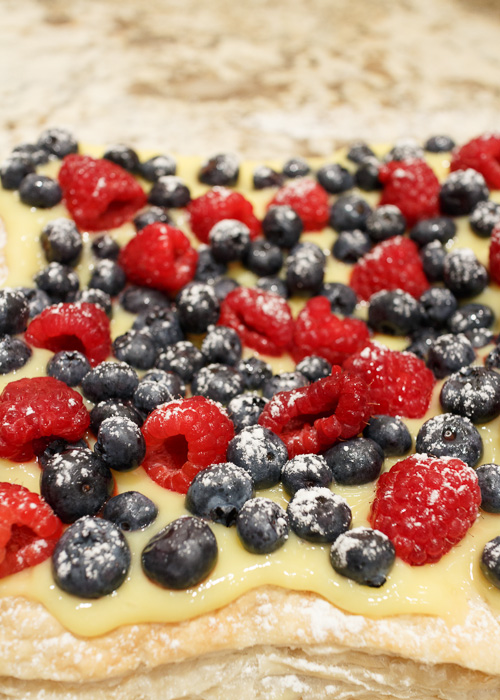
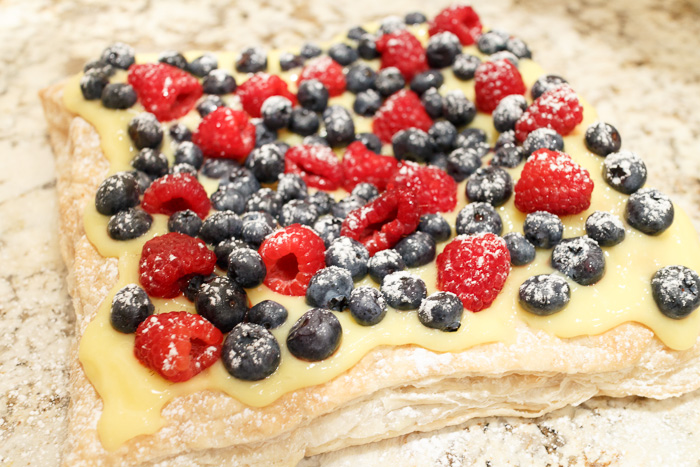
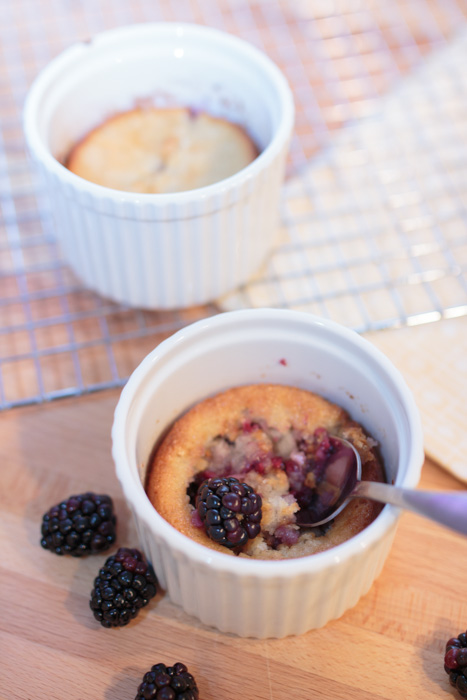
 Some cobblers have a texture more similar to biscuits, but I like this recipe for the cake-like result it yields. The ingredient amounts are a bit odd because I was scaling down a full-sized treat, but the end result is satisfying deliciousness. Cutting into the soft cake with your spoon to discover the moist berry inside is almost as exciting as scraping that last bit of the cobbler into your mouth. Almost. So treat yourself and your lucky friend, significant other, child or second-cousin twice removed to these delightful mini berry cobblers. Or treat yourself twice, you know by now I certainly won’t judge you.