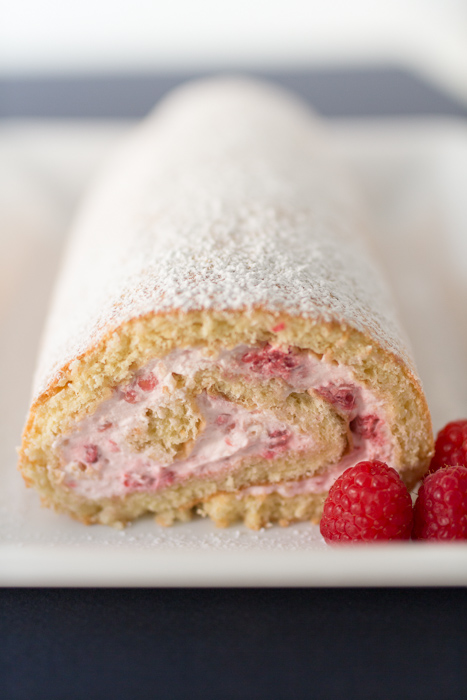
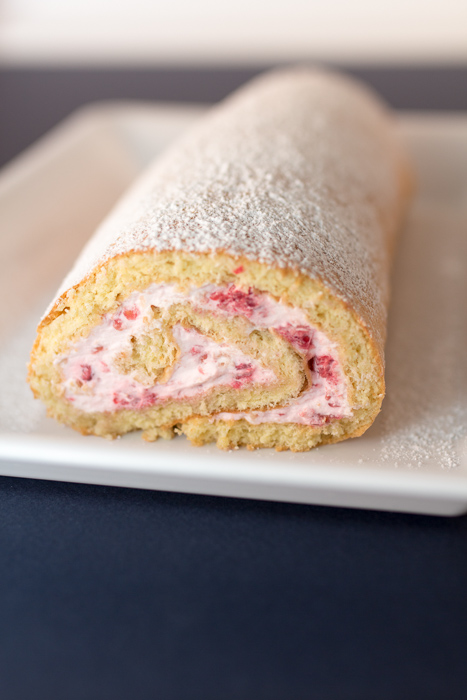
Raspberries and Cream Sponge Cake Jelly Roll
The item on the top of my 50 recipes I want to conquer in the kitchen list was a jellyroll. I have no idea why, but I could not wait to try one out myself. Maybe it’s because they always look so beautiful. Maybe it’s because the possibilities are seemingly infinite. As soon as I got my hands on a half sheet pan, courtesy of Matt, I knew I was going to christen it with a homemade jelly roll. I quickly sat down and scribbled out two pages of cake-filling combination ideas.

My mind was on overdrive! Classics like pumpkin with cream cheese filling and sponge cake filled with jam. Chocolate dipped strawberry, banana split and chocolate chip cookie dough. Peaches and cream, Oreos and cream and lemon cream pie. I was busy wiping the drool from my lips while I contemplated exactly which one to create first. Raspberries and cream sponge cake jelly roll. Classic, yet updated. Moist and airy with the perfect amount of sweetness. And of course, visually beautiful with an ideal Valentine’s Day treat coloring. Also there was already a container of raspberries in my fridge, but that tidbit spoils the poetic description of it all.
My favorite part of making this raspberries and cream jelly roll sponge cake, more so than eating it, which is saying a lot since it’s divine, was discovering just how simple it is to make a jelly roll cake. You really can do it! All of you! The key is to pay attention to the small details in the recipe, such as cooling time, being gentle with the cake and coating the proper tea towel. You will surprise yourself at how easy it all really is. The whole time I kept looking over at Matt and saying, “Look! I’m doing it! The jelly roll cake is working!” So put aside your baking bashfulness and impress everyone with this gorgeous raspberries and cream jelly roll sponge cake.
- ¾ cup all-purpose flour
- 1 teaspoon baking powder
- ¼ teaspoon salt
- 5 large eggs
- ¾ cup sugar
- ½ teaspoon vanilla extract
- 4 ounces cream cheese, softened
- ¼ cup powdered sugar
- ½ teaspoon vanilla extract
- ¼ teaspoon lemon extract
- 1 cup heavy cream
- ½ cup mashed raspberries
- Raspberries and powdered sugar for serving
- Preheat the oven to 350 degrees F.
- Grease a half sheet pan (18" x 13") then line with parchment paper. Grease the parchment paper then sprinkle flour on the greased sheet and shake to coat.
- In a small bowl whisk together the flour, baking powder and salt. Set aside.
- Using a stand mixer whip the eggs with the whisk attachment at medium high speed while slowly adding the sugar and vanilla. Continue to whip until the mixture is thick, about 5-8 minutes.
- Sift the flour mixture into the egg mixture and combine with a spatula until just incorporated.
- Pour the batter onto the prepared baking sheet and carefully spread it into an even layer.
- Bake for 12-17 minutes or until the cake feels firm, but springs back when you touch it. Make sure to rotate the pan halfway through the baking time.
- While the cake is cooking, lay a clean tea towel on a flat surface and lightly dust with powdered sugar.
- Place a metal bowl and whisk attachment in the freezer.
- Beat the cream cheese, powdered sugar, vanilla extract and lemon extract in stand mixer until combined. Set aside.
- Using the chilled metal bowl and whisk attachment beat the heavy cream until stiff peaks form. Do not over mix or the cream will collapse. Gently fold the cream cheese mixture into the whipped cream. Then gently fold the mashed raspberries into the frosting until just combined.
- When the cake comes out of the oven, immediately run a knife around the edge of the pan then flip the cake onto the towel. Discard the parchment paper that the cake baked on. Beginning at 1 short end of the cake, carefully roll the cake and towel along with it into a tight log. It is important to do this step while the cake is still hot. Leave the cake seam side down and let cool for 15 minutes.
- Carefully unroll the cake. Add the filling making sure to leave a ½" border at the edges. There may be some filling leftover, you don't want to over-stuff the cake.
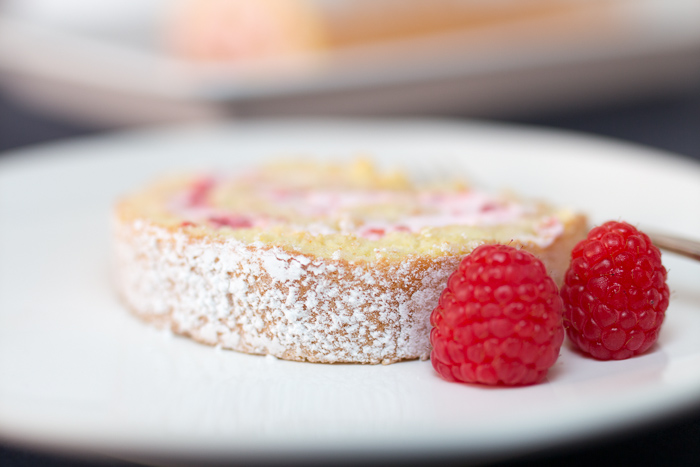
- Gently roll the cake bake up into a snug log, this time leaving the towel behind. Let cool completely, about 30 minutes. When ready to serve cut off the ends, transfer to a serving plater and top with an additional dusting of powdered sugar and fresh raspberries.
Cake from The Cook’s Illustrated Cookbook.
Frosting adapted from allrecipes.com.