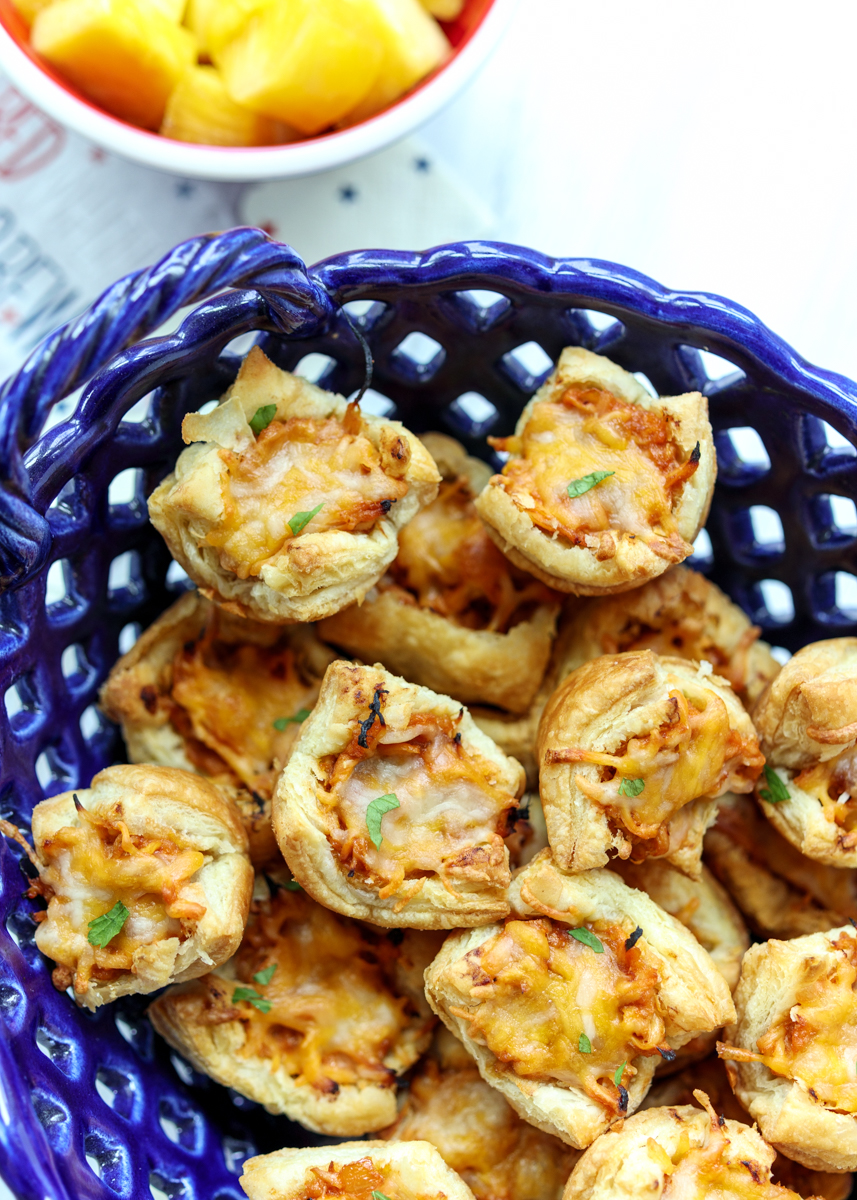
Cheesy Barbecue Chicken Puff Pastry Bites
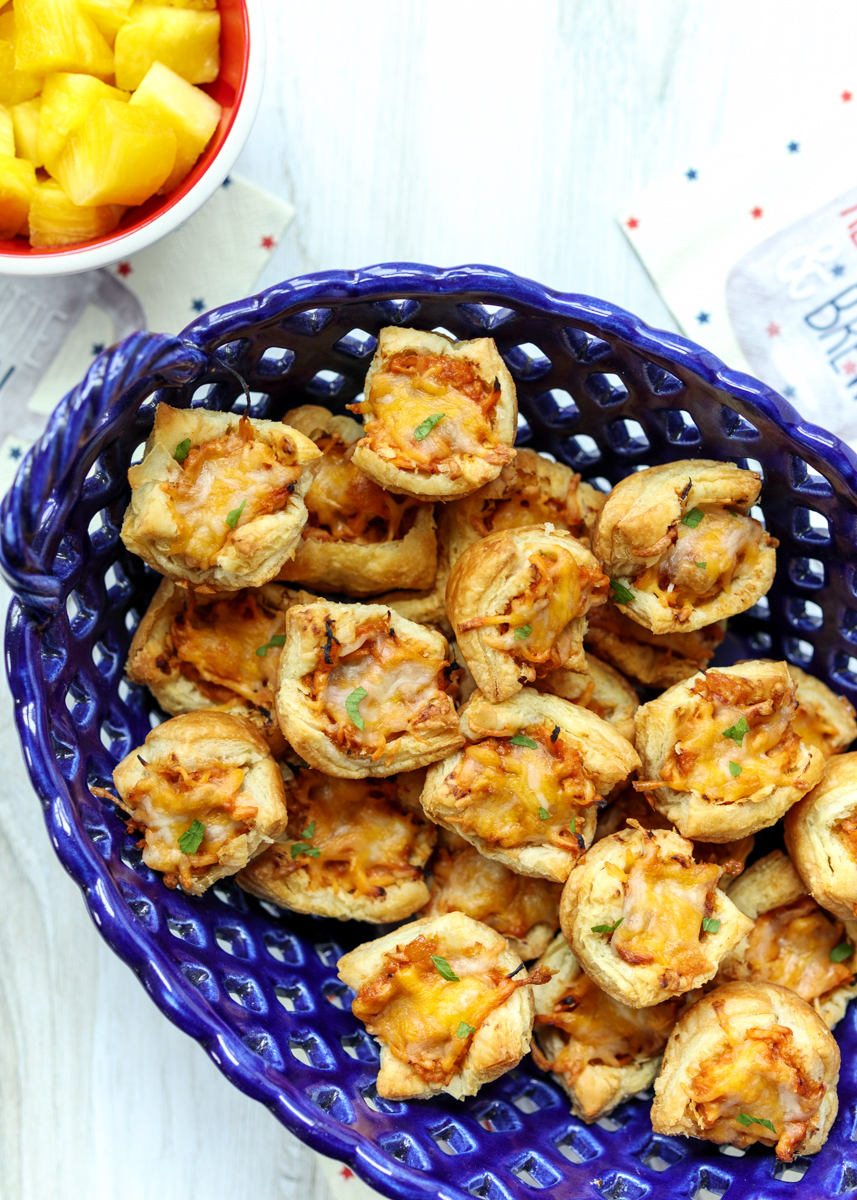
Hi, friends! I know it has been a bit since I posted, but I was determined to share these Cheesy Barbecue Chicken Puff Pastry Bites before Memorial Day weekend! Is there a more perfect party appetizer than something cheesy stuffed into a flaky puff pastry cup? The Antipasto Puff Pastry Bites and the Crab Dip Puffs are always such a hit that I decided I needed to come up with another version of puff pastry bites. Since Memorial Day is coming up I wanted an appetizer that would fit well on a BBQ menu. It’s hard to go wrong with sweet tender chicken smothered in gooey cheese, especially when it’s in crispy and buttery puff pastry.

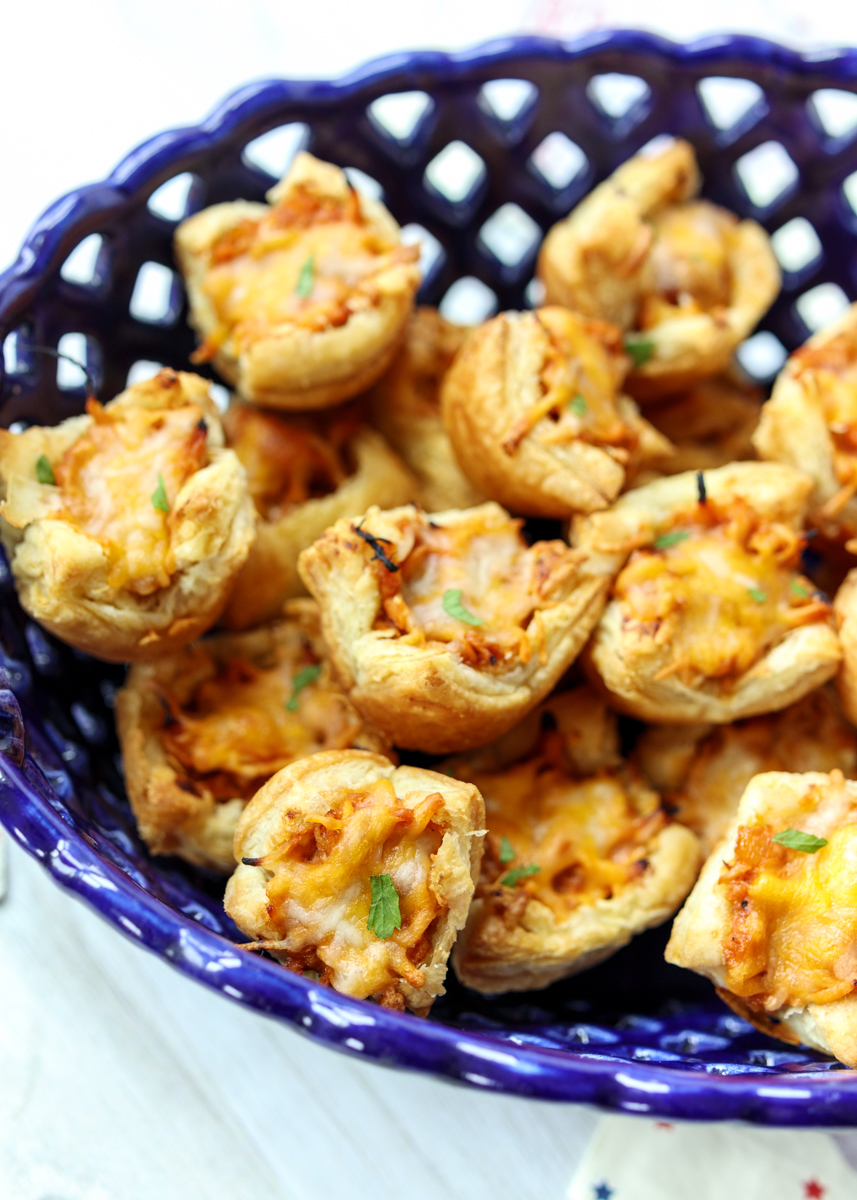
I know I talked about this in my Antipasto Puff Pastry Bites post, but I just want to reiterate how easy these little bites are to make. I know, I know, they look so fancy, but that’s just the store-bought puff pastry doing all the hard work for you. Roll out the thawed sheet of puff pastry until it’s a little thinner and larger then cut it into squares. I use my pizza cutter; I definitely don’t make the straightest cuts, but it doesn’t really matter. The little squares of puff pastry get pressed into the cups of a mini muffin pan that has been sprayed with nonstick spray.
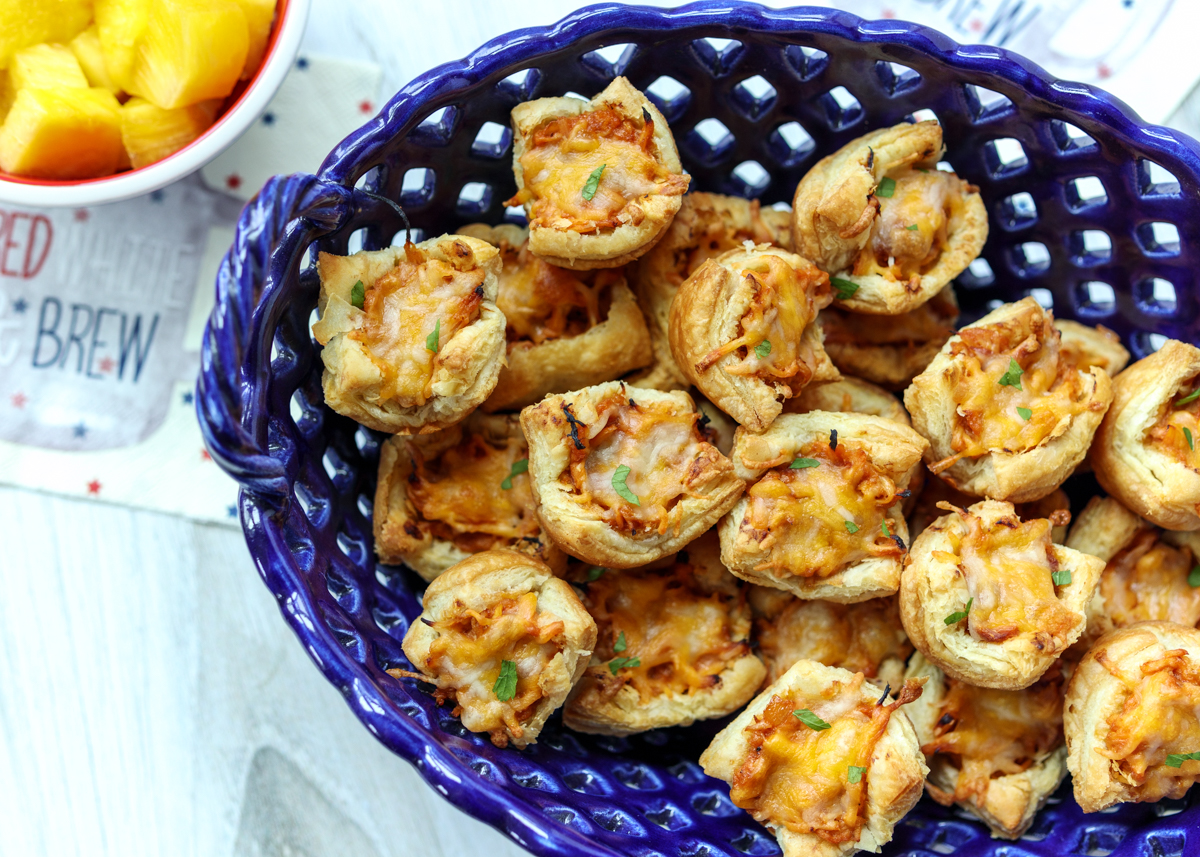
After baking just the puff pastry cups for ten minutes you use a spoon to deflate a little cavity into the center of each puff pastry cup then fill with some shredded barbecue chicken and cheddar cheese before baking for another ten minutes. The reason I split up the baking time is by letting the puff pastry bake a little on its own you’re making sure the bottoms will be crispy and completely cooked.
When I made these for some friends a couple weeks ago I rolled and cut the puff pastry sheet, placed it into the sprayed muffin pan, then covered the whole thing with plastic wrap and placed it in the fridge. That way when everyone arrived I was able to go right to the baking part and it took no time at all to spoon the chicken into the little cups in between the two ten-minute bakes.
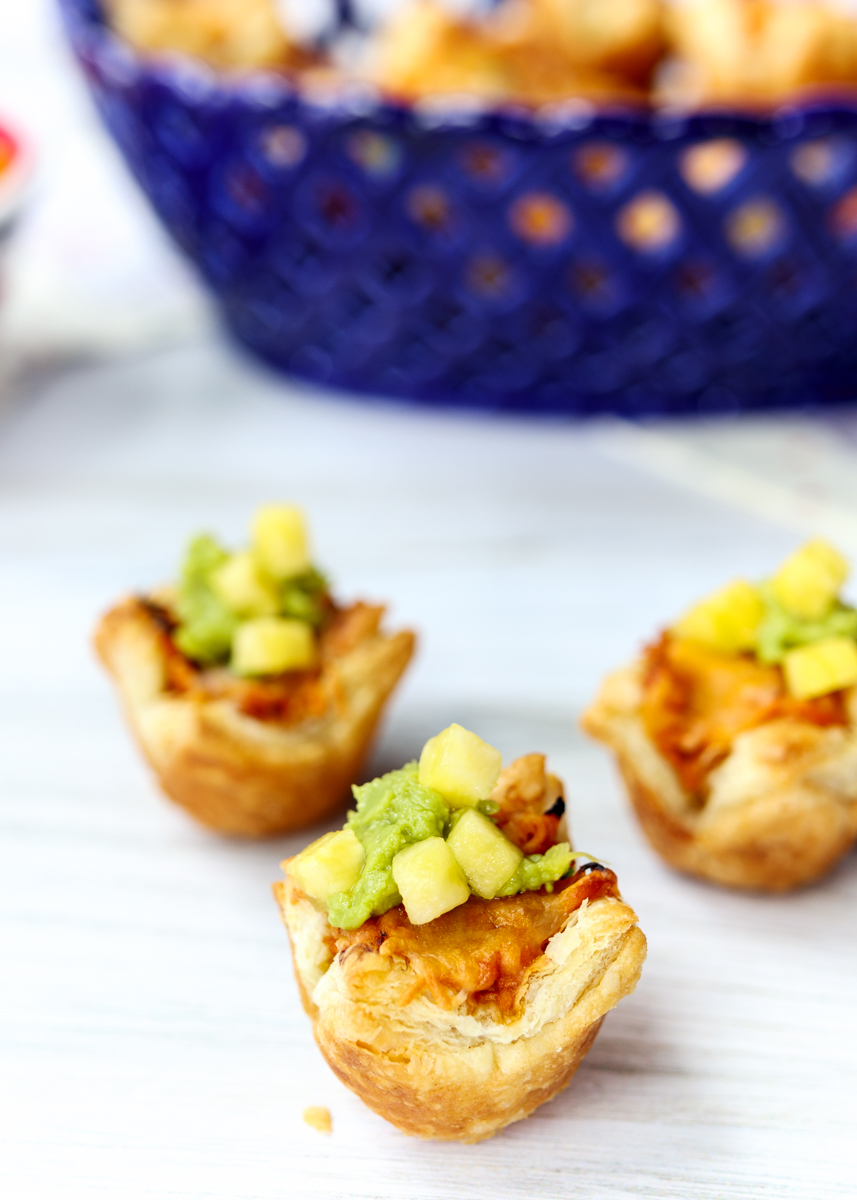
These Cheesy Barbecue Chicken Puff Pastry Bites taste awesome as is, but you can also get creative with different toppings to change the taste a little. My friends and I tried some with chopped pineapple on top and when I made them again for the photo shoot I tried them with a small dollop of guacamole. All three ways tasted really good! You could leave out some topping bowls and let guests choose their own different variations. I hope you all love these as much as we do!
- 1 sheet puff pastry, defrosted, but still cold (mine is usually just right when thawed at room temperature for 35 minutes)
- 1 cup shredded barbecue chicken, see note
- ¼ cup plus 1 tablespoon finely shredded cheddar or Mexican blend cheese
- Finely chopped pineapple for serving, optional
- Guacamole for serving, optional
- Cooking spray
- Preheat the oven to 400 degrees F. Lightly spray a mini muffin pan with cooking spray and set aside.
- On a lightly floured surface unfold the puff pastry sheet. Roll into a rectangle about 10” by 15”. Cut the rectangle of puff pastry into 24 squares. Press each square into a cup of the prepared mini muffin pan. Return to the fridge for 10 minutes to chill or cover with plastic wrap and leave in the fridge until ready to serve. When ready, bake for 10 minutes then remove from the oven.
- When the puff pastry comes out of the oven, gently press a spoon into the middle of each bite to lightly deflate the middle and make room for the chicken. Spoon the shredded chicken into the puff pastry bites. Sprinkle the top of each bite with some of the shredded cheese. Return to the oven for another 10 minutes. Serve hot as is or with pineapple and guacamole on top.