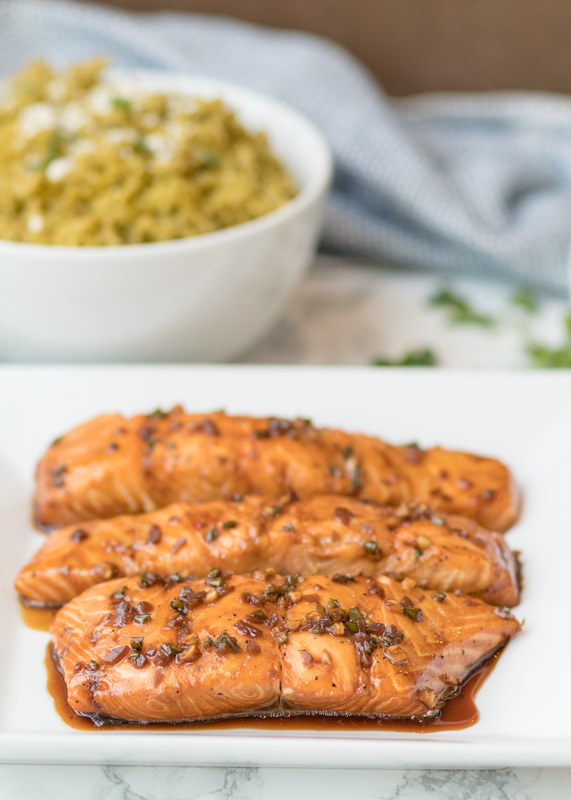
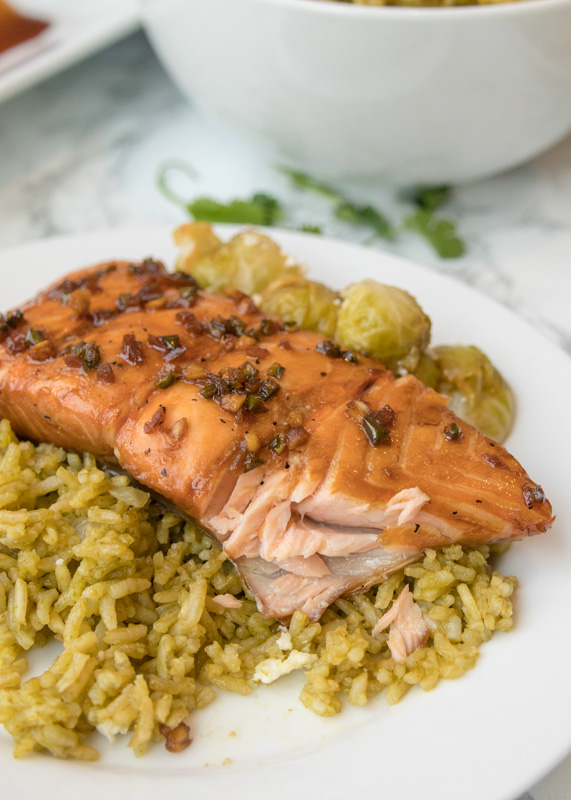
Sweet & Salty Salmon
I don’t cook salmon often so when I finally do I want it to taste unbelievably good. The main reason we don’t have salmon in our regular rotation is because Matt is not a fan. So anything that can mask the “salmony-ness” as Matt puts it is an instant winner in our house.
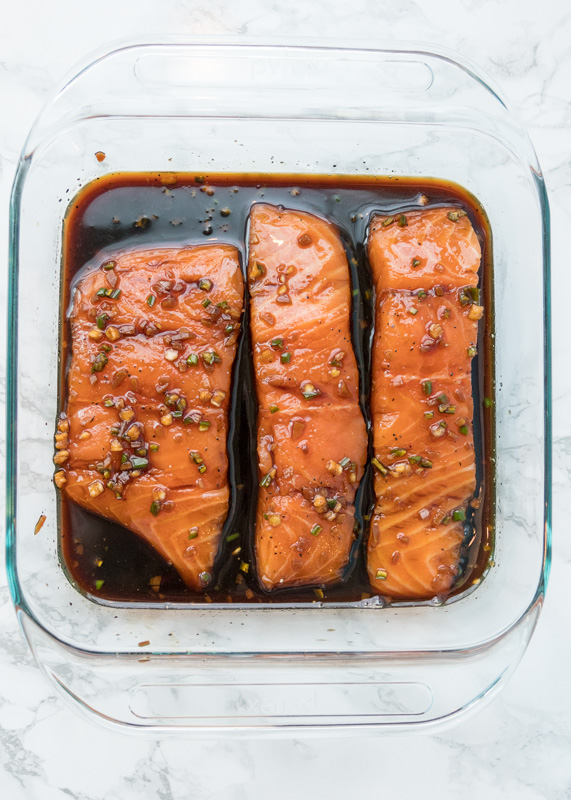
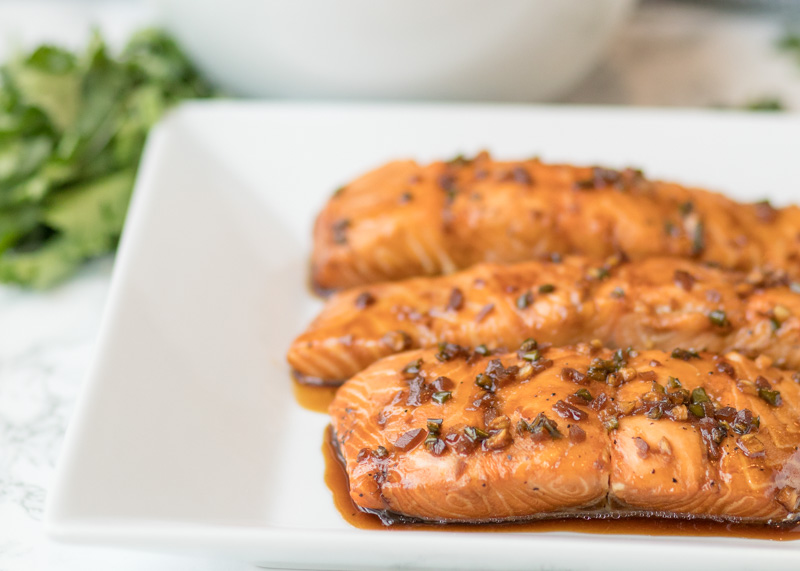
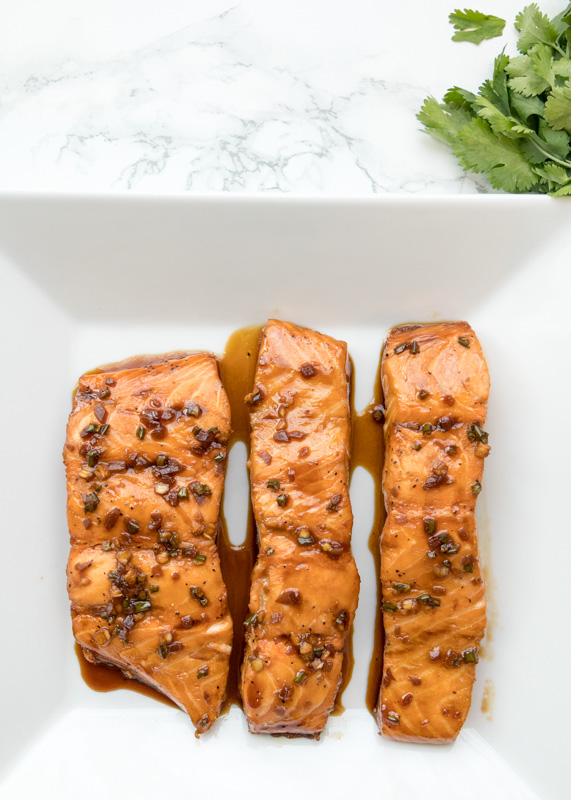
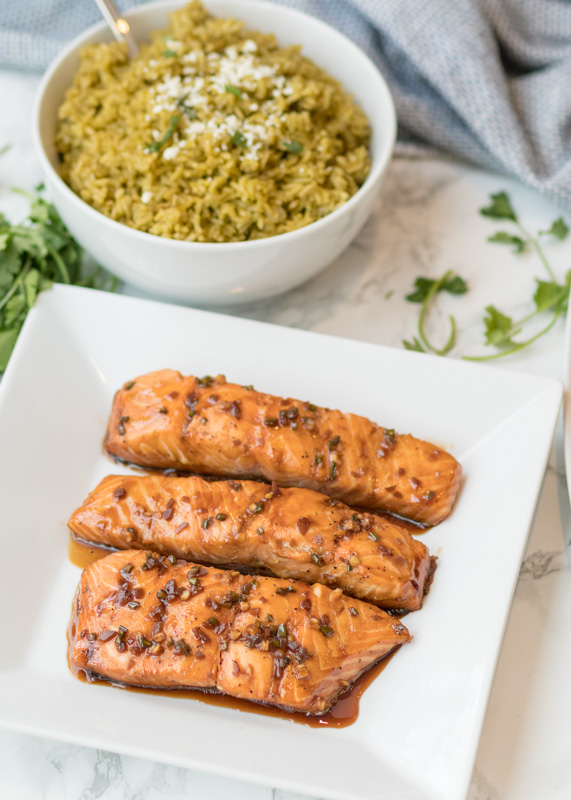
Both Matt and I devoured this Sweet and Salty Salmon. The salmon is marinated and then baked in the marinade, which keeps the fish super moist and tender. The sweet and salty marinade also imparts a ton of flavor on the salmon. The marinade is mostly brown sugar, soy sauce and lime juice. Add in the ginger, jalapeño and cilantro (or parsley if you’re like us and don’t like cilantro), and you have a total Asian-Mexican fusion happening in your kitchen.
I found this recipe in one of my absolute favorite cookbooks – Pati’s Mexican Table. I bought it on a whim and made seven recipes out of it for Matt’s Mexican food themed birthday weekend last year. You would think with seven recipes there would be at least a couple that were just okay, but every single one was so amazingly delicious. After that, I am fully confident to cook anything from the book and know the dish will be a winner, and this salmon proved that even more for me the other week. I was nervous about buying a Mexican cookbook since I am so intolerant to spicy food, but I have not had any issues. If you are looking for some delicious meals that have a totally different flavor profile than what you are used to cooking I very highly recommend this cookbook. Just like the Mexican Street Corn Pasta Salad, if you remove the seeds and pith from the jalapeño it will not make the marinade spicy. However, still be careful with how you cut the jalapeño or any chili pepper!
I had an unfortunate incident while making this dish. On photo shoot days I’m so busy cooking and photographing that I don’t have time to sit down and eat so I was multitasking by eating a piece of toast while preparing this marinade. I thought I was being careful about not using my hand that had touched the jalapeño seeds, but I must have switched hands and used my jalapeño hand for the toast. Instant searing pain on the outside of my lip ensued, forcing me to guzzle milk and frantically Google hot pepper burn remedies. This resulted in one so-so solution, which was very carefully washing the outside of my lip with dish soap, and one fantastic solution – peanut butter! I smeared it on my lip and felt instant relief. I also ate some for good measure. I let it sit on my lip for about an hour just to make sure I was in the clear and I was completely pain-free! So, the point of all the dramatics is to be careful when you are using hot peppers, even a mild one like jalapeño. And if you do get a burn, grab that jar of Jif!
Also, in case you were wondering, these are the seven recipes I made from the cookbook for Matt’s birthday last year! I will be posting the green rice recipe on Wednesday, but let me know in the comments below if there’s another recipe you would like me to make again and post!
– Charred Tomato Salsa (salsa roja)
– Cooked Green Salsa (salsa verde)
– Creamless Cream of Zucchini Soup (crema de calabacita)
– Oaxaca-Style Mushrooms and Cheese Quesadillas
– Blissful Corn Torte
– Creamy Poblano Rajas (rajas con crema)
– My Favorite Green Rice (arroz verde)
- 1 cup packed dark brown sugar
- ½ cup soy sauce
- ¼ cup lime juice
- 1 jalapeño, seeds and pith removed, minced
- 1½ tablespoons grated fresh ginger
- 1 clove garlic, minced
- 6 salmon filets, 4-6 ounces each, skin-on
- 2 tablespoons chopped parsley or cilantro leaves
- 2 scallions, stems removed and sliced
- Salt and pepper, to taste
- In a medium saucepan over medium heat, combine the brown sugar, soy sauce, lime juice, jalapeño, ginger, garlic and salt and pepper to taste. Cook for a few minutes while stirring until the brown sugar has dissolved. Remove from the heat and let cool.
- In a baking dish large enough for the salmon to be in a single layer, place the salmon then pour the marinade on top. Carefully flip the salmon to completely coat in the marinade before leaving the salmon skin-side down. Cover and refrigerate the salmon for at least 30 minutes or up to 4 hours. Several times while it’s marinating spoon the marinade over the salmon.
- Preheat the oven to 375 degrees F. Remove the salmon from the fridge 10 minutes before cooking. Bake the fish for 15-18 minutes or until it flakes easily with a fork. Carefully remove the skin before serving and garnish with the parsley and scallions.
Recipe from Pati’s Mexican Table.
Some of the links above are affiliate links, which means I may receive a small commission for my referral. This does not affect the retail cost of the item. Thank you for supporting Lemon & Mocha!