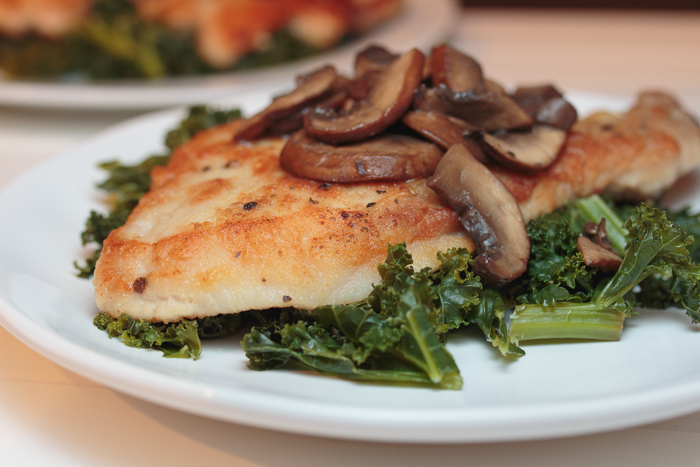
Dredged Pork Cutlets with Mushrooms & Kale
Do you ever have yourself convinced something is in a certain spot, but then when it’s not there you find yourself going nuts tearing your house apart looking for it? This happened to me recently with a recipe. Actually with a recipe that was supposed to be shared today. A recipe that apparently doesn’t exist because I can’t find it ANYWHERE.
I love cooking new dishes and between magazines, cookbooks, recipes that have been given to me and online recipes I’ve saved I have more recipes than I could ever cook in my lifetime so it is not uncommon for me to go years in between cooking the same dish, even if it was a favorite at the time. About three years ago I distinctly remember making a stovetop pork and mushroom dish for Matt and I in our old apartment. I remember it being simple, quick and incredibly delicious. I remember it being from one of my favorite cookbooks.
Well after combing through all my cookbooks I owned three years ago, all my neatly organized and cataloged magazine recipes, my personal recipe binders and recipes I have saved online I have concluded that this mystery dish is a lost cause. I decided to create a new dish: pork and mushroom 2.0. Since I can’t remember any of the original ingredients other than pork and mushrooms who knows how similar it is to the mystery dish, but what matters is that it’s even more delicious than I remember.
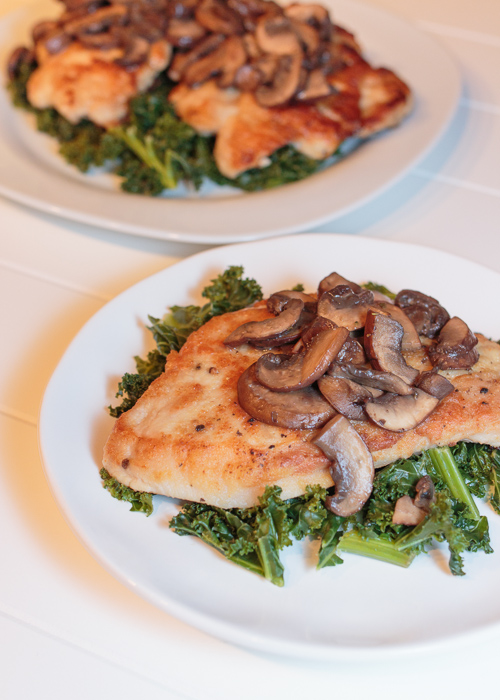
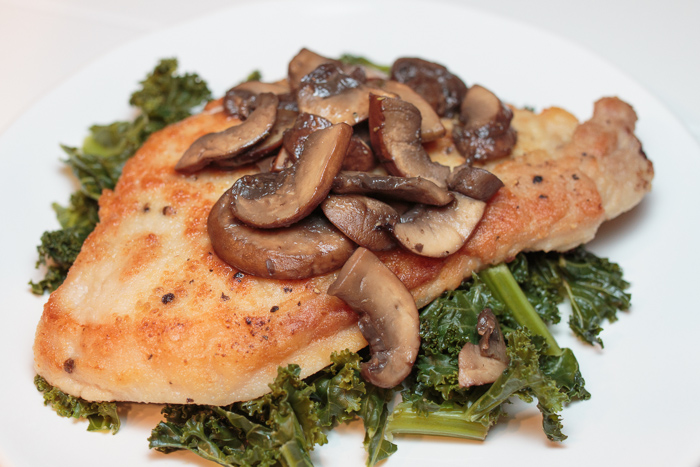
The pork cutlets are lightly dredged in flour before being pan-fried with mushrooms, red wine vinegar and seasonings. Serve it over some wilted kale and top with a fried egg, because all meat tastes better with a little runny yolk sauce. As much as it’s driving me bonkers that I wasn’t able to find that recipe this pork and mushroom dish over kale is certainly a good distraction.
- 2 tablespoons olive oil, divided
- 8 cups chopped kale, thick stems removed
- ½ teaspoon garlic powder
- ¼ cup water
- 1 pound pork cutlets, ¼ inch thick
- 4 tablespoons flour, plus more if needed
- 12 ounces mushrooms
- ¼ teaspoon dried oregano
- ½ teaspoon onion powder
- 2 tablespoons red wine vinegar
- Salt, pepper & garlic powder
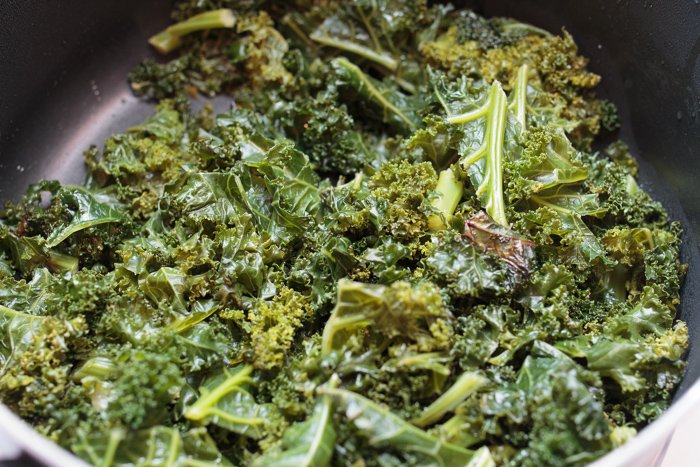
- Heat 1 tablespoon of olive oil in a large saucepan over medium-high heat. Slowly add the kale using tongs to move around the kale as it cooks down to make room for more. Season with salt, pepper and ½ teaspoon garlic powder. Let the kale saute, moving often with the tongs, until all the kale is moistened and a medium green color, about 5 minutes. Reduce the heat to medium, add ¼ cup water, cover and let cook until tender, about 10-15 minutes.
- Season the pork cutlets on both sides with salt, pepper and garlic powder.
- Place the flour in a shallow bowl or plate then dredge the first pork cutlet in the flour until it's fully coated. Shake off the excess and set aside on a cutting board or plate. Repeat for the rest of the pork cutlets adding more flour if needed.
- Heat the remaining tablespoon of olive oil in a large skillet over medium-high heat. Cook the pork cutlets a few minutes on each side, until they are golden brown and reach an internal temperature of 145 degrees F. Remove the pork from the pan to let rest.
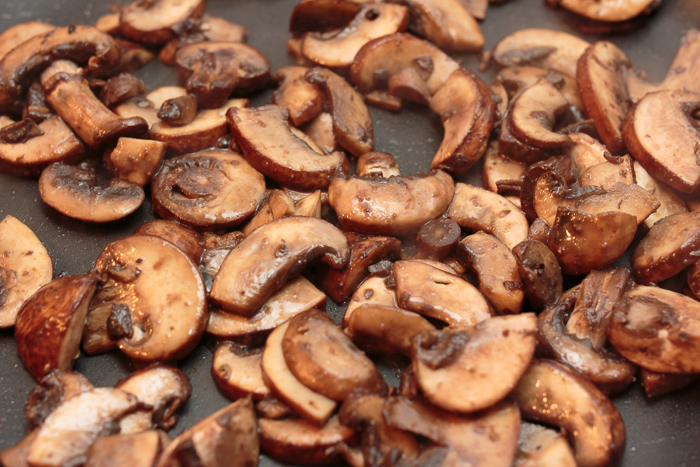
- Add the mushrooms to the pan along with the dried oregano and onion powder. Season with salt and pepper. Once the mushrooms have started to brown add the red wine vinegar. Cook until the vinegar has reduced by half and the mushrooms are nice and tender.
- Place a serving of kale on each plate followed by some pork and red wine vinegar mushrooms. Serve as is or with a side of rice pilaf.