Appetizers & Snacks

Cheesy Baked Prosciutto and Salami Egg Rolls

Cheesy Baked Prosciutto and Salami Egg Rolls  |  Lemon & Mocha

This is a monumental recipe! Not because it tastes amazing (which is does) or because you should make it immediately (which you should), but because it’s the first recipe I’ve made and photographed for the blog since Sam was born. It may have taken two days and gone in and out of the fridge five times while I started and stopped, but here it is! Don’t worry, the recipe is actually super simple and easy so it won’t take you much time at all to whip up, unless you also have a three month old who decides to only take twenty minute naps that day!

Cheesy Baked Prosciutto and Salami Egg Rolls  |  Lemon & Mocha

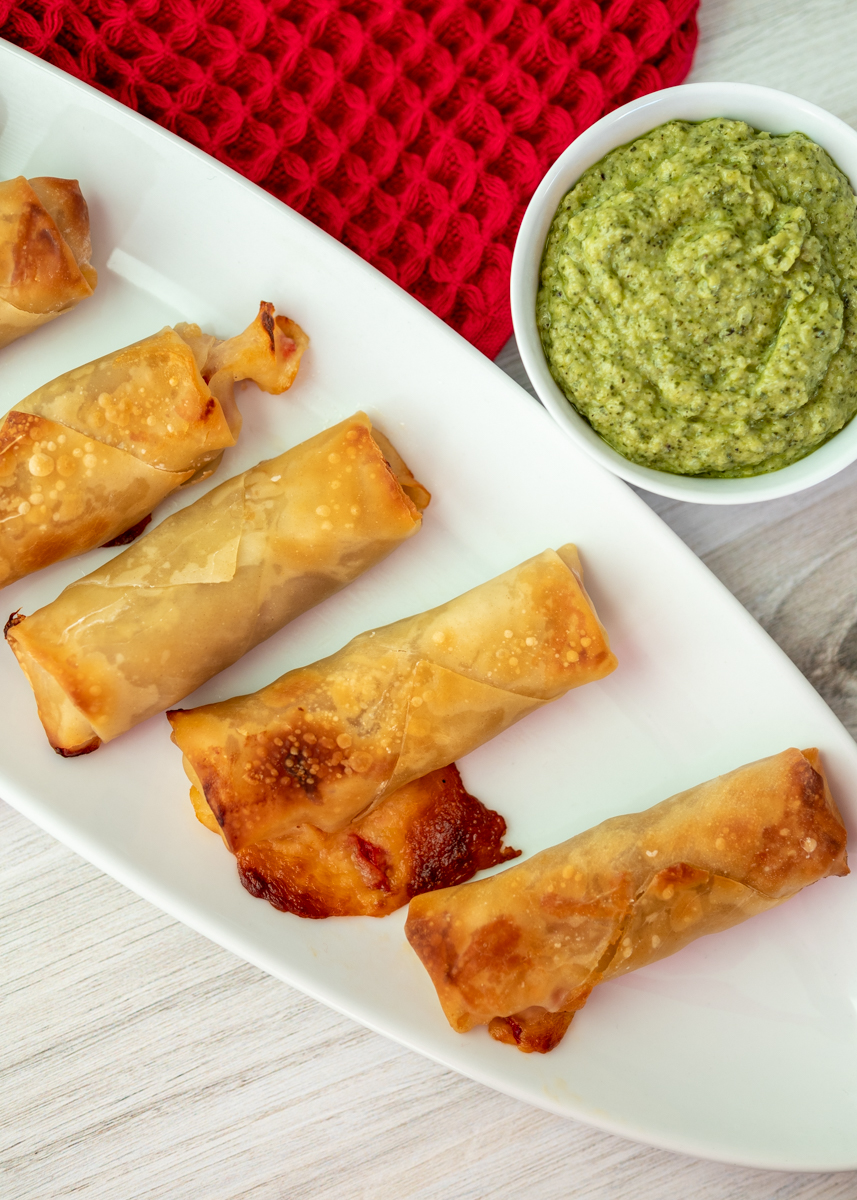
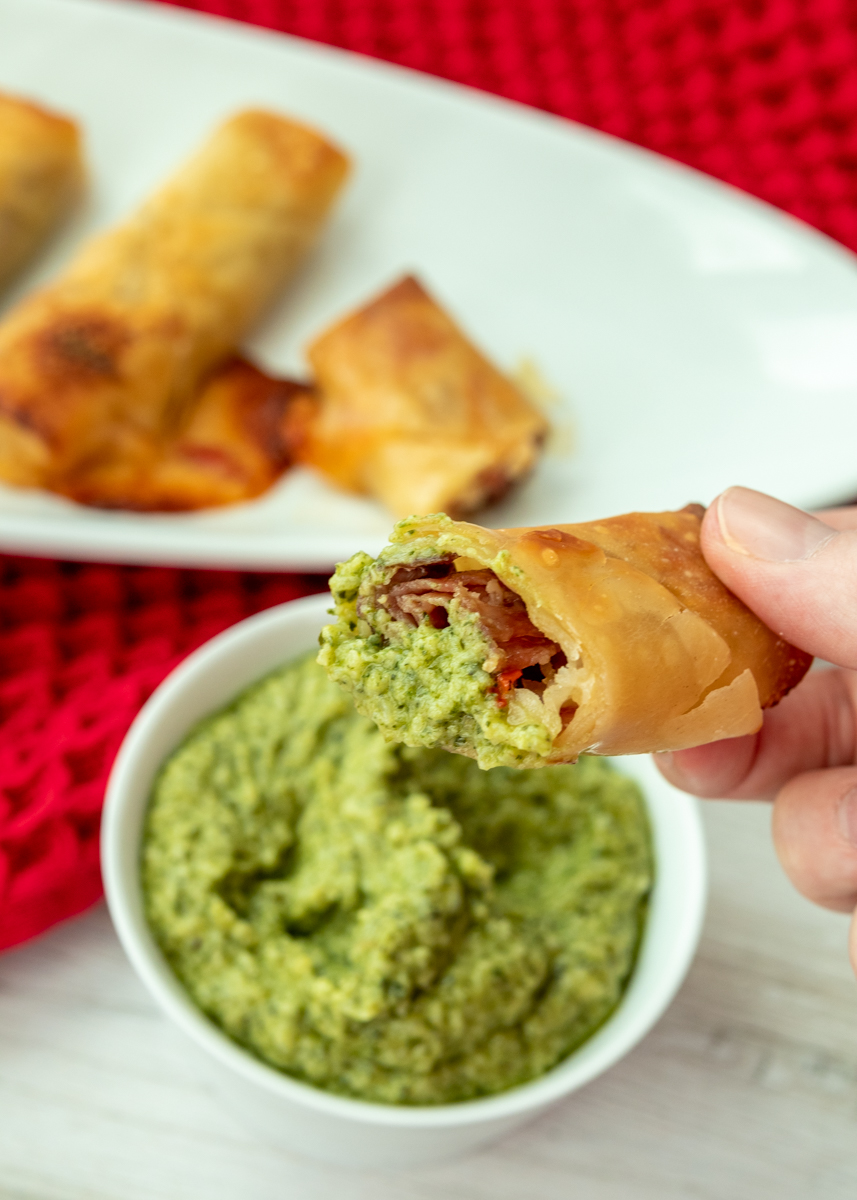
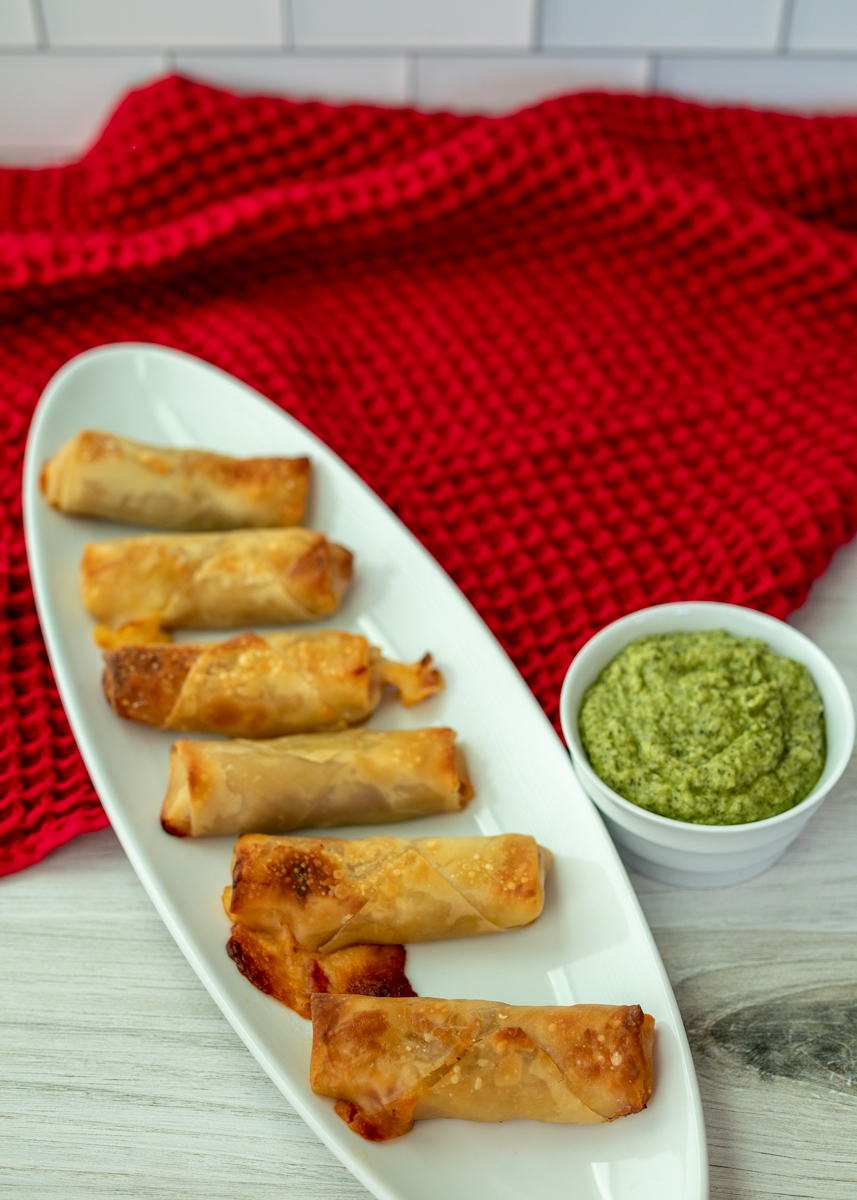
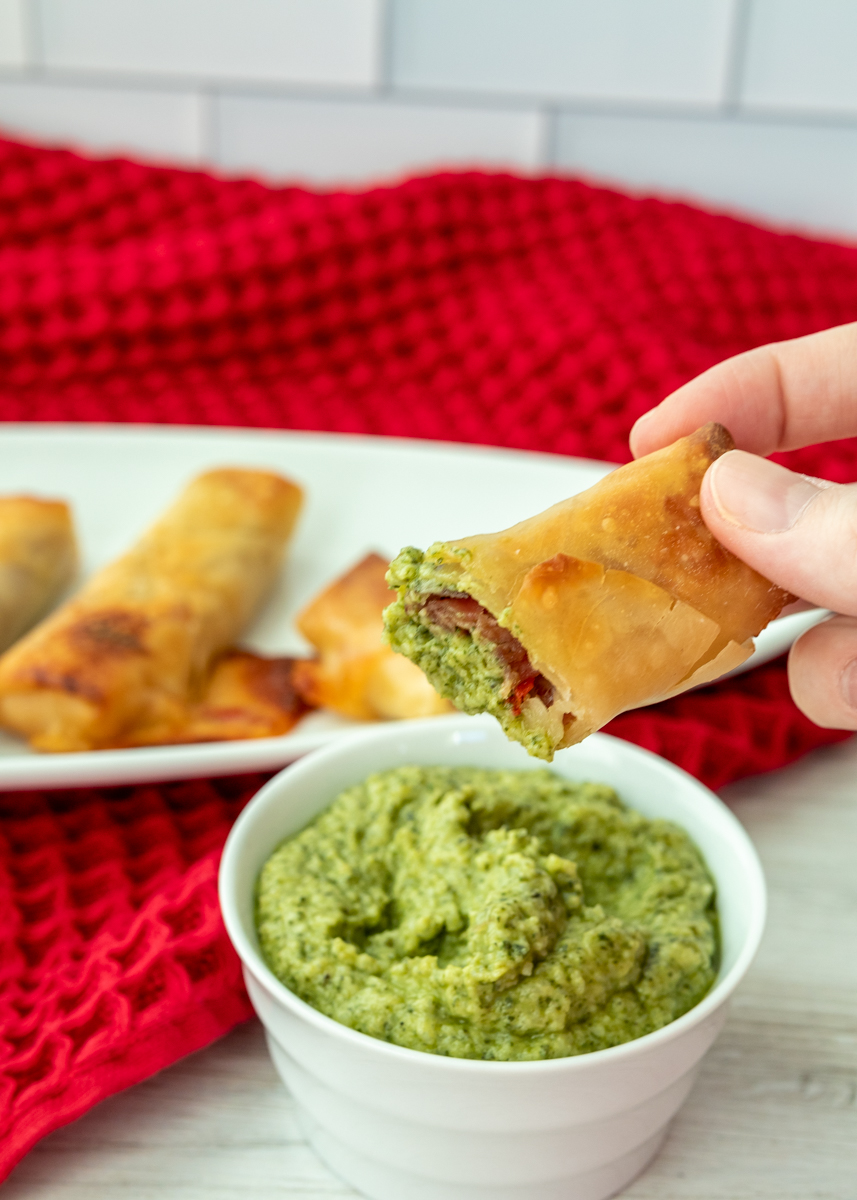
I wanted to post something tasty in time for the Super Bowl on Sunday. I thought of these Cheesy Baked Prosciutto and Salami Egg Rolls a while ago and I’m so excited I finally made them. Prosciutto, salami, roasted red peppers and mozzarella cheese all get wrapped up in these crispy egg rolls. They are savory, salty and perfectly cheesy.

Cheesy Baked Prosciutto and Salami Egg Rolls  |  Lemon & Mocha

I like to think of them as antipasto egg rolls and you really could customize them with your favorite antipasto components. An all veggie one with roasted mushrooms and artichokes would be delicious! You would just have to make sure you chop the pieces small enough so you can roll the wrapper without it breaking.

Cheesy Baked Prosciutto and Salami Egg Rolls  |  Lemon & Mocha

As great as they are on their own these party appetizer egg rolls needed a dipping sauce. I had a hard time deciding on one because there’s so many that would pair well with them. Ultimately I landed on a creamy pesto dipping sauce using my cauliflower puree trick to make the pesto creamy without actually adding cream. Just as it worked in the sun-dried tomato cream sauce, the cauliflower taste doesn’t come through, but it adds a creamy thickness to the pesto.

Cheesy Baked Prosciutto and Salami Egg Rolls  |  Lemon & Mocha

If you’re looking for a pesto recipe I have one here. Enjoy!

Cheesy Baked Prosciutto and Salami Egg Rolls  |  Lemon & Mocha

Cheesy Baked Prosciutto and Salami Egg Rolls
 
Yield: 12 egg rolls
Ingredients
for the egg rolls
  • 12 egg roll wrappers, see note
  • 4 slices prosciutto (about 2 ounces), cut into thirds
  • 6 thin slices genoa salami (about 2 ounces), cut in half
  • 6 thin slices sopressata (about 2 ounces), cut in half
  • ½ cup thinly sliced roasted red peppers (about 1 roasted red pepper)
  • 1½ cups shredded mozzarella cheese
for the pesto dipping sauce
  • 1 cup steamed cauliflower florets
  • ½ cup basil pesto
Directions
for the egg rolls
  1. Preheat the oven to 400 degrees F. Line a baking sheet with nonstick aluminum foil or coat with cooking spray and set aside.
  2. Before filling the egg roll wrappers, make sure you have a little bowl or cup of warm water and a clean work surface. Place the egg roll wrapper down so that a corner is facing you. Stack a piece of the prosciutto, genoa salami and sopressata near the bottom corner of the wrapper. Add some roasted red peppers and about 2 tablespoons of the shredded mozzarella on top. Take the bottom corner of the wrapper and fold it up and over the fillings so it’s completely covering it then continue to roll it one more time. Fold in the left and right corners so they create a little envelope then wet your finger with the water and use it to moisten the whole exposed top corner. Continue to roll the wrapper and seal the roll. Place it on the baking sheet. Repeat for the remaining rolls then coat all the rolls with cooking spray.
  3. Bake the rolls for 8 minutes, then flip them over and bake for another 8 minutes. They should be crispy and golden brown. Serve warm with the pesto dipping sauce.
for the pesto dipping sauce
  1. Combine the cauliflower and the pesto in a blender or food processor until smooth. If it’s too thick add a tablespoon of water.
Notes
I use Nasoya egg rolls wrappers. I find them in the refrigerated section of my grocery store near the tofu products.


Roasted Shrimp Cocktail

Roasted Shrimp Cocktail  |  Lemon & Mocha

Hi, friends! For those of you that celebrate, I hope you had a wonderful Christmas! I wanted to pop on here real quick to share one final recipe before the end of the year. This simple Roasted Shrimp Cocktail recipe is the perfect party appetizer so I’m sharing it just in time for those of you that have New Year’s celebration plans. For those of you that won’t be cooking party appetizers, this is still a great one to have in your back pocket.

Roasted Shrimp Cocktail  |  Lemon & Mocha

It’s also so delicious that sometimes I just make it for Matt and I for dinner along with a salad! This recipe is simply shrimp cocktail kicked up a notch. Roasting tends to bring out extra flavor and as Ina Garten lets us know in her Back to Basics cookbook, shrimp are no exception.

Roasted Shrimp Cocktail  |  Lemon & Mocha

The shrimp get briefly roasted with some olive oil, salt and pepper before being left to cool and served with cocktail sauce. That’s it! It sounds so simple (because it is), but I promise you everyone will be raving over this easy appetizer.

Roasted Shrimp Cocktail  |  Lemon & Mocha

Diane has been making this Roasted Shrimp Cocktail for years; it’s a staple at all our family gatherings and sunset watching cocktail hours when we visit my parents down in Florida. I’ve recently started incorporating it into my menus when we have family and friends over and I don’t know why I didn’t do it sooner because it seriously is the easiest and tastiest dish to put out.

Roasted Shrimp Cocktail  |  Lemon & Mocha

I hope you all enjoy this one! Have a great weekend!

Roasted Shrimp Cocktail  |  Lemon & Mocha

Roasted Shrimp Cocktail
 
Yield: 4-6 servings
Ingredients
  • 2 pounds jumbo shrimp (raw, peeled and deveined with tails on)
  • 1 tablespoon extra virgin olive oil
  • ½ teaspoon salt
  • ½ teaspoon fresh ground black pepper
  • Cocktail sauce, for serving
Directions
  1. Preheat oven to 400 degrees F.
  2. Place the shrimp on a sheet pan and toss with the olive oil. Season with the salt and pepper and spread them out so they’re in a single layer. Roast the shrimp for 8-10 minutes. They should have just turned pink and firm and be cooked through. Set aside to cool.
  3. Serve at room temperature with the cocktail sauce. If you cooked them earlier in the day and had them in the fridge, let sit out for 10 minutes before serving.

Recipe from Barefoot Contessa Back to Basics.
Some of the links above are affiliate links, which means I may receive a small commission for my referral. This does not affect the retail cost of the item. Thank you for supporting Lemon & Mocha!

Baked Brie Fruit & Nut Tartlets

Baked Brie Fruit & Nut Tartlets  |  Lemon & Mocha

Sometimes the tastiest recipes are born out of a classic fridge and freezer clean-out. Last month I was trying to clear out our freezer to have space for all the freezer meals I prepped in anticipation of our little guy’s arrival. Side note: I plan to do a detailed freezer meal prep post when I’m back from my maternity leave so stay tuned!

Baked Brie Fruit & Nut Tartlets  |  Lemon & Mocha

Anyways, the freezer was stuffed with all sorts of odds and ends, one of which was a package of these frozen mini fillo shells. I can’t for the life of me remember why I bought them, but it was clearly for some recipe that never came to be. While I was brainstorming what to stuff the flaky tartlet shells with I thought about how much I love baked brie, especially in the fall when it starts getting chilly outside.

Baked Brie Fruit & Nut Tartlets  |  Lemon & Mocha

These bites are a take on a baked brie that’s been cooked until gooey and smothered with warm nuts and dried fruit. The first time I made them they were really good, but they needed more of that gooey brie so I adjusted the recipe to ensure you won’t be missing the cheese in your tartlets.

Baked Brie Fruit & Nut Tartlets  |  Lemon & Mocha

For the topping, we’re combining crunchy toasted pecans, tart dried cranberries, dried apricots and some apricot preserves for a little sweetness. This mixture gets dolloped on top of the brie in the fillo shells before being baked for just ten minutes. These is a great mini appetizer for Thanksgiving or a Christmas party, especially because it is so incredibly quick to throw together.

Baked Brie Fruit & Nut Tartlets  |  Lemon & Mocha

Now, I hope you all have enjoyed the last several savory recipes because from this Friday until Christmas Lemon & Mocha is going to be all about the sweets! I’m doing something fun and exciting this holiday season: Lemon & Mocha’s 12 Days of Cookies. I have so many must-make cookie recipes to share and I can’t wait for you to see them all!

Baked Brie Fruit & Nut Tartlets  |  Lemon & Mocha

Baked Brie Fruit & Nut Tartlets
 
Yield: 15 tartlets
Ingredients
  • ¼ cup chopped pecans
  • ¼ cup dried cranberries
  • 4 dried apricots, chopped
  • 2 tablespoons apricot preserves
  • 6 ounces brie, rind removed
  • 15 frozen mini fillo shells (Athens brand)
Directions
  1. Preheat oven to 350 degrees F.
  2. Toast the pecans. Place the chopped pecans on a baking sheet then bake for 3-5 minutes. Remove from the oven and let cool slightly.
  3. In a small bowl, combine the toasted pecans, dried cranberries, chopped apricots and apricot preserves. Set aside.
  4. Place the tartlet shells on a baking sheet. Cut the brie so you can put a small wedge into the bottom of each tartlet shell. Cover the brie in the tartlet shell with a spoonful of the apricot mixture. Bake for 10 minutes. Serve hot.


Pepperoni Pizza Rolls

Pepperoni Pizza Rolls  |  Lemon & Mocha

Wow! Wow! Wow! I do not know how else to start this post, but that’s all that flashes in my brain when I think about these epic Pepperoni Pizza Rolls. The rolls are crispy on the outside, fluffy on the inside and packed full of pepperoni pizza flavor. There’s plenty of garlic and herb seasoning as well as melted mozzarella cheese and pepperoni slices. When they come hot out of the oven a little melted butter, fresh parsley and Parmesan gets brushed on top before serving. Dip a bite into some warm marinara and it’s just like eating a slice of pepperoni pizza except, dare I say it, better!

Pepperoni Pizza Rolls  |  Lemon & Mocha

Tomorrow is National Pepperoni Pizza and since it’s also pizza Friday I thought it would be perfect to post a recipe for pepperoni pizza. I had all of the ingredients ready to go, but couldn’t get motivated to deal with either my pizza stone or my countertop pizza oven and the rolling and stretching of the pizza dough involved. I started brainstorming for an easier solution and came up with these epic Pepperoni Pizza Rolls.

Pepperoni Pizza Rolls  |  Lemon & Mocha

The shredded mozzarella and chopped pepperoni slices get kneaded right into the pizza dough. You then make the dough into a ball, cut it into eight pieces and roll each piece into its own little ball. The little dough balls get baked at 475 degrees F for twelve minutes and voila! Time to eat!

Pepperoni Pizza Rolls  |  Lemon & Mocha

The secret that makes these even easier is that we’re using Sunny Anderson’s 1-2-3 pizza dough as the base for this recipe. I first saw this published in my Food Network Magazine a few years ago and decided that I finally needed to try it. The 1-2-3 is for the only ingredients involved: 1 tablespoon of garlic and herb seasoning, 2 cups of plain Greek yogurt and 3 cups of self rising flour. I halved this to get eight Pepperoni Pizza Rolls, although they’re so good that if you’re making them for more than just your family you will want to double the recipe I have below! It sounds odd, but the ingredients get mixed together with a dough hook in a stand mixer (or you could mix and then knead by hand if you don’t have a stand mixer) and somehow create the most delicious dough.

Pepperoni Pizza Rolls  |  Lemon & Mocha

If you don’t want to use self-rising flour I included a note in the recipe, but it really helps making them even easier. I promise that even the most novice home cook could nail this recipe – and it only takes twenty minutes to make including the baking time! These are definitely going to be a new regular recipe of mine. Try them out – I know you will love them just as much as we do!

Pepperoni Pizza Rolls  |  Lemon & Mocha

Pepperoni Pizza Rolls
 
Yield: 8 rolls
Ingredients
  • 1½ cups self rising flour
  • 1 cup plain nonfat Greek yogurt
  • 1 teaspoon Italian seasoning
  • ½ teaspoon garlic powder
  • 1 cup shredded mozzarella cheese
  • ½ cup sliced pepperonis
  • 1 tablespoon butter, melted
  • 2 teaspoons chopped parsley
  • 1 teaspoon grated Parmesan cheese
  • Marinara, for serving
Directions
  1. Preheat oven to 475 degrees F. Line a baking sheet with aluminum foil, lightly spray with cooking spray and set aside.
  2. Add the self rising flour, Greek yogurt, Italian seasoning and garlic powder to the bowl of a stand mixer. Mix with a dough hook on medium speed until combined, stopping and scraping down the sides and bottom at least once. Continue until the dough comes together.
  3. Add the mozzarella cheese to the bowl of the stand mixer. Chop the sliced pepperonis and add to the bowl of the stand mixer. Mix on medium-low speed until incorporated. Take the dough out of the bowl, form into a large ball and place on a cutting board. Slightly flatten the dough ball then cut into 8 even wedges. Roll each wedge into a ball and place on the prepared baking sheet. Bake for 12 minutes.
  4. While the pizza rolls are in the oven, combine the melted butter, chopped parsley and grated Parmesan in a small bowl. Sprinkle in a little Italian seasoning. When the rolls come out of the oven, brush the tops with the melted butter mixture. Serve hot with the marinara sauce.
Notes
If you don’t have self-rising flour use the following substitution: 1½ cups all-purpose flour, 2¼ teaspoons baking powder, ¼ teaspoon salt plus ⅛ teaspoon salt.

 Pizza dough recipe adapted from June 2017 issue of Food Network Magazine.

Some of the links above are affiliate links, which means I may receive a small commission for my referral. This does not affect the retail cost of the item. Thank you for supporting Lemon & Mocha!

Salsa Verde

Salsa Verde  |  Lemon & Mocha

I find it so interesting how your tastebuds evolve over time. If you had told me when I first started this blog back in 2013 that I would be all jazzed up about a Salsa Verde with jalapeños, tomatillos and cilantro I’m sure I would have wrinkled my nose and shook my head at you.

Salsa Verde  |  Lemon & Mocha

Fast forward to Matt’s Cinco de Mayo themed birthday a couple years ago where I made a whole bunch of recipes from a now favorite cookbook of mine, Pati’s Mexican Table. I decided to make the roasted salsa and the Salsa Verde, mostly for Matt and my brother-in-law, Nick, rather than myself. Little did I know how obsessed with it I was going to be!

Salsa Verde  |  Lemon & Mocha

When I’ve made salsas in the past I’ve been disappointed in their blandness, but both these salsas had such depth of flavor I couldn’t stop digging in for more! It’s especially surprising for the Salsa Verde considering we are just boiling everything for a little, pureeing together then quickly warming on the stove-top. The layering of zesty tomatillos with fresh cilantro, lime, onion, garlic and salt is pure magic. I love that you can completely control the heat level of this salsa by what parts of the jalapeño you use. I don’t like any spiciness so I leave the seeds and pith completely out. The jalapeño flesh alone does not make it spicy, but adds to that flavor punch.

Salsa Verde  |  Lemon & Mocha

I’ve never been a fan of cilantro so the first time I made this Salsa Verde I used half cilantro and half parsley. My cilantro tastebuds must be evolving because when I just made it again I used all cilantro and I was still just as hooked. If you can’t stand cilantro please, please don’t just skip over this recipe! Try making it with all parsley because it is too good not to try. You could even try adding in the tiniest bit of cilantro; you might surprise yourself!

Salsa Verde  |  Lemon & Mocha

Salsa Verde
 
Yield: About 2 cups
Ingredients
  • 1 pound tomatillos, husks removed and rinsed
  • 1 clove garlic
  • 1-2 jalapeños, see note
  • ⅓ cup roughly chopped white onion
  • 1 cup cilantro leaves (can include top parts of stems)
  • 1 teaspoon salt
  • 3 tablespoons vegetable oil
Directions
  1. Add the tomatillos, garlic and jalapeño to a medium saucepan and then cover with water. Bring to a boil then reduce to low and simmer covered for 10 minutes. The tomatillos should become pale green and should be soft, but not falling apart.
  2. Use a slotted spoon to transfer the tomatillos, garlic and jalapeño to a high-speed blender or food processor. Add the onion, cilantro and salt then puree until smooth.
  3. Heat the vegetable oil in a medium saucepan over medium heat. Once hot, add the salsa and cook until thickened slightly, about 6-8 minutes, stirring occasionally. Serve warm or refrigerate for later and serve cold or at room temperature.
Notes
If you don’t want your salsa spicy only use 1 jalapeño and remove all the seeds and pith before putting in the blender. If you like it spicy try 1 jalapeño with the seeds and pith and if you want it even more spicy you could add a second jalapeño.

Recipe from Pati’s Mexican Table.
Some of the links above are affiliate links, which means I may receive a small commission for my referral. This does not affect the retail cost of the item. Thank you for supporting Lemon & Mocha!