Recipes

Chicken and Spinach Enchiladas Verde

Chicken and Spinach Enchiladas Verde  |  Lemon & Mocha

I’m so glad I experimented with another recipe from my Pati’s Mexican Table cookbook. This Chicken and Spinach Enchiladas Verde dish was so crave-worthy and will certainly be a new regular at our house. I’ve been thoroughly impressed by every recipe I’ve made from this book and I’m excited to keep cooking more and more recipes from it. Do you have a cookbook at home that just nails it every time for you?

Chicken and Spinach Enchiladas Verde  |  Lemon & Mocha

I did make a few changes to the original recipe by including spinach, since I love to sneak in green veggies whenever I can, and by adding some shredded colby jack cheese.

Chicken and Spinach Enchiladas Verde  |  Lemon & Mocha

Normally when I think of enchiladas I picture a saucy, gooey dish loaded with melted cheese. Not that there’s anything wrong with that once in a while, but for a typical dinner I’m not looking to eat something quite so rich. There’s something about these Chicken and Spinach Enchiladas Verde that is lighter and more refined, while still having all the qualities of a comfort food dish you just want to dive into.

Chicken and Spinach Enchiladas Verde  |  Lemon & Mocha

The key is that the tortillas get fully submerged into the warm Salsa Verde before being stuffed with the chicken and spinach mixture so that when you roll them up you know every bite will have the flavor of the Salsa Verde. This helps give the enchiladas that fork-tenderness so that there isn’t a single dry bite to be had.

Chicken and Spinach Enchiladas Verde  |  Lemon & Mocha

I added that layer of melted colby jack cheese on top because even if I didn’t want the enchiladas weighed down by cheese I still wanted a hint of gooeyness. The mildness of that cheese also pairs really well with the saltiness from the crumbly cotija cheese that gets sprinkled on top after the enchiladas come out of the oven. These Chicken and Spinach Enchiladas Verde are homey enough to be comforting in the cold of winter, while being light enough to eat with a nice glass of white wine in the summer so I’m looking forward to enjoying this dish all year long!

Chicken and Spinach Enchiladas Verde  |  Lemon & Mocha

Chicken and Spinach Enchiladas Verde
 
Yield: 6 servings
Ingredients
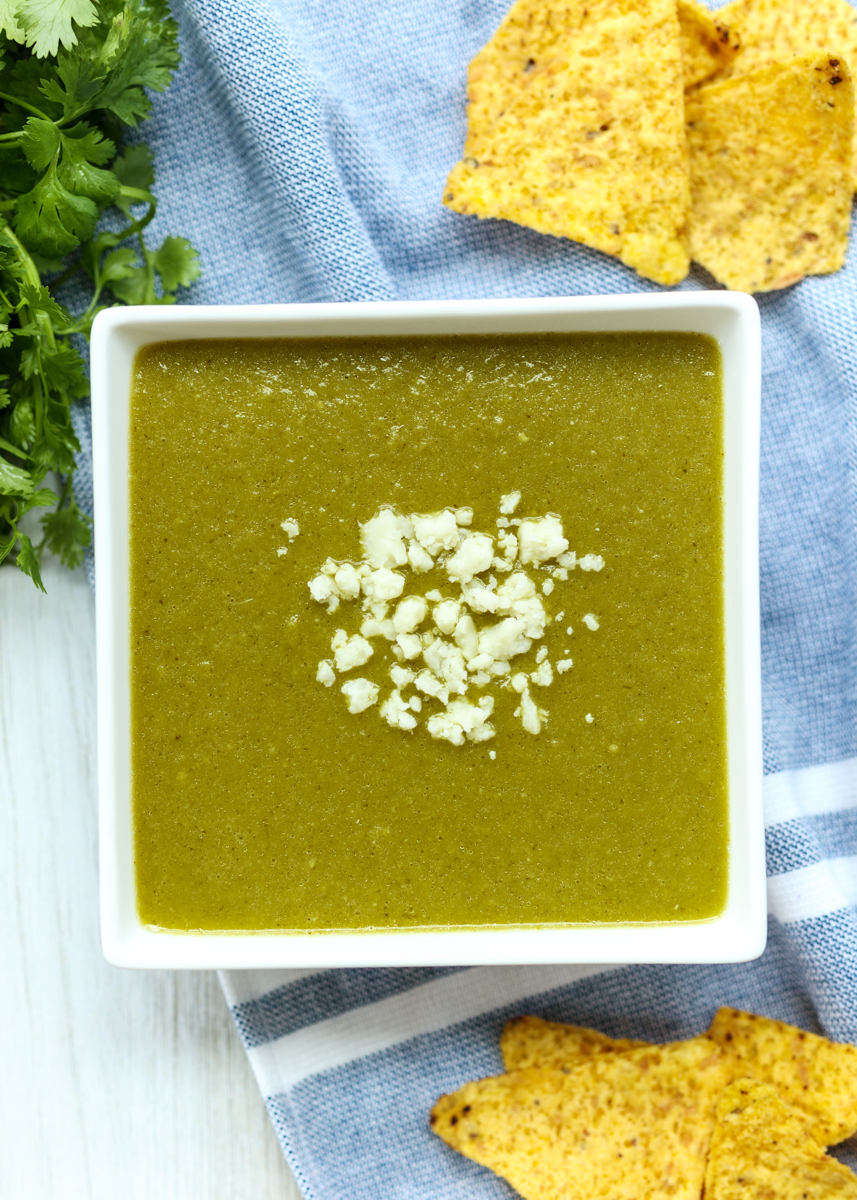
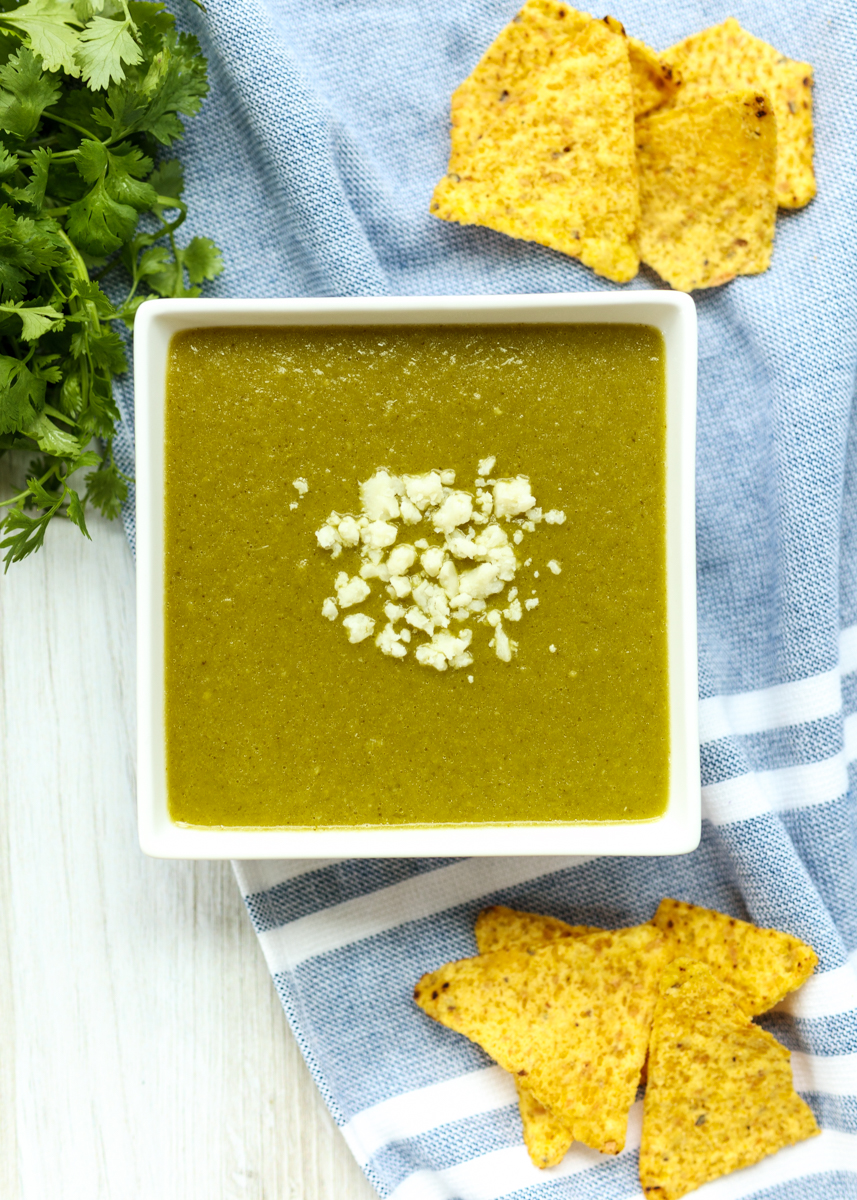
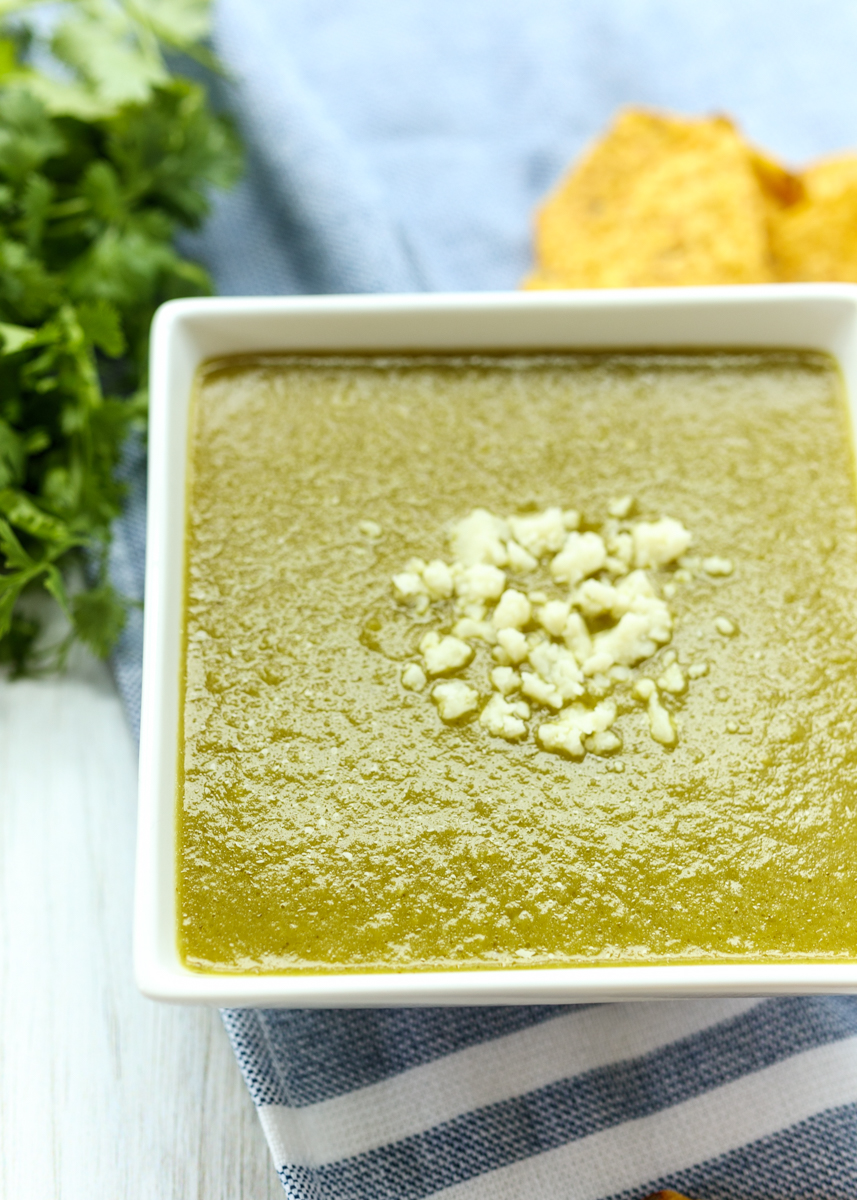
  • 2 batches salsa verde, about 4 cups
  • 12 6-inch corn tortillas
  • 2 cups shredded chicken
  • 3 ounces baby spinach leaves
  • 1½ cups shredded colby jack cheese, divided
  • Sour cream, for topping
  • Crumbled cotija cheese, for topping
  • Chopped white onion, for topping
  • Chopped cilantro, for topping
Directions
  1. Preheat the oven to 375 degrees F.
  2. Heat the salsa in a medium saucepan over medium-low heat; once warm reduce to the lowest setting to keep warm until ready to use.
  3. Lightly toast the tortillas. Heat a nonstick skillet over medium heat and add a tortilla. Heat the tortillas, one at a time, for 30 seconds per side in the skillet. Remove with tongs to a plate when done toasting both sides of the tortilla and just stack them on top of each other on the plate until you’re done toasting all the tortillas.
  4. Remove the salsa from the heat. Use tongs to dip a tortilla into the salsa so it’s completely coated then place on a plate. Add a handful of spinach leaves, 2-3 tablespoons of shredded chicken and 1 tablespoon of colby jack cheese. Tightly roll the tortilla up (no need to tuck in the sides) then place seam side down in a 9-inch by 13-inch baking dish. Repeat for the remaining tortillas until they’re all tucked into the baking dish. Top the enchiladas with the remaining salsa then sprinkle with the remaining ½ cup of shredded colby jack.
  5. Cover with aluminum foil and bake for 15 minutes. Remove the aluminum foil and bake for 5 more minutes, or until the cheese on top is melted. Take the enchiladas out of the oven and top with a drizzle of sour cream, the crumbled cotija cheese, chopped white onion and cilantro before serving.

 
Salsa Verde
 
Yield: About 2 cups
Ingredients
  • 1 pound tomatillos, husks removed and rinsed
  • 1 clove garlic
  • 1-2 jalapeños, see note
  • ⅓ cup roughly chopped white onion
  • 1 cup cilantro leaves (can include top parts of stems)
  • 1 teaspoon salt
  • 3 tablespoons vegetable oil
Directions
  1. Add the tomatillos, garlic and jalapeño to a medium saucepan and then cover with water. Bring to a boil then reduce to low and simmer covered for 10 minutes. The tomatillos should become pale green and should be soft, but not falling apart.
  2. Use a slotted spoon to transfer the tomatillos, garlic and jalapeño to a high-speed blender or food processor. Add the onion, cilantro and salt then puree until smooth.
  3. Heat the vegetable oil in a medium saucepan over medium heat. Once hot, add the salsa and cook until thickened slightly, about 6-8 minutes, stirring occasionally. Serve warm or refrigerate for later and serve cold or at room temperature.
Notes
If you don’t want your salsa spicy only use 1 jalapeño and remove all the seeds and pith before putting in the blender. If you like it spicy try 1 jalapeño with the seeds and pith and if you want it even more spicy you could add a second jalapeño.

Recipe slightly adapted from Pati’s Mexican Table.
Some of the links above are affiliate links, which means I may receive a small commission for my referral. This does not affect the retail cost of the item. Thank you for supporting Lemon & Mocha!

Salsa Verde

Salsa Verde  |  Lemon & Mocha

I find it so interesting how your tastebuds evolve over time. If you had told me when I first started this blog back in 2013 that I would be all jazzed up about a Salsa Verde with jalapeños, tomatillos and cilantro I’m sure I would have wrinkled my nose and shook my head at you.

Salsa Verde  |  Lemon & Mocha

Fast forward to Matt’s Cinco de Mayo themed birthday a couple years ago where I made a whole bunch of recipes from a now favorite cookbook of mine, Pati’s Mexican Table. I decided to make the roasted salsa and the Salsa Verde, mostly for Matt and my brother-in-law, Nick, rather than myself. Little did I know how obsessed with it I was going to be!

Salsa Verde  |  Lemon & Mocha

When I’ve made salsas in the past I’ve been disappointed in their blandness, but both these salsas had such depth of flavor I couldn’t stop digging in for more! It’s especially surprising for the Salsa Verde considering we are just boiling everything for a little, pureeing together then quickly warming on the stove-top. The layering of zesty tomatillos with fresh cilantro, lime, onion, garlic and salt is pure magic. I love that you can completely control the heat level of this salsa by what parts of the jalapeño you use. I don’t like any spiciness so I leave the seeds and pith completely out. The jalapeño flesh alone does not make it spicy, but adds to that flavor punch.

Salsa Verde  |  Lemon & Mocha

I’ve never been a fan of cilantro so the first time I made this Salsa Verde I used half cilantro and half parsley. My cilantro tastebuds must be evolving because when I just made it again I used all cilantro and I was still just as hooked. If you can’t stand cilantro please, please don’t just skip over this recipe! Try making it with all parsley because it is too good not to try. You could even try adding in the tiniest bit of cilantro; you might surprise yourself!

Salsa Verde  |  Lemon & Mocha

Salsa Verde
 
Yield: About 2 cups
Ingredients
  • 1 pound tomatillos, husks removed and rinsed
  • 1 clove garlic
  • 1-2 jalapeños, see note
  • ⅓ cup roughly chopped white onion
  • 1 cup cilantro leaves (can include top parts of stems)
  • 1 teaspoon salt
  • 3 tablespoons vegetable oil
Directions
  1. Add the tomatillos, garlic and jalapeño to a medium saucepan and then cover with water. Bring to a boil then reduce to low and simmer covered for 10 minutes. The tomatillos should become pale green and should be soft, but not falling apart.
  2. Use a slotted spoon to transfer the tomatillos, garlic and jalapeño to a high-speed blender or food processor. Add the onion, cilantro and salt then puree until smooth.
  3. Heat the vegetable oil in a medium saucepan over medium heat. Once hot, add the salsa and cook until thickened slightly, about 6-8 minutes, stirring occasionally. Serve warm or refrigerate for later and serve cold or at room temperature.
Notes
If you don’t want your salsa spicy only use 1 jalapeño and remove all the seeds and pith before putting in the blender. If you like it spicy try 1 jalapeño with the seeds and pith and if you want it even more spicy you could add a second jalapeño.

Recipe from Pati’s Mexican Table.
Some of the links above are affiliate links, which means I may receive a small commission for my referral. This does not affect the retail cost of the item. Thank you for supporting Lemon & Mocha!

Chocolate Covered Caramel Apple Cupcakes

Chocolate Covered Caramel Apple Cupcakes  |  Lemon & Mocha

We’re celebrating the start of apple picking season here on Lemon & Mocha all week and I saved the best for last. Why is it the best? Because it is heavy on the chocolate and anything involving chocolate immediately jumps to the top of the list for me. Especially when there’s chocolate covered apples, too.

Chocolate Covered Caramel Apple Cupcakes  |  Lemon & Mocha

If you haven’t had chocolate covered apples before then you are seriously missing out, but you could remedy that this weekend by making these over-the-top Chocolate Covered Caramel Apple Cupcakes. The base of these cupcakes is my Perfect Chocolate Cupcakes. They are fluffy, moist and rich with chocolate flavor.

Chocolate Covered Caramel Apple Cupcakes  |  Lemon & Mocha

On top we have an apple cider cream cheese frosting. We’re using the same technique from Tuesday’s Baked Apple Cider Donuts of reducing down apple cider to get a concentrated spiced apple flavor. This apple cider reduction is whipped into the cream cheese frosting.

Chocolate Covered Caramel Apple Cupcakes  |  Lemon & Mocha

Next, we have chocolate covered apple wedges. I decorated mine with mini M&M’s because the more chocolate the better and I love the pop of color they add to the cupcakes. You can use any of your favorite candy apple toppings, such as toffee, nuts or even Oreos. Or you could just drizzle with some melted white chocolate or melted peanut butter chips – yum! Finally, I added a generous drizzle of salted caramel sauce. You could make your own or you could buy your favorite brand and drizzle away.

Chocolate Covered Caramel Apple Cupcakes  |  Lemon & Mocha

I made these cupcakes last year for a fun girls weekend where we did all the fall things, including apple picking of course. They were a big hit and I’m getting so hungry looking at the photos that I think I will definitely have to make them again this fall! Enjoy, friends, and have a great weekend!

Chocolate Covered Caramel Apple Cupcakes  |  Lemon & Mocha

Chocolate Covered Caramel Apple Cupcakes
 
Yield: 24 cupcakes
Ingredients
for the cupcakes
  • 2 cups sugar
  • 1¾ cups all-purpose flour
  • ¾ cup unsweetened cocoa powder
  • 1½ teaspoon baking powder
  • 1 teaspoon baking soda
  • 1 teaspoon salt
  • 2 large eggs
  • 1 cup buttermilk, see note
  • ¼ cup butter, melted
  • ¼ cup vegetable oil
  • 1 tablespoon vanilla extract
  • 1 cup hot coffee, see note
for the frosting
  • ¾ cup apple cider
  • 12 ounces cream cheese, room temperature (use block cream cheese)
  • 12 tablespoons unsalted butter, room temperature
  • 6 cups powdered sugar, sifted, plus more as needed
  • 1 teaspoon vanilla extract
  • ¼ teaspoon salt
for topping
  • 2 apples, cored and cut into wedges (a total of 24 wedges)
  • 1⅓ cups semisweet chocolate chips
  • 2 tablespoons coconut oil
  • Mini M&Ms or other preferred topping
  • Salted caramel topping, such as Smucker’s brand
Directions
for the cupcakes
  1. Preheat the oven to 350 degrees and line 2 cupcake pans with paper liners and set aside.
  2. In a large mixing bowl or in the bowl of a stand mixer, sift together the sugar, flour, cocoa powder, baking powder, baking soda and salt.
  3. In a medium mixing bowl, whisk together the eggs, buttermilk, melted butter, vegetable oil and vanilla extract. Pour the liquid ingredients into the dry ingredients and mix together until smooth.
  4. Pour the hot coffee into the batter and stir until combined. The batter will be extremely liquidy. Divide the batter between the 24 cupcake liners, filling them slightly more than half full. Bake for 18-20 minutes, or until a toothpick inserted in the center comes back mostly clean. Alternatively, they are done when you gently press your finger on the center of a cupcake and it lightly springs back. I find mine to be done at exactly 19 minutes.
  5. Let cool in the pan for a couple minutes then remove to a wire cooling rack to cool completely before frosting.
for the frosting
  1. Simmer the apple cider in a small saucepan over low heat until it has reduced to ¼ cup. It will not thicken, but it will get darker. This may take anywhere from 10 to 20 minutes. Once reduced let cool completely.
  2. Beat the cream cheese and the butter in the bowl of a stand mixer fitting with a whisk attachment or in a large bowl with a hand mixer on medium-high speed until smooth and fluffy, about 5 minutes. Add the powdered sugar and slowly beat until combined, increasing speed as it combines. Add the vanilla extract, salt and reduced apple cider and beat to combine. If the frosting isn’t firm enough to pipe after adding the apple cider add more powdered sugar until the desired stiffness is reached.
for topping
  1. Line a baking sheet that will fit in your fridge with wax paper and set aside.
  2. In a liquid measuring cup or other narrow, tall microwave-safe bowl, heat the chocolate chips and the coconut oil for 30 seconds. Stir, then continue heating in 15 second intervals, stirring after each, until melted and smooth. Use a fork to help you completely dip an apple wedge into the melted chocolate. Place on the prepared baking sheet then sprinkle with the mini M&Ms or other topping. Repeat for the remaining apple wedges. If you need to reheat your chocolate, do it at 15 second intervals. Place the apple wedges in the fridge and let set until firm, about 30 minutes.
  3. To decorate the cooled cupcakes, pipe the apple cider cream cheese onto the cupcakes. Top with a chocolate covered apple wedge and then a drizzle of the salted caramel topping. If you aren’t serving right away, wait to top the cupcakes with the apple wedges and caramel sauce. Frosted cupcakes need to stay refrigerated because it’s a cream cheese frosting.
Notes
To make your own buttermilk: pour 1 tablespoon of lemon juice or vinegar in a liquid measuring cup. Pour milk, any fat percentage, into the measuring cup until you have 1 cup. Let sit for 5 minutes before using.
If you don’t want to use coffee you can use hot water, but the flavor of the chocolate won’t be as pronounced. You can use decaffeinated coffee if you prefer.
The cupcakes, unfrosted, freeze very well if you want to make them ahead of time.


Grilled Chicken with Apple and Mango Chutney

Grilled Chicken with Apple and Mango Chutney  |  Lemon & Mocha

We’re continuing our apple week here on Lemon & Mocha! Fall and apple picking go hand in hand and there’s so many sweet and savory dishes you can make with apples. Today we’re going down the savory route with a healthy dinner dish.

Grilled Chicken with Apple and Mango Chutney  |  Lemon & Mocha

This Grilled Chicken with Apple and Mango Chutney is definitely a bit out of the box for me. It uses a spice, garam masala, I had previously never used, which is a spice commonly used in Indian cooking. It’s a warm spice blend that can incorporate different spices depending on the region or brand and it was the perfect ingredient to liven up this grilled chicken dish.

Grilled Chicken with Apple and Mango Chutney  |  Lemon & Mocha

The chicken is marinated in Greek yogurt, which I love for grilled chicken since it helps the meat stay juicy and flavorful. The apple and mango chutney has both complementary flavors and textures going for it with the tartness and crispness of the apples and the sweetness and softness of the ripe mango.

Grilled Chicken with Apple and Mango Chutney  |  Lemon & Mocha

Why it’s a chutney and not a salsa, I really have no clue, but whatever it’s called it complements the yogurt marinated grilled chicken perfectly.

Grilled Chicken with Apple and Mango Chutney  |  Lemon & Mocha

Matt and I both really enjoyed this dish (more chicken – sorry Matt!), but I don’t think it will bump ahead of the Sesame Pecan Chicken Strips or the Chicken Cordon Bleu anytime soon. Mostly because the flavor profile is just so far out of our normal realm of eating. But if you like Indian flavors or are looking for a different way to spice up your chicken dinner then definitely make this healthy recipe!

Grilled Chicken with Apple and Mango Chutney  |  Lemon & Mocha

Grilled Chicken with Apple and Mango Chutney
 
Yield: 4 servings
Ingredients
for the chicken
  • 1 cup plain non-fat or low-fat Greek yogurt
  • 2 tablespoons frozen apple juice concentrate, thawed
  • 1 tablespoon apple cider vinegar
  • 2 teaspoons garam masala
  • 1 teaspoon salt
  • 1 teaspoon ground black pepper
  • 8 2-ounce boneless skinless chicken cutlets (about ¼-inch thick)
for the chutney
  • 3 tablespoons apple cider vinegar
  • 2 tablespoons apricot preserves
  • 1 small jalapeño, seeds and pith removed, finely chopped
  • 2 tablespoons Dijon mustard
  • 1 teaspoon hot sauce
  • ½ teaspoon salt
  • ⅛ teaspoon ground black pepper
  • ⅛ teaspoon ground cloves
  • 1 apple, such as Gala, cut into ⅓-inch dice (about 1¼ cups)
  • 1 small mango, peeled and cut into 1-3-inch dice (about 1 cup)
  • ¼ cup chopped fresh mint leaves
  • Cooking spray
Directions
for the chicken
  1. In a shallow plastic storage container or baking dish, whisk together the yogurt, apple juice concentrate, apple cider vinegar, garam masala, salt and pepper. Add the chicken cutlets then toss to coat. Cover and return to the fridge to let marinate for at least 2 hours or up to 1 day.
  2. Preheat a grill or place a grill pan over medium-high heat. If using a grill, use a paper towel to lightly coat the grill grates with vegetable oil before turning on. If using a grill pan, lightly spray with cooking spray before turning on the stove. Place the chicken cutlets on the grill and grill until they reach an internal temperature of 165 degrees F, about 4-5 minutes per side. Remove from the grill and let rest before serving with the chutney over top.
for the chutney
  1. Combine the apple cider vinegar, apricot preserves, jalapeño, Dijon, hot sauce, salt, pepper, cloves and ginger in a medium bowl until combined. Toss in the apple, mango and chopped mint. Let sit for 30 minutes before serving or cover and return to the fridge for up to 2 days.

Recipe from Giada’s Feel Good Food.
Some of the links above are affiliate links, which means I may receive a small commission for my referral. This does not affect the retail cost of the item. Thank you for supporting Lemon & Mocha!

Baked Apple Cider Donuts

Baked Apple Cider Donuts  |  Lemon & Mocha

September is here! To try to get myself excited for the end of summer I’m diving right into fall recipes. Don’t get me wrong – I love fall. Here in New England the changing leaves are beautiful and there’s plenty of fun fall activities. I love all the celebrations: Halloween, Thanksgiving, my anniversary and my birthday. Of course you can’t forget all the delicious fall flavors coupled with cozy blankets and cool nights.

Baked Apple Cider Donuts  |  Lemon & Mocha

But these last few years I’ve started this shift where summer is starting to tie fall as my favorite season. Maybe it’s because I’m cold all the time and I can appreciate the summer heat more since I’m much better at avoiding getting sunburned these days. It’s hard to beat the long days as well, especially since I’m a morning person and highly unproductive once the sun goes down. Yet here we are in September so I’m trying to amp myself up with a week dedicated to one of fall’s classic flavors: apple.

Baked Apple Cider Donuts  |  Lemon & Mocha

Apples are synonymous with fall, with plenty thanks to apple picking being a quintessential fall activity. The best treat while apple picking is a hot apple cider donut caked in cinnamon-sugar. Their sugary spiced scent has you drooling before you even have one in your hands.

Baked Apple Cider Donuts  |  Lemon & Mocha

Today we’re recreating that deliciousness with these Baked Apple Cider Donuts. It had been too long since I used my silicone donut pans and I was excited to break them out for another baked donut treat. The key to getting that perfect apple cider flavor in these donuts is that we’re using apple cider concentrate that we’ve made by reducing apple cider down on the stove-top. We’re also adding plenty of cinnamon, nutmeg and other apple pie spices to get that rich spiced flavor.

Baked Apple Cider Donuts  |  Lemon & Mocha

If you don’t have a donut pan you can bake these up in a sprayed mini muffin pan at the same temperature in the recipe below for about nine minutes. I hope you enjoy this tasty fall treat!

Baked Apple Cider Donuts  |  Lemon & Mocha

Baked Apple Cider Donuts
 
Yield: 12-14 donuts
Ingredients
for the donuts
  • 1¾ cups apple cider, see first instruction
  • 2 cups all-purpose flour
  • 1 teaspoon baking soda
  • ¾ teaspoon baking powder
  • 1½ teaspoons ground cinnamon
  • ¼ teaspoon ground nutmeg
  • ⅛ teaspoon ground cardamom or allspice
  • ⅛ teaspoon ground cloves
  • ¼ teaspoon salt
  • 2 tablespoons unsalted butter, melted
  • 1 egg, room temperature
  • ½ cup granulated sugar
  • ½ cup brown sugar
  • ½ cup milk, room temperature
  • 1 teaspoon vanilla extract
for the sugar topping
  • 4 tablespoons unsalted butter, melted
  • 1 cup granulated sugar
  • 1¼ teaspoons ground cinnamon
  • ¼ teaspoon ground nutmeg
  • ⅛ teaspoon ground cardamom or allspice
Directions
for the donuts
  1. Reduce the apple cider. Heat in a saucepan over medium-low heat for about 30 minutes, or until it has reduced to ½ cup plus 2 tablespoons. It can take a while so be patient; you most likely aren’t doing anything wrong and it just needs to reduce longer. The apple cider will not get thicker, it will just reduce down to less liquid and also get a little darker. Let cool for 10 minutes before using in the recipe.
  2. Preheat oven to 350 degrees F. Spray donut pan with nonstick cooking spray and set aside.
  3. Whisk together the flour, baking soda, baking powder, spices and salt in a large mixing bowl.
  4. Whisk together the melted butter, egg, sugar, brown sugar, milk and vanilla in a medium mixing bowl. Pour the butter mixture into the flour mixture and whisk until combined. Add ½ cup of the reduced apple cider and whisk. Carefully pour the batter into the prepared donut pan so that the cavities are filled halfway up. I use Wilton batter spoons; you could also pipe from a piping bag. Bake for 12-14 minutes. The tops of the donuts should be browned and they should spring back lightly when you press them. Cool in the pan for 2-4 minutes then remove to a wire cooling rack to cool completely.
for the sugar topping
  1. Place the melted butter and the remaining 2 tablespoons of reduced apple cider in one bowl large enough to dip one donut at a time. In another bowl combine the sugar and spices. Dunk the donut in the melted butter mixture (being sure not to oversaturate) and then dip in the cinnamon-sugar mixture to coat completely. Repeat for the remaining donuts. Donuts will taste best fresh, but can also be eaten at room temperature for 2 days.

Recipe slightly adapted from Sally’s Baking Addiction.

Some of the links above are affiliate links, which means I may receive a small commission for my referral if you purchase something. This does not affect the retail cost of the item. Thank you for supporting Lemon & Mocha!