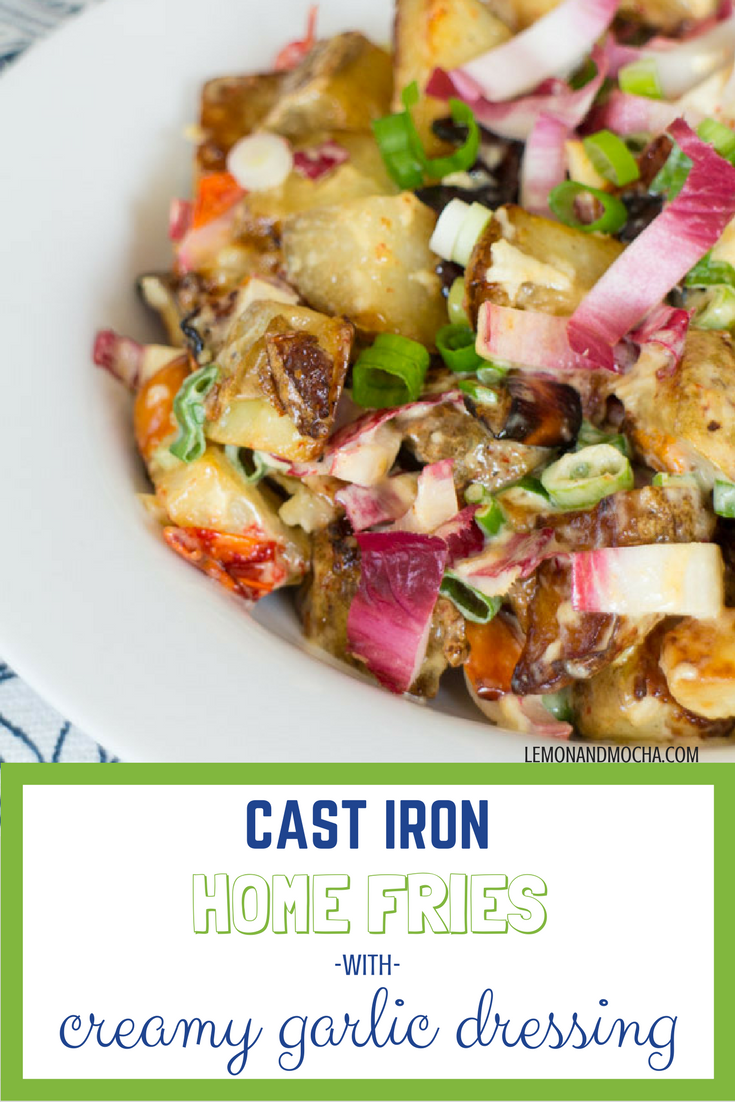
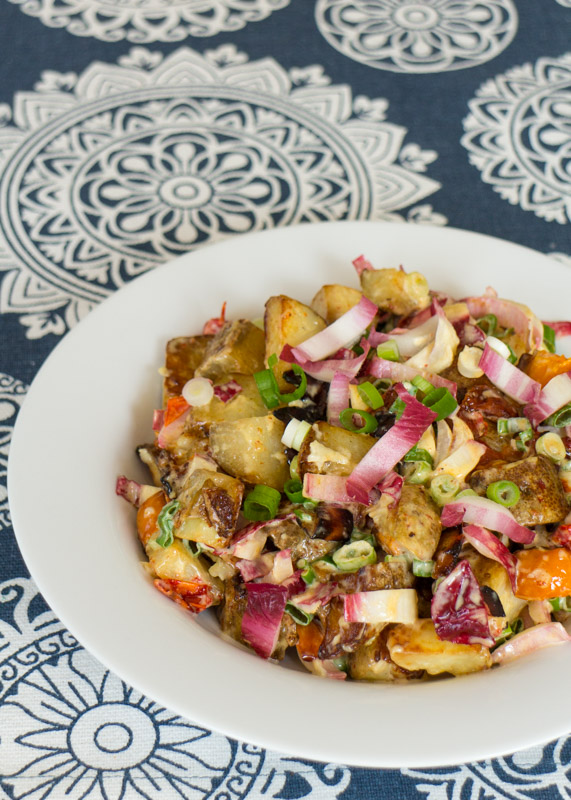
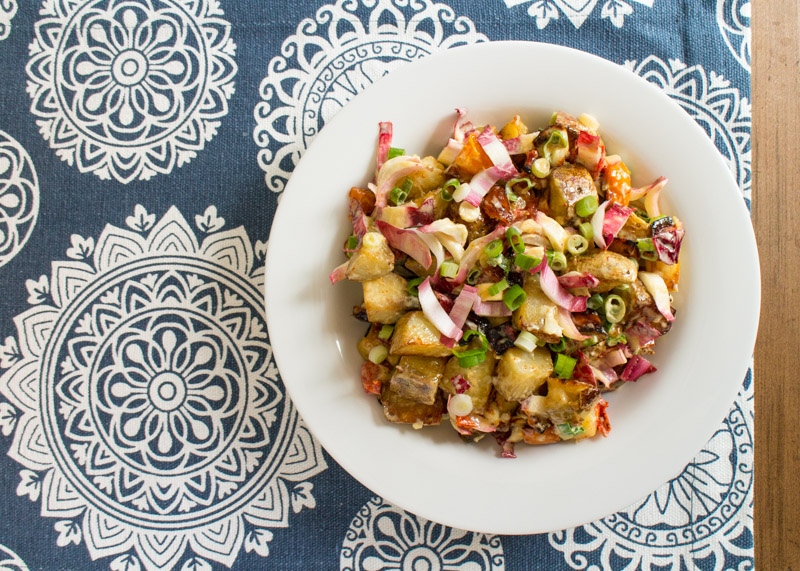
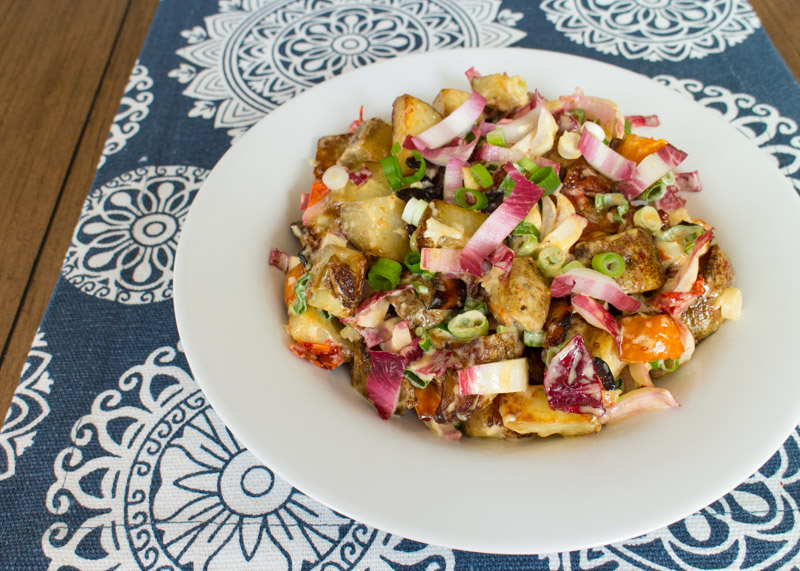
Cast Iron Home Fries with Creamy Garlic Dressing
I owe you all a huge apology. It is with a heavy heart that I must let you know that I kept this savory, tangy, and unbelievably tasty cast iron home fries recipe from you all for two years. I legitimately have no excuse and won’t even try to make one up, so I am sorry. But now that I’ve apologized we can all move on and focus on how these Cast Iron Home Fries with Creamy Garlic Dressing need to be at your next brunch. Or weekend breakfast. Or breakfast for lunch, because who says brunch food has to be either breakfast or “breakfast for dinner”?!
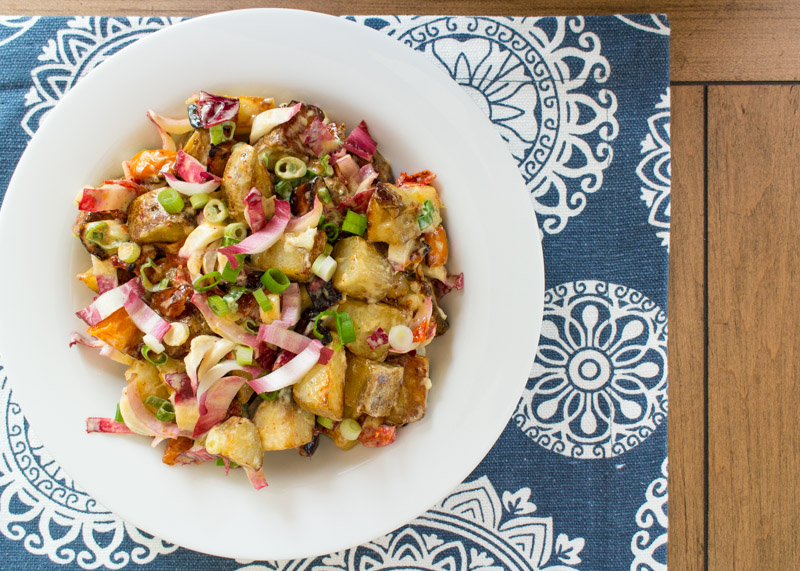
When my brother-in-law gave me the Brunch at Bobby’s cookbook I immediately gravitated towards this recipe in the side dish section. Something about the colors of the dish and the crispiness of the potatoes made me want to make (and eat) it ASAP. I’ve had a lot of home fries over the years, but never one with a dressing. Genius! The dressing allows the potatoes to have so much more flavor and really pack a punch.
This side dish could easily be made into the star of brunch by serving it with poached or fried eggs. The thought of the runny yolks mixing with the creamy dressing is causing my brain to overload with excitement right now. Deep breaths. Phew.
I originally made these potatoes to go with the Eggs Benedict over Cheddar Scallion Waffles with Crispy Chorizo, Smashed Avocado, and Green Chile Hollandaise I made for a Southwestern themed brunch. The boldness of these potatoes held up to the outrageous-ness of the eggs Benedict perfectly. I adjusted a few things from the original recipe to save some time and fit my personal preferences, including roasting the garlic for the dressing to add a more mild and caramelized flavor. Enjoy!
- ½ cup mayonnaise
- 2 tablespoons white wine vinegar
- 1 tablespoon Dijon mustard
- 4 cloves of roasted garlic (see note)
- 3 pounds russet potatoes, about 3 large potatoes
- 3 tablespoons vegetable oil, plus more as needed
- 1 bell pepper, I used ½ red & ½ orange for some variety
- 1 small head radicchio
- 3 scallions
- In a small bowl, mash the roasted garlic. Add the mayonnaise, vinegar, and mustard then whisk to combine. Season with salt and pepper then let sit for 30 minutes to allow the flavors to settle. If you will be letting it sit for more than 30 minutes, cover the bowl and place in the fridge until ready to serve.
- Scrub then clean the potatoes. Pierce them each 5-6 times with a fork then place the potatoes on a microwave safe baking dish and cook in the microwave for 5 minutes. Carefully flip the potatoes over then microwave for another 5 minutes. You should be able to poke a fork or paring knife into the potato with no resistance. Add more cooking time if needed, or alternatively use the “potato” setting on your microwave. Once the potatoes are cool enough to handle cut them into a 1-inch dice.
- While the potatoes are cooking, prep the rest of the vegetables. Removing the seeds, cut the bell pepper into a thick dice. Halve the radicchio then thinly slice. Thinly slice the scallions, discarding the dark green parts.
- Heat 1 tablespoon of the vegetable oil in a cast iron skillet over medium-high heat. Add the diced bell pepper and cook until the pepper starts to soften. Add the remaining oil then the diced potatoes. Spread the potatoes so they are in a single layer and cook until they have begun to get crispy on the bottom, about 5 minutes. Carefully toss them and continue to cook until crispy, about 5 more minutes. Add more oil or increase the heat of the stove if needed. Remove the skillet from the heat.
- Move the potatoes and bell pepper to a large bowl or serving dish. Add the sliced radicchio, dressing, and scallions then carefully stir to combine. Feel free to not use all the dressing depending on your personal preference. Season with salt and pepper to taste. Serve while warm or at room temperature.
- To prep ahead: roast the garlic, make the dressing, microwave the potatoes, and prep the vegetables. Then in the morning you will only have to deal with the cast iron skillet portion of the recipe.
- Cooking the potatoes: the original recipe from Bobby Flay called for the potatoes to be boiled whole for about 25 minutes, or until cooked through. I went with the microwave method to save time, but feel free to boil the potatoes if you prefer.
Recipe adapted from Brunch at Bobby’s.