Fall Fruit Salad

Fall Fruit Salad  |  Lemon & Mocha

I can’t believe it’s already late September! Time goes by way too quickly for my liking, but at least it’s Friday so I’m not really complaining. I had a completely different recipe scheduled to share today, but then I made this Fall Fruit Salad and it was so good I decided it needed to be shared here on Lemon & Mocha.

Fall Fruit Salad  |  Lemon & Mocha

As soon as fall hits, everyone is all about the pumpkins and apples, myself definitely included. As great as those flavors are, there’s so many other seasonal fall fruits that often get ignored. I’m here to bring their gorgeous selves to the center stage with this Early Fall Fruit Salad. I’m including the ‘early’ because most of these fruits are in season right now and won’t be in just a week or two. It’s hard to keep up with all the seasonal fruits and vegetables going in and out of the stores! Just a few weeks ago I wanted to buy some fresh cherries, but seemingly overnight they had all disappeared from the produce shelves. So take advantage of these juicy fruits while you can!

Fall Fruit Salad  |  Lemon & Mocha

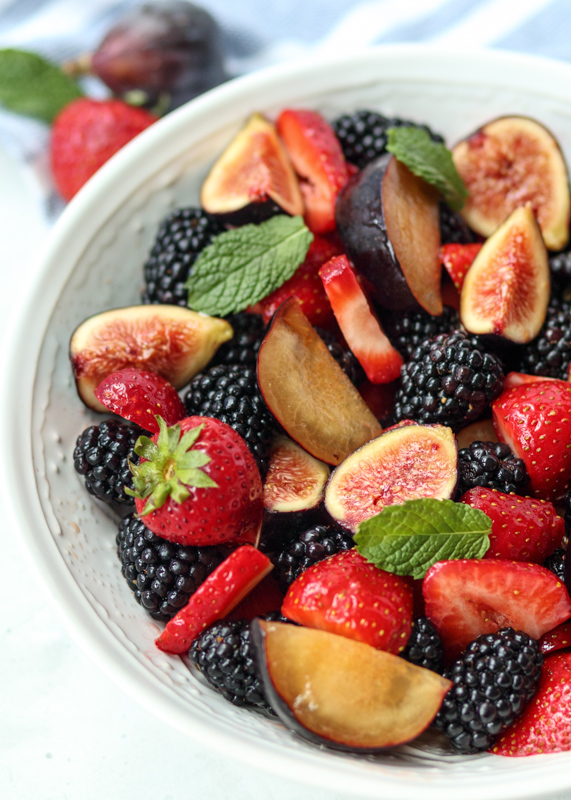
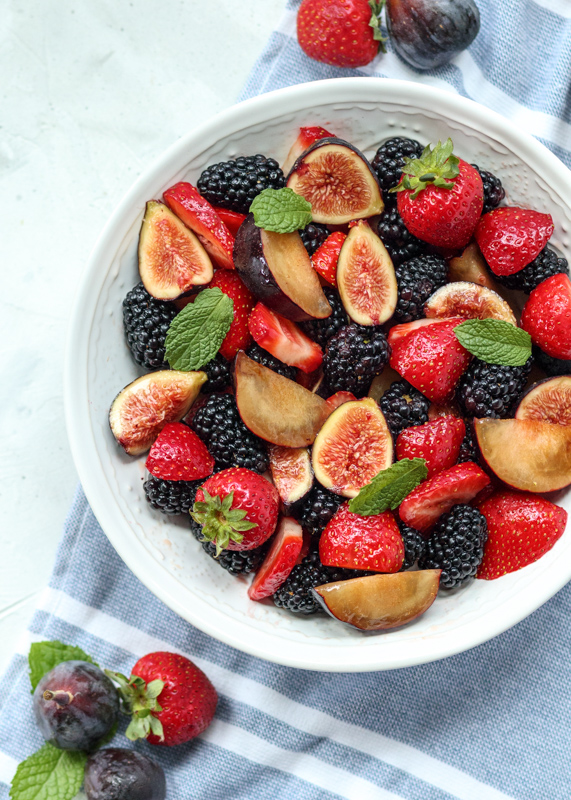
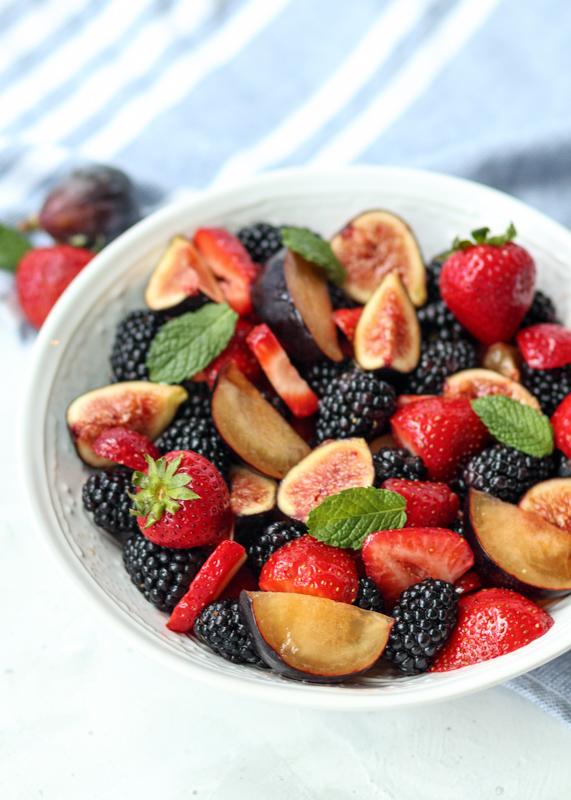
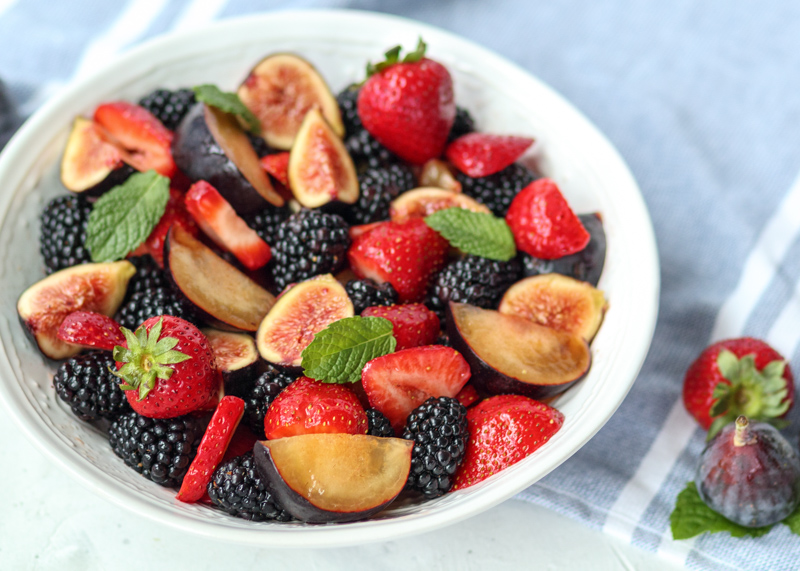
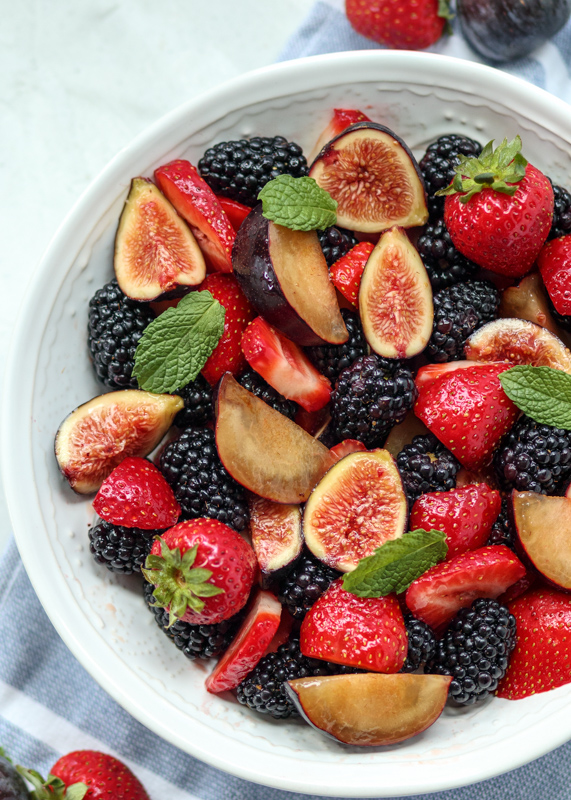
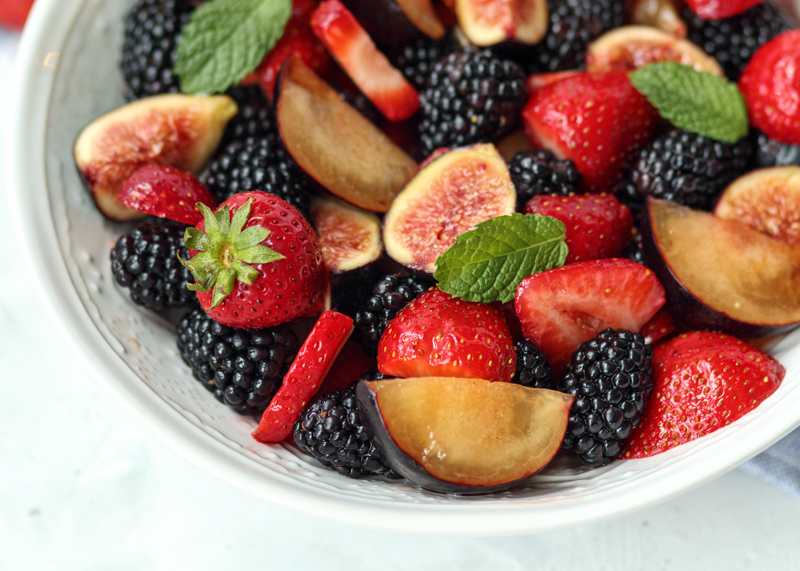
I mixed together blackberries, plums, figs and strawberries. I find that fall fruits and berries aren’t as sweet as most summer fruits so I’ve added a little maple syrup to sweeten them up. You’re going to want to use a bold maple syrup for that extra depth of flavor. I used an infused maple syrup, which you can read about in my Instagram post. I also added some lime juice and fresh mint, which really brings the whole fruit salad together.

Fall Fruit Salad  |  Lemon & Mocha

This fruit salad did not last long in our house. Matt opted to eat it as is, while I scooped mine over fluffy pancakes – so good! Another reason I love this fruit salad is having fruit prepped and ready in the fridge makes us much more inclined to reach for them as snacks during the week.

Fall Fruit Salad  |  Lemon & Mocha

There’s a little bit of time left while some of these fruits are still in season so we’ll definitely be back to the store soon to make some more Fall Fruit Salad. I hope you all enjoy and have a great weekend!

Fall Fruit Salad  |  Lemon & Mocha

Fall Fruit Salad
 
Yield: 4-6 servings
Ingredients
  • 6 ounces blackberries
  • 8 ounces strawberries, sliced
  • 2 ripe plums, cored and sliced
  • 8 figs, quartered
  • 3 tablespoons pure maple syrup
  • Juice from 1 lime
  • 1 tablespoon whole fresh mint leaves
Directions
  1. Combine the fruit in a serving bowl. Pour the maple syrup and lime juice over top. Gently toss to combine. Top with the fresh mint leaves; if they are large cut them in half.


Crispy Baked Apple Pie Bites with a Chai Vanilla Dipping Sauce

Crispy Baked Apple Pie Bites with a Chai Vanilla Dipping Sauce  |  Lemon & Mocha

It’s peak apple picking season! Oftentimes it doesn’t feel like fall here until September is almost over so I’ve always associated apple picking with October. However, a few years ago Matt and I went apple picking with Matt’s parents at an orchard by them in Connecticut during the second week of October only to find that there were almost no apples left! Apparently while we were waiting for it to start feeling like fall we had missed peak season for apples. So today I’m sharing some apple goodness so you can join in while there’s still plenty of apples to be picked, stuffed into cinnamon sugar egg roll wrappers and eaten.

Crispy Baked Apple Pie Bites with a Chai Vanilla Dipping Sauce  |  Lemon & Mocha

I wanted to make an easy apple dessert that would be quick to whip up so I started thinking about apple dumplings. There’s a lot of recipes on Pinterest that combine apples with crescent dough and while that sounds delicious I was looking to make something slightly less indulgent. Then I remembered my Southwest Turkey Baked Egg Rolls. I loved how crispy the baked egg rolls got that I had already started brainstorming other variations, but what about a sweet dessert variation?

Crispy Baked Apple Pie Bites with a Chai Vanilla Dipping Sauce  |  Lemon & Mocha

When I tried one of these Crispy Baked Apple Pie Bites out of the oven they tasted even more outrageous than I was imagining. The spiced apples cooked down just the right amount so the soft apples contrast perfectly with the crunchy cinnamon-sugar coated outside. They’re also so easy to put together! There’s no cooking required except for letting them bake in the oven and as I talked about in my Southwest Turkey Baked Egg Rolls post, folding the filling up into these egg roll wrappers is way easier than you would think.

Crispy Baked Apple Pie Bites with a Chai Vanilla Dipping Sauce  |  Lemon & Mocha

Once they are done cooking you get to indulge in the best part – dipping them in the vanilla chai dipping sauce. Simply powdered sugar, brewed chai tea and vanilla extra, this dipping sauce complements the Crispy Baked Apple Pie Bites really well. Chai tea is full of warming spices that are reminiscent of fall bringing a nice depth of flavor to a traditional vanilla glaze.

Crispy Baked Apple Pie Bites with a Chai Vanilla Dipping Sauce  |  Lemon & Mocha

Also, by using brewed tea instead of the traditional milk or cream we are keeping the entire recipe dairy free, dipping sauce included, if that sort of thing is important to you. So between the fruit, the baking instead of frying, only using cooking spray and keeping them dairy free we totally have a healthy dessert on our hands right?! Okay, maybe not “healthy”, but definitely healthier than other desserts I’ve posted here so I’m going to go with just a eat a whole bunch of them and have no regrets, friends!

Crispy Baked Apple Pie Bites with a Chai Vanilla Dipping Sauce  |  Lemon & Mocha

Looking for some more apple recipe inspiration? Check out a few of my favorite apple recipes below!

Caramelized Onion & Apple Dip

Caramelized Onion & Apple Dip

Baked Apple Chips

Baked Apple Chips

Spiced Sweet Potato & Apple Soup

Spiced Sweet Potato & Apple Soup

Peanut Butter Apple Bars

Peanut Butter Apple Bars

Crispy Baked Apple Pie Bites with a Chai Vanilla Dipping Sauce
 
Yield: 15 apple pie bites
Ingredients
for the apple pie bites
  • 3 medium granny smith apples, about 1 pound
  • ⅓ cup brown sugar
  • 1 teaspoon ground cinnamon, plus ½ teaspoon
  • ¼ teaspoon ground nutmeg
  • 15 egg roll wrappers, see note
  • 2 teaspoons sugar
  • Cooking spray
for the vanilla chai sauce
  • 1 cup powdered sugar
  • 1 tablespoon strongly brewed chai tea
  • ½ teaspoon vanilla extract
Directions
for the apple pie bites
  1. Preheat the oven to 400 degrees F. Line a baking sheet with nonstick aluminum foil or coat with cooking spray and set aside.
  2. Peel the apples then cut them into a small dice. You do not want the pieces too big or it will be difficult to roll the wrappers. In a medium mixing bowl, toss the apples with the brown sugar, 1 teaspoon of the cinnamon and the ground nutmeg.
  3. Before filling the egg roll wrappers, make sure you have a little bowl or cup of warm water and a clean work surface. Place the egg roll wrapper down so that a corner is facing you. Scoop 2½ tablespoons of the apple mixture and place it in a horizontal strip in the middle (closer to the bottom corner than the top corner). I like to adjust the mixture so it’s more of a log shape then a big mound. Now you are about to fold and make sure you fold gently and carefully so they don't break although if it breaks a little that's okay. Take the bottom corner of the wrapper and fold it up and over the mixture so it’s completely covering it then continue to roll it one more time. Fold in the left and right corners so they create a little envelope then continue to roll it until it’s 1 roll away from the top corner. Wet your finger with the water and use it to moisten the whole exposed top corner. Fold the corner down to close up and seal the roll. Place it on the baking sheet. Repeat for the remaining rolls.
  4. In a small bowl combine the remaining ½ teaspoon ground cinnamon with the 2 teaspoons of sugar. Coat all the rolls with cooking spray then sprinkle the cinnamon sugar over top. Bake the rolls for 8 minutes, then flip them over and bake for another 8 minutes. They should be crispy and golden brown. Serve warm with the dipping sauce.
for the vanilla chai sauce
  1. Sift the powdered sugar into a small mixing bowl. Add the chai tea and vanilla extract then whisk to combine. If it’s too thin, add more powdered sugar.
Notes
I use Nasoya egg rolls wrappers. I find them in the refrigerated section of my grocery store near the hummus and guacamole.


Sheet Pan Honey Mustard Roasted Salmon & Broccoli

Sheet Pan Honey Mustard Roasted Salmon & Broccoli  |  Lemon & Mocha

Look at this salmon! It is so tender and sticky and sweet and I’m drooling all over my keyboard just writing about it.

Sheet Pan Honey Mustard Roasted Salmon & Broccoli  |  Lemon & Mocha

Salmon lovers and salmon haters alike, rejoice! Even the pickiest fish eater will love this meal and I have proof. I’ve been trying to incorporate more fish into my diet over the last couple months. Now I love salmon and plenty of other fish, but Matt usually does not share my sentiments unless it’s sushi. He agreed to try salmon once a week for dinner with me so I set out gathering some recipes to try.

Sheet Pan Honey Mustard Roasted Salmon & Broccoli  |  Lemon & Mocha

The first week I tried this honey mustard baked salmon and it was a big hit for both the salmon lover (me) and the salmon somewhat dis-liker (Matt). The next week when salmon night rolled around Matt requested the honey mustard salmon again instead of a few other recipes I had found. The next week it happened again and soon enough we were having this recipe every week. And let me tell you, I am not mad about this one bit and still can’t get enough of this dish! Every time I get another taste of it I start craving it all over again.

Sheet Pan Honey Mustard Roasted Salmon & Broccoli  |  Lemon & Mocha

The salmon filet is baked in a foil semi-packet, which traps the steam and keeps the salmon incredibly moist and tender.

Sheet Pan Honey Mustard Roasted Salmon & Broccoli  |  Lemon & Mocha

I turned the dish into a sheet pan supper by roasting the broccoli along with the salmon so I could make our side dish at the same time without any extra steps. Also, because this honey mustard sauce is so good I wanted to smother everything in it. The honey brings sweetness while the Dijon and apple cider vinegar help balance it out so it’s not overly sweet. I love the pop of crunch the whole mustard seeds give so definitely don’t skip those! I hope you all try this salmon soon and love it as much as we do!

Sheet Pan Honey Mustard Roasted Salmon & Broccoli  |  Lemon & Mocha

Sheet Pan Honey Mustard Roasted Salmon & Broccoli
 
Yield: 4 servings
Ingredients
  • ¼ cup Dijon mustard
  • ¼ cup honey
  • 3 cloves garlic, minced
  • 2 tablespoons apple cider vinegar
  • 1 tablespoon whole mustard seeds
  • ½ teaspoon smoked paprika
  • ¼ teaspoon salt
  • ⅛ teaspoon ground black pepper
  • 1½ pound salmon filet, skinless and boneless
  • 2 heads broccoli, cut into florets
  • Chopped fresh parsley, for serving
Directions
  1. Preheat the oven to 375 degrees F. Line a sheet pan with nonstick aluminum foil, with enough overhang on one short side that you will be able to fold it up and over the salmon (the salmon will be on one half of the baking sheet, the broccoli will be on the other). Set aside.
  2. In a small mixing bowl, whisk together the honey, garlic, apple cider vinegar, mustard seeds, smoked paprika, salt and pepper.
  3. Place the salmon filet on the half of the baking sheet with the overhang. Place the broccoli florets on the other. Spoon ½ of the honey mustard mixture over the broccoli florets and toss well so they are fully coated. I usually rub the tops of the florets into the sauce to make sure they get really well coated. Spoon the remaining half of the honey mustard sauce over the salmon filet and brush/spoon so the whole filet is coated, including the sides. Take the overhang of foil and fold it over the salmon like you are making a foil packet that just won’t be sealed on all sides.
  4. Bake in the oven for 22 minutes or until the salmon flakes easily. Be careful when you pull back the foil because there will be a lot of steam. My salmon filet was about an 1½ inches thick so adjust your time accordingly based on the thickness of your filet. I have found that wild salmon tends to cook much quicker than farm raised (I used farm raised), mostly because wild salmon tends to be thinner. Fold back the foil and broil the salmon and broccoli for 1-2 minutes. Make sure the sauce and broccoli doesn’t burn, but gets slightly browned. Serve as is or alongside some rice or quinoa.

Recipe adapted from Gimme Some Oven.

Chocolate Chip Mini Muffins

Chocolate Chip Mini Muffins  |  Lemon & Mocha

As if the monthly Food Network Magazine muffins weren’t enough I’m now introducing even more muffins! That’s okay though because these Chocolate Chip Mini Muffins are so worth it. You know those mini muffins you can buy prepackaged at the grocery store? The Little Bites or Little Debbie ones, etc.? These Chocolate Chip Mini Muffins taste just like that so if you are a fan then you will be loving these mini bites. If you’ve never had them, I would almost describe them as chocolate chip pancakes, but in the form of a muffin. They are light, moist, soft – and chocolatey from all the mini chocolate chips, which is obviously the best part.

Chocolate Chip Mini Muffins  |  Lemon & Mocha

There are two dangerous aspects of this recipe. The first is that they are so easy to make. The second is that they are completely pop-able. As in, you just want to keep popping more and more of them in your mouth until they’re all gone. Oops. I first made these muffins to bring to my friend’s brunch football tailgate. I wanted something that didn’t need to stay hot and that would be a universal hit.

Chocolate Chip Mini Muffins  |  Lemon & Mocha

I highly recommend these mini muffins for brunch tailgates, morning potlucks or to have on hand when you’re going to be having guests stay with you. Or for eating in the car on a road trip, eating while watching Netflix or eating while biking along the coast. Also for breakfast, snack, lunch or dessert. Did I forget anything?

Chocolate Chip Mini Muffins  |  Lemon & Mocha

If you want to turn them into double chocolate chip mini muffins check out my note in the recipe. Also, a couple tips for baking and storing the muffins. As you can see in the photos, the muffins stay pale on the top. They do not get golden brown like a lot of other muffin recipes so if you are waiting for that you will overcook them. Just follow the recipe instructions and note so you will have perfectly moist and fluffy mini muffins.

Chocolate Chip Mini Muffins  |  Lemon & Mocha

I store the mini muffins at room temperature in a sealed plastic container so they stay soft just like the ones from the grocery store. Normally with muffins you don’t want them to get soft because you want the tops to stay nice and crunchy, but this is one case where they taste so good soft all over. I hope you all love these mini muffins as much as we do!

Chocolate Chip Mini Muffins  |  Lemon & Mocha

Chocolate Chip Mini Muffins
 
Yield: 48 mini muffins
Ingredients
  • 2 cups all-purpose flour
  • ½ cup granulated sugar
  • 2 tablespoons brown sugar
  • 1 tablespoon baking powder
  • ½ teaspoon salt
  • 1 egg
  • 1¼ cups buttermilk
  • ⅓ cup vegetable oil
  • 2 teaspoons vanilla extract
  • 1 cup mini chocolate chips
Directions
  1. Preheat the oven to 400 degrees F. Lightly spray a 24 cup mini muffin pan with nonstick cooking spray (or 48 cup if you have it). Set aside.
  2. In a large mixing bowl, sift together the flour, sugar, brown sugar, baking powder and salt until combined.
  3. In a medium mixing bowl, beat the egg until frothy. Add the milk, vegetable oil and vanilla extract then beat until combined. Pour into the flour mixture and stir until just combined - try not to over-mix. Fold in the mini chocolate chips.
  4. Scoop the muffin batter into the prepared muffin pan. It makes 48 mini muffins so if you only have one 24 cup mini muffin pan you will have to refill it after the first batch is done and the pan has had a chance to cool. Fill the muffin cups ¾ full. Bake for 9-11 minutes, or until a toothpick inserted in the center of the muffins comes out clean or with a crumb or two. Let cool for 1 minute in the pan before carefully transferring the muffins to a wire cooling rack.
Notes
The tops of the muffins stay pale so don’t wait for them to get golden or the muffins will be overcooked. Just check them with a toothpick at 9 minutes and see if they need more time or not from there.
If you want some chocolate chips right on the top of your mini muffins for presentation purposes, carefully pull out the muffin pan after they have been baking for about 2 minutes and quickly place a couple mini chips on the top of the muffins before returning to the oven.
If you want to make double chocolate mini muffins, you could add 2 tablespoons of sifted cocoa powder to the flour mixture. I haven’t experimented with this version enough, but you might want to add a little espresso powder to emphasize the chocolate flavor and a little more vegetable oil (maybe ½ to 1 tablespoon?) to keep them moist. I will try the chocolate version again soon and report back. Everyone that ate them liked them, I’m just extra picky when it comes to my own baking!

Recipe slightly adapted from All Recipes.

Some of the links above are affiliate links, which means I may receive a small commission for my referral. This does not affect the retail cost of the item. Thank you for supporting Lemon & Mocha!

Crispy Baked Chicken Cutlets with an Orange and Arugula Salad

Crispy Baked Chicken Cutlets with an Orange and Arugula Salad  |  Lemon & Mocha

I’m back with another delicious family-friendly dinner recipe, courtesy of Rachael Ray’s Look + Cook cookbook. When I was flipping through the cookbook to get to the Pesto Presto Chicken recipe a few weeks ago I kept seeing all these recipes I made from the book when I first got it that were so good. I was suddenly craving all these dishes I hadn’t made in years because I always have a million new recipes on the agenda. I decided these Crispy Baked Chicken Cutlets with an Orange and Arugula Salad needed to be pulled out of the archives immediately so here we are.

Crispy Baked Chicken Cutlets with an Orange and Arugula Salad  |  Lemon & Mocha

I’m so excited I rediscovered this dish because I am always looking for new ways to cook chicken for dinner. This dish has a fresh twist on your classic baked chicken cutlets by including some orange zest in the breadcrumb mixture. The chicken cooks at a high temperature to get super crispy without any frying. One quick tip is to move the cooked chicken cutlets to a wire cooking rack as soon as they are done cooking in the oven so they stay extra crispy until you’re ready to eat them.

Crispy Baked Chicken Cutlets with an Orange and Arugula Salad  |  Lemon & Mocha

Since I tend to cook and photograph during the day when the light is best, Matt and I eat a lot of reheated food for dinner. I was so bummed Matt couldn’t try this dish right when I made it because it definitely lost its crispiness. He still loved it, but this isn’t a dinner you will want to make ahead of time. Which is fine since it’s so quick to make!

Crispy Baked Chicken Cutlets with an Orange and Arugula Salad  |  Lemon & Mocha

I love recipes that are an all-in-one deal so I don’t have to worry about additional side dishes. While the chicken is baking, you make a very simple salad of peppery arugula, juicy orange segments, fresh yellow tomatoes, red onion and a little extra virgin olive oil. Season with some salt and pepper and it’s the perfect fresh accompaniment to the crispy chicken. I especially love the sweetness the oranges bring to the chicken when you get a bite of the two of them together.

Crispy Baked Chicken Cutlets with an Orange and Arugula Salad  |  Lemon & Mocha

I hope you all enjoy this quick and tasty dinner dish!

Crispy Baked Chicken Cutlets with an Orange and Arugula Salad  |  Lemon & Mocha

Crispy Baked Chicken Cutlets with an Orange and Arugula Salad
 
Yield: 4 servings
Ingredients
  • ⅔ cup all-purpose flour
  • 1 egg, beaten
  • ¾ cup panko bread crumbs
  • ⅓ cup grated Parmesan cheese
  • 1½ tablespoons finely chopped fresh parsley leaves, divided
  • 2 seedless naval oranges
  • 2 large boneless skinless chicken breasts, about 1 pound
  • 2 yellow tomatoes
  • ½ small red onion
  • 2 tablespoons extra virgin olive oil
  • 4 cups baby arugula leaves
  • Salt & pepper
Directions
  1. Preheat the oven to 425 degrees F. Line a baking sheet with nonstick aluminum foil or parchment paper and set aside.
  2. Set up your breading station with 3 shallow bowls. Place the flour in the first bowl. In the second bowl, add the beaten egg. In the third bowl, combine the panko bread crumbs, the Parmesan, and 1 tablespoon of the chopped parsley. Add zest from 1 of the oranges. Stir to combine.
  3. Split the chicken breasts in half lengthwise so that you have 4 chicken cutlets. Season both sides of the chicken cutlet with salt and pepper then coat the cutlet with the flour mixture, shaking off any excess. Dip the flour-coated cutlet into the egg mixture, letting any excess drip off. Then place it in the panko mixture and make sure the cutlet gets completely coated, pressing panko on if necessary. Place on the prepared baking sheet and repeat for the rest of the cutlets.
  4. Spray the breaded chicken cutlets with cooking spray then flip them over to spray the other side. Bake for 10 minutes then flip the cutlets over and bake for another 12 minutes, or until they reach an internal temperature of 165 degrees F. When the cutlets are done, place them on a wire cooling rack if you aren’t ready to serve them right away so they stay crispy.
  5. While the chicken is baking, make the orange and arugula salad. Peel the oranges, then section and dice them. Seed and dice the tomatoes. Finely chop the red onion. In a medium mixing bowl, stir together the diced oranges, tomatoes, chopped red onion and the remaining ½ tablespoon chopped parsley with the olive oil. Season with salt and pepper to taste. When you’re ready to eat, add the arugula, toss and season with additional salt and pepper if needed.

Recipe adapted from Rachel Ray’s Look + Cook.
Some of the links above are affiliate links, which means I may receive a small commission for my referral. This does not affect the retail cost of the item. Thank you for supporting Lemon & Mocha!