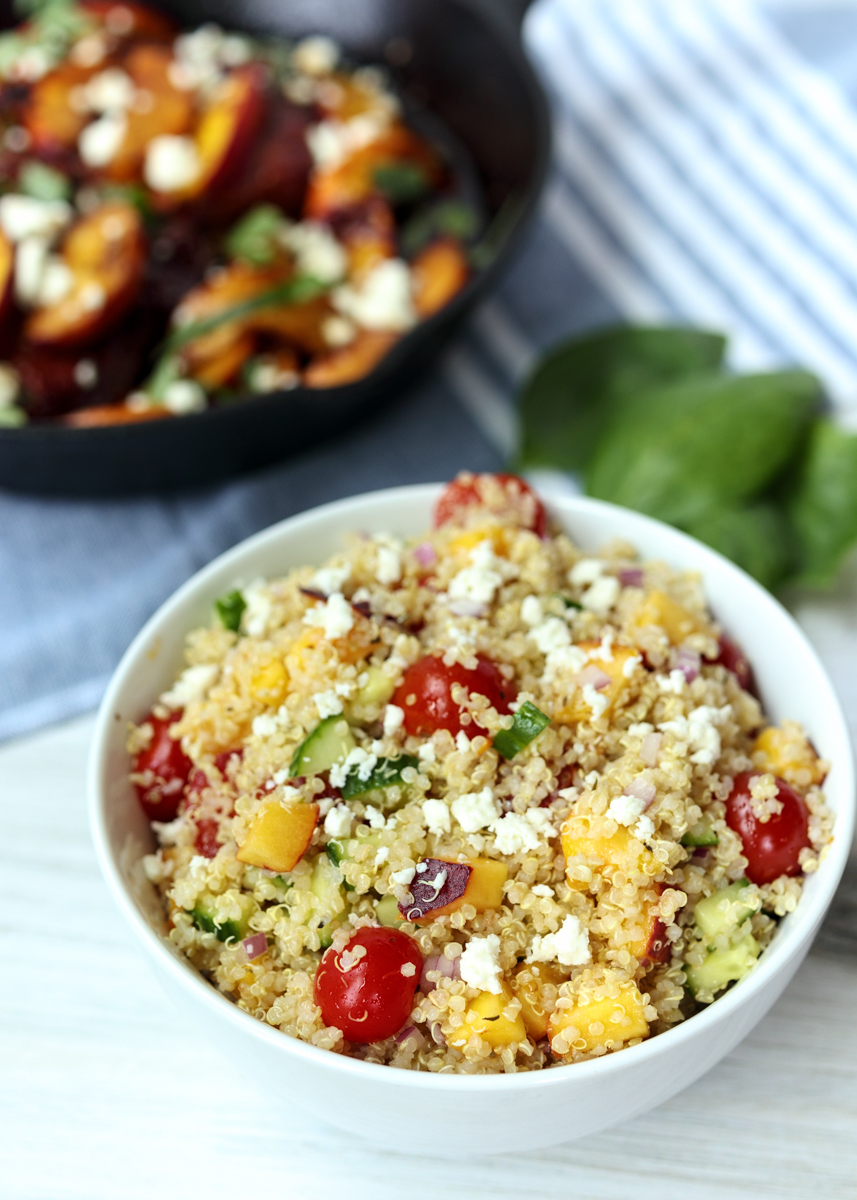
Summer Peach Greek Quinoa Salad
I’ve been sharing a lot of appetizer and dessert recipes lately, but I have a whole bundle of dinner recipes that I cannot wait to post here on Lemon & Mocha. Matt and I have definitely been living the good life with our meals the last couple of weeks! I’ve done a lot of experimenting in the kitchen and I’m sharing the very best ones with you all this month.
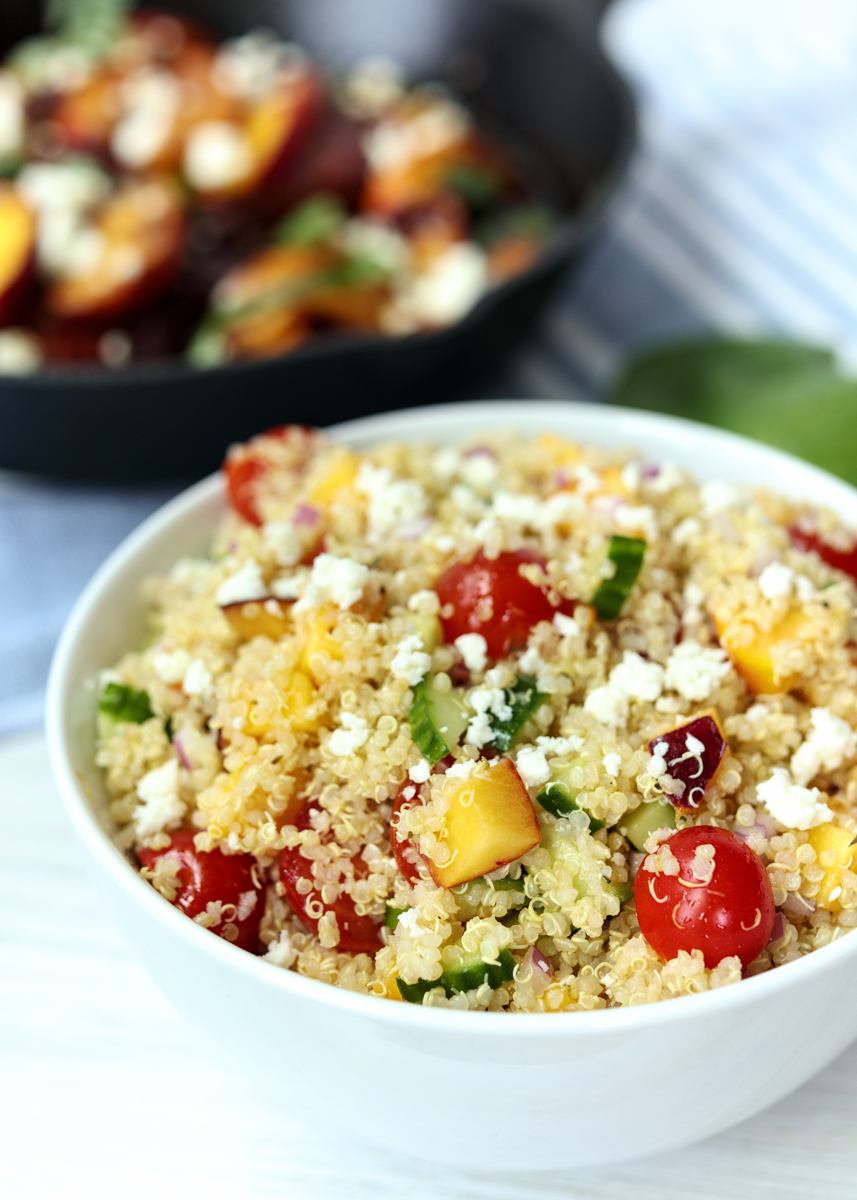
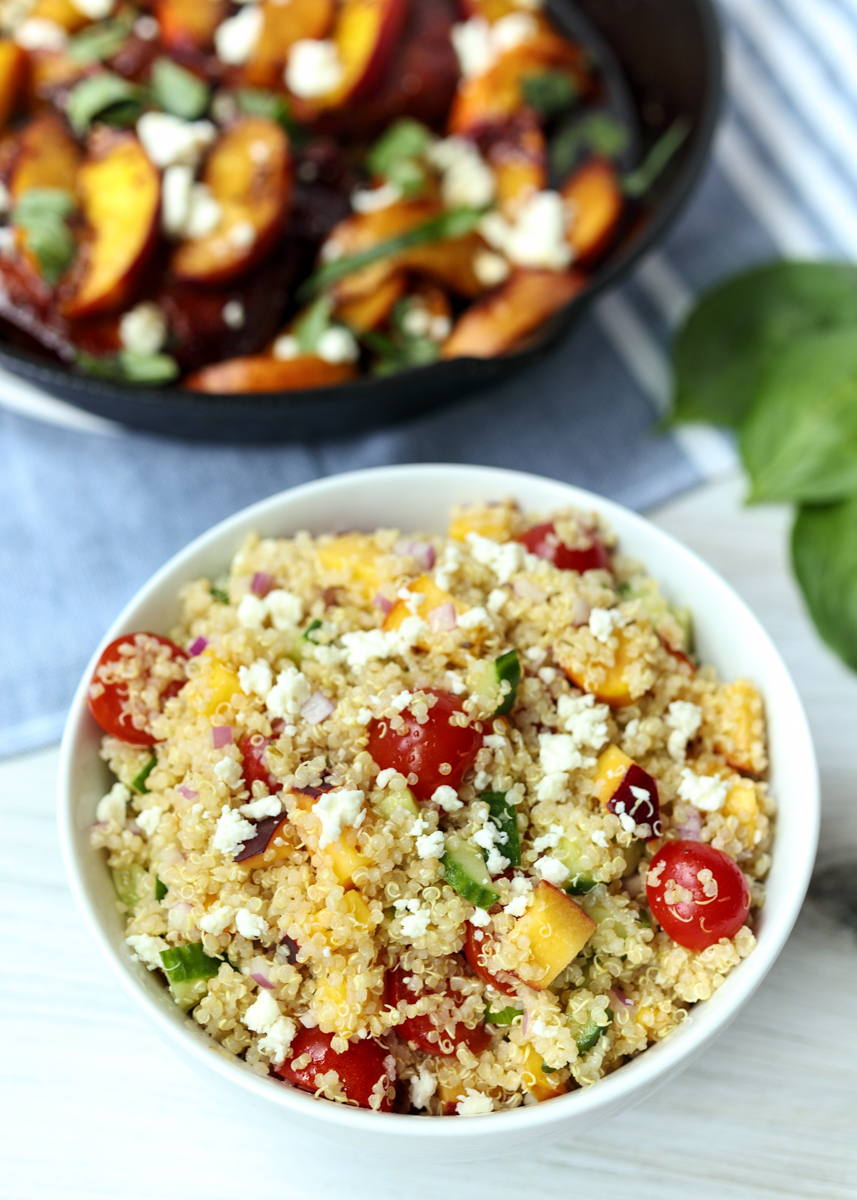
One of these dishes is this Summer Peach Greek Quinoa Salad. I can’t get enough of fresh fruit all summer long, but one that I look forward to the most are juicy, sweet peaches. Last year summer had passed by and I had only managed to share one peach recipe on the blog – these Raspberry Peach Turnovers with a Fresh Raspberry Glaze. So I immediately started brainstorming peach recipe ideas for this summer.

I have a few peach dessert recipes already here on Lemon & Mocha so my mind went the savory route and I got this idea in my head of a Greek quinoa salad with peaches in it. Of course since I thought of it after peak peach season was over I had to wait until this summer to test out of my creation.
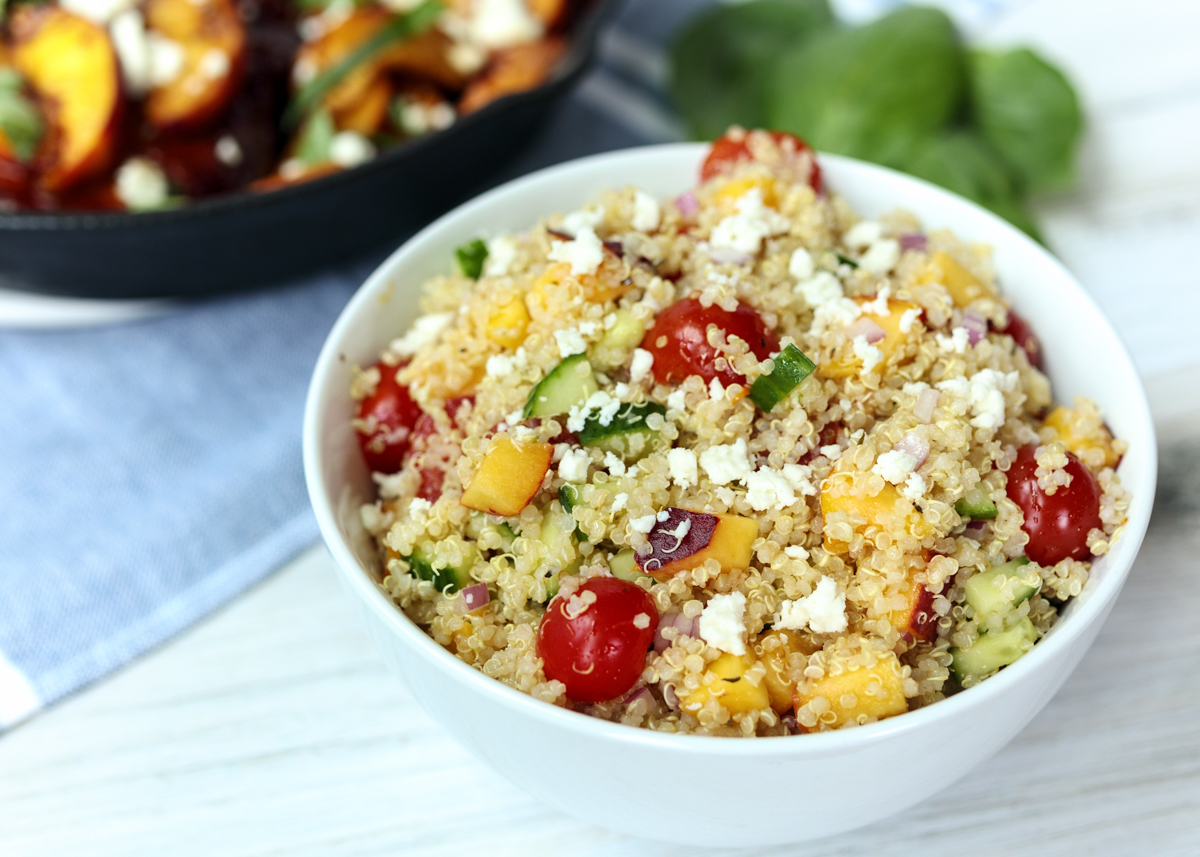
The verdict? SO good. The ingredients are simple; quinoa, tomatoes, cucumber, red onion, feta and a quick homemade Greek vinaigrette plus the sweet peach twist. This Summer Peach Greek Quinoa Salad doesn’t have to be a dinner dish as you could certainly serve it for lunch or as a side at a barbecue, but Matt and I had it along an incredible pork dish that I’ll be sharing on Wednesday and it was pure perfection!
What summer fruit do you look forward to the most?
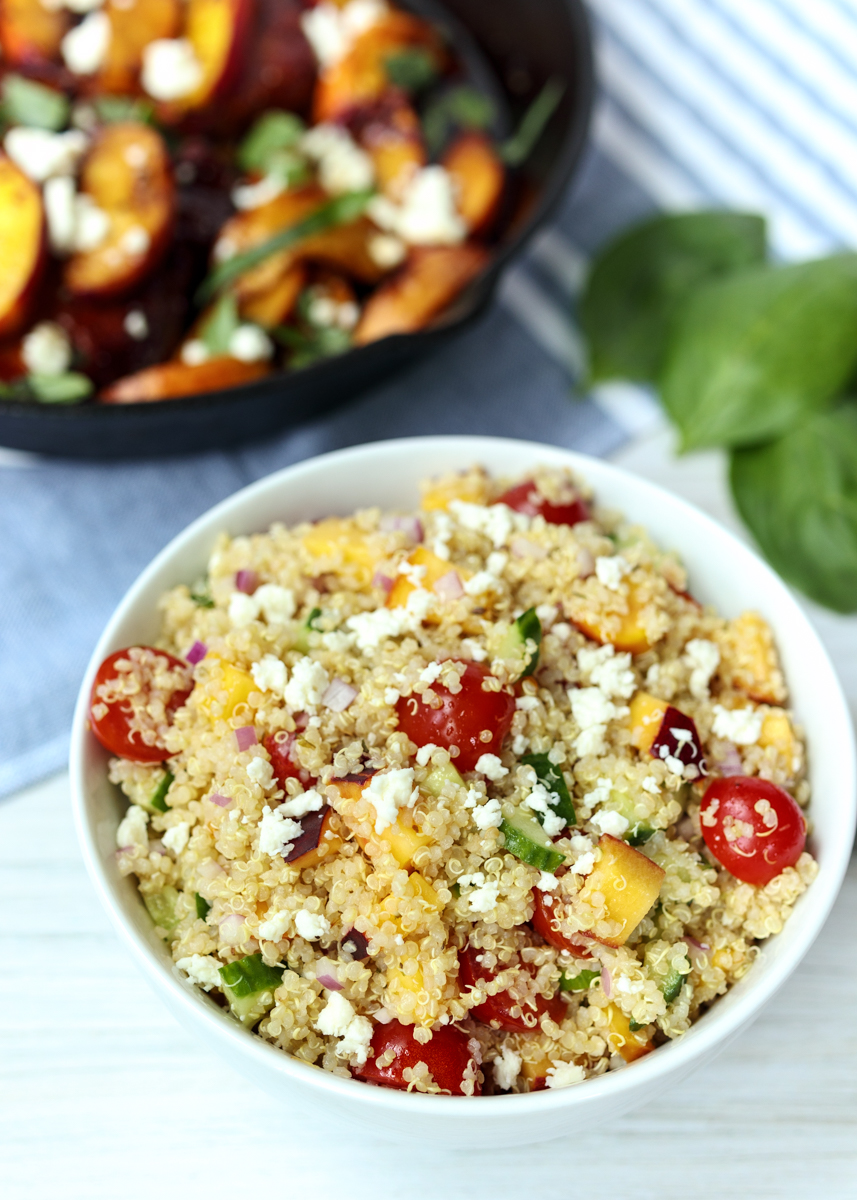
- 1 cup uncooked quinoa (or 3 cups cooked)
- ¼ cup olive oil
- 3 tablespoons lemon juice
- 1 tablespoon red wine vinegar
- ¾ teaspoon dried oregano
- ⅛ teaspoon garlic powder
- ¾ cup cherry tomatoes, halved (about 12-13)
- ¼ red onion, minced
- ½ English cucumber, small diced (about ⅔ cup)
- 1 fresh peach, pitted and diced
- ½ cup feta crumbles
- Salt and pepper
- Combine 1 cup uncooked quinoa with 2 cups water in a medium saucepan. Bring to a boil, cover and reduce to a simmer for 15 minutes. Remove from the heat and let cool; the quinoa should be cooked and the water should be absorbed.
- In a liquid measuring cup, whisk together the olive oil, lemon juice, red wine vinegar, dried oregano and garlic powder. Season with salt and pepper.
- In a mixing bowl, toss together the cooked quinoa, tomatoes, onion and cucumber. Add the dressing and toss to combine. Gently stir in the diced peach and feta crumbles. Add more feta if desired.