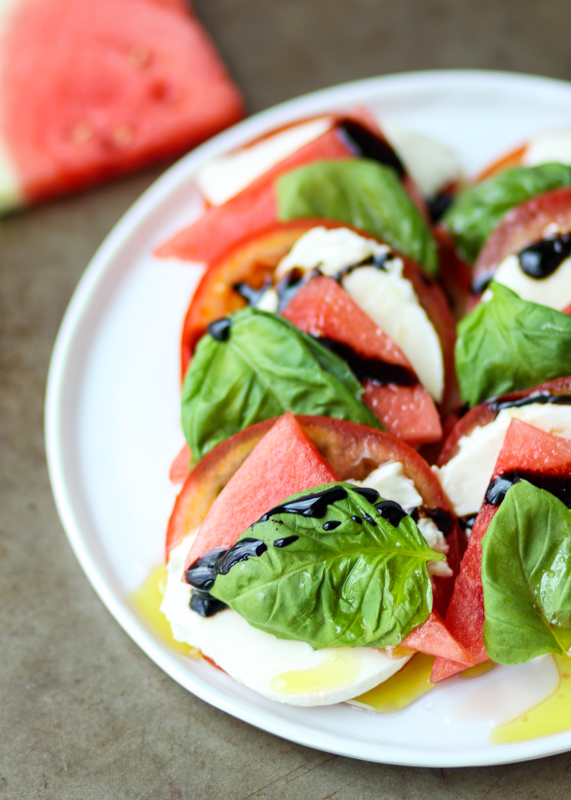
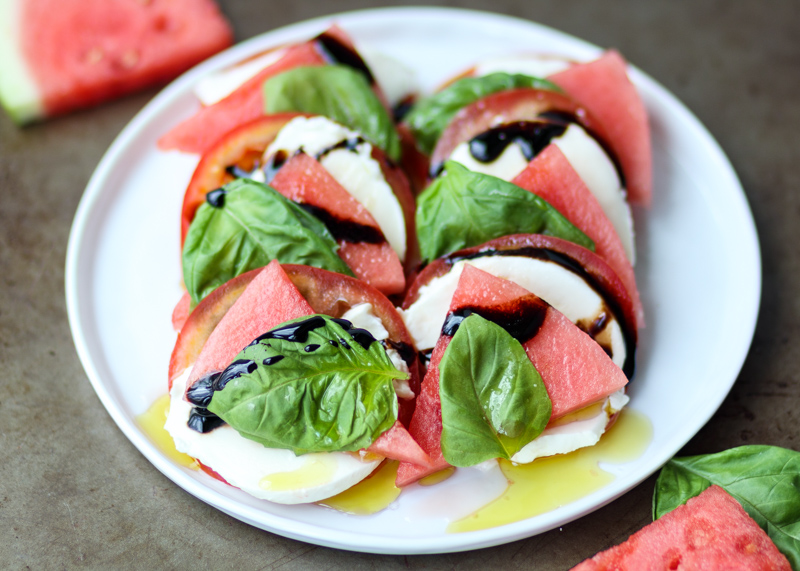
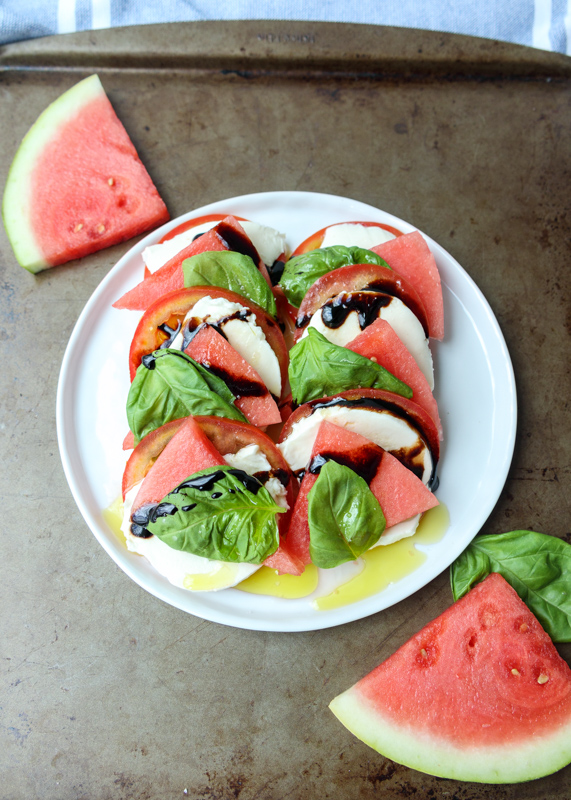
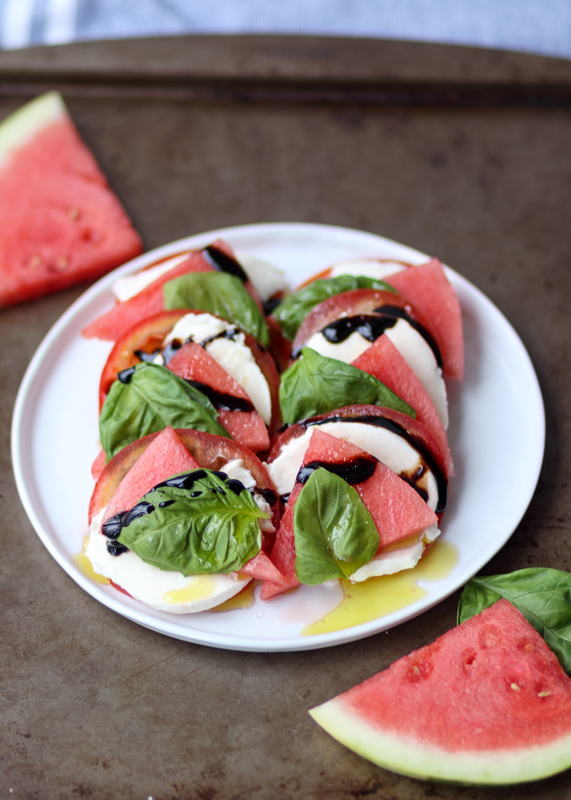
Watermelon Caprese Salad
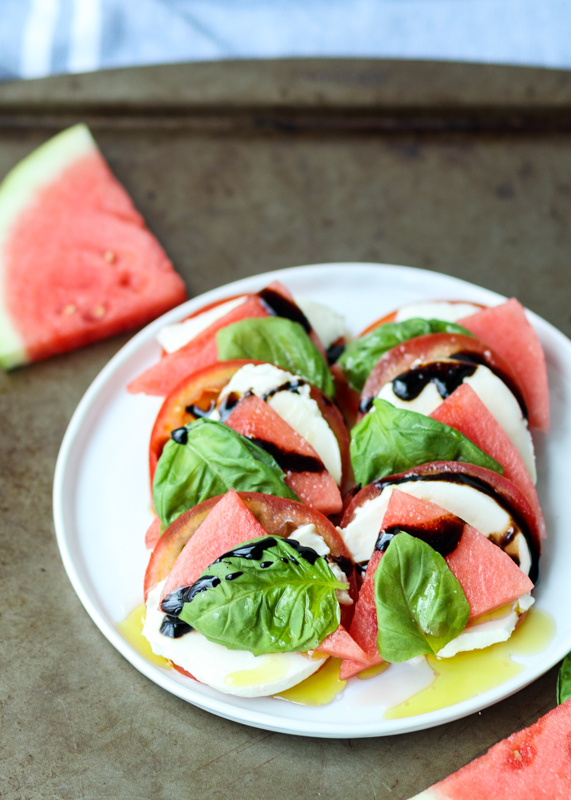
Tomorrow is the first day of summer! I’m posting one of my favorite summer dishes to celebrate – Watermelon Caprese Salad. Even though caprese salad is incredibly simple, when it’s made with fresh peak-season tomatoes it is complete summer perfection. Layers of sweet tomatoes, creamy mozzarella and fresh basil are drizzled with extra virgin olive oil, syrupy balsamic glaze and thick granules of sea salt.
The only addition I’ve ever tasted that has somehow been even better than the classic is juicy watermelon slices. I first had this combination during the summer five years ago with my parents at a restaurant out in Colorado. I even have a picture! Here it is below. Matt had just gotten me my first “real” camera that spring for our trip to Seattle so I was putting it to good use taking pictures of all our dishes.
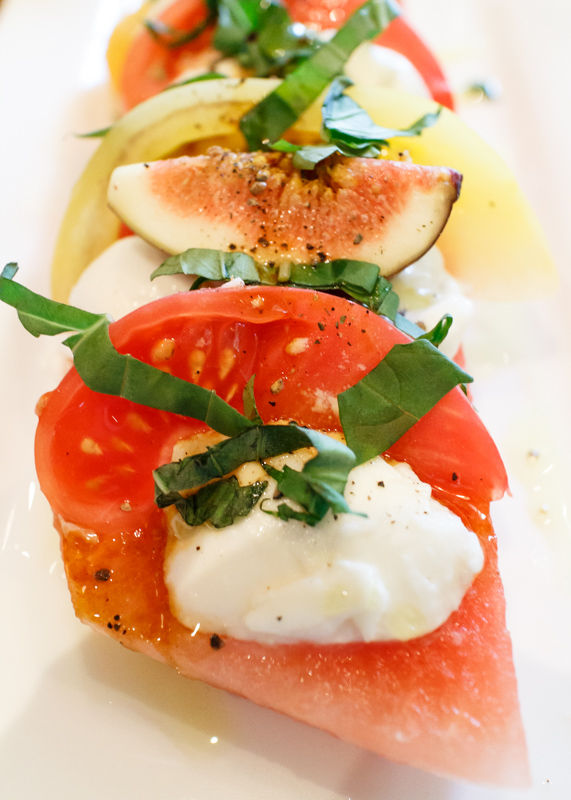
It was a special on the menu that night and even though their summer caprese had figs, heirloom tomatoes and burrata, the real standout was the watermelon. Diane and I could not believe how much the crisp sweet watermelon brought to the dish.
Later that summer we were at our annual family beach week and my aunt was making a caprese salad with some tomatoes she got at the farm stand. Diane suggested that we put some watermelon slices on it like the dish we had in Colorado; just like that we officially converted to religious Watermelon Caprese Salad makers and we haven’t looked back since! Watermelon individually pairs well with all the components of a caprese salad and makes the salad even more refreshing and summery.
Since there’s only a few ingredients you want them to really shine so make sure you buy the best watermelon, tomatoes, mozzarella and basil your farmer’s market or grocery store has to offer. I promise once you try this version it will be your new summer go-to! Enjoy and happy summer everyone!
- ¼ of a seedless watermelon, sliced into pieces roughly the same size and thickness of the tomato slices
- 2 ripe tomatoes, sliced
- 8 ounces fresh mozzarella, sliced
- Fresh basil leaves
- Extra virgin olive oil
- Salt, preferably sea salt or kosher salt
- Balsamic glaze (see note)
- Layer the caprese salad. I like to do a tomato slice, topped with a mozzarella slice, topped with a watermelon slice, then finally topped with a basil leaf. I usually plan on 2 stacks like this per person, depending on how many other sides there will be. Arrange the stacks so they are layered over one another.
- When you are ready to serve, drizzle with olive oil and balsamic glaze. Sprinkle the salt over top then serve.