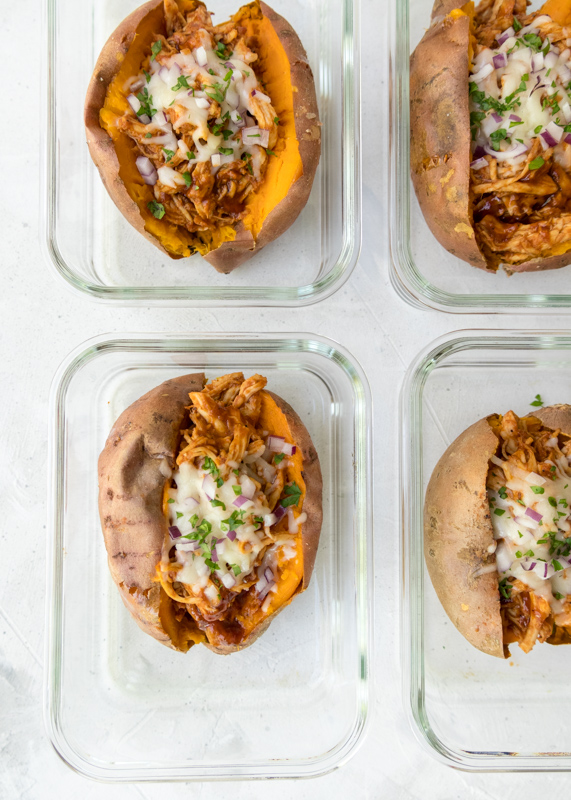
Barbecue Chicken Stuffed Sweet Potatoes
I am so excited to share this healthy meal prep lunch with you! It is also great as dinner, but Matt and I love having these Barbecue Chicken Stuffed Sweet Potatoes for make-ahead lunches. Since I usually cook dinner the last thing I want to do is make lunch a big production. Quick and easy are key lunch qualities. I also don’t like having the same salad or sandwich for weeks on end and bonus points if the meal is hot! Something about a hot meal at lunch makes me look forward to it so much more. Anyone else? It’s okay, I’m probably the only weird one.
Although you can certainly use store-bought barbecue sauce to make this even easier, I am obsessed with the quick and tasty barbecue sauce I came up with for these stuffed sweet potatoes. I am always looking for ways to make lunch healthier so I figured a homemade barbecue sauce would be a great way to control the sugar, sodium and preservatives going into this dish.
To make the homemade barbecue sauce, everything is brought to a boil then simmered for fifteen minutes. That’s it! The sweetness comes from molasses and maple syrup so there is no refined sugar involved. Wanting to eliminate refined sugar and reduce sodium is also why I made the bulk of the sauce with tomato paste and water instead of ketchup. Don’t worry, between the added Worcestershire and other seasonings I promise you would never know it isn’t store-bought barbecue sauce. In fact it’s so easy and delicious you will definitely find yourself seeking out recipes that use barbecue sauce just so you can eat some more.
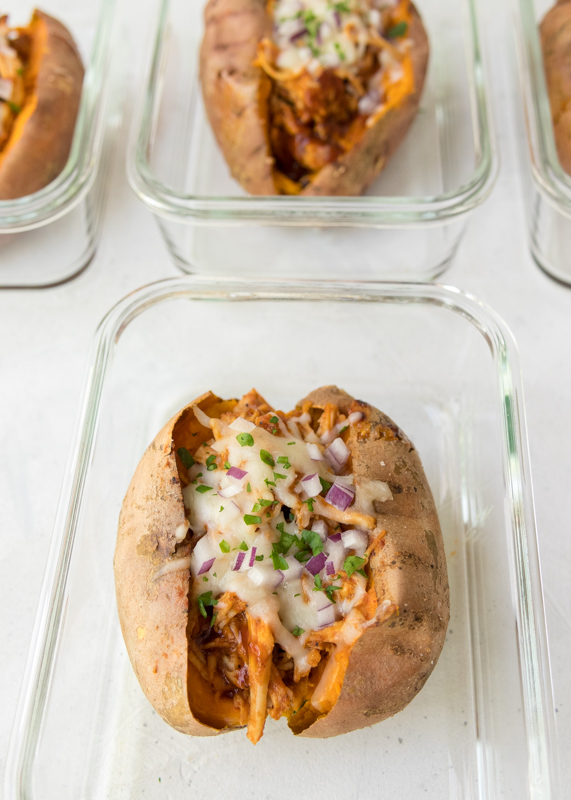
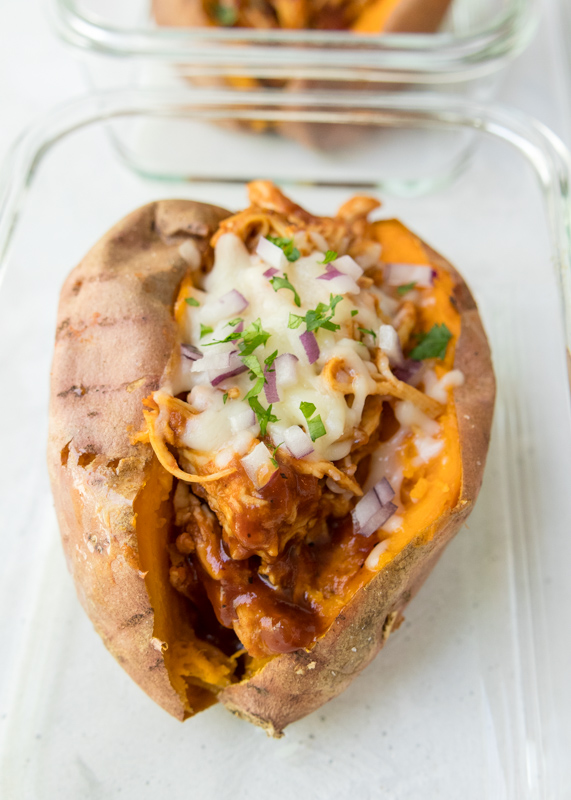
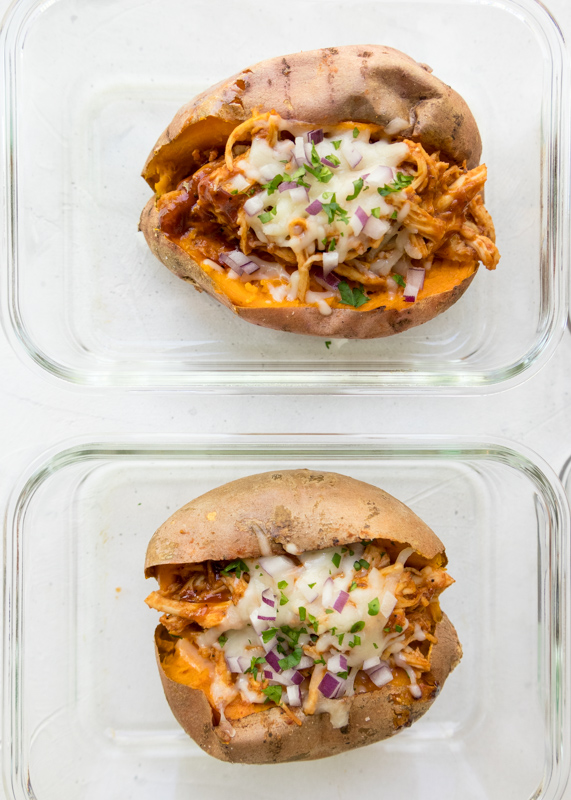
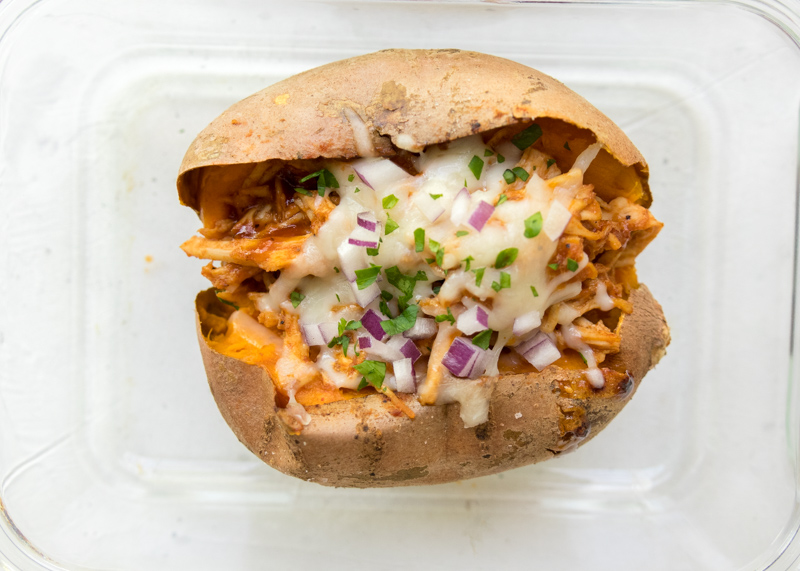
The sweet and tangy barbecue sauce gets tossed in with the shredded chicken before being stuffed into tender roasted sweet potatoes. A little sprinkling of mozzarella cheese and some chopped red onion and you have arrived at lunch perfection. These Barbecue Chicken Stuffed Sweet Potatoes are very filling and keep me stuffed until dinnertime, pun definitely intended. I cannot wait for you to try this recipe, especially the healthy homemade barbecue sauce!
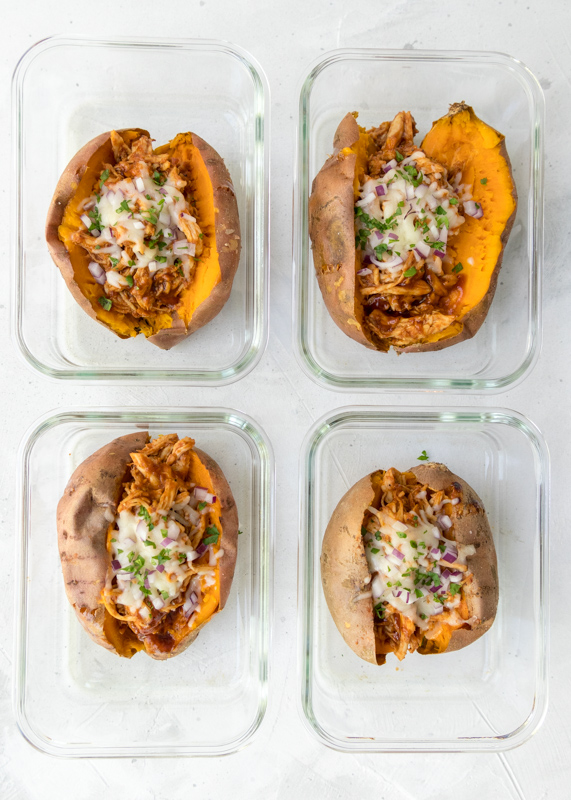
On a side note, I love these new meal prep containers I got on Amazon. They are really secure – Matt commutes to work on public transportation and brings his lunch to work in his bag so they get tossed around and have never spilled. They are a great size for lunches or make-ahead dinners and they are dishwasher safe, which is key in my house. They also are freezer-safe and you can’t see this because I didn’t post a picture of the lid, but they have a little microwave vent at the top. Also, they look awesome for my photos! You can buy them here.
- 1 small can tomato paste, about 6 ounces
- 1 cup water
- 2 tablespoons apple cider vinegar
- 4 teaspoons molasses
- 4 teaspoons Worcestershire sauce
- 4 teaspoons maple syrup
- 2 teaspoons dijon mustard
- 1 teaspoon onion powder
- 1 teaspoon garlic powder
- ½ teaspoon paprika
- ¼ teaspoon salt
- ¼ teaspoon ground black pepper
- 4 sweet potatoes, scrubbed and dried well
- 1 pound boneless skinless chicken breasts, cooked and shredded
- 4 tablespoons shredded cheddar or mozzarella
- 1½ tablespoons finely chopped red onion
- Chopped parsley for garnish, optional
- Combine all the ingredients in a small saucepan. Bring to a boil then reduce to low heat, cover and simmer for 15 minutes, stirring occasionally. Remove from the heat.
- Preheat the oven to 400 degrees F. Line a small baking pan with nonstick aluminum foil and set aside.
- Pierce the sweet potatoes 5-6 times each with a fork. Lightly rub the sweet potatoes with oil (I use olive oil and a paper towel) then bake until tender, about 45 minutes. Let cool slightly before carefully cutting a slit in the top of the potatoes.
- Toss the shredded chicken in the small saucepan with the barbecue sauce to coat. Divide the sauced chicken between the four potatoes and stuff in the center. Top each potato with 1 tablespoon of the shredded cheese and some of the red onion and parsley, if using. I cook these for make-ahead meals so the cheese gets melted when I microwave them, but if you are making and eating right away you could toss them under the broiler for a minute or 2 to melt the mozzarella.
Some of the links above are affiliate links, which means I may receive a small commission for my referral. This does not affect the retail cost of the item. Thank you for supporting Lemon & Mocha!