About Lauren

Posts by Lauren :

Spiked Hazelnut Hot Chocolate

There is so much hot chocolate in my apartment right now. I guess you could say I’m a bit of a hot chocolate hoarder. It’s okay, there are worse things to hoard like styrofoam peanuts and diner jelly packets, although I do have a couple of those packets in the fridge. What do you expect, I was raised by my grandma!

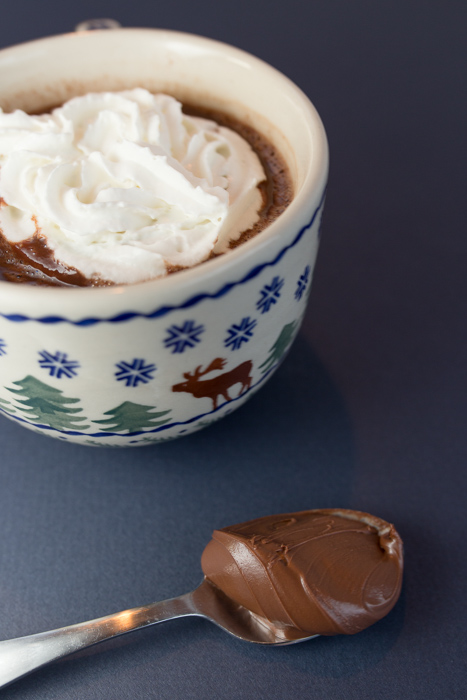
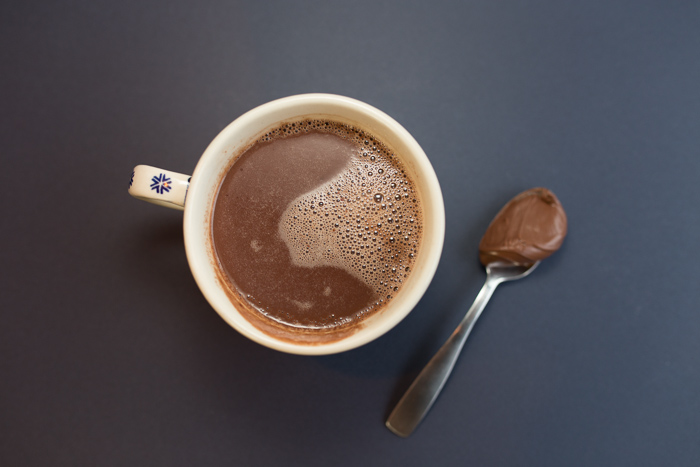
Even with all the hot chocolate options sitting in my cabinet I could not resist making this spiked hazelnut hot chocolate. I have never made homemade hot chocolate without a mix and after this experience it’s going to be hard to go back. The drink is creamy and decadent with a strong hazelnut flavor.

Just like Nutella tastes by itself, the hazelnut doesn’t overpower the chocolate taste. Since there is no powdered cocoa involved this hazelnut hot chocolate stays delightfully smooth.

The addition of the Frangelico, although fun and perfect for bringing out the hazelnut flavor, is of course optional so feel free to omit it for any kiddos or nondrinkers. I know this won’t be the last I see of this hot chocolate over the next couple months. I plan to drink it as a cozy breakfast treat, an after dinner dessert or as a nice warm pick-me-up after inevitably shoveling my car out of snow for the tenth time. How will you enjoy yours?

Spiked Hazelnut Hot Chocolate
 
Yield: 1 hot chocolate
Ingredients
  • 1 cup milk
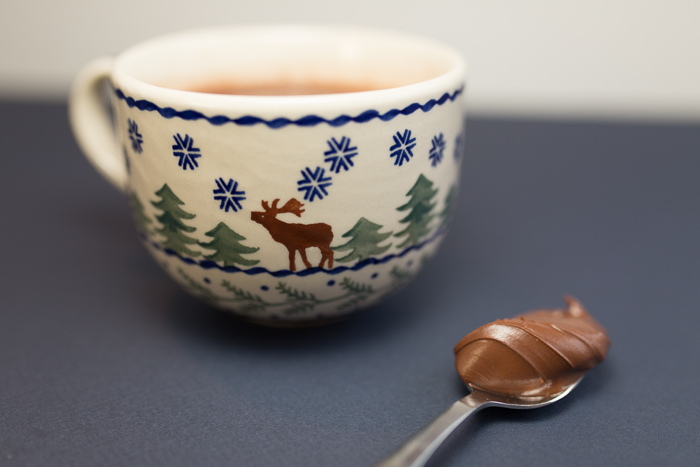
  • 2 tablespoons Nutella
  • 1 tablespoon Frangelico or another hazelnut liquor
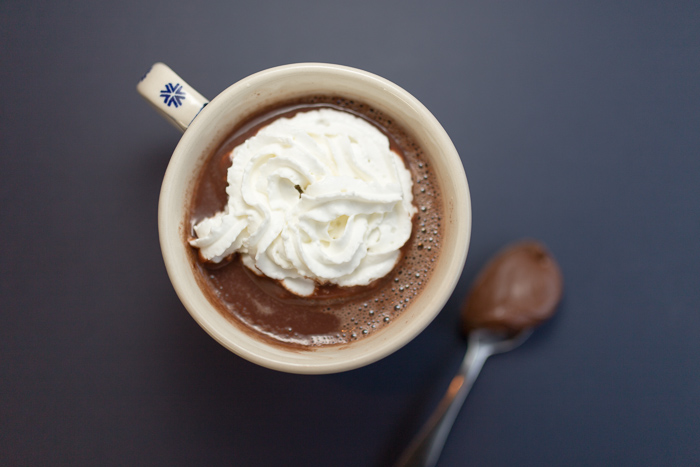
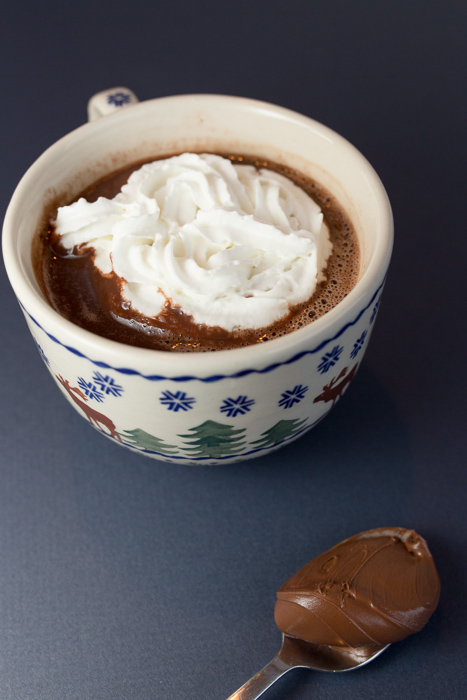
  • Whipped cream
Directions
  1. In a small saucepan on medium heat warm the milk until it begins to bubble at the edges.
  2. Remove the saucepan from the heat, add the Nutella and Frangelico and whisk until smooth.
  3. Top with whipped cream then serve.

Recipe from Saveur.

Spinach Salad with Fried Goat Cheese, Pears, Toasted Walnuts and a Pomegranate Molasses Vinaigrette

I often get inspired by dishes I have out at restaurants. Sometimes it is because the dish was so fantastic that I dream about it day and night. I develop an obsessive nonstop craving for it and must recreate it myself to satisfy this craving. Sometimes the dish wasn’t all that great, but in theory it sounded amazing. That is when I know I must recreate it to help the dish live up to its potential. The later was the case with this salad. A spinach salad with fried goat cheese, pears and toasted walnuts. The minute I saw it written on the menu my mouth started watering.

I have an affinity for goat cheese with its creamy texture and tangy taste so the thought of adding a crispy exterior had me over the moon with delight. Then adding pears for sweetness balanced by the toasted walnuts for crunch and an earthiness? Genius workings of a perfect salad in my eyes. But then it came to the table and the first bite was a serious letdown. The dressing was bland and the fried goat cheese was overpowered by breading. I knew the salad was meant to be amazing so a week later I set out to help it reach its full potential.

This spinach salad with fried goat cheese, pears and toasted walnuts with a pomegranate molasses vinaigrette exceeds expectations beyond what my wildest dreams had imagined. The fried goat cheese has a very light yet crunchy exterior which pairs perfectly with the refreshing spinach, pears and toasted walnuts, but what really makes this salad sing is the pomegranate molasses vinaigrette. Sweet and tangy this dressing packs a punch and is anything but bland. You only need a small amount so make sure you don’t overdress the spinach.

Typically, a salad is the last meal choice on my list, but that week I ate this salad every day, oftentimes for lunch and dinner. Now if that testament isn’t enough to get you to make this salad right this minute, then I’m not sure what is.

Spinach Salad with Fried Goat Cheese, Pears, Toasted Walnuts and a Pomegranate Molasses Vinaigrette
 
Yield: 4 servings, 1 cup dressing
Ingredients
for the fried goat cheese
  • 8 ounces goat cheese or goat cheese with honey
  • 2 egg whites
  • ⅓ cup panko bread crumbs
for the dressing
  • ¼ cup pomegranate molasses
  • 2 tablespoons red wine vinegar
  • 1 tablespoon Dijon mustard
  • 1 tablespoon honey
  • ¾ cup extra-virgin olive oil
  • Salt and pepper
for the salad
  • ⅓ cup chopped walnuts
  • 8 cups fresh spinach
  • 2 pears
Directions
for the fried goat cheese
  1. Place a small cooling rack over a baking sheet small enough to fit in your fridge then set aside.
  2. Beat the eggs with 1 tablespoon of water in a small bowl. Place the breadcrumbs in a separate small bowl. Set aside.
  3. Slice the goat cheese into ½” thick slices. The best way to cleanly cut goat cheese is with a small piece of dental floss.
  4. Carefully dip each slice of goat cheese into the egg white mixture then the breadcrumbs before placing on the cooling rack. After all the pieces have been dipped let them chill in the fridge for at least 15 minutes.
  5. When the goat cheese rounds have chilled, heat a sauté pan over medium-high heat with 1 tablespoon of olive oil.
  6. Cook 2-3 minutes per side then remove from the heat.
for the dressing
  1. Whisk together the pomegranate molasses, vinegar, mustard and honey until combined. Slowly whisk in the olive oil. Season with salt and pepper to taste.
for the salad
  1. Preheat the oven to 350 degrees F. Evenly place the walnuts on a baking sheet and toast for 3-5 minutes or until lightly browned.
  2. Thinly slice the pears.
  3. Toss the spinach with some of the salad dressing. Divide dressed spinach onto 4 plates then top each plate with the ¼ of the toasted walnuts, ½ of the sliced pears and 2 pieces of warm fried goat cheese.

Vinaigrette from Bobby Flay.
Fried goat cheese from Ina Garten.

Roast Chicken with a Pomegranate Molasses and Apricot Glaze

The first time I made a whole roast chicken was all due to a happy accident. Vehicle-less and not wanting to lug groceries on the T, my college roommates and I decided to test out Peapod online grocery delivery service. After the roommates and I added all our items, Matt added a couple of his own before completing the order. When it arrived a couple days later I pulled out an entire ten pound chicken. What college student buys a ten pound chicken? Especially in an apartment where we were living on grilled cheeses, frittatas and pasta! Turns out in his haste Matt accidentally ordered a whole chicken instead of chicken breasts. So we stuck it in the freezer until we could work up the courage to tackle the bird.

But when we finally did and took the first bite out of our labor of love we had seasoned, buttered and basted for hours, it was absolutely glorious. There is something so delicious about a roast chicken. It could be that the anticipation goes to your head while you’re waiting for it to cook. It might be that you get overwhelmed by a sense of accomplishment at having completed such a monumental task.

But if I was to really try and put my finger on it I’d have to keep it simple: from the juicy white meat to the tender thighs to the crispy skin a whole roast chicken is just damn tasty. This pomegranate molasses and apricot roast chicken is certainly no exception. The meat is moist, flavorful and fragrant, while the exterior is sweet and sticky. Finger-lickin’ great chicken.

You will wish you had five ovens so you could whip up a whole bunch of these bad boys at once. If you have never made roast chicken before don’t be shy! I promise you that if a couple of grilled cheese making college kids can do it then so can you. And if you have made a whole roast chicken before then you will regret not giving this one a shot. So go ahead, use some of that precious pomegranate molasses and tackle that bird.

Roast Chicken with a Pomegranate Molasses and Apricot Glaze
 
Yield: 6 servings
Ingredients
  • 4-6 pound chicken, giblets removed
  • 1 orange, cut in slices
  • 1 lemon, cut in slices
  • ½ onion, cut in half
  • 2 cloves garlic
  • ¼ cup pomegranate molasses
  • ¼ cup orange juice
  • 3 tablespoons apricot jam
  • 1 tablespoon lemon juice
  • 1 tablespoon melted butter
  • Salt and pepper
Directions
  1. Preheat the oven to 450 degrees F.
  2. Rinse the chicken inside and out and dry thoroughly.
  3. Salt and pepper then inside of the chicken the stuff the cavity with the orange slices, lemon slices, onion pieces and garlic cloves.
  4. Use kitchen twine to tie the legs together, tucking the wings under the body of the chicken. Place the chicken breast-side down on the roasting rack in a deep roasting pan.
  5. Roast the chicken for 15 minutes. Use the melted butter to baste the chicken allover. Reduce the oven temperature to 375 degrees F and continue to cook for 45 minutes. After 20 minutes baste the chicken again with butter.
  6. While the chicken is in the oven make the glaze. Whisk together the pomegranate molasses, orange juice, apricot jam and lemon juice until combined. Season with salt and pepper.
  7. After the 45 minutes are up flip the chicken so the breasts are up then coat allover with the glaze. Cook for 30 minutes, basting with the glaze again after 15 minutes. Remove from the oven when the chicken reaches an internal temperature of 165 degrees F or when the juices run clear when you cut between a leg and thigh.

Recipe adapted from The Global Jewish Kitchen.

Chocolate Maple Bacon Cupcakes with a Whiskey Cream Filling

These cupcakes have me in such a frenzy of excitement that I don’t even know where to begin. I suppose the best place to start is how these cupcakes came into existence. Well, literally I baked them, but before that they were just a vision of my tasty, chocolate-clouded imagination. Last year my friend was having a big milestone birthday and three important factors came into play when determining what to make her for said birthday. One, she is a health fanatic and does not eat desserts. I’m talking no desserts even during our holiday potluck at work; this girl’s got some serious willpower. Two, she loves bacon and regularly orders a bacon, egg and cheese, minus the bread and cheese. Don’t ask. Three, and this is the important one, she informed me that for her birthday she was going to treat herself to some dessert.

The minute that sentence left her mouth I knew I was tasked with creating the most amazing, decadent, oh-my-Paula-Deen, diet breaking worthy dessert of all time. Each component is more sin-inducing than the previous and you will wonder how you managed to exist up until this point without experiencing such a life altering cupcake perfect morsel.

The base is a chocolate cake recipe that we know and love, fondly referred to as the perfect chocolate cupcake for its incomparable moist texture and rich chocolate taste. They are then stuffed with a whiskey cream filling. A little bit naughty and a whole lot delicious. The maple glaze on top is light enough that it doesn’t add too much richness to the already decadent cupcakes, but the maple flavor still comes through to compliment the bacon.

Oh the bacon. The ultimate dessert garnish is no garnish at all, but the singular component that unifies the entire cupcake. Pan-fried as all proper bacon should be so that it’s allowed to cook in it’s own grease and soak up as much bacony flavor as possible. Then half dipped in chocolate to create a salty-sweet duo that will bring you to your knees, where you will stay while you finish your cupcake because you’re shaking so much from excitement that you can’t be trusted at a full upright position. If you’ve been searching for the one dessert that will make you overjoyed that you broke your diet then make these this weekend.

Chocolate Maple Bacon Cupcakes with a Whiskey Cream Filling
 
Yield: 24 cupcakes
Ingredients
for the bacon
  • 8 pieces bacon, cooked in a frying pan until crispy
  • ½ cup semisweet chocolate chips
  • 1 teaspoon vegetable oil
for the filling
  • 2 cups powdered sugar
  • ½ cup heavy cream
  • 2 teaspoons whiskey
for the glaze
  • 1 cup powdered sugar
  • ¼ cup maple syrup
Directions
for the bacon
  1. Line a small cookie tray or cutting board that will fit in the fridge with wax paper then set aside.
  2. Carefully break the pieces of bacon into roughly 2” pieces. Set aside.
  3. Melt the chocolate chips in a double boiler over medium heat until smooth, stirring occasionally.
  4. Remove from the heat and stir in the vegetable oil until combined.
  5. Dip half of each piece of bacon into the chocolate, let the excess drip off, then place on the wax paper. Once all the pieces have been dipped place in the fridge to set.
for the filling
  1. Whip the heavy cream in a chilled mixing bowl until stiff peaks are just about to form.
  2. Slowly add the powdered sugar and beat until stiff peaks form, being sure not to over-beat the cream.
  3. Add the whiskey and stir with a spatula until combined. At this point, the filling will taste very strong. The longer the cupcakes rest before eating, especially if resting in the fridge, the more mellow the flavor will become.
  4. Fit a pastry bag with the Wilton Bismarck tip #230. Fill the pastry bag with the filling.
  5. Insert the tip halfway into the center of the cupcake and squeeze in some filling. Slowly start pulling out the tip while still squeezing. Remove and stop squeezing in some filling when the top of the cupcake starts to bulge and is just about to crack.
  6. Place in the fridge to chill.
for the glaze
  1. While the cupcakes are chilling whisk together the powdered sugar and maple syrup in a small mixing bowl.
  2. Remove the cupcakes from the fridge. Carefully dip the top of each cupcake into the maple glaze. Place a piece of chocolate dipped bacon on top so it sets with the glaze.
  3. Place the cupcakes in the fridge to set before serving.


Raspberries and Cream Sponge Cake Jelly Roll

The item on the top of my 50 recipes I want to conquer in the kitchen list was a jellyroll. I have no idea why, but I could not wait to try one out myself. Maybe it’s because they always look so beautiful. Maybe it’s because the possibilities are seemingly infinite. As soon as I got my hands on a half sheet pan, courtesy of Matt, I knew I was going to christen it with a homemade jelly roll. I quickly sat down and scribbled out two pages of cake-filling combination ideas.

My mind was on overdrive! Classics like pumpkin with cream cheese filling and sponge cake filled with jam. Chocolate dipped strawberry, banana split and chocolate chip cookie dough. Peaches and cream, Oreos and cream and lemon cream pie. I was busy wiping the drool from my lips while I contemplated exactly which one to create first. Raspberries and cream sponge cake jelly roll. Classic, yet updated. Moist and airy with the perfect amount of sweetness. And of course, visually beautiful with an ideal Valentine’s Day treat coloring. Also there was already a container of raspberries in my fridge, but that tidbit spoils the poetic description of it all.

My favorite part of making this raspberries and cream jelly roll sponge cake, more so than eating it, which is saying a lot since it’s divine, was discovering just how simple it is to make a jelly roll cake. You really can do it! All of you! The key is to pay attention to the small details in the recipe, such as cooling time, being gentle with the cake and coating the proper tea towel. You will surprise yourself at how easy it all really is. The whole time I kept looking over at Matt and saying, “Look! I’m doing it! The jelly roll cake is working!” So put aside your baking bashfulness and impress everyone with this gorgeous raspberries and cream jelly roll sponge cake.

Raspberries and Cream Sponge Cake Jelly Roll
 
Yield: about 10 servings
Ingredients
for the cake
  • ¾ cup all-purpose flour
  • 1 teaspoon baking powder
  • ¼ teaspoon salt
  • 5 large eggs
  • ¾ cup sugar
  • ½ teaspoon vanilla extract
for the filling
  • 4 ounces cream cheese, softened
  • ¼ cup powdered sugar
  • ½ teaspoon vanilla extract
  • ¼ teaspoon lemon extract
  • 1 cup heavy cream
  • ½ cup mashed raspberries
  • Raspberries and powdered sugar for serving
Directions
for the cake
  1. Preheat the oven to 350 degrees F.
  2. Grease a half sheet pan (18" x 13") then line with parchment paper. Grease the parchment paper then sprinkle flour on the greased sheet and shake to coat.
  3. In a small bowl whisk together the flour, baking powder and salt. Set aside.
  4. Using a stand mixer whip the eggs with the whisk attachment at medium high speed while slowly adding the sugar and vanilla. Continue to whip until the mixture is thick, about 5-8 minutes.
  5. Sift the flour mixture into the egg mixture and combine with a spatula until just incorporated.
  6. Pour the batter onto the prepared baking sheet and carefully spread it into an even layer.
  7. Bake for 12-17 minutes or until the cake feels firm, but springs back when you touch it. Make sure to rotate the pan halfway through the baking time.
  8. While the cake is cooking, lay a clean tea towel on a flat surface and lightly dust with powdered sugar.
for the filling
  1. Place a metal bowl and whisk attachment in the freezer.
  2. Beat the cream cheese, powdered sugar, vanilla extract and lemon extract in stand mixer until combined. Set aside.
  3. Using the chilled metal bowl and whisk attachment beat the heavy cream until stiff peaks form. Do not over mix or the cream will collapse. Gently fold the cream cheese mixture into the whipped cream. Then gently fold the mashed raspberries into the frosting until just combined.
for assembly
  1. When the cake comes out of the oven, immediately run a knife around the edge of the pan then flip the cake onto the towel. Discard the parchment paper that the cake baked on. Beginning at 1 short end of the cake, carefully roll the cake and towel along with it into a tight log. It is important to do this step while the cake is still hot. Leave the cake seam side down and let cool for 15 minutes.
  2. Carefully unroll the cake. Add the filling making sure to leave a ½" border at the edges. There may be some filling leftover, you don't want to over-stuff the cake.
  3. Gently roll the cake bake up into a snug log, this time leaving the towel behind. Let cool completely, about 30 minutes. When ready to serve cut off the ends, transfer to a serving plater and top with an additional dusting of powdered sugar and fresh raspberries.

Cake from The Cook’s Illustrated Cookbook.
Frosting adapted from allrecipes.com
.