About Lauren

Posts by Lauren :

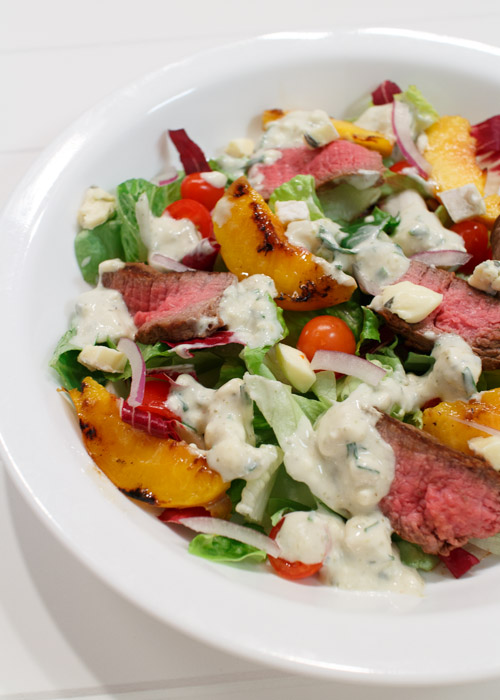
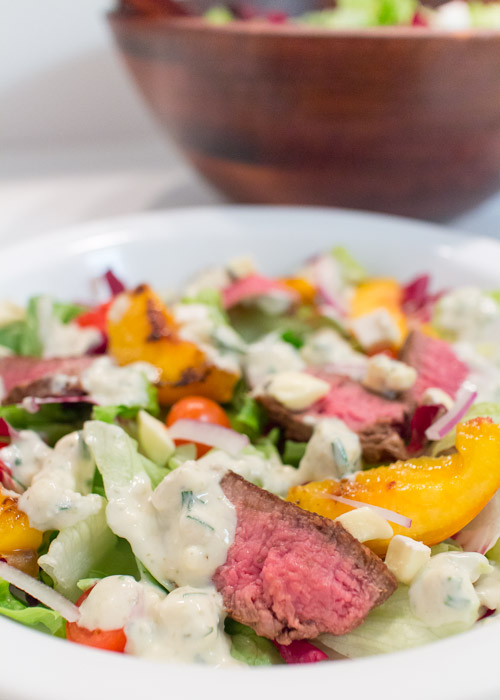
Grilled Steak and Peach Salad with Homemade Blue Cheese Dressing

I am not a huge fan of having a salad as an entrée. Maybe it’s because salads get a bad rap as diet food. Maybe it’s because it’s ingrained in my brain that dinner should be a hot meal. Or maybe it’s because munching on all that lettuce makes me feel a bit like a rabbit.

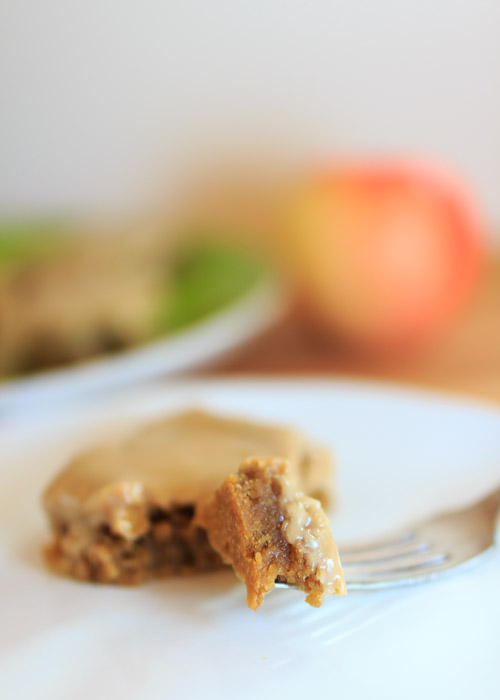
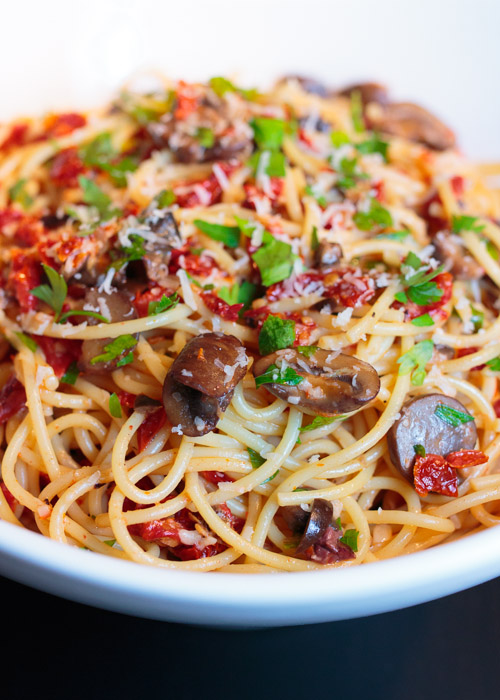
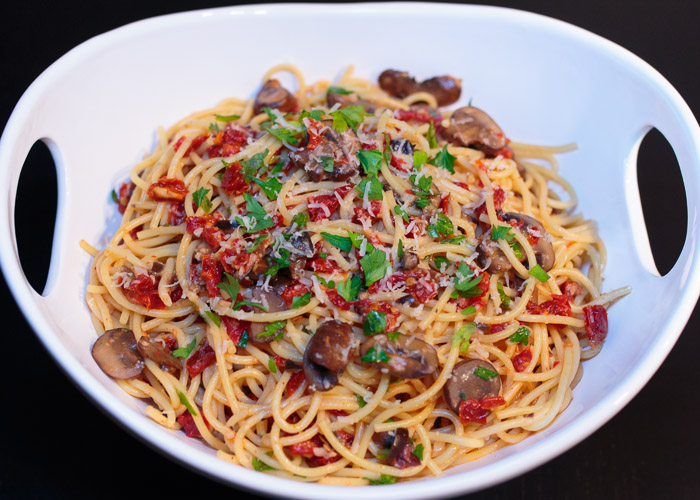
But sometimes between the pasta dishes and batches of peanut butter apple bars you just need a fresh break. All the recent baking and experimenting in the kitchen left me craving a salad. Of all things. Unbelievable.

This grilled steak and peach salad did not disappoint. Peach season is ending, but there’s still time to take advantage of this sweet fleshy fruit before it’s gone from grocery stores until next summer. Peaches are delicious, but grilled peaches are like a whole new species. The outer flesh caramelizes and develops a light smoky taste while the inner peach juices form a syrupy concentrate. For those of you who have not grilled peaches before, I apologize for sharing this secret at the end of peach season.

Between the succulent grilled peaches, the tender steak and the creamy mild dressing this salad made me forget all about my salad doubts. And I didn’t even think about rabbits once.

Grilled Steak and Peach Salad with Easy Homemade Blue Cheese Dressing
 
Yield: 4 servings
Ingredients
for the steak
  • 1 cup extra-virgin olive oil
  • 1 tablespoon vinegar
  • 1 teaspoon brown sugar
  • ¼ teaspoon onion powder
  • ¼ teaspoon garlic powder
  • ¼ teaspoon paprika
  • ⅛ teaspoon cayenne powder
  • ⅛ teaspoon mustard seeds
  • salt and pepper
  • 1 pound sirloin tips
for the dressing
  • ½ pound cambozola cheese crumbles, or another mild blue cheese of your choosing
  • ⅓ cup light sour cream
  • 1 tablespoon lemon juice
  • 1 tablespoon red wine vinegar
  • 1 tablespoon honey
  • 2 teaspoons minced fresh chives
  • 1 teaspoon pesto
for the salad
  • 2 peaches, halved and pitted
  • 4 cups mixed romaine, raddicchio and butter lettuce, or the greens of your choosing
  • 1½ cups grape tomatoes, halved
  • ¼ of a red onion, thinly sliced
Directions
  1. Place the steak in a shallow dish. Whisk together the first 9 ingredients in a small bowl then pour over the steak. Cover and refrigerate overnight, or for at least three hours. Remove the marinated steak from the fridge about 30 minutes before cooking.
  2. Heat a grill pan over medium-high heat and let it get hot. Place the steak tips on the grill pan, being sure not to crowd the pan, and let them cook 5-6 minutes per side for medium depending on the thickness of the tips. Remove to a cutting board and let rest for 10 minutes before cutting into thin slices.
  3. While the steaks are cooking make the dressing. Put half the blue cheese into a small mixing bowl with the sour cream, lemon juice, vinegar, honey, chives and pesto. Cover and chill until ready to serve.
  4. While the steak is resting, finish the salad. Brush the cut side of the peaches with extra-virgin olive oil then place them cut side down over a grill pan on medium-high heat. Grill the peaches for 3 minutes then flip and grill the other side for one minute. Remove from the heat and let cool slightly. Once peaches are cool enough to touch, slice into wedges.
  5. Toss the greens, grape tomato halves and red onion slices in a large bowl. Divide onto the four plates then top with the sliced steak, peach wedges, dressing and the remaining blue cheese crumbles.

Recipe adapted from September 2013 issue of Food Network Magazine.

Blueberry Sour Cream Pancakes with Blueberry Syrup

When weekdays often consist of grabbing a bagel on the way out the door or eating a yogurt at the office there’s something so satisfying about sitting down for a hearty Saturday breakfast. Growing up, weekend family breakfasts consisted of bacon, eggs and homemade pierogies. If you haven’t had the fortune of tasting a pierogi it is an outrageous potato and cheese dumpling, but that’s a story for another day.

Unfortunately, since living on my own I don’t have my grandma to stock my freezer with homemade pierogies and for the sake of my recently acquired slow adult metabolism I try to only keep bacon in my apartment for special occasions. But sometimes I wake up on a Saturday morning with an urge that can only be satisfied by a grand mid morning meal and pancakes have become my new savior.

Do you have some eggs, milk and a few essential baking ingredients? Boom! Pancakes! I tend to have leftover ingredients from my different kitchen experiments and I always end up having to be creative about using them. A few Saturdays ago I was staring at a half empty container of light sour cream in my fridge when a light bulb went off. I ran to my bookcase (okay, I probably walked), pulled out my Pioneer Woman cookbook and there it was: “Edna Mae’s Sour Cream Pancakes.”

If you’re sitting here reading this thinking, “Yuck! Sour cream pancakes?”, shame on you! These golden discs from the heavens are crisp on the outside, fluffy on the inside and have a nice lightness about them that you don’t get from regular pancakes.

More fridge staring inspired the addition of the blueberries. Berries are expensive so I didn’t want to just plop them in the pancake batter. If I was going to use these berries I was going to make them shine. This blueberry syrup is laughably easy, but the tartness of the berries mellowing out the sweetness of the syrup will take your pancakes to the next level. I used a combination of fresh and frozen blueberries so feel free to use whatever is staring at you from your fridge or freezer.


Blueberry Sour Cream Pancakes with Blueberry Syrup
 
Yield: 2 servings
Ingredients
for the pancakes
  • 1 cup sour cream
  • 7 tablespoons all-purpose flour
  • 1 tablespoon sugar
  • 1 teaspoon baking soda
  • ½ teaspoon salt
  • 2 large eggs
  • ½ teaspoon vanilla extract
  • 1 cup blueberries
  • Butter
for the syrup
  • ½ cup maple syrup
  • 1½ cup blueberries
Directions
  1. Put the sour cream in a medium mixing bowl. Sift in the flour, sugar, baking soda and salt.
  2. Stir together until just combined. The batter will be lumpy.
  3. In a separate bowl, whisk together the two eggs with the vanilla.
  4. Pour the egg mixture into the sour cream and flour mixture. Stir until just combined.
  5. Place a frying pan or griddle over medium-low heat. Once the pan is hot melt a tablespoon of butter and wait for it to bubble.
  6. When the butter is bubbling, pour ¼ cup of batter for each pancake. Try not to overcrowd your pan; the amount of pancakes you can fit will depend on your pan's size. Leave some space between the pancakes as they will expand when you add the blueberries.
  7. As soon as the batter is in the pan, place a small handful of blueberries on each pancake.
  8. Cook until the pancake is covered with tiny bubbles on the top, then flip. Cook for another two minutes then remove from the pan.
  9. Add some more butter and repeat with the remaining batter until you have cooked all your pancakes.
  10. While the pancakes are cooking, make the syrup. Put the syrup and the blueberries in a small saucepan and bring to a boil over medium-high heat. Let the syrup boil for 3 minutes then remove from the heat. Slightly mash the blueberries with a wooden spoon or potato masher, keeping some of the blueberries whole. Pour the syrup into a small pitcher and place on the table with the pancakes.
Notes
I add my blueberries to each pancake individually as I have noticed when I add them to the mixing bowl they all sink to the bottom. Adding individually means you get to be more precise, but it also does spread out the pancakes quite a bit so be cautious when determining how many pancakes will fit in your pan.

Pancakes from The Pioneer Woman Cooks: Recipes from an Accidental Country Girl.
Blueberry syrup from Nigella Lawson at Food Network.

Peanut Butter Apple Bars

Pumpkin Pie scented Yankee Candles, Shipyard Pumpkinhead Ale in cinnamon sugar rimmed glasses and tubs of Zachary’s mellowcreme pumpkins are a few of my favorite things about fall. When these items roll into the stores, I know fall is upon us and I can’t help getting excited. So many of the things that we associate with fall revolve around pumpkin flavors. But during those first weeks of fall, pre-pumpkin carving and Thanksgiving pumpkin pie prepping, everyone is ringing in the new season by going apple picking.

There’s nothing quite like strolling through an apple orchard, sampling the season’s freshest offerings and going home with more pounds of apples than you would normally buy in a month. We went apple picking a couple weekends ago and the whole time I only had one thought pounding in my brain: peanut butter apple bars.

I first made these peanut butter apple bars two years ago during a snowstorm. It was October, but we live in New England, so there you have it. Similar in taste to a peanut butter blondie brownie, these bars are especially moist from the addition of the chopped apples. You can use any type of apples you prefer, but I recommend granny smiths or a similar tart apple to help balance the sweetness of the bars.

The real magic of these bars, and the reason why you need to make these THIS SECOND (after you finish reading the post, of course), is the creamy, smooth, put-it-in-a-glass-and-drink-it-it’s-that-delicious peanut butter glaze on top. As the glaze hardens on these peanut butter apple bars it takes them to a heavenly place and everyone will be asking for more. And the best part? The recipe is super simple so go ahead and make them another batch!


Peanut Butter Apple Bars
 
Yield: 24 bars
Ingredients
for the bars
  • ¼ cup (1/2 stick) unsalted butter
  • 2 tablespoons Chobani Apple Cinnamon non-fat Greek yogurt
  • 2 cups light brown sugar
  • ½ cup creamy peanut butter
  • 2 large eggs
  • 1 teaspoon vanilla extract
  • 2½ cups all-purpose flour
  • 1 teaspoon baking powder
  • ¼ teaspoon baking soda
  • ½ teaspoon salt
  • 1 cup peeled and diced apples
for the peanut butter glaze
  • ½ cups powdered sugar
  • ¼ cup milk
  • ¼ cup creamy peanut butter
  • ½ teaspoon vanilla extract
Directions
  1. To make the bars, preheat the oven to 350°F. Line a 9" x 13" pan with parchment paper then spray lightly with cooking spray.
  2. In a small saucepan over medium heat, stir the butter and brown sugar until the butter is melted and the mixture is smooth, about 10 minutes.
  3. Remove from the heat and add the peanut butter. Stir until the mixture is combined then set aside to cool.
  4. In a large bowl, sift together the flour, baking powder, baking soda and salt.
  5. Add the vanilla extract to the slightly cooled peanut butter mixture and stir to combine. Add the eggs to the mixture and stir well. Add the Greek yogurt and stir until fully incorporated.
  6. Carefully pour the peanut butter mixture into the dry ingredients. Stir until well combined and smooth.
  7. Fold the diced apples into the batter. The batter will be thick and difficult to manipulate so fold in the apples the best you can, but it doesn't have to be perfect.
  8. Spread the batter evenly into the prepared pan. Bake for 30 minutes, or until the top and edges are golden brown. Remove from the oven and let cool on a wire rack.
  9. To make the peanut butter glaze, sift the powdered sugar into a medium bowl. Add the milk, peanut butter and vanilla extract, then whisk until smooth.
  10. Once the bars are cooled, pour the glaze all over the bars, spreading with a spatula. If you are feeling fancy, you can drizzle the glaze instead. Cut bars into 24 squares and remove from the pan before serving.
Notes
If you can't find Chobani Apple Cinnamon non-fat Greek yogurt, you can substitute plain or vanilla. You can also omit the Greek yogurt altogether and replace it with a half a stick of butter (bringing the total butter count of the recipe to 1 stick).

Recipe slightly adapted from Two Peas and Their Pod.

Sun-dried Tomato & Kalamata Olive Lemon Pasta

I find it amazing how much our taste in food adapts and evolves as we age. Do you know children often need to be introduced to a food 15-20 times before deciding whether they like or dislike it? I must have never given many of the ingredients in this dish a proper chance because if I told my 10-year-old self that I would be happily chowing down a bowl of pasta with mushrooms, garlic, lemon and… olives? Gasp! Unthinkable!

For my whole childhood and early young adulthood, I was an olive hater. It was more than simple dislike of olives; when others ate them I would scrunch my face up and say, “Ew, gross, you like olives??” Clearly I was particularly mature for my age.

But this pasta here, this is miracle pasta. Whether you snarf down olives by the jar or their briny smell makes you run away, you must try this pasta dish. The savory mushrooms and pasta are perfectly balanced by the saltiness of the olives and Parmesan. The lemon and parsley provide a fresh finish and help keep the dish light. This recipe is easily adaptable as you can adjust it to your own preferences. A few more mushrooms, a little less garlic, it’s up to you. If you’re feeling super adventurous you could even load up on the olives.

Since I’m still warming up to olives and don’t want a whole jar of them sitting in our fridge I usually get what I need from the salad bar at my grocery store. Sometimes if you put them in the little dressing container they won’t even charge you! Now hurry up and get cooking!

Sun-dried Tomato & Kalamata Olive Lemon Pasta
 
Yield: 4 servings
Ingredients
  • 12 ounces thick spaghetti
  • 3 tablespoons olive oil
  • 2 teaspoons minced garlic
  • 1 cup sliced mushrooms
  • ¼ cup kalamata olives, pits removed & chopped
  • 3 tablespoons lemon juice
  • 1 cup chopped sun-dried tomatoes
  • 1 tablespoon lemon zest
  • ⅓ cup fresh grated parmesan, plus more for serving
  • ½ cup fresh chopped parsley
Directions
  1. Cook the spaghetti al dente. When draining the cooked pasta, reserve 1 cup of the cooking water.
  2. While the pasta is cooking heat the oil in a large skillet over medium heat. Add the garlic and mushrooms, stirring occasionally.
  3. After 5 minutes, or once the mushrooms look almost browned, add the olives, lemon juice and sun-dried tomatoes. Cook for 3 minutes.
  4. Add the cooked spaghetti, lemon zest and parsley to the skillet. Toss together in the skillet then add ⅓ cup of the reserved water. Add more reserved water if there is not enough sauce to coat the spaghetti.
  5. After pasta is tossed, top with the parmesan.
  6. To serve top with more parmesan if desired.
Notes
I use dry-packed sun-dried tomatoes when I make this recipe. If you use oil-packed sun-dried tomatoes instead you may want to reduce the amount of oil in the second step of the recipe.

Recipe adapted from September 2013 issue of Women’s Health.

Hello!

Welcome to Lemon & Mocha! I have always been obsessed with food, but discovering food blogs brought it to a whole new level for me. In 2008 I discovered The Pioneer Woman and my desire to create my own food blog was born.

Sharing my kitchen adventures with my family and friends, fellow foodies and hungry web browsers was the dream, but I always had plenty of reasons not to get started. I didn’t have the time, or the right camera, or the extra money for the hosting or the space for all the kitchen supplies.

Four lame excuses, three different apartments and five years later, I decided it was time to go for it. So here we are! I hope you enjoy :-). To learn more about my crazy self and food fanatical ways, keep reading.