Recipes

Beef Bolognese Sauce

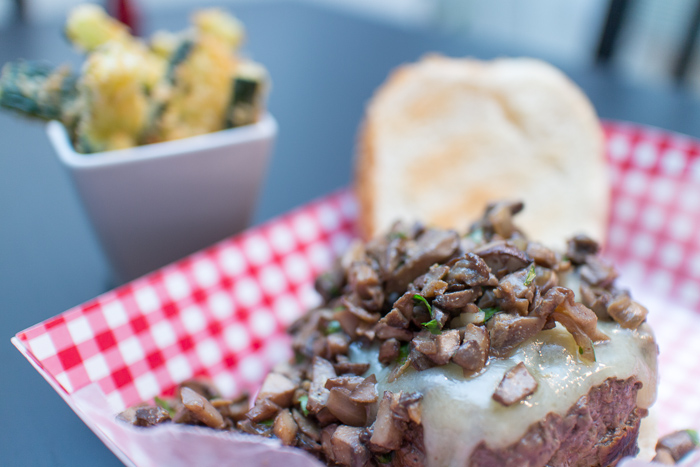
This is not your momma’s meat sauce. Well it might be, but the possibility of that is highly unlikely. This is certainly not a marinara sauce with some meat casually tossed in. This is a rich, creamy and satisfying beef bolognese sauce. There are a couple differences between this deliciousness and your average meat sauce. The beef bolognese here before you includes rehydrated porcini mushrooms along with their soaking liquid, which becomes a light mushroom stock. We learned from the mushroom overload cheddar burgers posted earlier this week that these babies are mushroom gold when adding a decadent earthiness to beef.

Second is that the milk added cuts the acid of the tomato base and brings a great creaminess to the sauce without overloading it with fat like a traditional cream sauce. Finally, all the different steps- the processing, the sauteing, the eating-with-a-spoon-but-someone-needs-to-taste-test-it-ing- may seem like a lot of work, but once you ravishingly start into that first bite of bolognese coated pasta it will all be worth it. The original recipe calls for using a meatball mixture, typically consisting of beef, pork and veal, but feel free to use whatever you prefer. Or is readily available in your grocery store as was my case.

Beef Bolognese Sauce
 
Yield: 6 servings
Ingredients
  • ½ cup water
  • ½ ounce dried porcini mushrooms
  • 1¼ cups white wine
  • 1 small carrot, peeled and cut into ½ inch pieces
  • ⅓ cup finely chopped onion
  • 1 tablespoon unsalted butter
  • 1 teaspoon sugar
  • 1 garlic clove, minced
  • 1¼ pounds ground beef
  • 1½ cups whole milk
  • 2 tablespoons tomato paste
  • 1 28-ounce can crushed tomatoes
  • Salt and pepper
Directions
  1. Microwave the water until hot. Add the dried mushrooms and let rehydrate for 10 minutes. Using a fine mesh strainer set over a small bowl drain the mushrooms making sure to reserve the liquid. Set aside.
  2. In a small skillet over medium heat cook the wine until it has reduced to about 2 tablespoons, about 20 minutes. Set aside.
  3. While the wine is reducing use a food processor to finely grind the rehydrated porcini mushrooms. Add the carrot and pulse until the carrot pieces are smaller than a chop, but larger than a mince. Add the onion and pulse until combined.
  4. Heat a large pot over medium high heat. Melt the butter then stir in the mushroom, carrot and onion mixture. Cook until the vegetables are soft.
  5. Add the sugar and minced garlic and cook for 30 seconds. Add the ground beef and cook for 1 minute, making sure to break apart the meat with a wooden spoon. Stir in the milk and continue breaking apart the meat. Once the milk begins to bubble, reduce to medium low heat.
  6. Continue to cook the ground meat, making sure to break up the meat often, for 20 minutes. Once the meat has begun to sizzle, stir in the tomato paste to combine. Add the can of crushed tomatoes, reserved mushroom liquid, ¼ teaspoon salt and ⅛ teaspoon pepper.
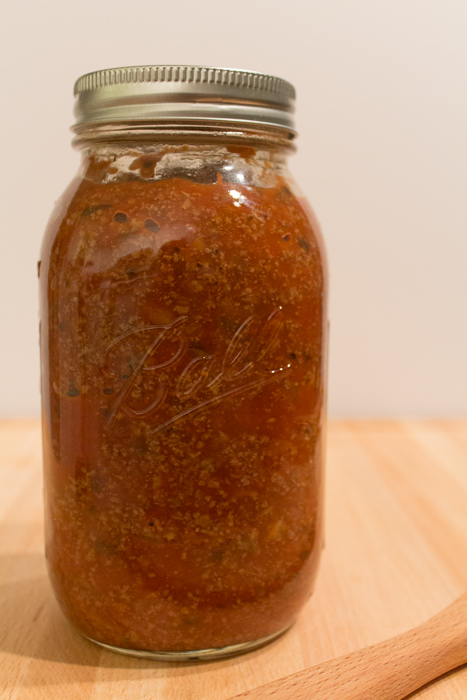
  7. Cook for another 15 minutes then stir in the reduced wine. Cook for a couple more minutes then remove from the heat. Serve hot over pasta or store in the fridge for 2 days or the freezer for 2 months.


Mushroom Overload Cheddar Burgers

A couple of my cousins are fellow food lovers and we always inevitably land on the topic of food. Partly because we are usually gathering for some sort of meal and partly because endless discussions about food is a consequence (or bonus!) of being in my company. Somehow of all the various directions our food conversations could go we always make our way to the topic of fast food.

Now I eat fast food very rarely. And my cousins and I all have great food around our city of Boston that we enjoy frequently. But there is something so universal and instantly crave-inducing about a crispy McNugget, salty skinny fries and creamy soft serve ice cream in a cake cone. It probably has something to do with what’s in the food at these places, but shh! Let’s not ruin it!

The most crave-worthy of all is a juicy, cheesy burger. The last time I was with my cousins they asked when I was going to post a burger so here it is. A mushroom overload cheddar burger. Now originally I was waiting to post this during the warmer months when it would seem more seasonally appropriate. But I couldn’t wait. I had to post it right this second. What else were you going to eat with those zucchini fries?

Mushroom lovers will swoon over these patties loaded with porcini mushrooms and mushroom stock. And if that’s not enough, which is probably the case because there are never enough mushrooms, the burger is topped with a seasoned mushroom and shallot sauté that pairs perfectly with the richness of the sharp cheddar. These burgers will do more than satisfy your burger craving- they will create a whole new craving to have these again and again!

Mushroom Overload Cheddar Burgers
 
Yield: 4 burgers
Ingredients
  • ½ cup water
  • ½ ounce chopped dried porcini mushrooms
  • 2 tablespoons olive oil
  • 4 ounces cremini mushrooms, chopped
  • ½ shallot, minced
  • 2 teaspoons dried Italian seasoning
  • 1⅓ pounds ground beef
  • ¼ cup finely chopped onion
  • 1 clove garlic, minced
  • 4 slices sharp cheddar cheese
  • 4 burger buns
  • Salt and pepper
Directions
  1. Microwave the water until hot. Add the dried mushrooms and let rehydrate.
  2. In a large sauté pan heat the olive oil over medium high heat. Add the mushrooms and minced shallot then season with salt and pepper. Cook until mushrooms are tender and golden, about 10 minutes, while stirring occasionally. Stir in the Italian seasoning and remove from the heat.
  3. In a large mixing bowl combine the ground beef, chopped onion, minced garlic, rehydrated dried mushrooms and a couple tablespoons of the soaking liquid. Do not overwork the meat, mix until just combined. Divide the beef mixture into four equal portions and form each portion into a 1 inch thick burger patty. Season each side of the burgers with salt and pepper.
  4. Cook the burgers on a grill or grill pan until desired doneness. During the last couple minutes of cooking place 1 slice of cheese on each burger. If using a grill pan tent foil over the pan to help the cheese melt.
  5. Serve the burgers on the buns topping with a large spoonful of the mushroom mixture.

Recipe adapted from Bobby Flay’s Burgers, Fries & Shakes.

Baked Zucchini Fries with Special Sauce

Many people extol the wonderful qualities of winter. They argue that warm winter fires, cozy blanket couch snuggling and glistening snowflakes are romantic and special. Well as someone who lives in a fireplace-less apartment that Matt keeps at a snuggie required temperature year round I argue, what is so romantic about an extra-long work commute on a sandy, dirty snow-covered road?

Yes, I know, January just started and I’m already complaining about winter. January gets me a little down as my favorite holiday of the year is over and there’s nothing to look forward to for the rest of the season. Besides Valentine’s Day, my anniversary, skiing, creamy winter mac and cheeses… but hey, I’m busy complaining here! Sometimes I need a little burst of summer to get me through these long dark days. Aside from actually seeing the sun before and after work, what really gets me thinking about summer are summer vegetables. And french fries, mmm french fries.

Voila! Baked zucchini fries. These fries will have everyone gobbling their vegetables like they’re, well, eating fries. The subtle flavor of the zucchini is amped up by the seasonings in the crunchy coating. Served alongside special sauce these baked zucchini fries may just be habit-forming. My mom used to call it fish stick sauce, but I think special sauce sounds a little more appetizing and versatile. Special sauce is also fitting as it has special powers that include getting kids to gobble up their fish sticks and vegetables. So make these fries and bring some summer to your winter.

Baked Zucchini Fries with Special Sauce
 
Yield: 2 servings
Ingredients
for the zucchini fries
  • 1 large zucchini
  • 3 tablespoons olive oil
  • 1 cup panko breadcrumbs
  • 1 tablespoon grated Parmesan
  • 1 teaspoon dried oregano
  • ½ teaspoon garlic powder
  • ½ teaspoon onion powder
  • ¼ teaspoon paprika
  • Salt and pepper
for the sauce
  • ⅓ cup mayonnaise
  • 3 tablespoons ketchup
Directions
  1. Preheat the oven to 425 degrees F.
  2. Lightly coat a cooling rack with cooking spray then place on a cookie sheet or jelly roll pan. Set aside.
  3. Cut the zucchini into 3 inch sticks.
  4. Place the olive oil in a small bowl and set aside.
  5. In a separate small bowl combine the breadcrumbs, Parmesan and seasonings.
  6. Working one zucchini stick at a time, dip the stick into the olive, coat in the breadcrumb bowl then carefully place on the prepared cooling rack. Repeat with the remaining zucchini sticks.
  7. Bake for 25 minutes or until golden brown.
  8. While the zucchini fries are baking, combine the mayonnaise and ketchup. Serve the zucchini fries warm with the special sauce for dipping.
Notes
Zucchini is naturally a soft vegetable when cooked so don't expect a sturdy fry, just one with flavor and an outer crunch.

Recipe adapted from Health Magazine.

Baked Pistachio Crusted Chicken

What is there to say about chicken? It’s healthy, a great source of protein and can be on the table in under thirty minutes. Did I put you to sleep yet? That is how I was feeling after all the chicken-eating going on in my apartment. The chickens were taking over! Well, at least of the boneless skinless variety. If you’ve been feeling like this lately then either you’re still traumatized from that childhood farm incident or you need to add some pizazz to your dinner table. Lets hope it’s the later, I’m a food blogger not a therapist.

I did not want to remove the chicken takeover from my kitchen as it has many mealtime benefits as previously mentioned. I decided I simply needed to add some new flavors and textures to re-excite myself about dinner. This baked pistachio crusted chicken has a crunchy exterior and juicy interior all while still bringing the health factor. It also pairs really well with last week’s roasted beet, blackberry and goat cheese salad; how convenient is that? So put down the grill pan and step away from the stir fry. It’s time to wake up your senses and reinvent your chicken.

I have some other chicken recipes I am trying out so I will be sure to share those here on Lemon & Mocha. However I am always looking for new suggestions. What is your favorite way to cook up this versatile poultry?

Baked Pistachio Crusted Chicken
 
Yield: 4 servings
Ingredients
  • 2 cups unsalted shelled pistachios
  • ½ teaspoon garlic powder
  • ½ teaspoon onion powder
  • ½ teaspoon paprika
  • Salt and pepper
  • 4 boneless skinless chicken breasts
Directions
  1. Preheat oven to 400 degrees F.
  2. Lightly coat a cooling rack or roasting rack with cooking spray. Set over a cookie sheet or jelly roll pan and set aside.
  3. Roughly chop the shelled pistachios in a food processor.
  4. Combine the chopped pistachios and seasonings in a shallow bowl.
  5. Place 1 chicken breast in the pistachio mixture and press down to coat. Flip and coat the other side of the breast. Carefully place on the prepared cooling rack. Do not pat the chicken dry as you will need the natural moisture of the chicken to help the pistachio coating stick. Repeat with the remaining chicken breasts.
  6. Bake the chicken for 20 - 30 minutes, or until the internal temperature reaches 160 degrees F. The time varies because every oven is different and chicken can dry out quickly so it's best to use temperature rather than time to judge doneness.
  7. Remove and serve with a big salad or lemon orzo and asparagus.


Roasted Beet, Blackberry and Goat Cheese Salad with Orange Champagne Vinaigrette

It is January 1st. A new year is upon us! It’s time for reflecting on how we live our lives, making resolutions to do better, watching our diet and going to the gym; at least for the next three weeks. In the spirit of the new year I am going to try very, very hard to not post any desserts for the next three weeks. Joking aside I know I could certainly use a dessert detox after all the stuffing my face sessions I participated in over the last couple months.

Being the food obsessed person I am I have an extraordinarily difficult time dieting so instead I just try to keep my meals fresh, healthy and flavorful. As I have previously mentioned on Lemon & Mocha I am not a fan of salads resembling rabbit food. However, I find when salads have a cooked element instead of all raw ingredients the texture and flavor is greatly enhanced.

This roasted beet, blackberry and goat cheese salad with an orange champagne vinaigrette packs so much punch you will completely forget you are eating healthy. The beets are roasted to mellow and sweeten their flavor as well as sliced thin to keep them from overwhelming the rest of the salad. The creamy goat cheese provides a nice contrast to the tangy citrus infused dressing. Serve alongside roast chicken or as a vegetarian main dish for a fresh, flavorful and seasonal meal this winter.

Roasted Beet and Goat Cheese Salad with Orange Champagne Vinaigrette
 
Yield: 4 servings, 1 cup dressing
Ingredients
for the salad
  • 1 large beet, top trimmed
  • 1 large golden beet, top trimmed
  • 1-2 tablespoons olive oil
  • Salt and pepper
  • 8 cups mixed beet greens and mesclun
  • 1 cup blackberries
  • Crumbled goat cheese
for the dressing
  • 1 tablespoon minced shallot, about ½ a shallot
  • ¼ cup orange champagne vinegar
  • 1 tablespoon dijon mustard
  • 1 tablespoon orange juice
  • Pinch of sugar
  • ¾ cup olive oil
  • Salt and pepper
Directions
for the salad
  1. Rinse the beets, scrubbing off any dirt, then dry. Tear off 2 small squares of tin foil large enough to encase each beet. Place each beet in a square of tin foil, slightly turn up the sides and drizzle each with olive oil. Lightly season with salt and pepper then seal up the tin foil packets. Bake the beets in the foil packets for 30 minutes.
  2. Remove the beets from the oven and set aside to cool. Once cool enough to touch, remove the skins by hand or with a paring knife. Thinly slice the beets.
  3. Wash the greens and place in a large bowl. Add the sliced beets and blackberries then toss with some of the dressing. Top with the crumbled goat cheese.
for the dressing
  1. Whisk together the minced shallot, orange champagne vinegar, mustard, orange juice and sugar. Slowly whisk in the olive oil then season with salt and pepper.
Notes
*I got orange champagne vinegar from Trader Joe's, but if you can't find any you can use regular champagne vinegar and add 1 tablespoon orange zest.
*Use the leaves from the bunches of beets for the beet greens.

Dressing recipe adapted from Martha Stewart.