Valentine’s Day

Red Velvet Swirl Cheesecake
Red Velvet Swirl Cheesecake  |  Lemon & Mocha

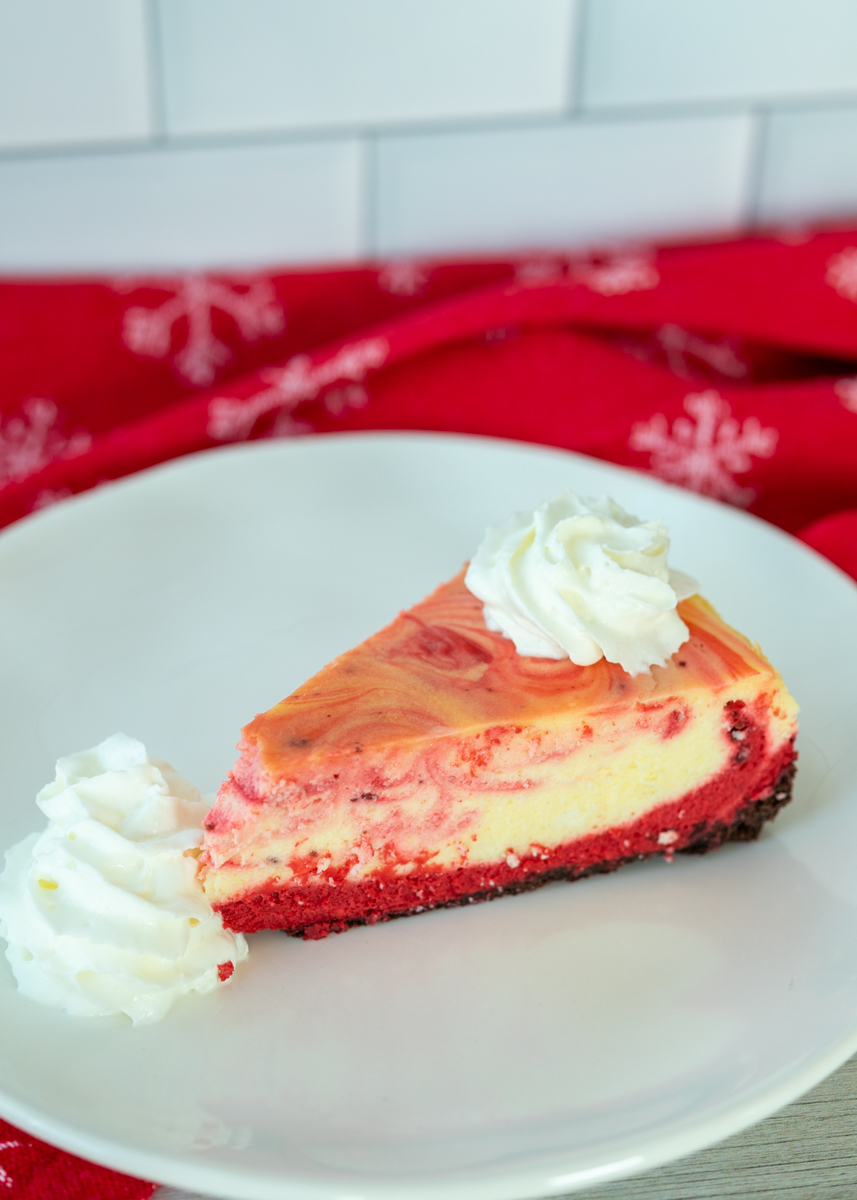
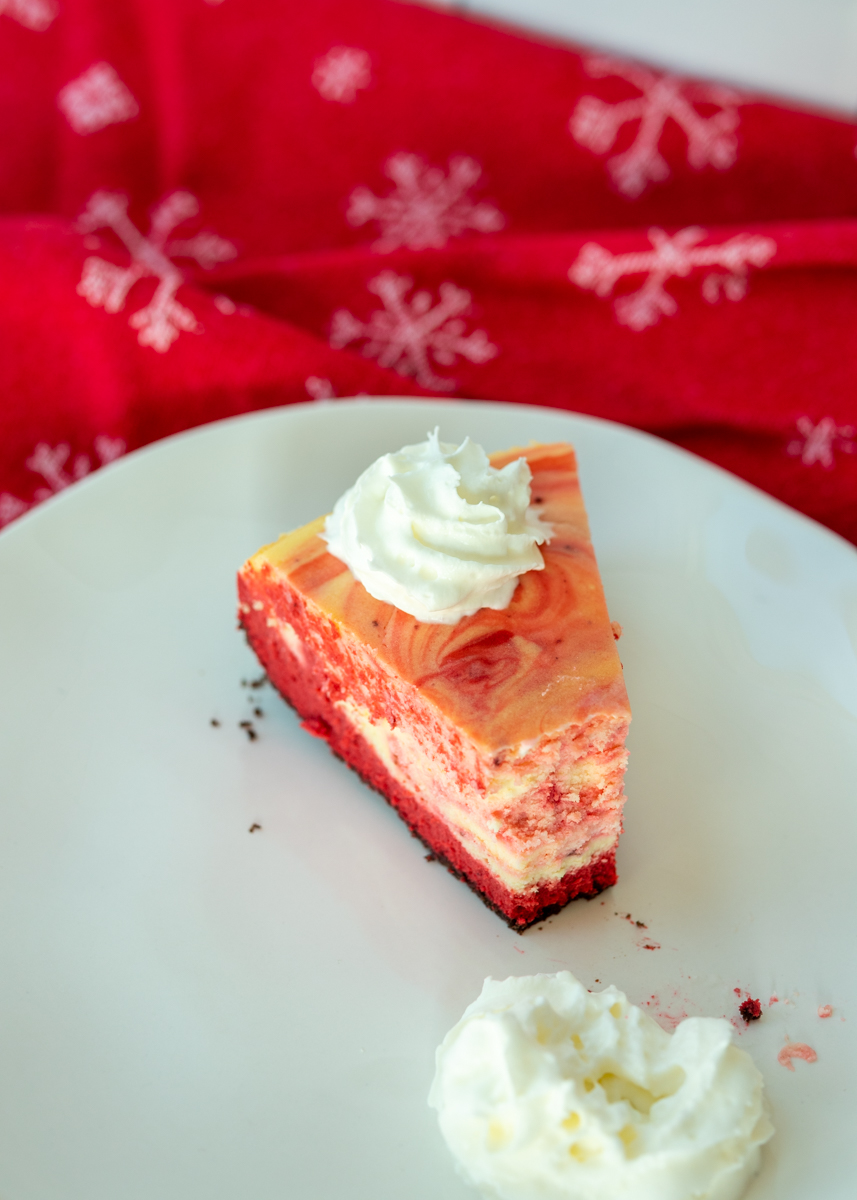
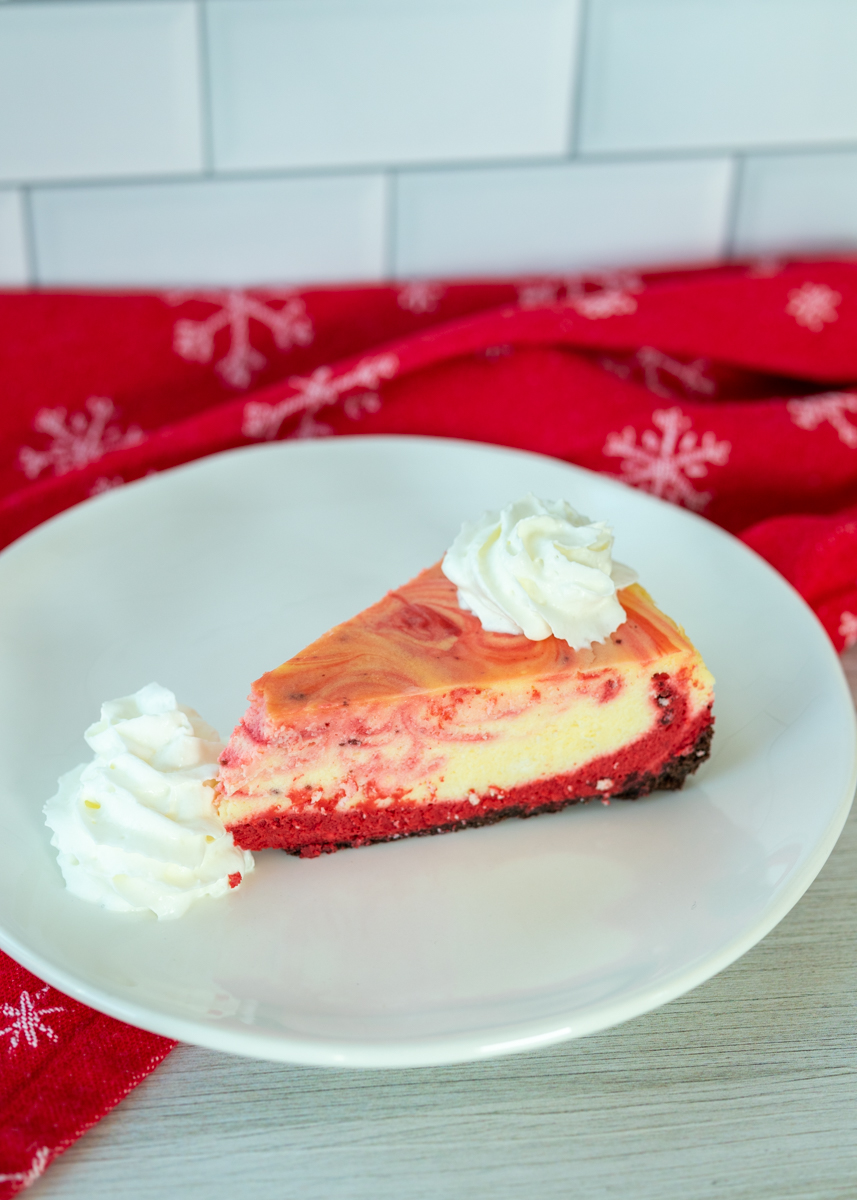
It’s time for this month’s cheesecake recipe! Of course with Valentine’s Day coming up this Friday it only made sense to bust out this Red Velvet Swirl Cheesecake for February. How fun is this cheesecake pattern?
Red Velvet Swirl Cheesecake  |  Lemon & Mocha

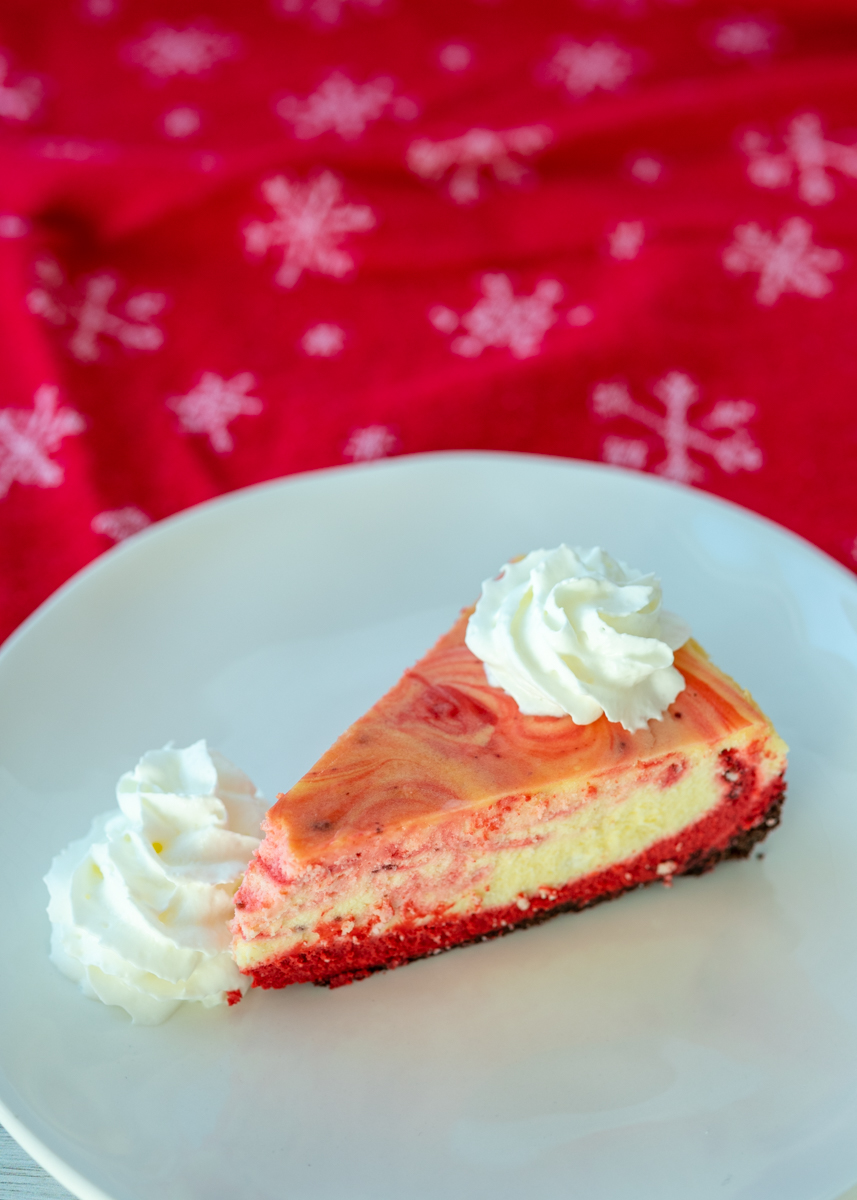
I’ve never made a swirled cheesecake before so I’m definitely going to have to work on my technique. I guess it’s more of a pink velvet swirl cheesecake!
Red Velvet Swirl Cheesecake  |  Lemon & Mocha

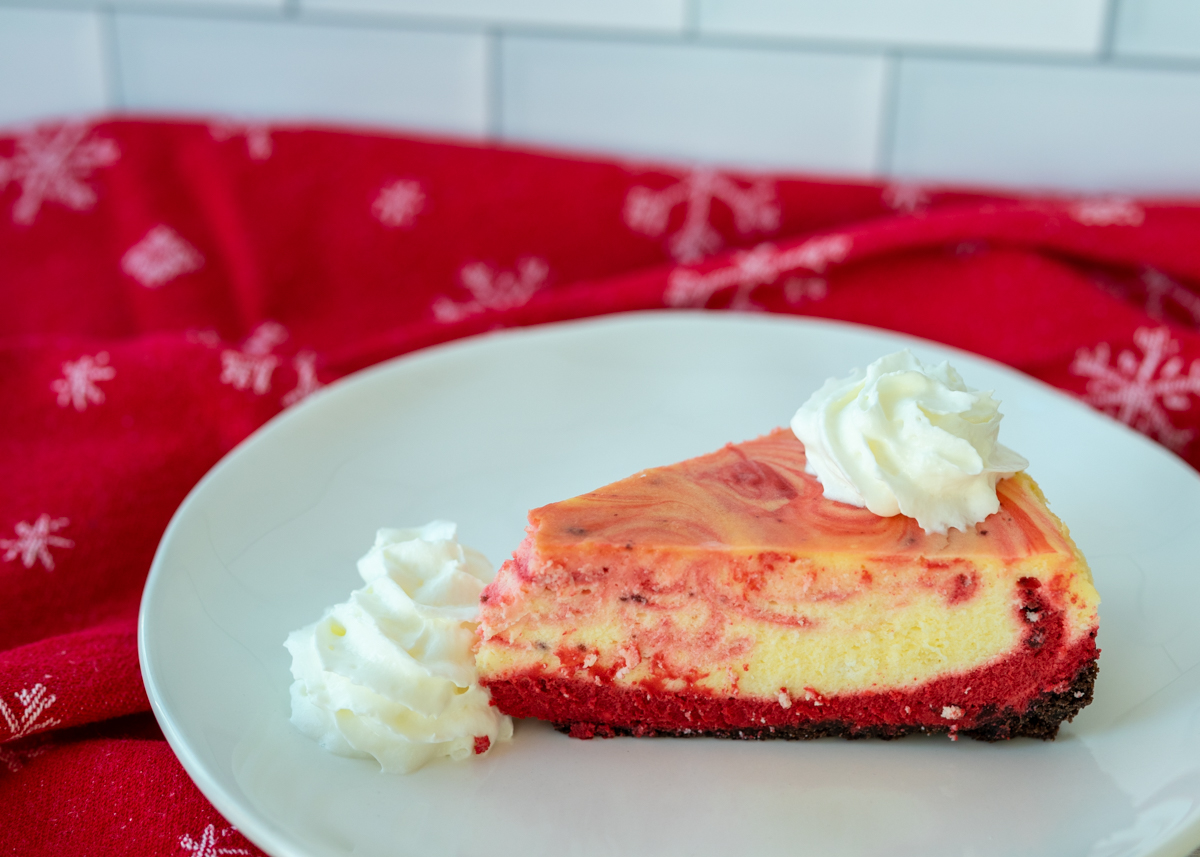
Red, pink, swirled, semi-swirled – either way it still looks pretty and cute for Valentine’s Day.
Red Velvet Swirl Cheesecake  |  Lemon & Mocha

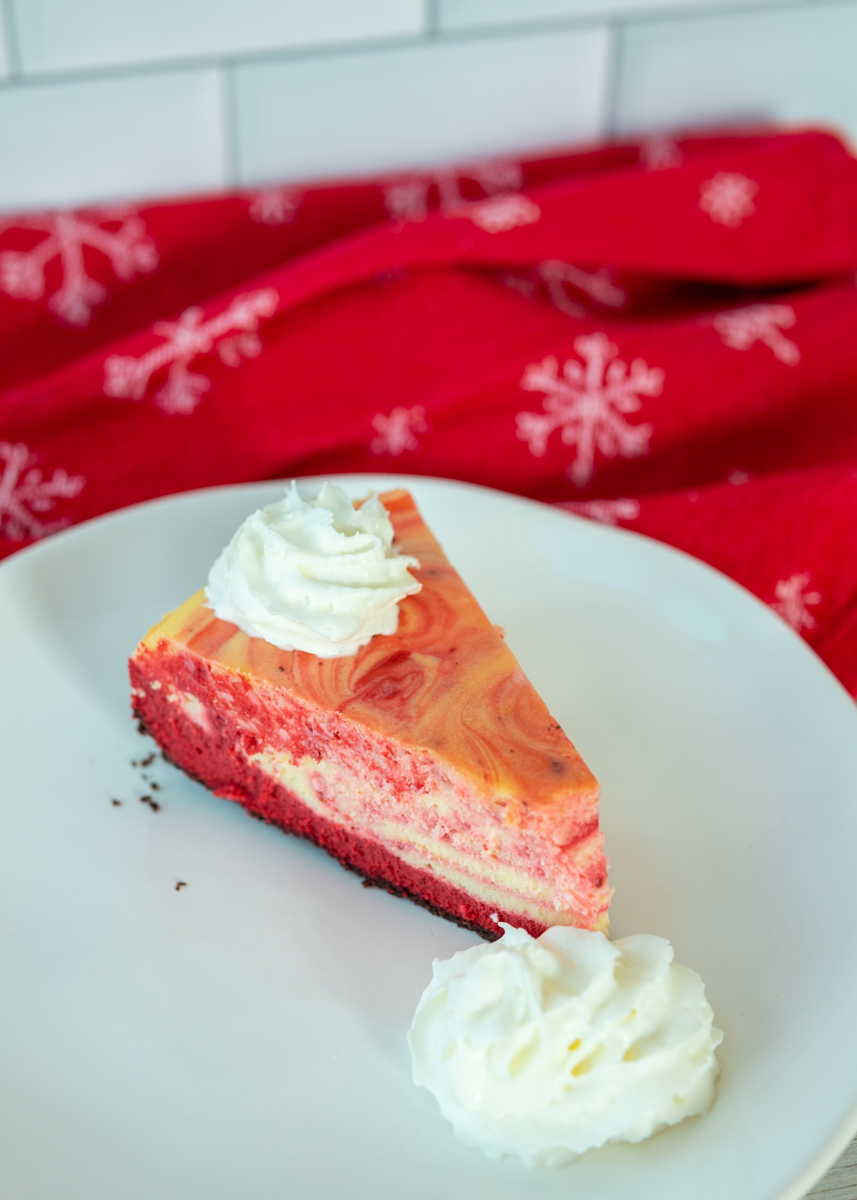
This is a creamy classic cheesecake with a chocolate graham cracker crust. Red velvet seems to reference the appearance of the cheesecake more than anything since there’s only a tablespoon of cocoa powder so you don’t really get that hint of chocolate that you think of with a red velvet cake, but it is still a really tasty cheesecake.
Red Velvet Swirl Cheesecake  |  Lemon & Mocha

I’m a big fan of Valentine’s Day so I have all kinds of fun treats posted on the blog, like these Strawberry Chocolate Ganache Cake Balls or these Red Velvet Oreo Truffle Chocolate Crunch Brownies. You can find them all the festive treats in the Valentine’s Day section of the recipe index. Are you making any sweets this Valentine’s Day?
Red Velvet Swirl Cheesecake  |  Lemon & Mocha

Red Velvet Swirl Cheesecake
 
Yield: 12 servings
Ingredients
  • 16 chocolate graham cracker squares
  • 5 tablespoons unsalted butter, melted
  • ¼ teaspoon salt
  • 2 pounds cream cheese (4 8-ounce packages), room temperature
  • 1¼ cups granulated sugar
  • 1 tablespoon lemon juice
  • 1 teaspoon vanilla extract
  • 2 tablespoons all-purpose flour
  • 4 large eggs, room temperature
  • 1 tablespoon cocoa powder
  • 2 teaspoons red food coloring
Directions
  1. Preheat oven to 350 degrees F. Spray a 9-inch springform pan with cooking spray then tightly wrap aluminum foil around the bottom and up the sides. This is to keep the water coming in from the water bath the cheesecake will be sitting in while cooking.
  2. Turn the graham crackers into fine crumbs using a food processor or whacking with a rolling pin. In a medium mixing bowl, combine the chocolate crumbs, melted butter and salt until it resembles coarse sand. Pour the mixture into the prepared pan and press it into the bottom and up the sides in an even layer. Bake for 8 minutes then let cool completely.
  3. To make the filling, beat the cream cheese, sugar, lemon juice and vanilla extract in a large bowl with a hand mixer or in the bowl of a stand mixer with the paddle attachment. Beat on medium speed then increase to medium-high and continue to beat until super smooth, scraping down the sides as needed. Add the flour then beat until combined. Add the eggs one at a time, beating until just combined after each addition. Spoon 2 cups of the filling into a mixing bowl. Add the cocoa powder and food coloring then mix until combined. Pour the red filling into the crust then pour the white batter over top. Use a spoon to pull up some of the red batter from the bottom and swirl it, being careful not to pull up any of the crust.
  4. Reduce oven to 325 degrees F. Place the springform pan on a baking pan then place in the oven. Carefully pour water into the baking pan so the water comes about ½-inch to 1-inch up the side of the springform pan. Bake for 1 hour and 15 minutes to an hour and 30 minutes. It is done when there is a 2-3” wobble in the center. Turn the oven off and crack it open, leaving the cheesecake inside. I usually wedge a wooden spoon in the door to leave it cracked. After the hour, carefully remove from the water bath and place on a cooling rack to cool completely. Once cool, cover with plastic wrap and place in the fridge for at least 6 hours or overnight.

 Recipe slightly adapted from January/February 2012 issue of Food Network Magazine.

Some of the links above are affiliate links, which means I may receive a small commission for my referral. This does not affect the retail cost of the item. Thank you for supporting Lemon & Mocha!

Raspberry Sorbet and Frozen Chocolate Mousse Domes

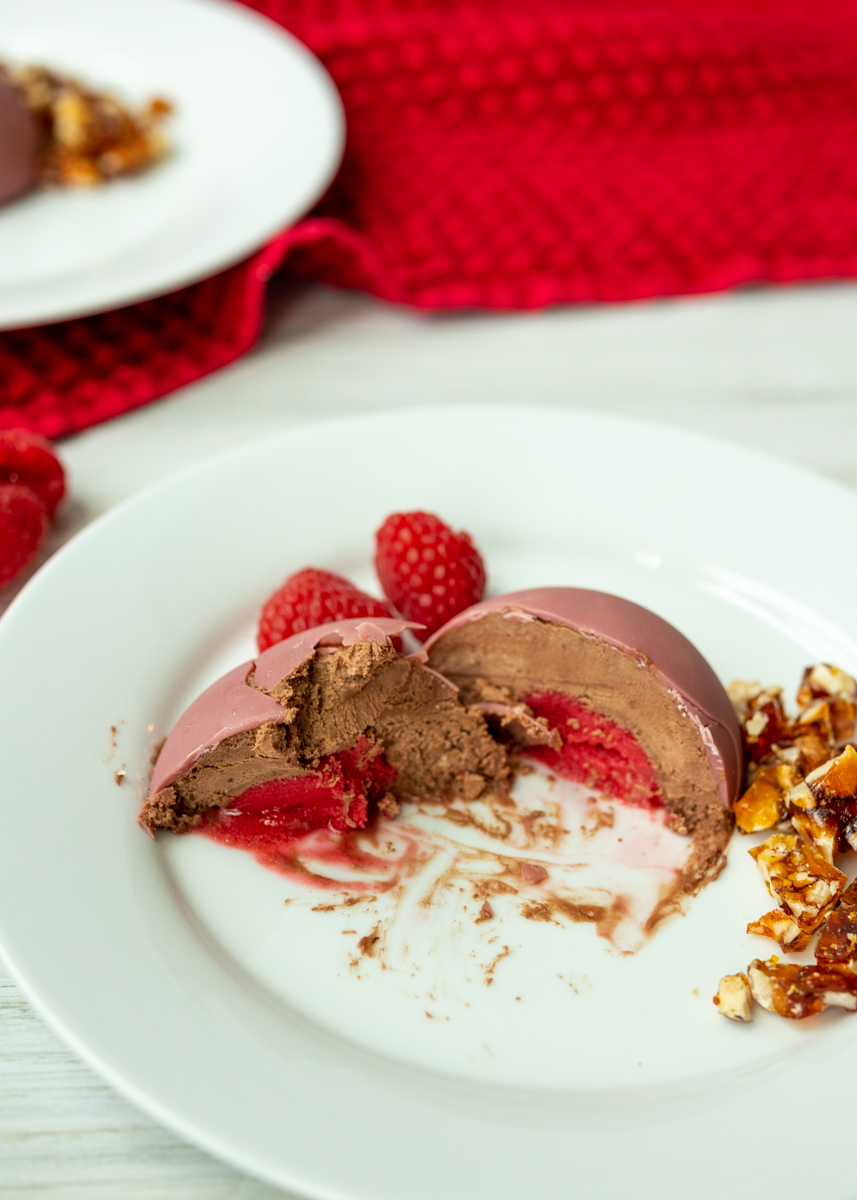
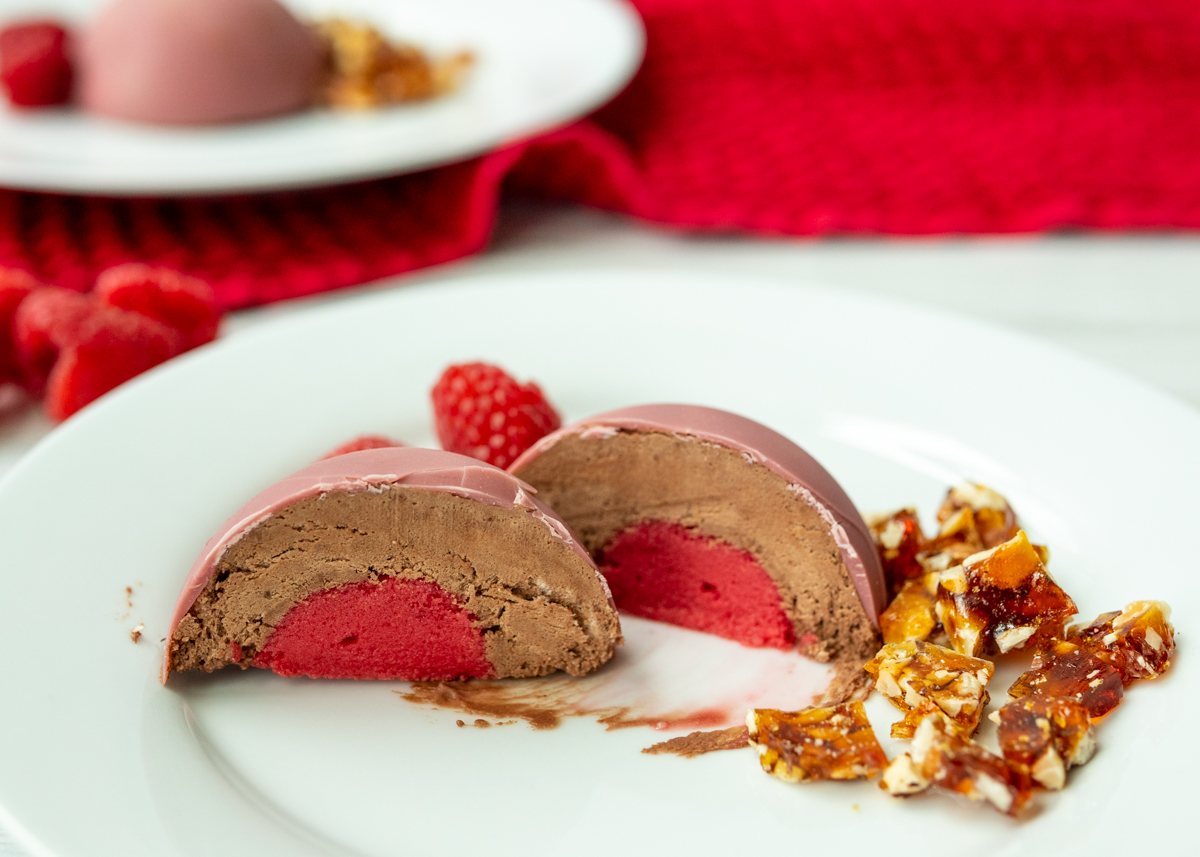
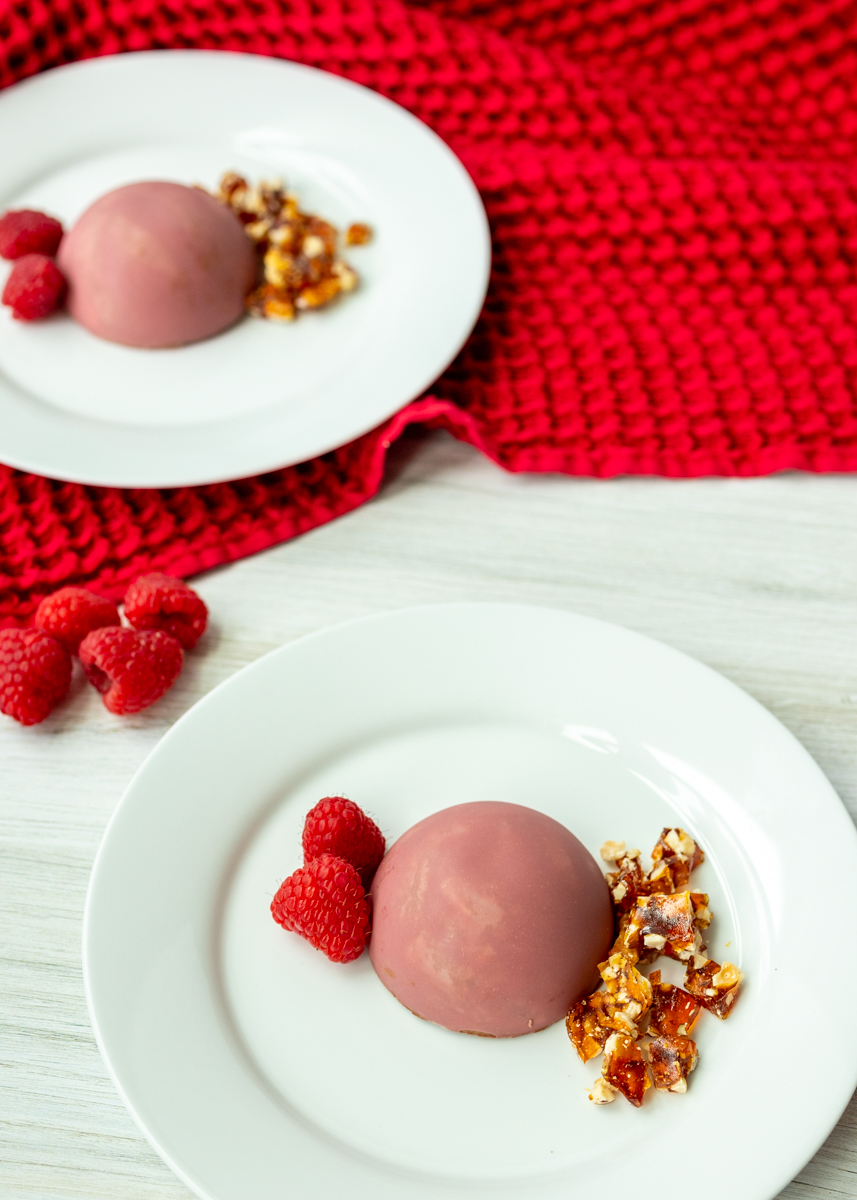
Raspberry Sorbet and Frozen Chocolate Mousse Domes  |  Lemon & Mocha

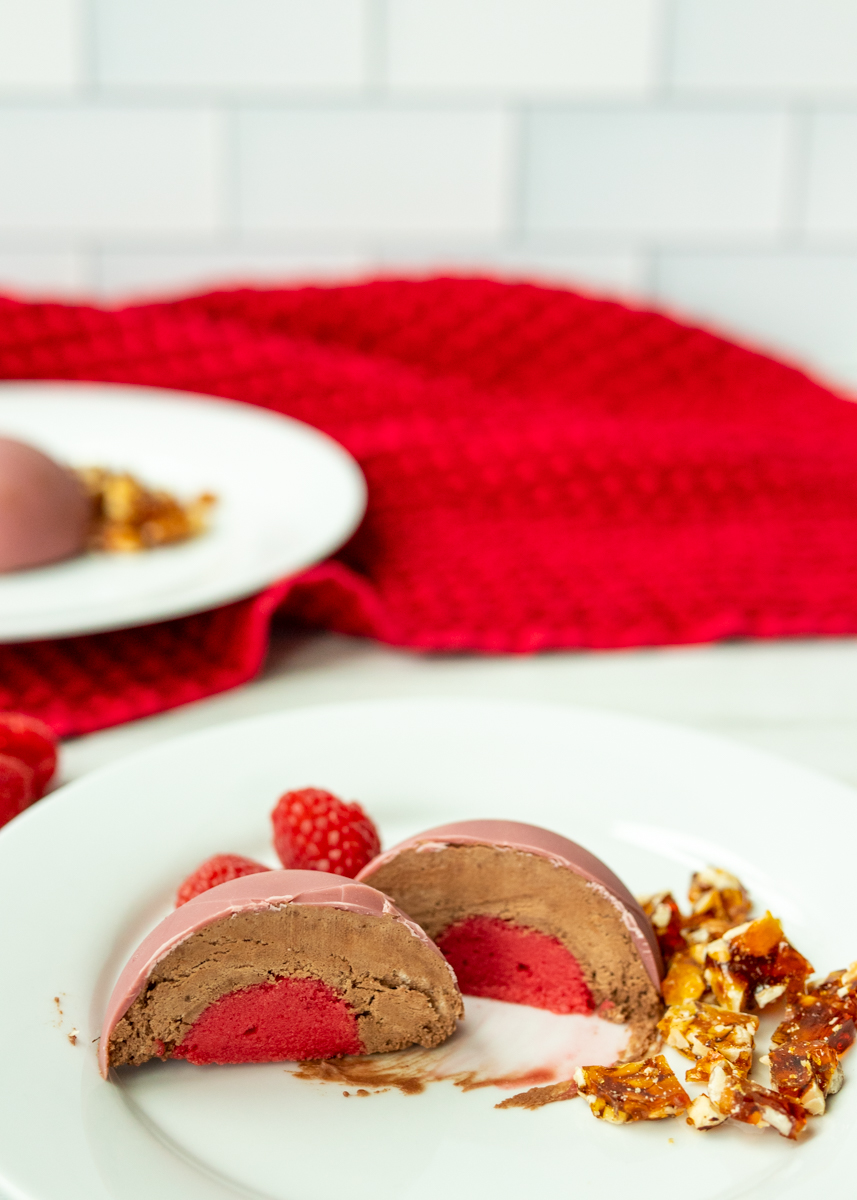
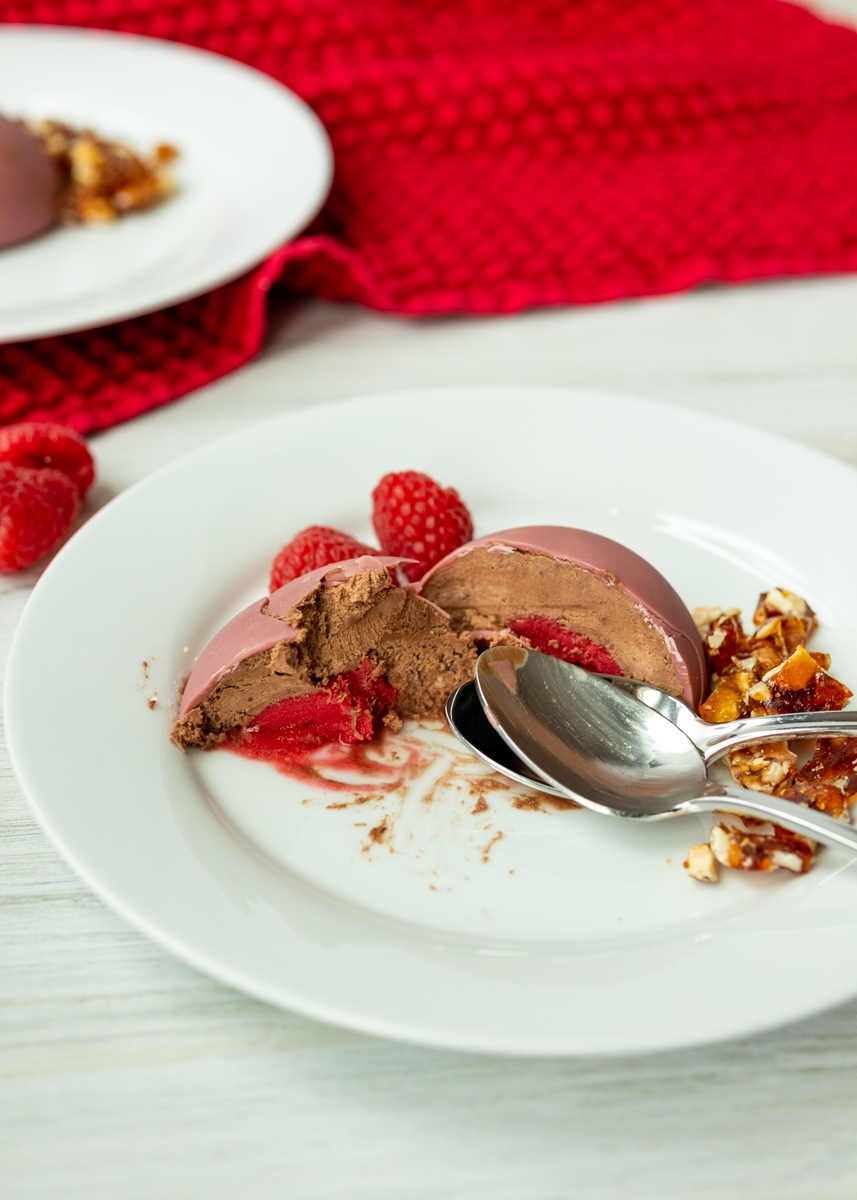
Today I am posting the best easy dessert to impress your valentine! Or to impress yourself and feel like you just nailed the confection round of Sugar Rush. Yes, I did use the word ‘easy!’ These Raspberry Sorbet and Frozen Chocolate Mousse Domes look fancy schmancy, but it’s really a few simple steps and the magic of silicone demi sphere molds. The dessert is the perfect balance of creamy, crunchy, decadent and tart. If you didn’t want to use molds you could make a deconstructed version that I’ll get into at the bottom of the post.

Raspberry Sorbet and Frozen Chocolate Mousse Domes  |  Lemon & Mocha

Ok, step one: spoon raspberry sorbet into the small mold and freeze until firm. Yep, that’s it! Step two: melt some ruby chocolate in the microwave then spoon it into the bigger mold and use your finger to spread it all around. Have you had ruby chocolate yet? It’s slightly fruity and so yummy! Plus it’s naturally a pretty pink color – perfect for Valentine’s Day! Trader Joe’s sells bags of it and a bunch of chocolate brands, like Chocolove, sell bars of it you could melt. Otherwise just use your favorite type of chocolate for the outside shell, but I highly recommend using ruby chocolate for this.

Raspberry Sorbet and Frozen Chocolate Mousse Domes  |  Lemon & Mocha

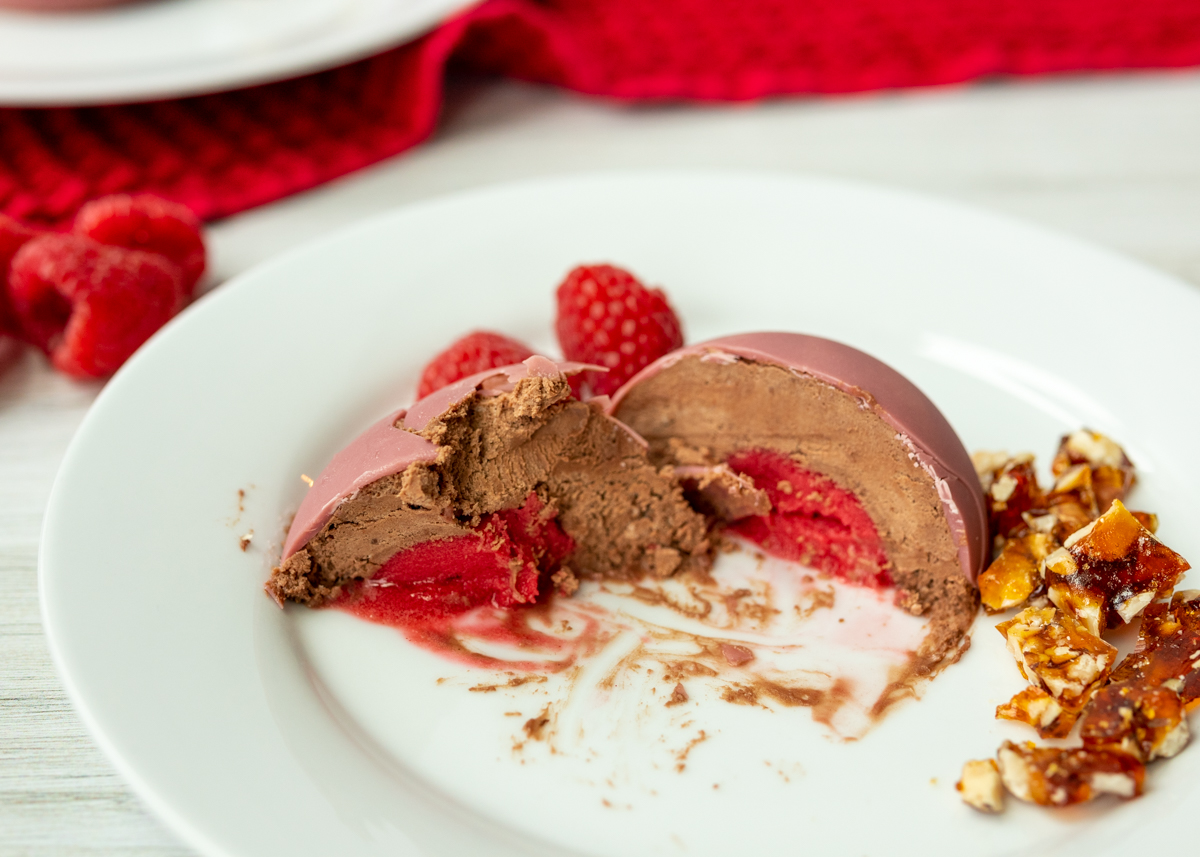
Step three: make the two ingredient chocolate mousse. I love this mousse recipe! Heat some heavy cream in the microwave then stir in chocolate chips until melted. While it’s cooling, beat some more heavy cream until stiff peaks form and gently fold into the chocolate mixture. See! Easy! Step four: assembly! Spoon the mousse into the ruby chocolate covered mold leaving a little room in the center to press in the raspberry sorbet half sphere. Smooth it out then pop in the freezer until you’re ready to serve.

Raspberry Sorbet and Frozen Chocolate Mousse Domes  |  Lemon & Mocha

Now initially I was planning on sharing this recipe and saying that the hazelnut crunch candy was an optional bonus, but after eating the finished dessert I want to stress to you that you need to make it! It adds the best textural crunch and flavor component, plus it’s also easy so why not?! Let water and sugar cook on your stovetop for eight minutes then pour over chopped toasted hazelnuts and let harden. Done!

Raspberry Sorbet and Frozen Chocolate Mousse Domes  |  Lemon & Mocha

Now if you’re interested in the silicone molds I have this bigger one and I just got this smaller one. I love using the bigger one to make mousse and ice cream desserts look fancy for when we have friends and family over for dinner. If you don’t want to experiment with the molds you could totally still make this dessert and just serve the mousse straight from the fridge instead of frozen in individual dishes with the hazelnut crunch candy and a small scoop of raspberry sorbet on top. I might even need to make the mousse with the candy its own post. Okay, I really hope you all try this one so you can feel all chefy and proud of yourselves! Let me know if you do try it!

Raspberry Sorbet and Frozen Chocolate Mousse Domes  |  Lemon & Mocha

Raspberry Sorbet and Frozen Chocolate Mousse Domes
 
Yield: 6 mousse domes
Ingredients
  • 6 tablespoons raspberry sorbet
  • ¼ cup ruby chocolate wafers, or 1½ ounces of ruby chocolate broken into pieces
  • 1 teaspoon coconut oil or vegetable oil
  • 1½ cups heavy cream, divided
  • 1 cup semisweet chocolate chips (I recommend Ghiradelli, Guittard or Trader Joe’s)
  • ⅔ cup chopped toasted hazelnuts (see note)
  • ⅔ cup granulated sugar
  • ½ cup water
Directions
  1. Let the raspberry sorbet soften slightly then spoon into 6 cavities of the smaller mold (each cavity should hold about 1 tablespoon). Press into the mold then smooth with an offset spatula or the straight back of a knife. Cover with plastic wrap and place in the freezer until firm, at least 2½ hours. Tip: placing the silicone molds on small baking sheets makes it easier to move.
  2. Place the ruby chocolate and coconut oil (or vegetable oil) in a microwave safe bowl. Microwave for 30 seconds, stir, then continue to microwave in 15 second increments, stirring after each increment, until melted. Spoon a bit into one of the cavities of the larger mold. Use your finger to spread the chocolate and completely coat the inside of the demi sphere. It should be thick enough that you can’t see the silicone through, but not too thick. Repeat for 5 more cavities. Place in the fridge to firm up for at least 15 minutes.
  3. Heat ½ cup of the heavy cream in a large microwave safe mixing bowl for 45 seconds to 1 minute. Add the chocolate chips then stir. Let sit for 5 minutes. Whisk the mixture together until smooth then let cool. While the chocolate mixture is cooling, whip the remaining 1 cup of the cream. Using a mixture, whip the cold cream on medium speed, slowly increasing to medium high. Continue to whip until stiff peaks form, which means when you lift up the beater the peaks of the cream stay exactly in place. Tip: whip in a metal bowl and place both the bowl and the whisk in the freezer 5-10 minutes before whipping the cream. Gently fold the whipped cream into the chocolate mixture in 3 additions. It’s okay if there’s still some streaks. If you’re ready to assemble the mousse domes move to the next step, otherwise cover and place in the fridge until ready to use.
  4. Spoon the chocolate mousse into the ruby chocolate coated mold. Fill all the way to the top, leaving a bit of space in the center for the raspberry sorbet. One at a time, gently pop the raspberry sorbet out of the silicone mold and press into the center of the chocolate mousse, flat side facing up. It’s okay if the sorbet doesn’t pop out in a perfect demi sphere. Smooth the top with an offset spatula or the straight back of a knife. Place in the freezer until firm; I usually leave in overnight.
  5. To make the hazelnut crunch candy, place the chopped hazelnuts on a parchment lined baking sheet close together. Add the sugar and water to a small saucepan and heat over medium-high heat, stirring until the sugar dissolves. Once the sugar dissolves, stop stirring. Let come to a boil then cook until it reaches a light brown color, about 6-8 minutes. Remove from the heat and wait until it stops bubbling then pour over the chopped hazelnuts. Place in the fridge for 30 minutes then break the candy in pieces. Store at room temperature in an airtight container until ready to serve. When ready to serve the mousse domes, carefully pop them out of the silicone mold. Alternatively, you could pop them out of the molds ahead of time and just keep them in the freezer on a lined baking sheet covered in plastic wrap until ready to serve.
Notes
To toast the chopped hazelnuts, bake them in a 350 degree F oven for 3-4 minutes.

Some of the links above are affiliate links, which means I may receive a small commission for my referral if you purchase something. This does not affect the retail cost of the item. Thank you for supporting Lemon & Mocha!

Cherry Kiss Cookies

Cherry Kiss Cookies  |  Lemon & Mocha

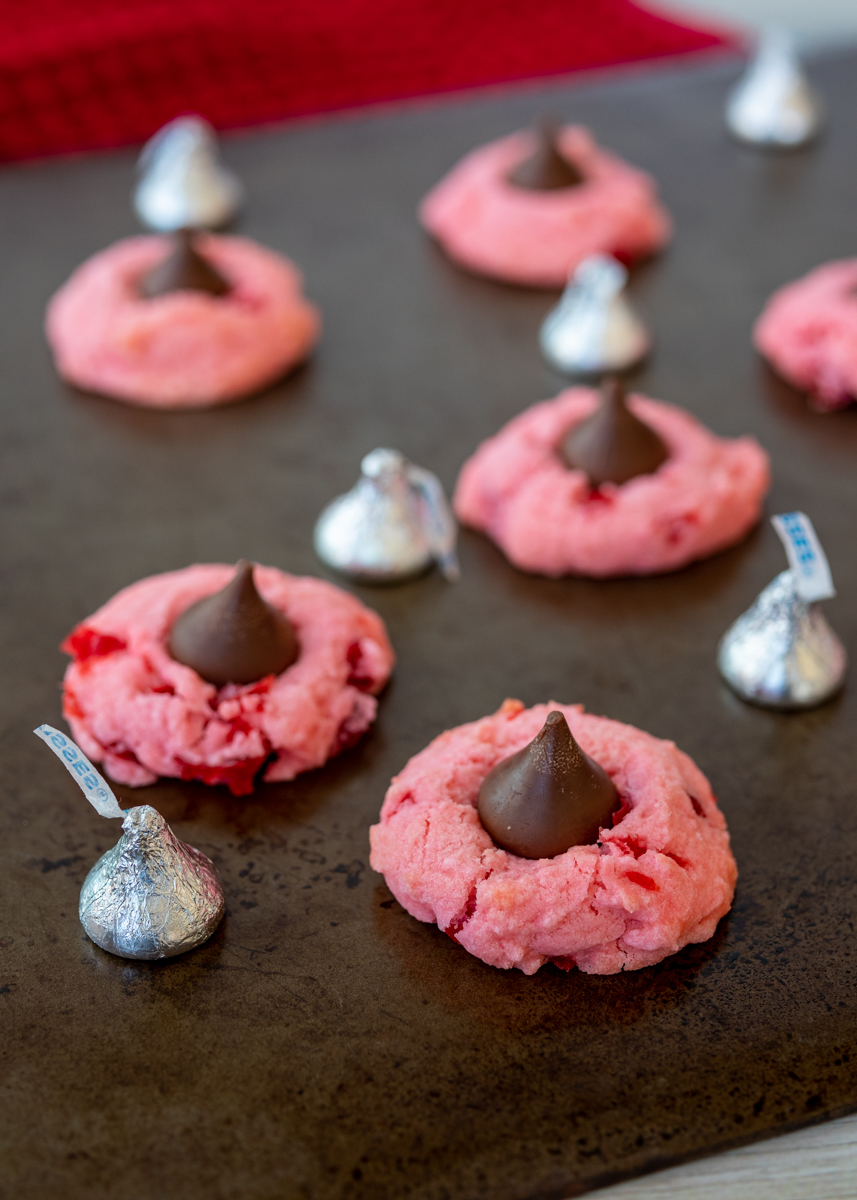
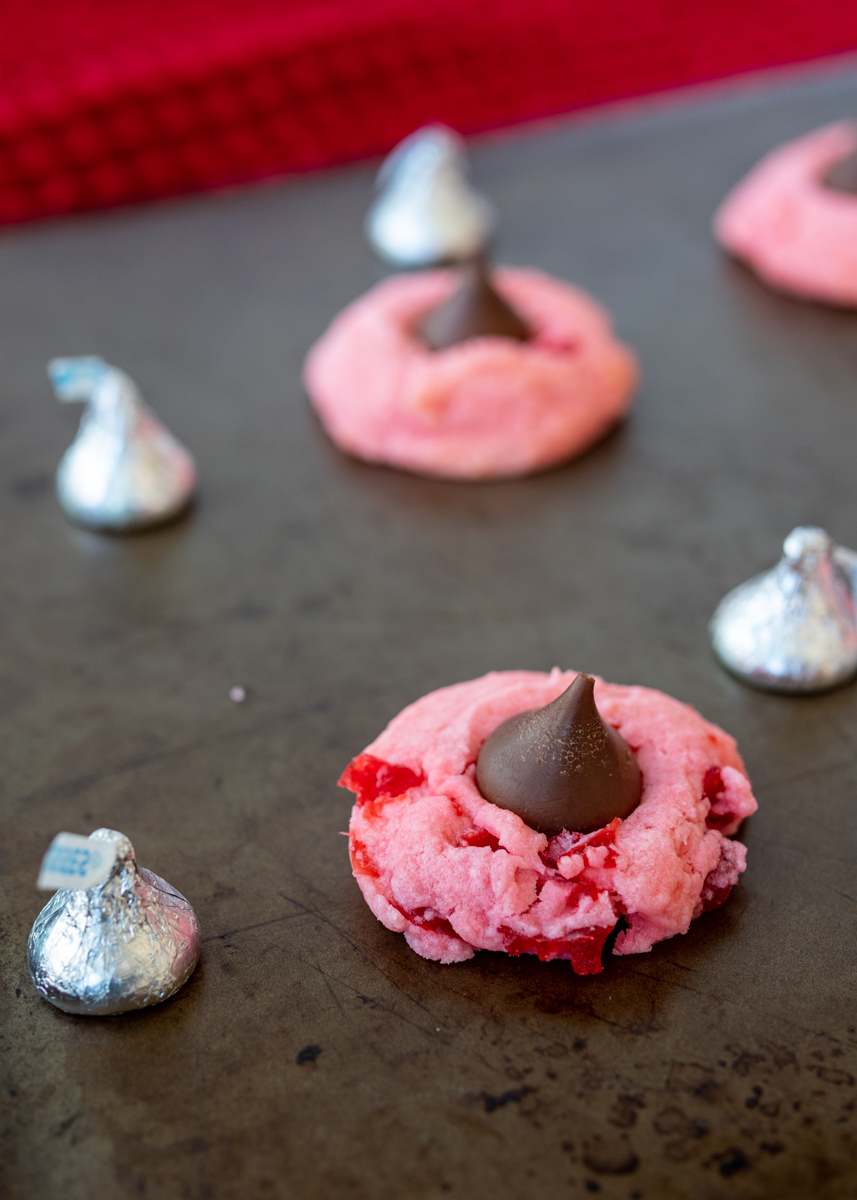
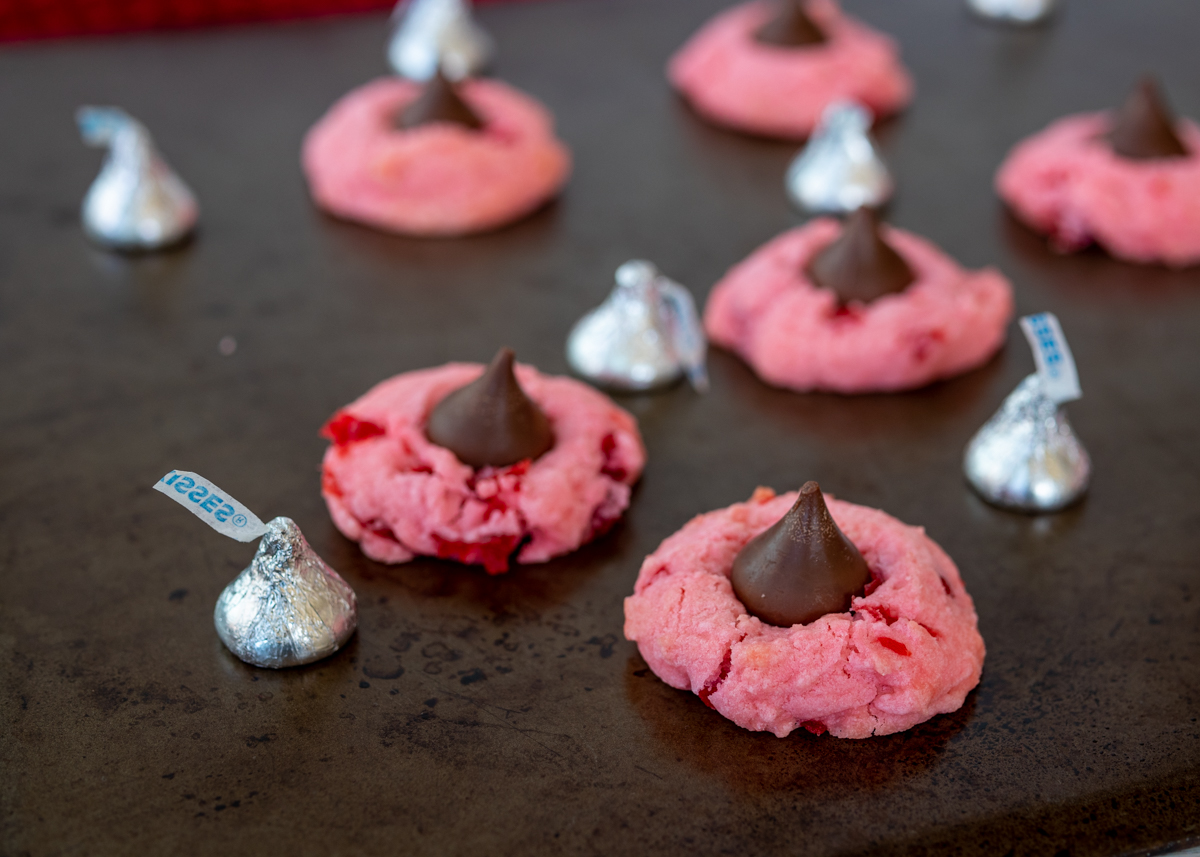
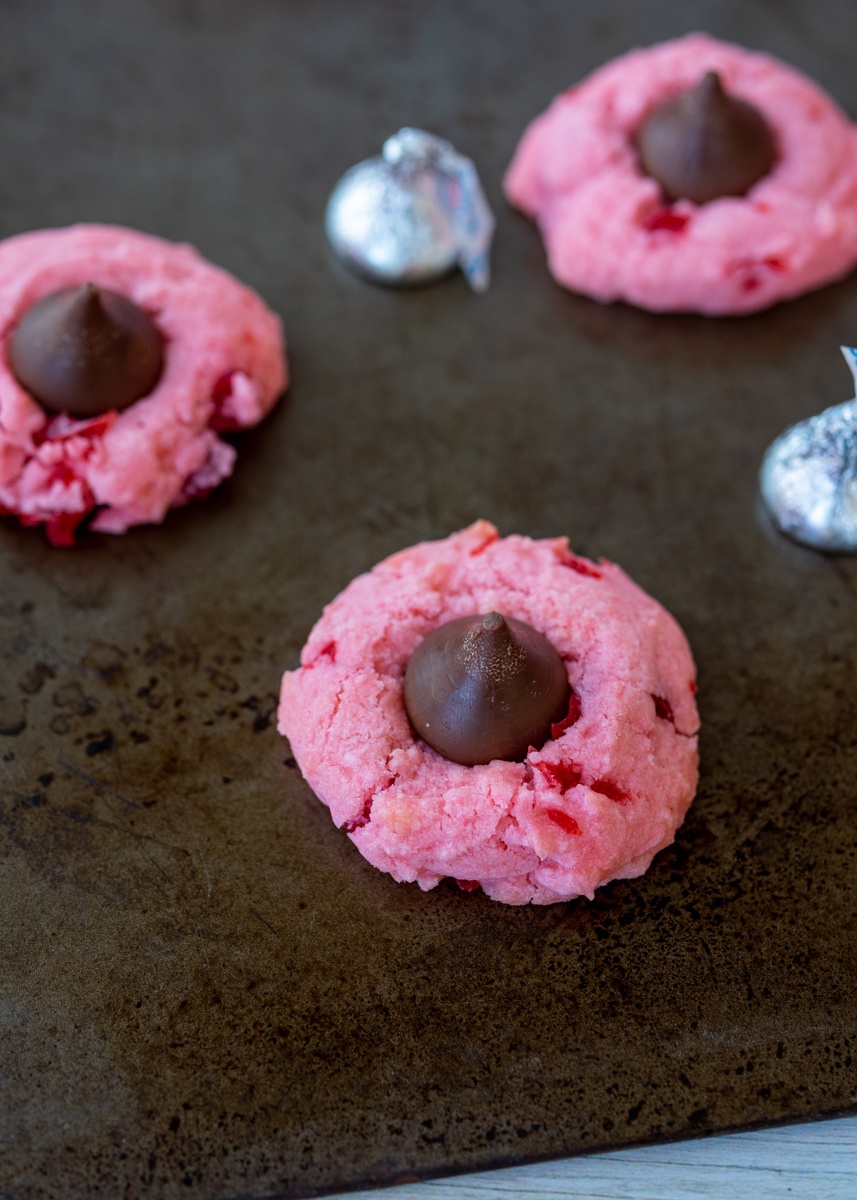
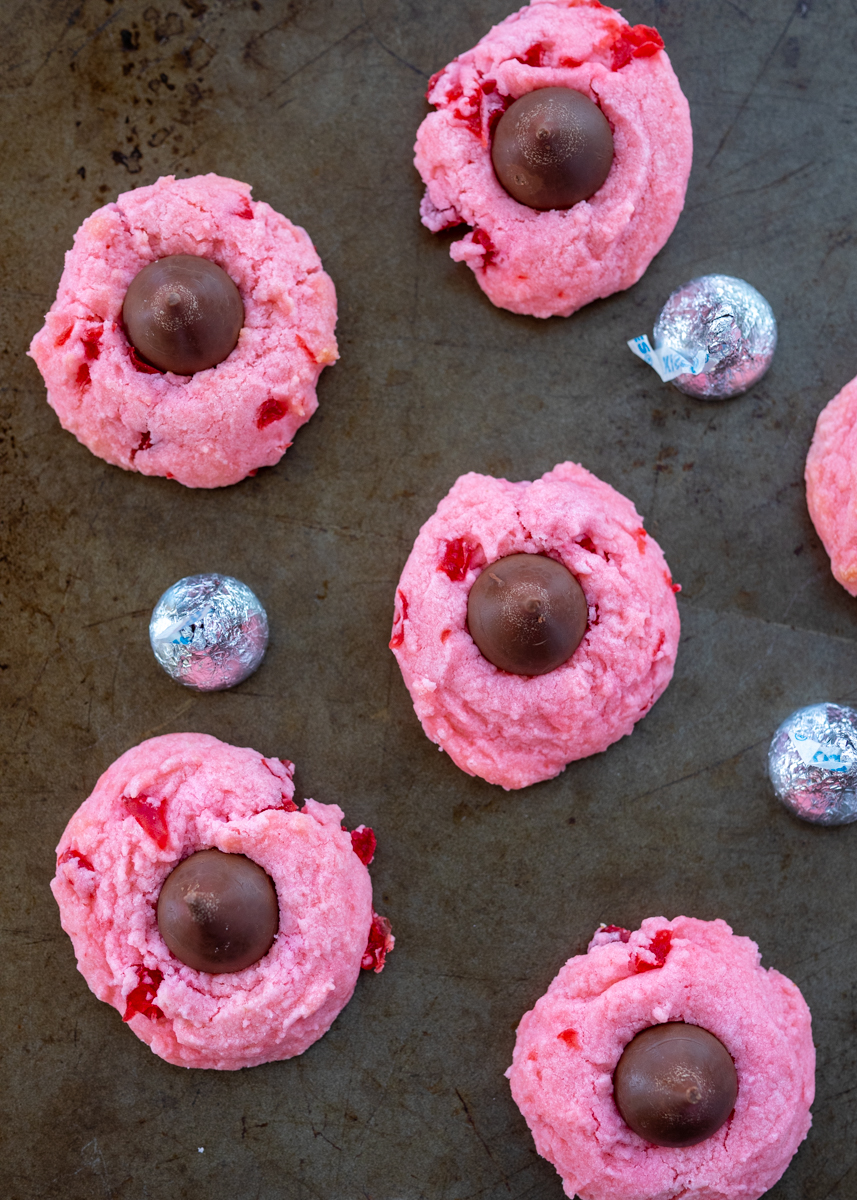
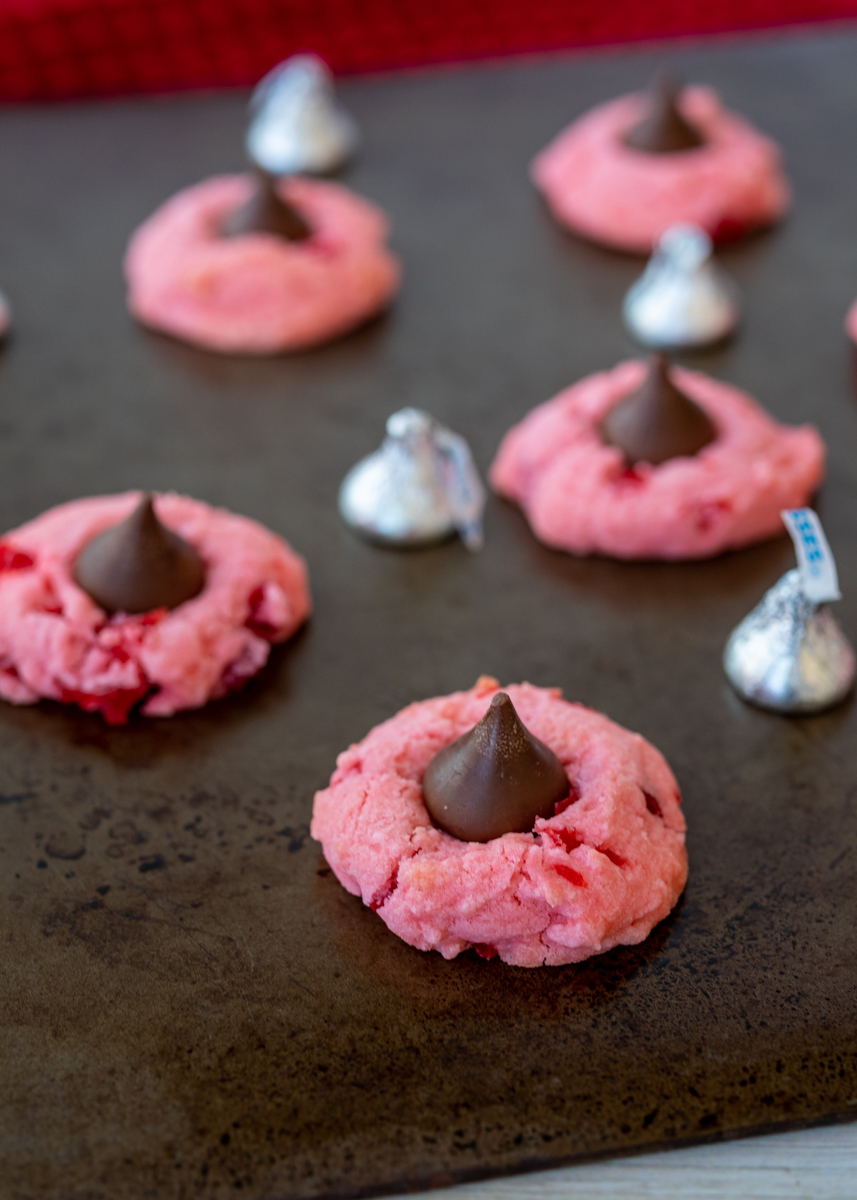
Happy Friday! Here we are at day eleven of Lemon & Mocha’s 12 Days of Cookies and I’ve definitely been saving some of the best for last. First of all, let’s just discuss how pretty these Cherry Kiss Cookies are! With their pink hue they certainly would be fitting for Valentine’s Day, but they also add a great pop of color to a Christmas cookie platter.

Cherry Kiss Cookies  |  Lemon & Mocha

If there was ever a cookie to be described as melting in your mouth, it would be these pillowy Cherry Kiss Cookies. They are soft, buttery and have just the perfect amount of cherry flavoring. There’s also a chocolate Hershey Kiss in the center of every cookie, which is always a delicious bonus.

Cherry Kiss Cookies  |  Lemon & Mocha

The cherry flavor in these cookies comes from cherry extract and chopped maraschino cherries, both which get mixed right into the batter. If you remember my Chocolate Raspberry Heart Cookie Pops I had a difficult time finding cherry extract in the grocery store so instead I used raspberry extract. Since I now have a big bottle of raspberry extract from those cookie pops I actually used it instead of cherry extract for these cookies as well. So I guess they are technically Cherry Raspberry Kiss Cookies. Either way you make them I’m sure you will be hooked. I saved these for right before Christmas because the dough requires no chilling and they’re very easy drop cookies to make so they would be a great last minute baking project.

Cherry Kiss Cookies  |  Lemon & Mocha

The cookies look very soft when they come out of the oven, but they will firm up as they cool. I left mine in the oven until I noticed just a couple of the cookies had started to very lightly brown on the edges, which can be difficult to notice at first since the cookies are pink.

Cherry Kiss Cookies  |  Lemon & Mocha

I used milk chocolate kisses since that is what I had on hand, but you could experiment with different kinds as I think the dark chocolate kisses would be extra tasty in these. Okay, only a few more days until Christmas! What are you baking this weekend?

Cherry Kiss Cookies  |  Lemon & Mocha

Cherry Kiss Cookies
 
Yield: 28 cookies
Ingredients
  • 1 cup butter (2 sticks), room temperature
  • 1 cup confectioners’ sugar
  • ½ teaspoon salt
  • ½ teaspoon vanilla extract
  • 1½ teaspoons cherry extract, see note
  • 5 drops red food coloring
  • 2¼ cups all-purpose flour
  • ½ cup chopped maraschino cherries
  • 28 Hershey Kisses, unwrapped
Directions
  1. Preheat oven to 350 degrees, making sure oven racks are in the upper and lower thirds positions. Line 2 baking sheets with parchment paper and set aside.
  2. In a large bowl with a hand mixer or in the bowl of a stand mixer, beat the butter, confectioners’ sugar and salt on low speed to combine then medium-high speed until fluffy, about 3 minutes. Add the vanilla, cherry extract and food coloring. Beat until combined. Add the flour and beat on low until only a few streaks remain. Use a spatula to stir in the chopped cherries.
  3. Use a medium cookie scoop to balls of dough onto the prepared cookie sheets. I put 14 on each of my half sheet pans; the cookies spread a little, but not a lot. Bake for 10-12 minutes, or until a couple of the cookies just start to very lightly brown on the edges. Remove from the oven and immediately press a chocolate kiss into the center of each cookie. Once the cookies have cooled for 2 minutes on the pan, remove to a wire cooling rack to cool completely.
Notes
If you don’t have cherry extract, raspberry extract also works really well.

Recipe adapted from Taste of Home.

Funfetti Peanut Butter White Chocolate Waffle Snack Mix

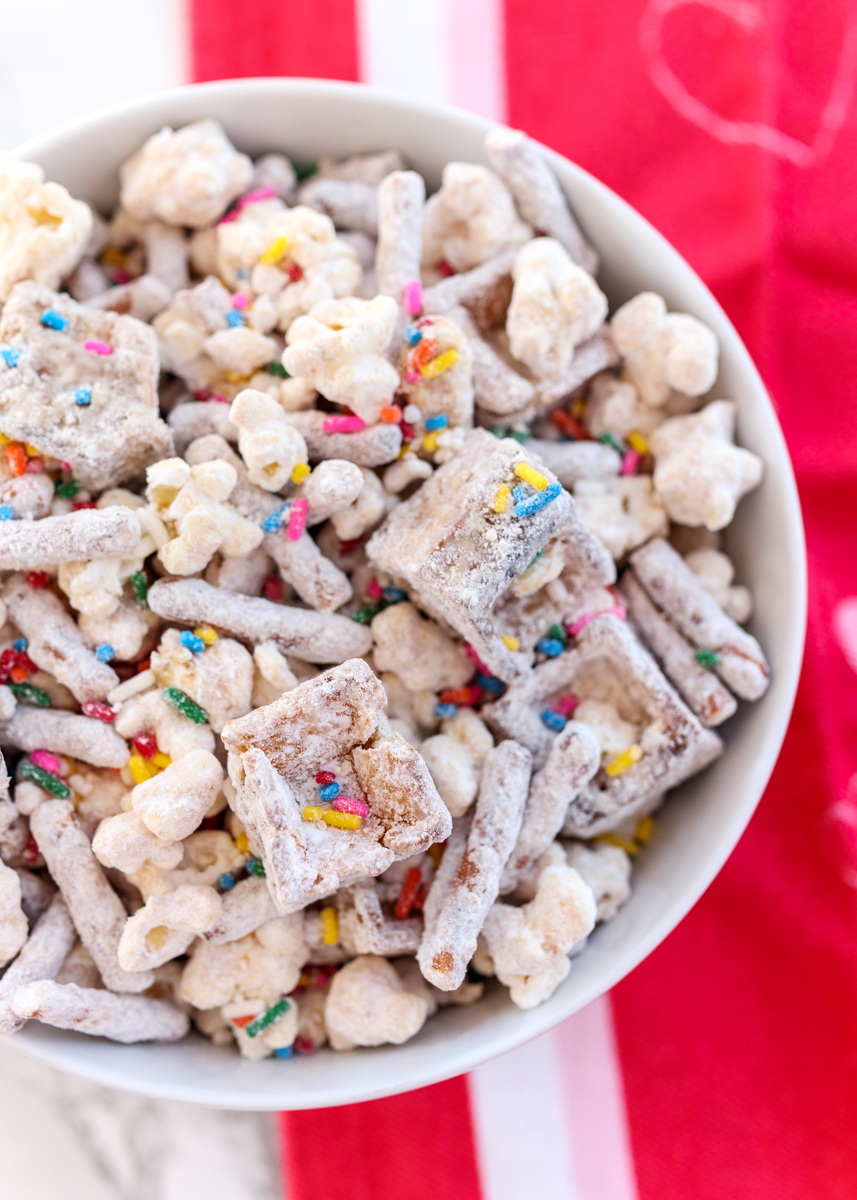
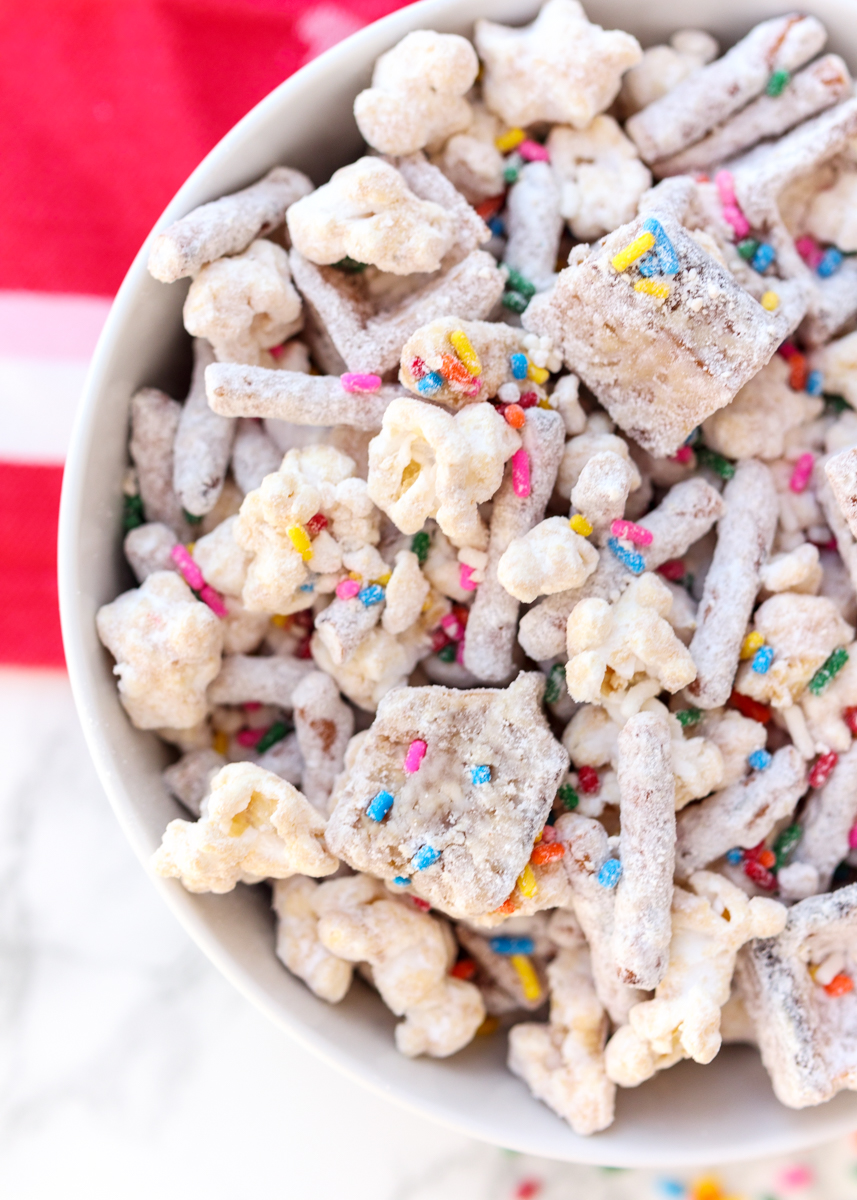
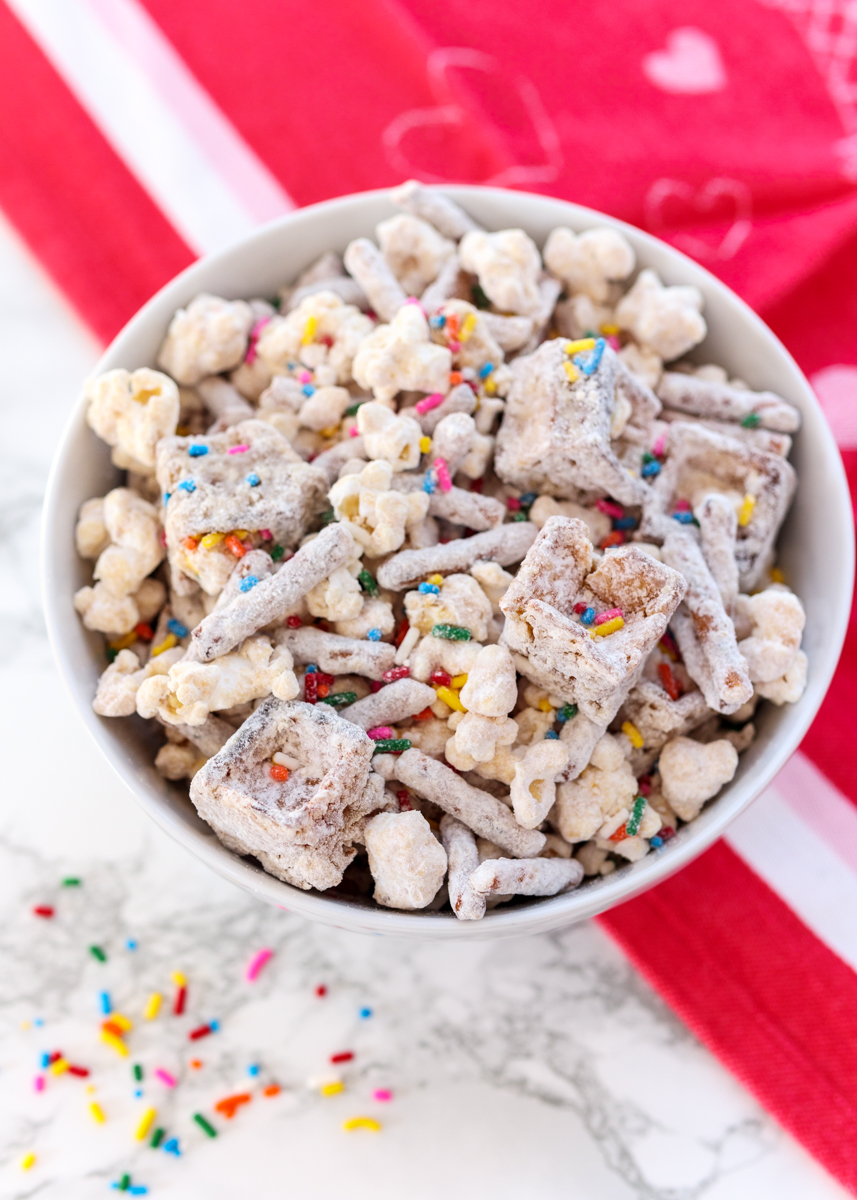
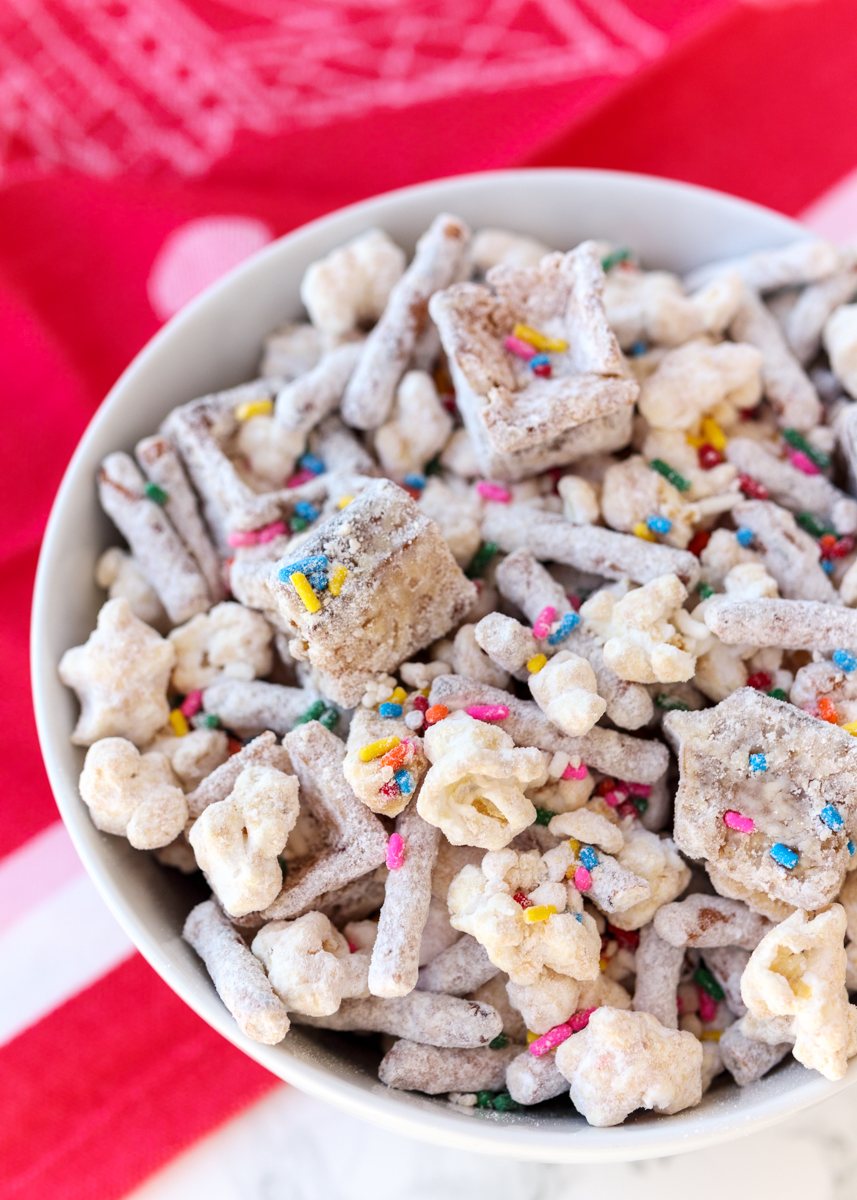
Funfetti Peanut Butter White Chocolate Waffle Snack Mix  |  Lemon & Mocha

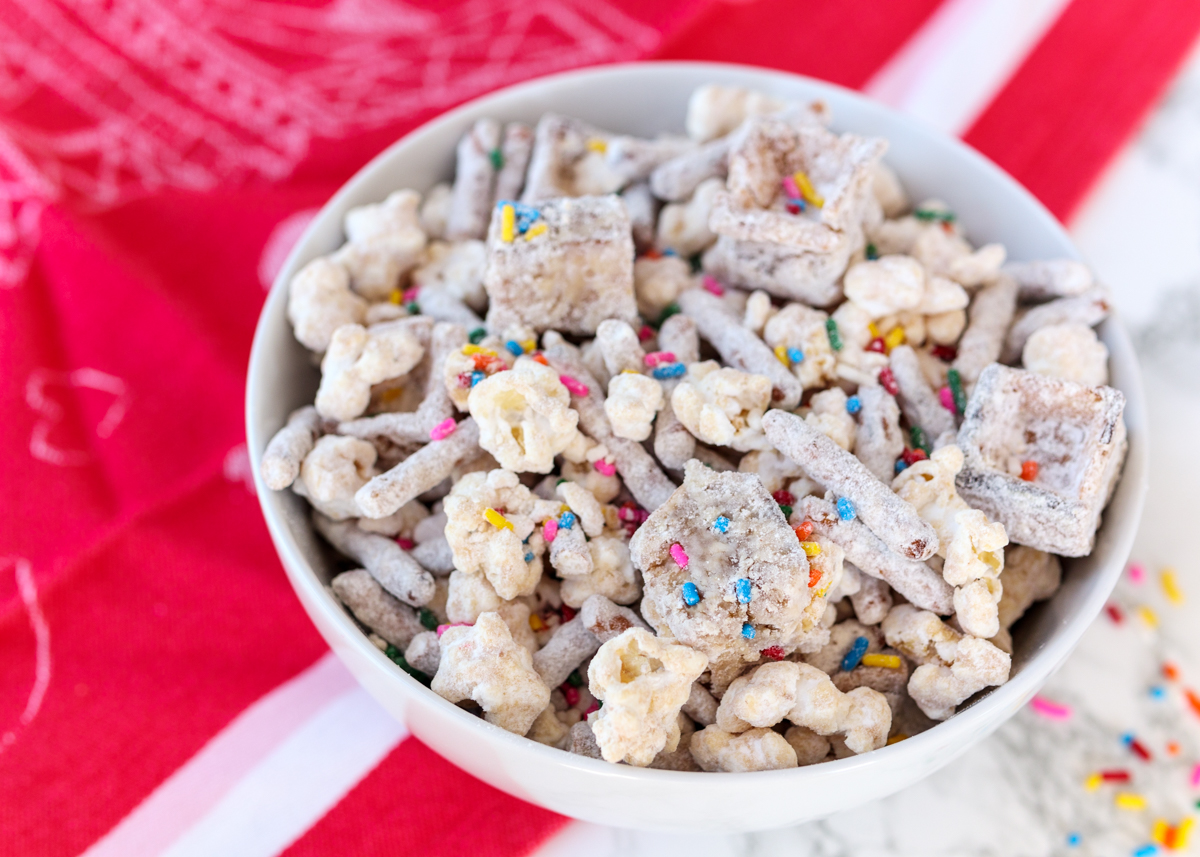
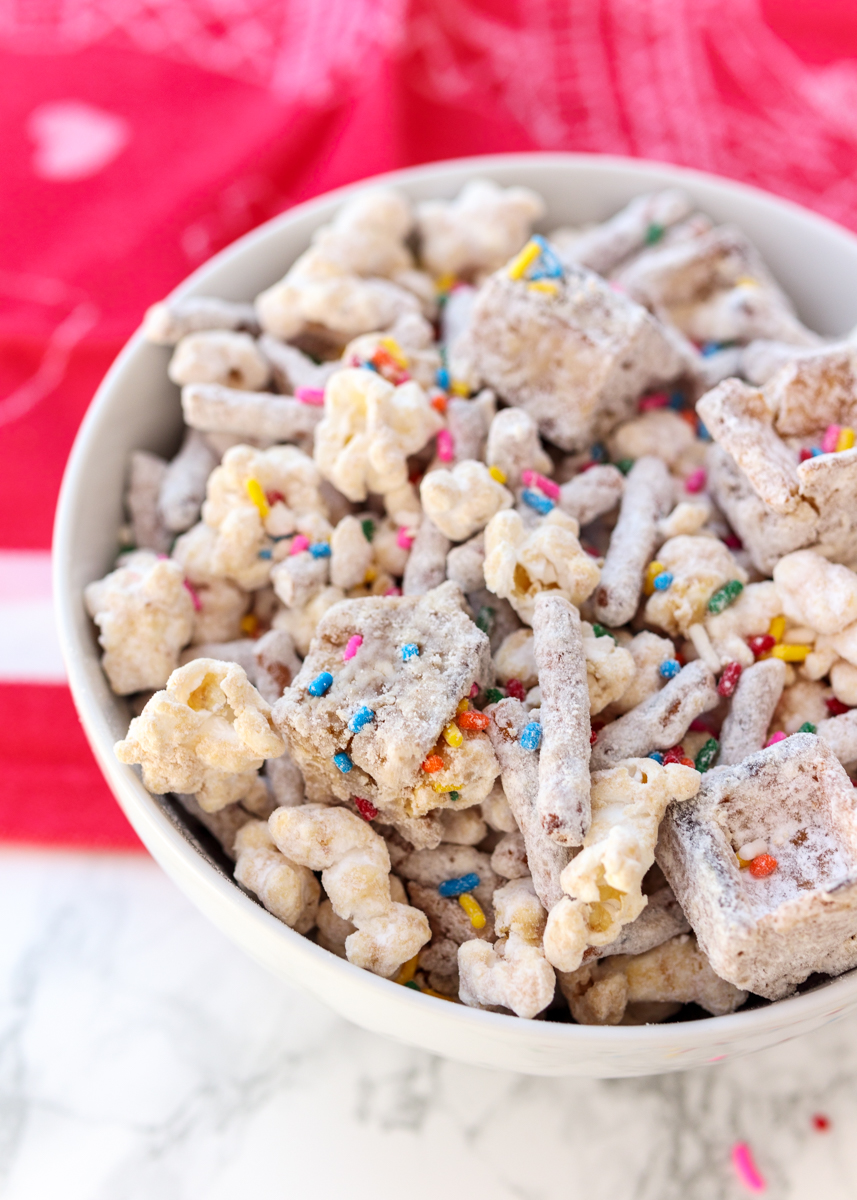
Funfetti Peanut Butter White Chocolate Waffle Snack Mix! Just writing the name of this post is getting me excited! Sometimes you want a dessert that’s easy and doesn’t require any baking. Sometimes you want a dessert that’s called a snack so you can eat it whenever you want. And sometimes you just want something you can cover in rainbow sprinkles. All of these scenarios are perfect reasons to make this sweet and salty treat.

Funfetti Peanut Butter White Chocolate Waffle Snack Mix  |  Lemon & Mocha

This snack mix is a slight twist on normal muddy buddies. Muddy buddies, or puppy chow, is rice cereal that’s been tossed in a peanut butter chocolate mixture before being coated in powdered sugar. Today we’re swapping the chocolate for white chocolate and there’s no rice cereal in sight. That’s because instead we’re using pretzel sticks, popcorn and buttered Belgian waffles! Yes, I said waffles. Pretzel sticks help bring in a little saltiness to the snack, which is great since white chocolate is pretty sweet. You could always use mini pretzels instead of pretzel sticks, but I still had some in our snack drawer from the Game Day Cookies.

Funfetti Peanut Butter White Chocolate Waffle Snack Mix  |  Lemon & Mocha

Have you ever had chocolate coated popcorn? It’s one of my favorite treats so I love having the popcorn in this snack mix. There are three ways you can make the popcorn in the microwave and I have them all listed in the recipe. My ideal method is to use this collapsible silicone popcorn microwave popper. I got it for Matt as part of his Christmas gift a few years ago and it has been a big hit in our house. Since it collapses it takes up minimal space (kitchen cabinet space is precious!) and you can pop popcorn kernels in it without any oil. Sur La Table doesn’t sell the one I bought anymore, but I found it on Amazon. If you don’t want to go that route, you can always use a paper lunch bag or a microwave safe bowl with a microwave safe plate fit on top. I haven’t tried that last method, but I’ve seen a lot of people mentioning it as a way to microwave popcorn without a bag.

Funfetti Peanut Butter White Chocolate Waffle Snack Mix  |  Lemon & Mocha

Anyways, moving on to the star of this snack mix – the buttered waffle pieces! I think every snack mix in my future needs to include chunks of Belgian waffle covered in powdered sugar because it is seriously addictive. I used frozen cinnamon Belgian waffles from Wegmans and that extra cinnamon flavor sent them over the top.

Funfetti Peanut Butter White Chocolate Waffle Snack Mix  |  Lemon & Mocha

Also, I don’t know how I’ve gone this whole post so far without drooling over the peanut butter in this since I’m peanut butter obsessed. The peanut butter flavor mixed with the white chocolate is absolute perfection. I hope you enjoy this tasty treat and happy early Valentine’s Day to you all!

Funfetti Peanut Butter White Chocolate Waffle Snack Mix  |  Lemon & Mocha

Funfetti Peanut Butter White Chocolate Waffle Snack Mix
 
Ingredients
  • 3 tablespoons popcorn kernels
  • 2 frozen Belgian waffles
  • 1 tablespoon butter
  • 1½ cups broken in half pretzel sticks
  • 6 ounces white chocolate
  • ¼ cup creamy peanut butter
  • ½ cup sprinkles
  • ¾ cup powdered sugar, plus more if needed
Directions
  1. Place the popcorn kernels in either a brown paper bag with the top folded closed a couple times, a silicone microwave popper with the lid on, or in a medium microwave safe bowl with a microwave safe plate snugly fitted on top. Heat the kernels starting with 3 minutes and stopping the microwave as soon as the popping becomes infrequent. Carefully remove from the microwave and place in a large mixing bowl. If there are any un-popped kernels save them for the next time you make popcorn.
  2. Toast the Belgian waffles in your toaster or toaster oven. When they’re toasted, divide the butter between the waffles and it on both sides. Cut the waffles into bite-sized pieces. Add the waffle pieces and broken pretzel sticks to the mixing bowl with the popcorn.
  3. Melt the white chocolate in a small microwave safe bowl. Start with 30 seconds, carefully remove and stir, then continue in 15 second increments, stirring after each increment, until it is melted. White chocolate seizes up easily so be sure not to over-heat. Add the peanut butter and stir until smooth. Pour the peanut butter white chocolate mixture over the bowl of snack mix. Gently toss to coat completely. Add the sprinkles and toss to coat. Sprinkle on the powdered sugar and toss to coat. Add more if needed. Snack mix can be stored in an airtight container, but tastes best eaten right away.
Notes
These recipe can easily be halved or doubled.

Some of the links above are affiliate links, which means I may receive a small commission for my referral if you purchase something. This does not affect the retail cost of the item. Thank you for supporting Lemon & Mocha!

Recipe slightly adapted from Averie Cooks.

Chocolate Raspberry Heart Cookie Pops

Chocolate Raspberry Heart Cookie Pops  |  Lemon & Mocha

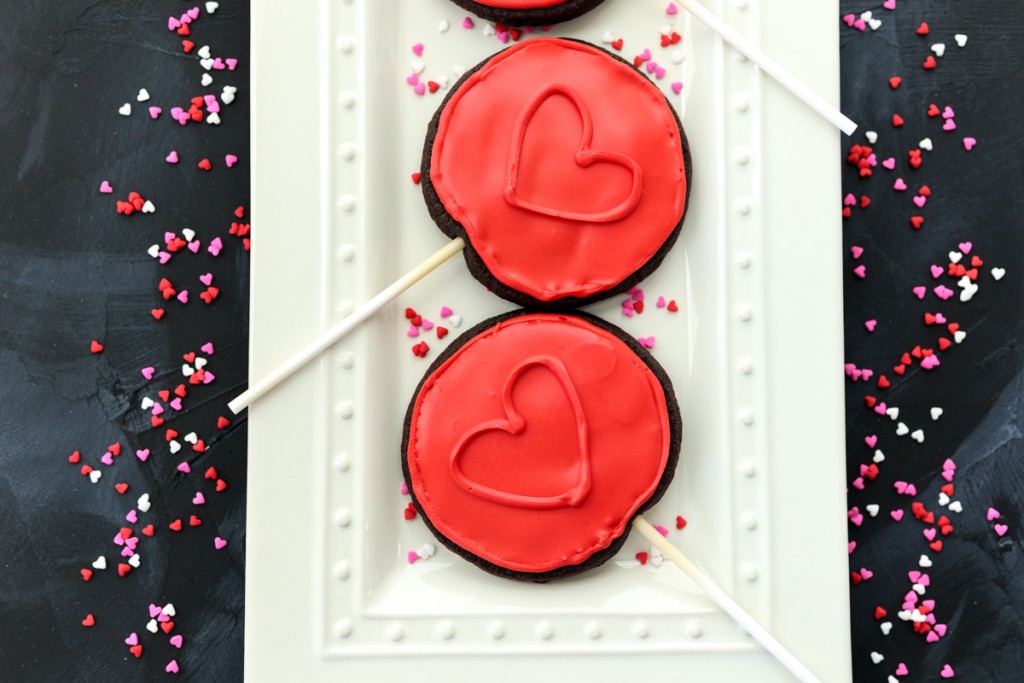
I’m posting the February cookies early so you have plenty of time to make them for Valentine’s Day next week. Which you will definitely want to do because how cute are these heart cookie pops? They are also game-changer cookies, but I’ll get into that in a bit. I have to admit that I was a little nervous about making these cookies because the recipe called for two things I’ve never done before; making cookie pops and making royal icing. I am happy to report that both were easier than I anticipated and there is no reason to be intimidated about making these Chocolate Raspberry Heart Cookie Pops!

Chocolate Raspberry Heart Cookie Pops  |  Lemon & Mocha

The dough could not be easier to make since you whip it up in a food processor. I know not everyone has a food processor (if you are thinking of getting one I highly recommend the 14-cup Cuisinart I have), but I imagine you could use a stand mixer instead. The butter gets cubed up and added into the dough while it’s cold, just like when making a pastry crust, so there’s no waiting around for your butter to come to room temperature. Since the dough is cold from the chilled butter, it’s very easy to roll out without any stickiness.

Chocolate Raspberry Heart Cookie Pops  |  Lemon & Mocha

I had to re-roll my dough because I initially rolled it too thin. You need the dough to be about 3/8-inch to 1/2-inch thick in order to insert the lollipop stick, which is thicker than you would think so break out that measuring tape! Since the dough was so thick, inserting the lollipop sticks was easy – first challenge complete! When I was cutting out the circles of dough I cut them tightly together so I was able to get all twelve circles from the initial rolled dough. The recipe says to gather, refrigerate and re-roll the scraps to cut out more cookies. Twelve cookie pops was already plenty for me so instead I just baked the scraps as is after I was done baking the cookie pops. They looked like funny bat winged cookies, but they still tasted delicious!

Chocolate Raspberry Heart Cookie Pops  |  Lemon & Mocha

Next up was the royal icing. Basically, the recipe has you make an icing that’s pretty stiff, which you pipe around the edge of the cookie. You then thin the icing and fill in the rest of the cookie within the piped line. I found it a little difficult to pipe a smooth line around the edge of the cookies, but after a few wonky lines I had it down. I don’t think I’ll become a cookier anytime soon, but they look so nice when they’re done. I went with a little heart on top instead of the swirl rose design on the original Food Network Magazine recipe.

Chocolate Raspberry Heart Cookie Pops  |  Lemon & Mocha

Okay, now back to that game-changer comment I made earlier. These Chocolate Raspberry Heart Cookie Pops taste so good! As in, both Matt and I called them dangerous and tried to hide them. Matt hit the flavor spot on – they taste like a buttery version of that Sheila G’s Brownie Brittle. I couldn’t find cherry extract in my grocery store, which the original recipe calls for, so I went with raspberry extract and I’m happy I did because the flavor was subtle, fruity and complements the chocolate cookie perfectly. There’s also something really satisfying about eating a cookie off a lollipop stick. This chocolate cookie base is definitely going to be a new regular in my cookie rotation. Next time I’m going to try chilling it in a log to make slice and bake cookies. And I might even slice them thick enough to stick lollipop sticks in them again. Yum!

Chocolate Raspberry Heart Cookie Pops  |  Lemon & Mocha

Chocolate Raspberry Heart Cookie Pops
 
Yield: 12 cookie pops
Ingredients
for the cookies
  • 2 cups all-purpose flour
  • ¾ cup powdered sugar
  • ⅓ cup unsweetened Dutch-process cocoa powder (I used Hershey’s Special Dark cocoa powder)
  • ¼ cup granulated sugar
  • ½ teaspoon salt
  • 2½ sticks cold unsalted butter, cut into cubes
  • 2 teaspoons vanilla extract
for the icing
  • 2½ cups powdered sugar
  • 1 tablespoon plus 2 teaspoons meringue powder
  • ¼ cup water, plus more as needed
  • ½ teaspoon raspberry extract
  • Red gel food coloring
Directions
for the cookies
  1. Prepare two sheets of parchment paper that are sized to line a baking sheet. Set aside. In a food processor, pulse together the flour, powdered sugar, cocoa powder, granulated sugar and salt. Once combined, add the cold butter cubes and the vanilla extract. Pulse until the mixture looks like it has larger crumbs and will hold together when pinched. Transfer the dough to a large bowl or clean work surface and press the dough into a ball. Knead the dough a few times. Place the dough ball on one of the pieces of parchment paper then top with the other sheet. Press the dough to flatten then roll out the dough until it’s ⅜-inch to ½-inch thick. Refrigerate the dough slab for about 1 hour, or until firm.
  2. Make sure oven racks are positioned in the lower and upper thirds of the oven. Preheat to 325 degrees F. Using a 3-inch round cookie cutter or biscuit cutter, cut out 12 cookies and arrange 2 inches apart on 2 baking sheets lined with parchment paper. Carefully insert a 6-inch lollipop stick about ¾ of the way into each round cookie. If needed, form the scraps into a ball, refrigerate and re-roll to cut out more cookies. Or, refrigerate the scraps as is to bake as odd shaped scrap cookies once the other cookies are done baking.
  3. Bake the cookies until they are set for 25-30 minutes, switching the pans from top to bottom and front to back halfway through. Mine took closer to 30 minutes. Let cookies cool for 10 minutes on the pan on a wire cooling rack then transfer cookies to the wire cooling rack to cool completely.
for the icing
  1. In a large bowl or the bowl of a stand mixer, whisk together the powdered sugar and the meringue powder. Add the water and raspberry extract then beat with a hand mixer or in a stand mixer on medium speed for about 3 minutes, or until there are soft glossy peaks. Tint the icing with the red food coloring. I found that I needed a lot of gel food coloring to achieve a red color (almost half a tube). The icing should be able to be piped without being runny. If the icing is too thick add up to 1 more tablespoon of water. I needed to add about 2 teaspoons more water.
  2. Put ½ cup of icing into a pastry bag or resealable plastic bag and snip a corner. If you wanted to be more precise you could use a small round pastry tip (I didn’t do this, but I would probably do it next time). Apply firm and even pressure to pipe the icing around the edge of each cookie. I found it piped cleaner when I made sure I didn’t have the tip of the bag too close to the cookie. Set the piping bag aside for decorating the heart detail later.
  3. Add 1 teaspoon of water at a time to thin the remaining icing in the bowl until it is the consistency of runny yogurt. Put the icing into a new pastry bag or resealable plastic bag (no need for a pastry tip) and pipe a bunch of icing within the outline of 6 of the cookies. Use an offset spatula or the back of a spoon to smooth out the icing and bring it all the way to the piped edge. You want to pipe enough icing that it’s easy to smooth, but not so much that it is spilling over the piped outline. Repeat with the remaining 6 cookies then let set at room temperature for about 1 hour. Use the reserved original piping bag of icing to pipe the heart details onto the cookies.
Notes
The cookies have a nice crispy texture to them. I stored them without the icing in a plastic container and they stayed that way. However, probably because of the icing, after storing them with the icing on, they became soft. They tasted really good both ways. I’m not sure if there is a way to avoid them from becoming softer because of the icing.


Recipe from January/February 2019 issue of Food Network Magazine.

Some of the links above are affiliate links, which means I may receive a small commission for my referral. This does not affect the retail cost of the item. Thank you for supporting Lemon & Mocha!