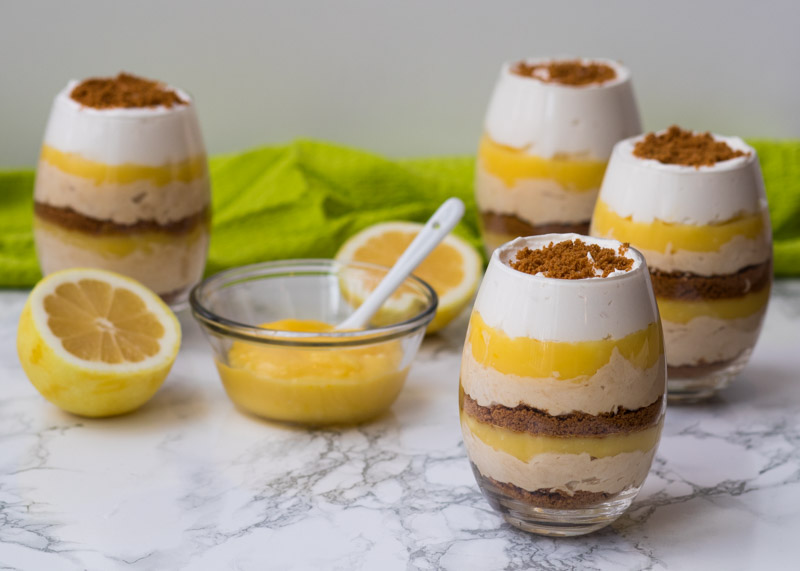
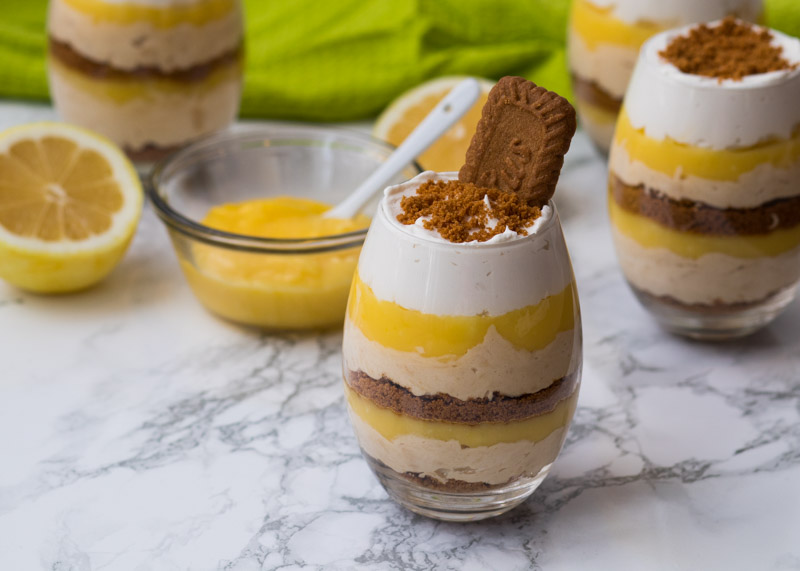
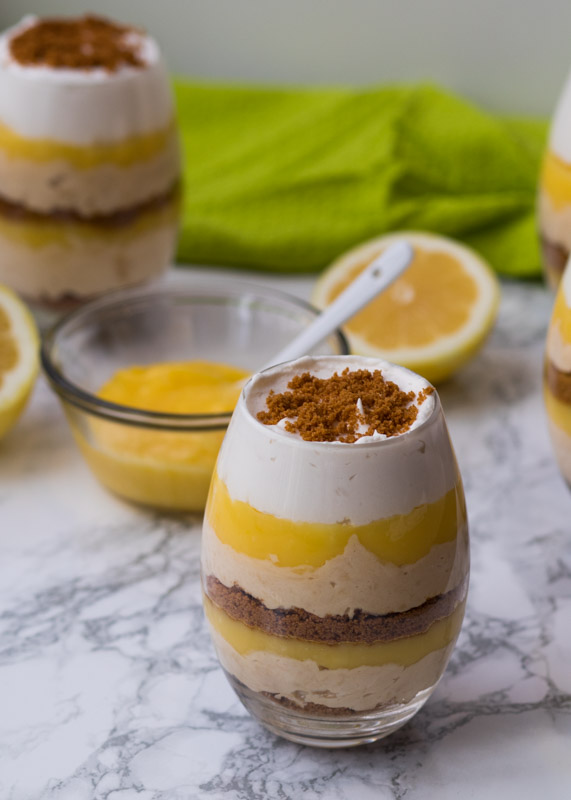
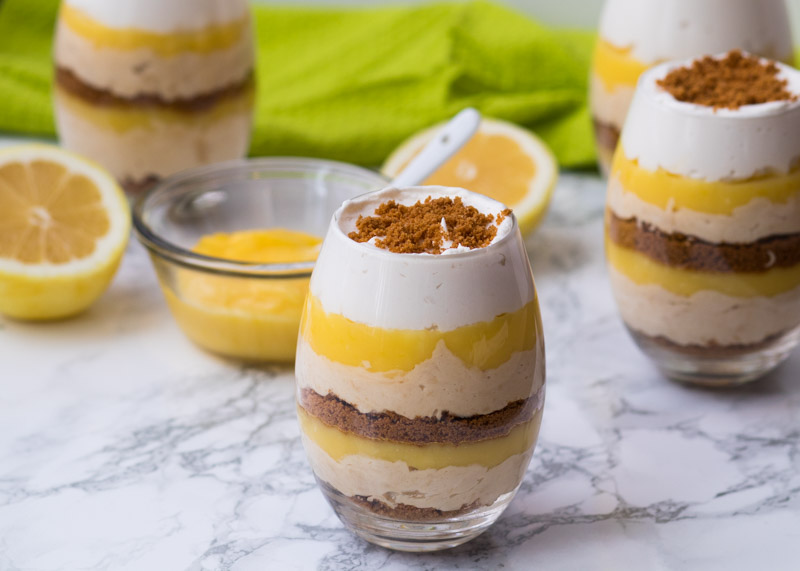
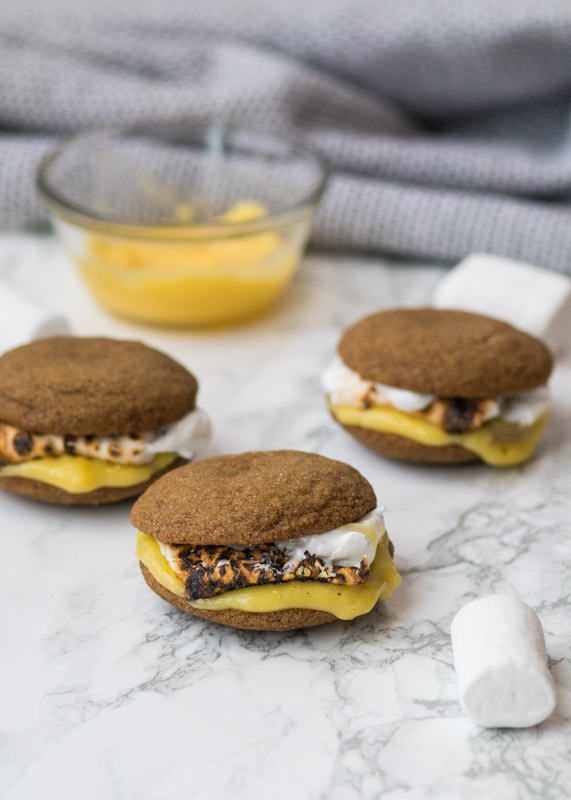
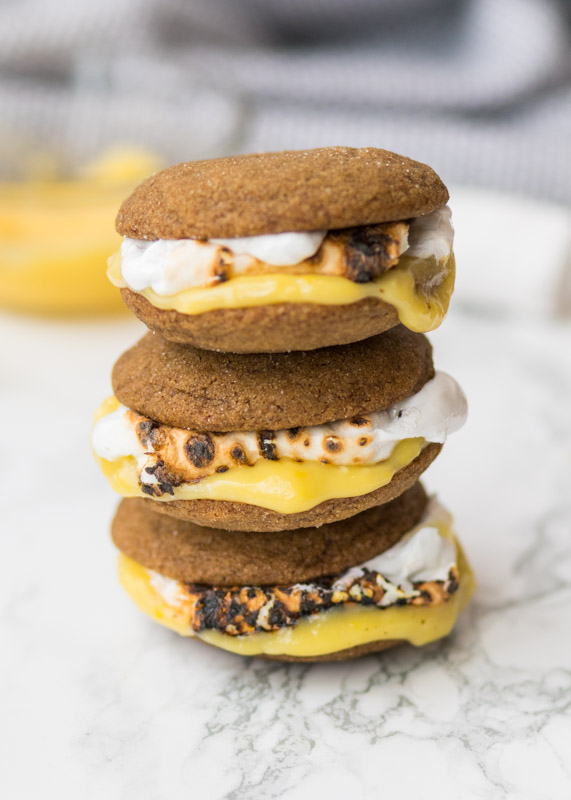
Lemon S’mores with Soft Gingersnap Cookies

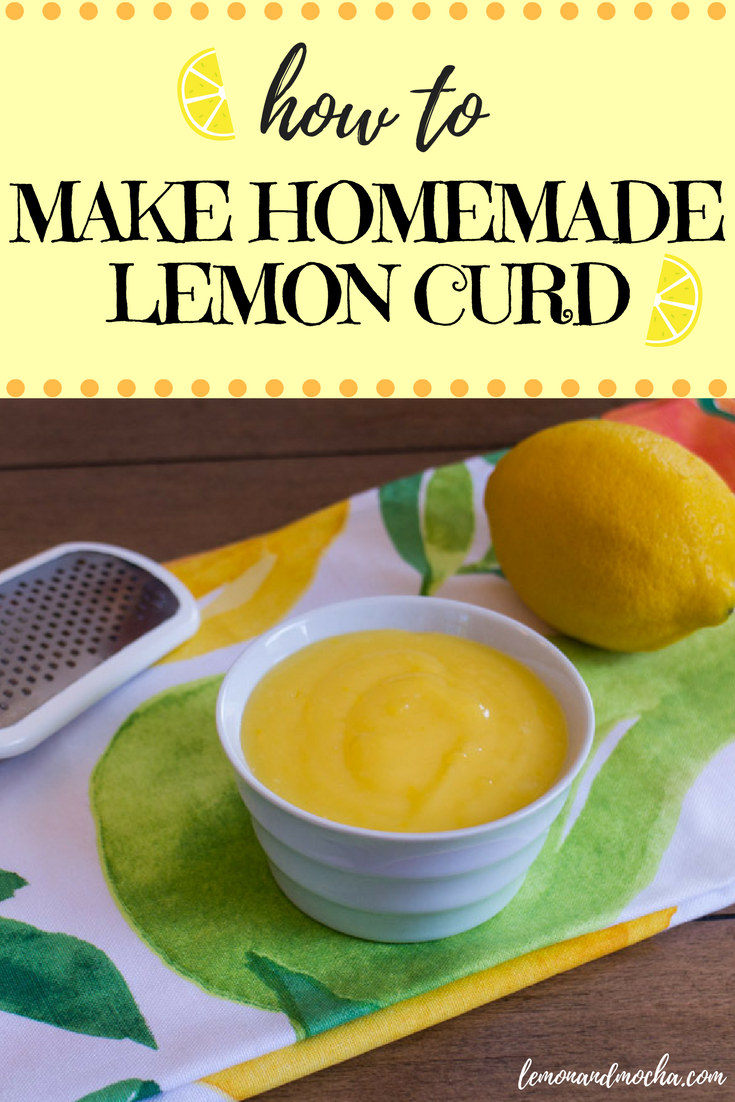
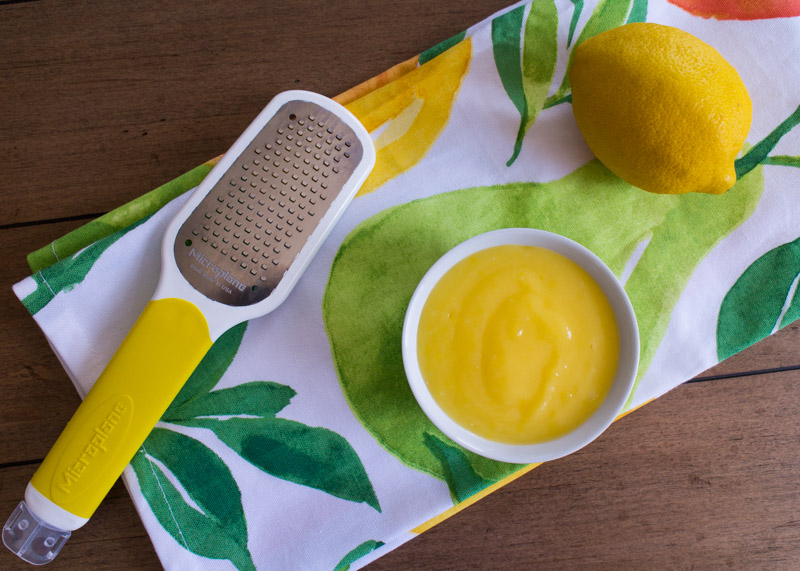
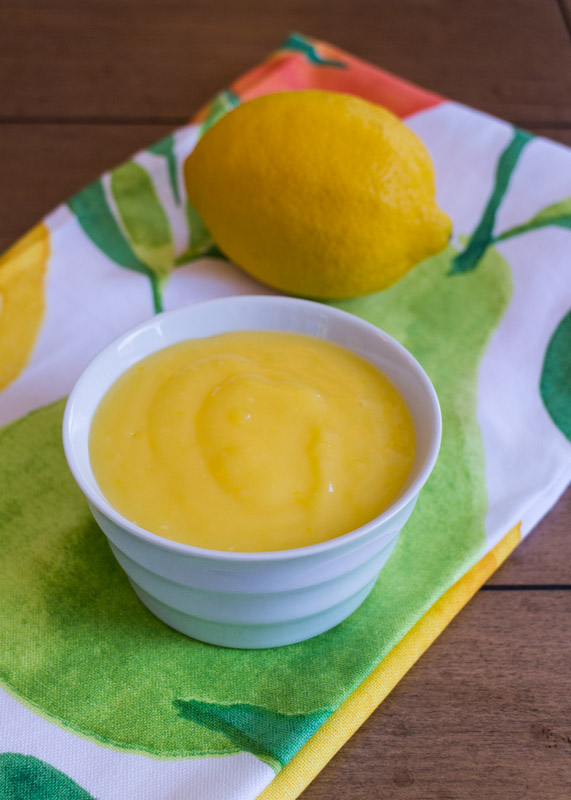
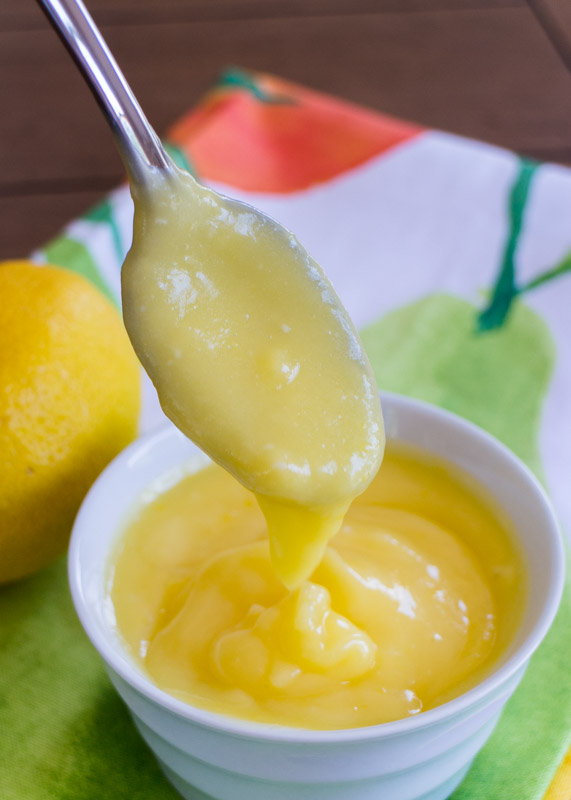
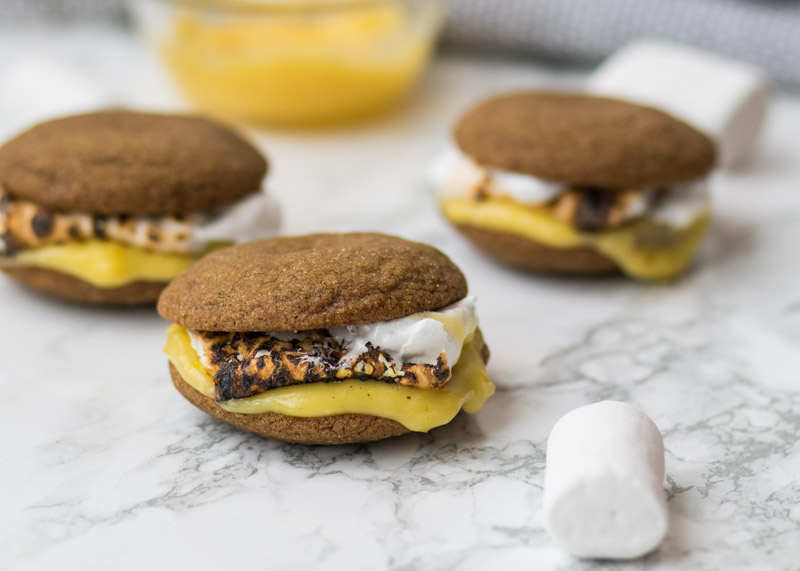
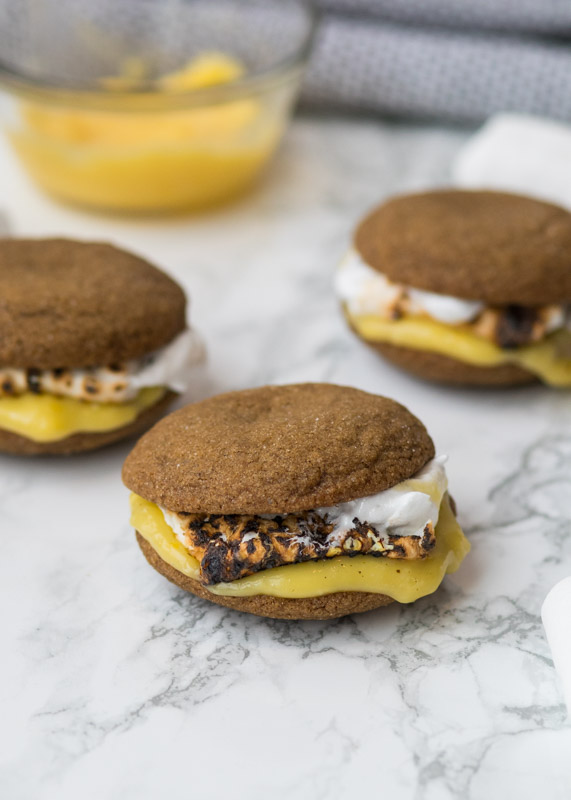
Look at that crispy gooey marshmallow! Look at it nestled up against the tart and creamy lemon curd! Have you ever seen lemon curd look more mouthwatering than this? I’ve already shared lemon curd paired with puff pastry, as part of a parfait, and even spread on a waffle so I wanted to come up with a completely different use for the citrusy treat I shared on Monday. Enter this Lemon S’mores with Soft Gingersnap Cookies. Even though spring just started, the cold temperatures in Boston already have me daydreaming about summer. Between the bright lemon curd and the charred marshmallows, these s’mores combine spring and summer in the best possible mash-up.
If it’s still a little too chilly to warm up the fire pit for a traditional roasted marshmallow, you can use your broiler or – carefully – use your gas grill. Roasting the marshmallow in the broiler doesn’t take much time so make sure you watch it carefully. You can broil the marshmallow right on top of one of the cookies or on a small piece of nonstick aluminum foil, but do not put the lemon curd in the broiler. If you still want that roasting on a stick experience you can be like me and – carefully – roast the marshmallow on a heat-safe skewer over a low flame of your gas grill. Mmmmm.
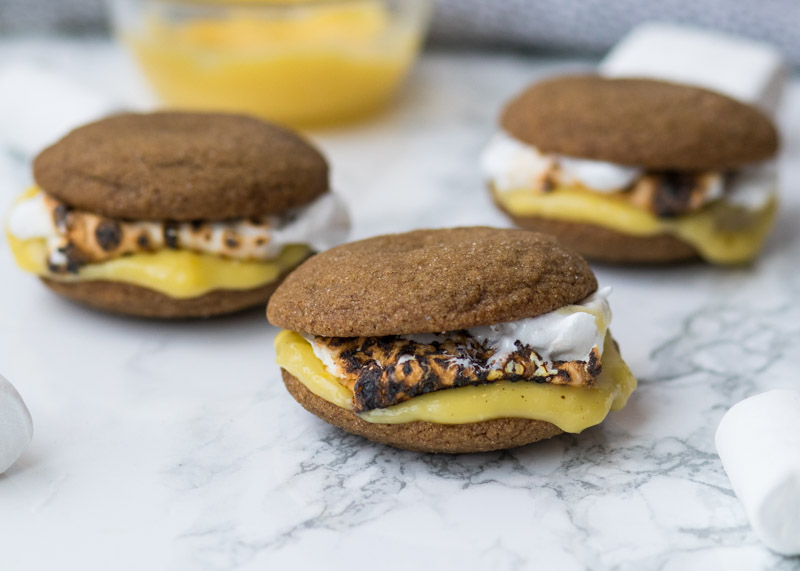
I still haven’t gotten to the best part of these s’mores. Well, one of the best parts. Yes, I know there’s only three components, but don’t make me choose! The soft gingersnap cookies are so amazingly delicious. I’m not kidding when I say they are soft; they’re just like out of a bakery. The exterior is soft; the inside is soft; they’re chewy and sweet and the ginger, molasses and spices come together perfectly. Can you tell I’m a little bit excited?
When I was deciding what cookie to use for the s’mores I knew a traditional graham cracker wouldn’t cut it. I didn’t want a crunchy cookie; I wanted the s’mores to have a soft perfect-bite quality, similar to a whoopie pie. If you want the classic graham cracker crunch then cinnamon graham crackers would pair well, but I would definitely recommend the soft gingersnap cookies for the most ideal lemon s’mores experience.
The recipe below is for a full batch of the soft gingersnap cookies as well as how to make one s’more. The s’mores are pretty big so I would suggest planning on one per person. I would definitely recommend making the full batch of soft gingersnap cookies because, trust me, you will want s’more of those. This recipe wraps up my week on lemon curd here in the Lemon & Mocha kitchen – just in time for Easter! Do you have a favorite way to enjoy lemon curd? Or, which of these are you going to try first?! Enjoy!
- 2¼ cups all-purpose flour
- 2 teaspoons ground ginger
- 1 teaspoon baking soda
- ¾ teaspoon ground cinnamon
- ½ teaspoon ground cloves
- ¼ teaspoon salt
- ¾ cup butter, softened
- 1 cup sugar, plus additional for rolling the dough
- 1 large egg
- ¼ cup molasses
- 2 cookies, per s’more
- 2 teaspoons lemon curd, per s’more
- 1-2 marshmallows per s’more, depending on size of marshmallows
- Preheat the oven to 350 degrees F. Line two cookie sheet with parchment paper and set aside.
- In a medium bowl, sift together the flour, ginger, baking soda, cinnamon, cloves and salt. Set aside.
- In the bowl of a stand mixer or in a large bowl with a hand mixer, beat the butter and sugar until fluffy, scraping down the sides as needed. Add the egg and molasses and beat to combine. Slowly add the flour mixture and mix until just combined.
- Place a few tablespoons of sugar in a small bowl. Use a medium cookie scoop or a heaping tablespoon of dough; roll into a ball then roll in the sugar before placing on the baking sheet. Continue, placing the cookie dough balls about 2” apart on the baking sheets. Bake for 10-12 minutes or until the cookies are puffy and the edges have started to lightly brown. Let cool for a few minutes on the cookie sheet then carefully move the cookies to a wire cooling rack to cool.
- Pick two cookies that are of equal size and slather one of them with the lemon curd. Roast your marshmallow or marshmallows. Place the roasted marshmallow(s) on the cookie with the lemon curd then sandwich with the other cookie, pressing down while you pull out your roasting stick or skewer.
Lemon curd from Sketches and Scribbles.
Gingersnap Cookies from Taste of Home.