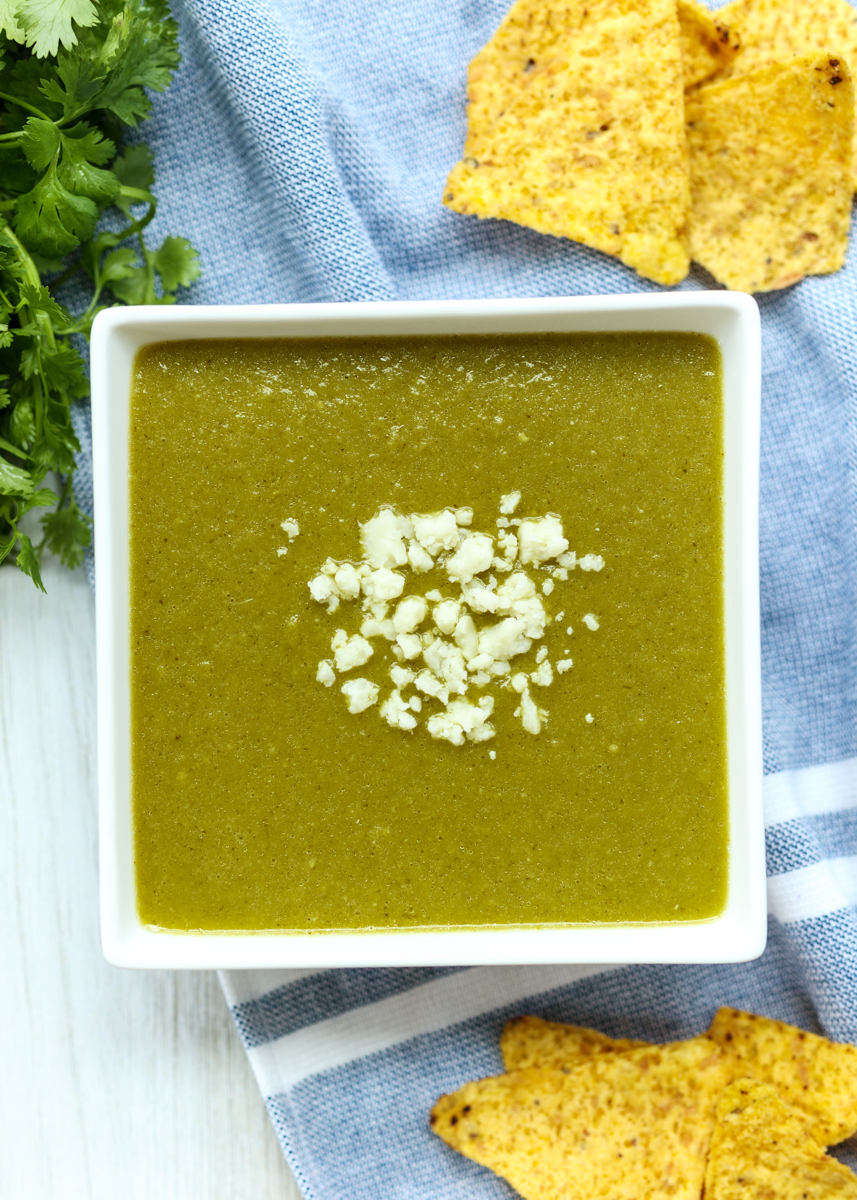
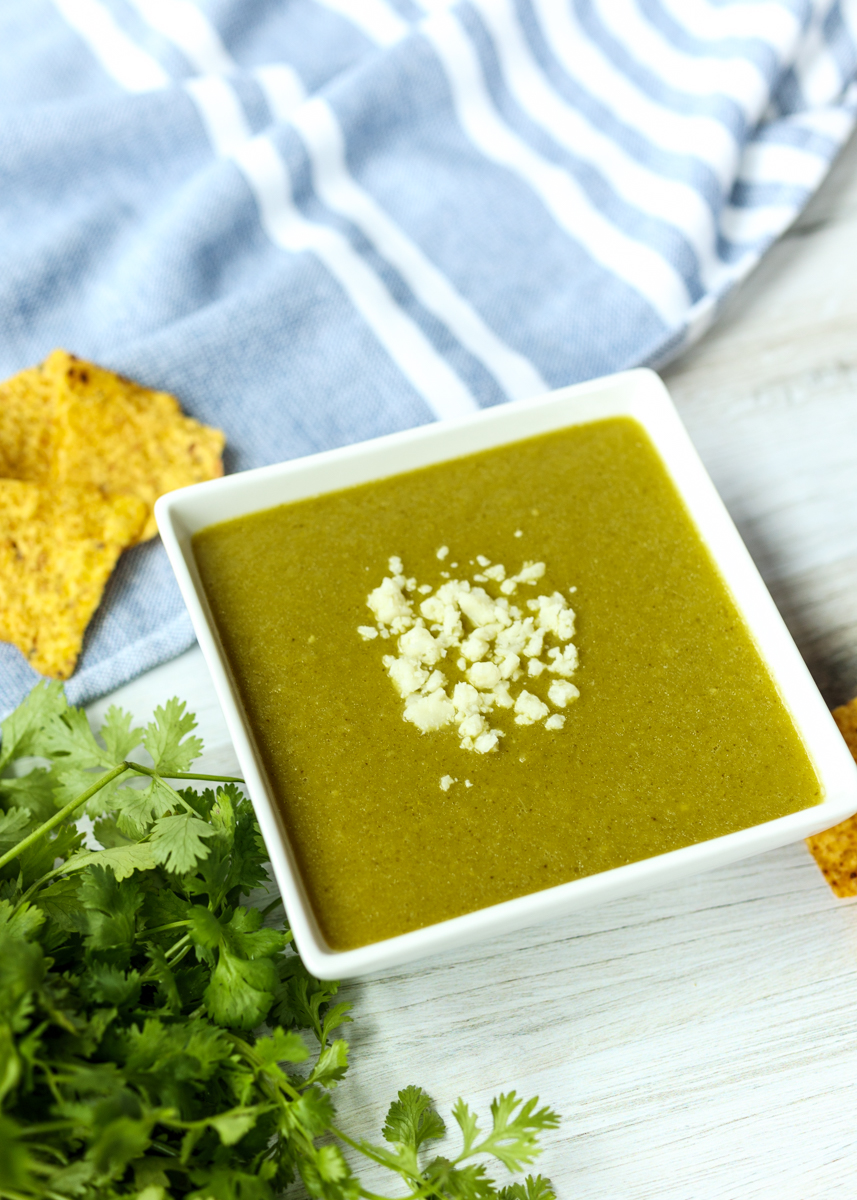
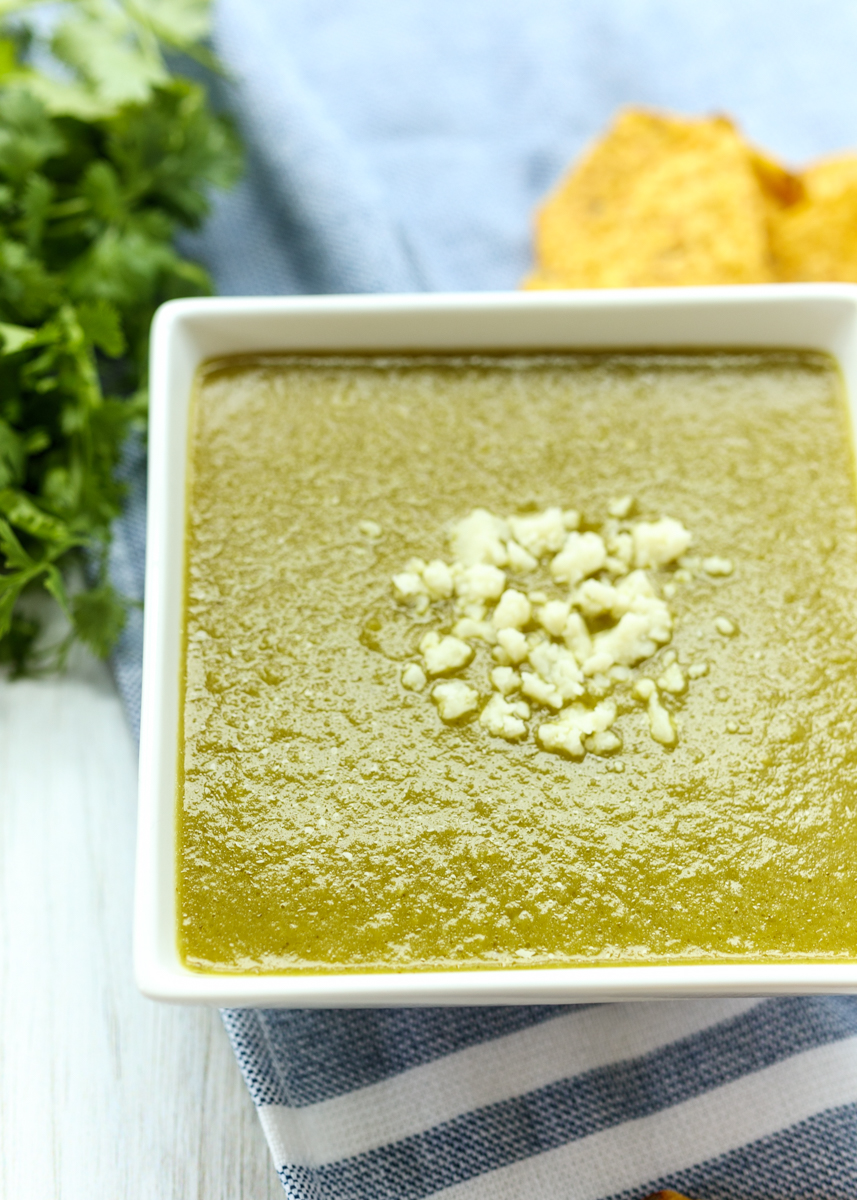
Dressings & Condiments

Salsa Verde

Salsa Verde  |  Lemon & Mocha

I find it so interesting how your tastebuds evolve over time. If you had told me when I first started this blog back in 2013 that I would be all jazzed up about a Salsa Verde with jalapeños, tomatillos and cilantro I’m sure I would have wrinkled my nose and shook my head at you.

Salsa Verde  |  Lemon & Mocha

Fast forward to Matt’s Cinco de Mayo themed birthday a couple years ago where I made a whole bunch of recipes from a now favorite cookbook of mine, Pati’s Mexican Table. I decided to make the roasted salsa and the Salsa Verde, mostly for Matt and my brother-in-law, Nick, rather than myself. Little did I know how obsessed with it I was going to be!

Salsa Verde  |  Lemon & Mocha

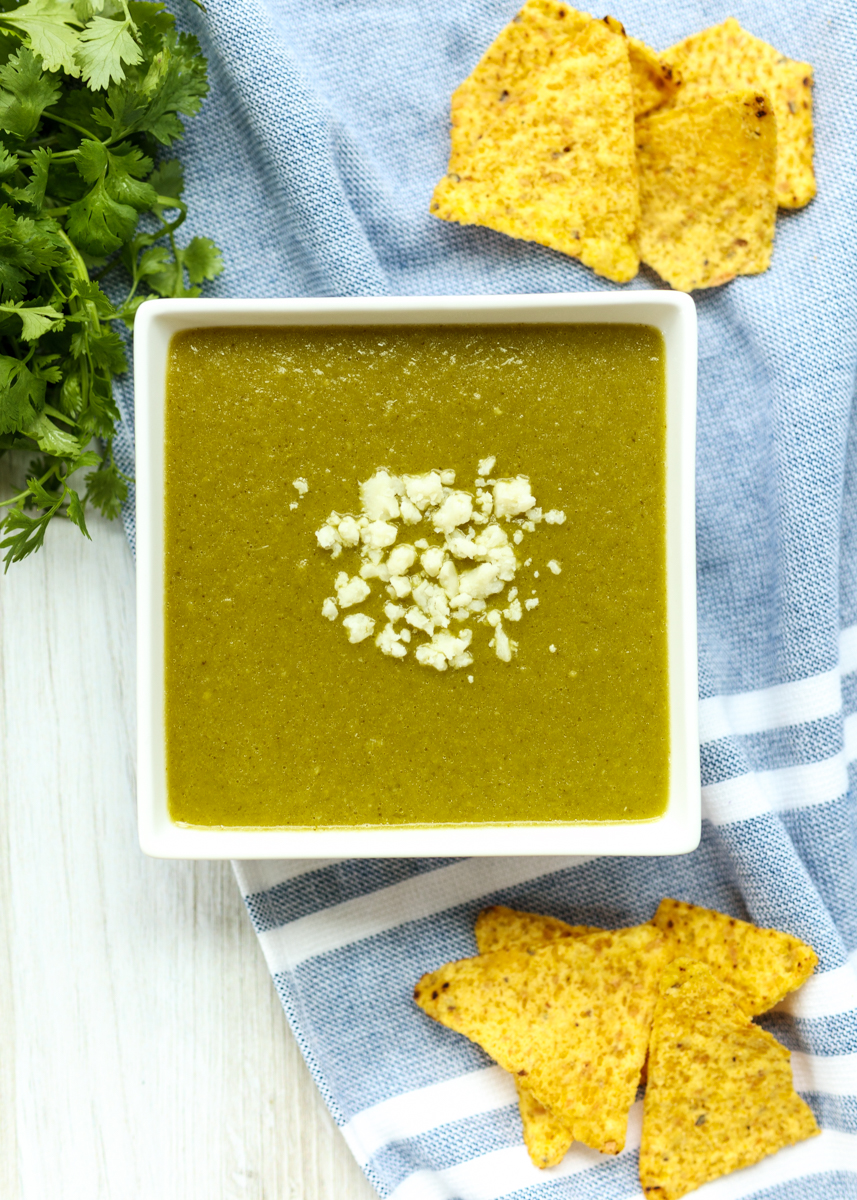
When I’ve made salsas in the past I’ve been disappointed in their blandness, but both these salsas had such depth of flavor I couldn’t stop digging in for more! It’s especially surprising for the Salsa Verde considering we are just boiling everything for a little, pureeing together then quickly warming on the stove-top. The layering of zesty tomatillos with fresh cilantro, lime, onion, garlic and salt is pure magic. I love that you can completely control the heat level of this salsa by what parts of the jalapeño you use. I don’t like any spiciness so I leave the seeds and pith completely out. The jalapeño flesh alone does not make it spicy, but adds to that flavor punch.

Salsa Verde  |  Lemon & Mocha

I’ve never been a fan of cilantro so the first time I made this Salsa Verde I used half cilantro and half parsley. My cilantro tastebuds must be evolving because when I just made it again I used all cilantro and I was still just as hooked. If you can’t stand cilantro please, please don’t just skip over this recipe! Try making it with all parsley because it is too good not to try. You could even try adding in the tiniest bit of cilantro; you might surprise yourself!

Salsa Verde  |  Lemon & Mocha

Salsa Verde
 
Yield: About 2 cups
Ingredients
  • 1 pound tomatillos, husks removed and rinsed
  • 1 clove garlic
  • 1-2 jalapeños, see note
  • ⅓ cup roughly chopped white onion
  • 1 cup cilantro leaves (can include top parts of stems)
  • 1 teaspoon salt
  • 3 tablespoons vegetable oil
Directions
  1. Add the tomatillos, garlic and jalapeño to a medium saucepan and then cover with water. Bring to a boil then reduce to low and simmer covered for 10 minutes. The tomatillos should become pale green and should be soft, but not falling apart.
  2. Use a slotted spoon to transfer the tomatillos, garlic and jalapeño to a high-speed blender or food processor. Add the onion, cilantro and salt then puree until smooth.
  3. Heat the vegetable oil in a medium saucepan over medium heat. Once hot, add the salsa and cook until thickened slightly, about 6-8 minutes, stirring occasionally. Serve warm or refrigerate for later and serve cold or at room temperature.
Notes
If you don’t want your salsa spicy only use 1 jalapeño and remove all the seeds and pith before putting in the blender. If you like it spicy try 1 jalapeño with the seeds and pith and if you want it even more spicy you could add a second jalapeño.

Recipe from Pati’s Mexican Table.
Some of the links above are affiliate links, which means I may receive a small commission for my referral. This does not affect the retail cost of the item. Thank you for supporting Lemon & Mocha!

Sun-dried Tomato Mayonnaise

I’m unsure of what reactions I’m going to get about the following confession. I love mayonnaise. Love it with a capital L. I think it tastes fantastic on a wide variety of foods and, this is usually where people draw the line, I could eat it with a spoon. I’m hoping there’s at least a few fellow mayonnaise lovers out there!

Well don’t worry, even if you aren’t as condiment obsessed as I am this sun-dried tomato mayonnaise is still sure to knock your socks off. It is so simple, but really brings something special to your sandwiches, paninis or other mayonnaise needs. I’m picturing this mixed in with some rotini pasta and crunchy veggies for a tasty twist on macaroni salad- yum!

One way I consume mayonnaise if I’m feeling naughty is dipping my french fries in it. This sun-dried tomato mayo would be especially good for fry dipping with the acidity and tomato flavor being reminiscent of ketchup. This delicious habit I got from my mom, who got it from living in the Netherlands for a few years. The Dutch are truly on to something.

When I was 12 my dad, brother, grandma and I went to the Netherlands and it was true, they dipped their fries in mayo. These were my people! Then I opened the mayonnaise packet and to my surprise it was pea green. Pea green mayonnaise? Twelve year-old me was concerned, but mayo-lover me decided to go for it. The verdict? Pea green mayo tasted just as delightful. So if you haven’t tried dipping your fries in mayonnaise before, make this sun-dried tomato mayo, eat some with your french fries and thank me later.

Sun-dried Tomato Mayonnaise
 
Ingredients
  • ⅓ cup minced sun-dried tomatoes (not packed in oil)
  • ½ cup mayonnaise
  • 1 tablespoon lemon juice
  • ¼ teaspoon minced garlic
  • ¼ teaspoon sugar
  • Pepper
Directions
  1. Soak the sun-dried tomatoes in ⅔ cup hot water until softened, about 5 minutes. Drain.
  2. Place the softened sun-dried tomatoes, mayonnaise, lemon juice, garlic and sugar in a food processor. Pulse until well blended. Season with freshly ground pepper to taste.

Recipe adapted from Taste of Home.

Baked Zucchini Fries with Special Sauce

Many people extol the wonderful qualities of winter. They argue that warm winter fires, cozy blanket couch snuggling and glistening snowflakes are romantic and special. Well as someone who lives in a fireplace-less apartment that Matt keeps at a snuggie required temperature year round I argue, what is so romantic about an extra-long work commute on a sandy, dirty snow-covered road?

Yes, I know, January just started and I’m already complaining about winter. January gets me a little down as my favorite holiday of the year is over and there’s nothing to look forward to for the rest of the season. Besides Valentine’s Day, my anniversary, skiing, creamy winter mac and cheeses… but hey, I’m busy complaining here! Sometimes I need a little burst of summer to get me through these long dark days. Aside from actually seeing the sun before and after work, what really gets me thinking about summer are summer vegetables. And french fries, mmm french fries.

Voila! Baked zucchini fries. These fries will have everyone gobbling their vegetables like they’re, well, eating fries. The subtle flavor of the zucchini is amped up by the seasonings in the crunchy coating. Served alongside special sauce these baked zucchini fries may just be habit-forming. My mom used to call it fish stick sauce, but I think special sauce sounds a little more appetizing and versatile. Special sauce is also fitting as it has special powers that include getting kids to gobble up their fish sticks and vegetables. So make these fries and bring some summer to your winter.

Baked Zucchini Fries with Special Sauce
 
Yield: 2 servings
Ingredients
for the zucchini fries
  • 1 large zucchini
  • 3 tablespoons olive oil
  • 1 cup panko breadcrumbs
  • 1 tablespoon grated Parmesan
  • 1 teaspoon dried oregano
  • ½ teaspoon garlic powder
  • ½ teaspoon onion powder
  • ¼ teaspoon paprika
  • Salt and pepper
for the sauce
  • ⅓ cup mayonnaise
  • 3 tablespoons ketchup
Directions
  1. Preheat the oven to 425 degrees F.
  2. Lightly coat a cooling rack with cooking spray then place on a cookie sheet or jelly roll pan. Set aside.
  3. Cut the zucchini into 3 inch sticks.
  4. Place the olive oil in a small bowl and set aside.
  5. In a separate small bowl combine the breadcrumbs, Parmesan and seasonings.
  6. Working one zucchini stick at a time, dip the stick into the olive, coat in the breadcrumb bowl then carefully place on the prepared cooling rack. Repeat with the remaining zucchini sticks.
  7. Bake for 25 minutes or until golden brown.
  8. While the zucchini fries are baking, combine the mayonnaise and ketchup. Serve the zucchini fries warm with the special sauce for dipping.
Notes
Zucchini is naturally a soft vegetable when cooked so don't expect a sturdy fry, just one with flavor and an outer crunch.

Recipe adapted from Health Magazine.

Roasted Beet, Blackberry and Goat Cheese Salad with Orange Champagne Vinaigrette

It is January 1st. A new year is upon us! It’s time for reflecting on how we live our lives, making resolutions to do better, watching our diet and going to the gym; at least for the next three weeks. In the spirit of the new year I am going to try very, very hard to not post any desserts for the next three weeks. Joking aside I know I could certainly use a dessert detox after all the stuffing my face sessions I participated in over the last couple months.

Being the food obsessed person I am I have an extraordinarily difficult time dieting so instead I just try to keep my meals fresh, healthy and flavorful. As I have previously mentioned on Lemon & Mocha I am not a fan of salads resembling rabbit food. However, I find when salads have a cooked element instead of all raw ingredients the texture and flavor is greatly enhanced.

This roasted beet, blackberry and goat cheese salad with an orange champagne vinaigrette packs so much punch you will completely forget you are eating healthy. The beets are roasted to mellow and sweeten their flavor as well as sliced thin to keep them from overwhelming the rest of the salad. The creamy goat cheese provides a nice contrast to the tangy citrus infused dressing. Serve alongside roast chicken or as a vegetarian main dish for a fresh, flavorful and seasonal meal this winter.

Roasted Beet and Goat Cheese Salad with Orange Champagne Vinaigrette
 
Yield: 4 servings, 1 cup dressing
Ingredients
for the salad
  • 1 large beet, top trimmed
  • 1 large golden beet, top trimmed
  • 1-2 tablespoons olive oil
  • Salt and pepper
  • 8 cups mixed beet greens and mesclun
  • 1 cup blackberries
  • Crumbled goat cheese
for the dressing
  • 1 tablespoon minced shallot, about ½ a shallot
  • ¼ cup orange champagne vinegar
  • 1 tablespoon dijon mustard
  • 1 tablespoon orange juice
  • Pinch of sugar
  • ¾ cup olive oil
  • Salt and pepper
Directions
for the salad
  1. Rinse the beets, scrubbing off any dirt, then dry. Tear off 2 small squares of tin foil large enough to encase each beet. Place each beet in a square of tin foil, slightly turn up the sides and drizzle each with olive oil. Lightly season with salt and pepper then seal up the tin foil packets. Bake the beets in the foil packets for 30 minutes.
  2. Remove the beets from the oven and set aside to cool. Once cool enough to touch, remove the skins by hand or with a paring knife. Thinly slice the beets.
  3. Wash the greens and place in a large bowl. Add the sliced beets and blackberries then toss with some of the dressing. Top with the crumbled goat cheese.
for the dressing
  1. Whisk together the minced shallot, orange champagne vinegar, mustard, orange juice and sugar. Slowly whisk in the olive oil then season with salt and pepper.
Notes
*I got orange champagne vinegar from Trader Joe's, but if you can't find any you can use regular champagne vinegar and add 1 tablespoon orange zest.
*Use the leaves from the bunches of beets for the beet greens.

Dressing recipe adapted from Martha Stewart.

Pomegranate Molasses

Pomegranate molasses may seem like a random recipe to post and you may have never even heard of it before, but doesn’t it sound delicious? I am making a festive side dish for you later this week and one of the ingredients it calls for is pomegranate molasses. I had never heard of it, tasted it and certainly never dreamed about it, but I instantly knew I wanted to try and make my own.

Whenever I see a unique ingredient on a recipe I usually first look to see if I can make a version of it myself. This has been born from a combination of not wanting to buy a large bottle of something I’m going to use three tablespoons of, preferring to know exactly what is going in my food and enjoying experimenting in the kitchen. The huge desire to avoid going to multiple stores in search of a single item is also high on that list.

Whether you have or have not come across pomegranate molasses before, once you make it you are sure going to be glad you have it. A quick Google search clued me in on all the exciting possibilities this ingredient has including glazing a roast chicken, mixing a fruity vinaigrette or pouring over a cheesecake. Don’t worry, I will be testing all these out for you so there will be plenty of opportunities for you to enjoy your pomegranate molasses this winter.

In the meantime, it will keep in a glass jar in your refrigerator for up to six months. I’m not sure of the exact reasoning behind storing it in a glass jar versus some other type of container, but if Alton Brown says so you better listen up!

Pomegranate Molasses
 
Yield: 1 cup
Ingredients
  • 4 cups pomegranate juice
  • ½ cup sugar
  • 1 tablespoon lemon juice
Directions
  1. In a medium saucepan over medium heat combine all three ingredients. Cook over medium heat and stir occasionally until the sugar has dissolved.
  2. Reduce the heat to medium-low and continue to cook until the mixture has reduced to about 1 cup. The original recipe says this should take approximately 70 minutes, but it took about 120 minutes for me so watch it carefully since every stovetop is different. When the molasses is the consistency of a thick syrup it should be removed from the heat. It will continue to thicken as it cools so don't let it get too thick.
  3. Once removed from the heat let cool in the saucepan for 30 minutes then transfer to a glass jar to continue cooling. Once cool cover and store in the refrigerator.
Notes
Molasses will keep in a glass jar in the fridge for up to 6 months.

Recipe from Alton Brown.