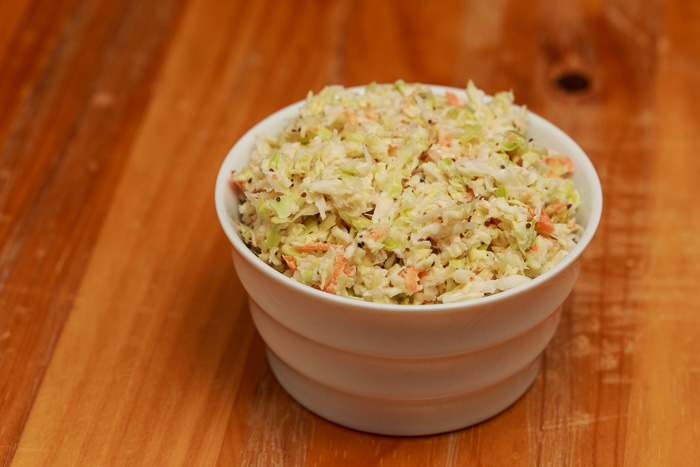
About Lauren

Posts by Lauren :

Coleslaw

I love the Fourth of July probably for the same two reasons most of America loves the holiday: days off work are awesome and barbecues are even better. I’m sure day-drinking summer beers is high up on the list as well. There are so many great barbecue side dishes that it’s hard to play favorites, but one that I always look forward to is coleslaw.

You’re probably thinking, “She just got us all hyped up about barbecues to bring the discussion to… coleslaw? Really?” Think about it though, it’s not only a side dish, but also a topping for burgers and hotdogs fresh off the grill. Versatility at its best. I’ve had some poor luck with homemade coleslaws, mostly because fast food chains have spoiled coleslaw for me with their little plastic cups of goodness probably loaded with preservatives and other fast food chemicals used to make things delicious.

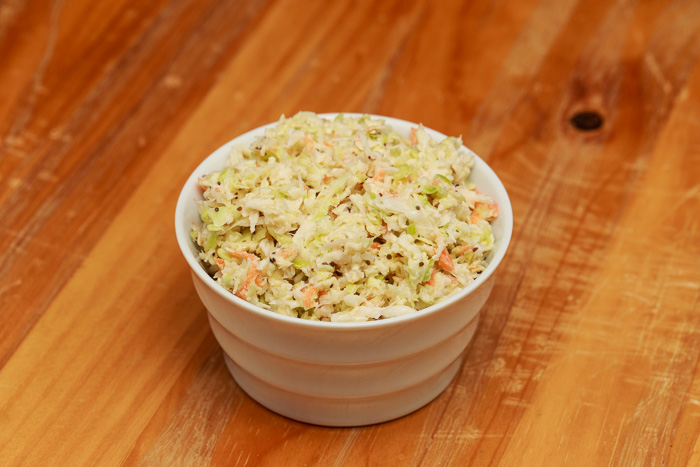
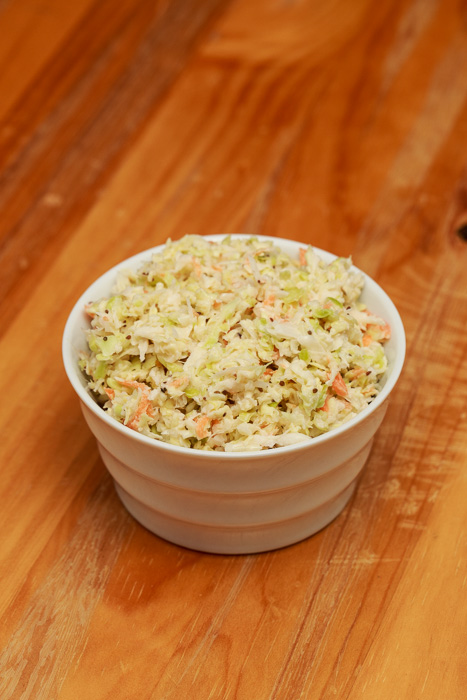
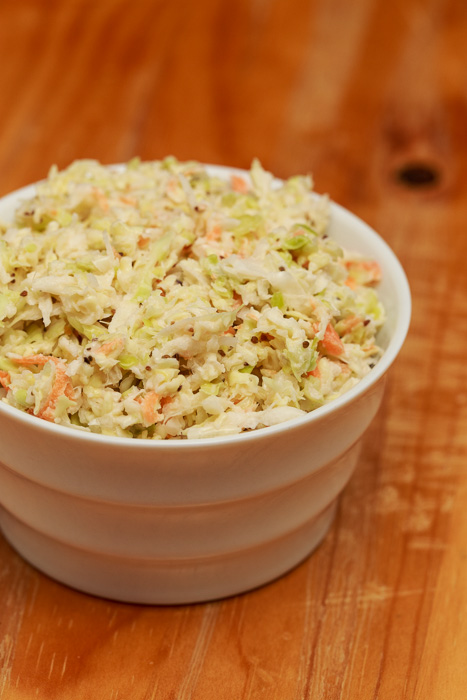
I’ve never let failure stop me before so I kept searching until I found a barbecue-worthy coleslaw. And I did! This coleslaw is simple, crunchy, slightly sweet with a bit of tanginess. Enjoy it on your plate, on your burger and in your stomach this Fourth of July.

Coleslaw
 
Yield: 10 servings
Ingredients
  • 1 cup mayonnaise
  • ½ white onion, grated
  • 3 tablespoons apple cider vinegar
  • 2 tablespoons sugar
  • 2 teaspoons celery seeds
  • 1 small head cabbage, shredded
  • 1 carrot, shredded
  • Salt and pepper
Directions
  1. In a large mixing bowl whisk together the mayonnaise, grated onion, apple cider vinegar, sugar and celery seeds. Add the shredded cabbage and carrot then toss to combine. Season with salt and pepper to taste. Let sit at least 1 hour before serving.

Recipe from Bobby Flay’s Burgers, Fries, and Shakes.

Croissant S’mores

We are officially in summer mode, which can only mean one thing: time for another s’mores post. Whether I have to use an oven broiler, microwave or fire pit I am constantly looking for more ways to sneak s’mores into my diet.

I have posted several different s’mores-flavored desserts on Lemon & Mocha, but I wanted to share something that was purely a s’mores recipe. Of course with a twist to make it blog-worthy. I found my calling with croissant s’mores.

Absent of graham cracker squares, buttery toasted croissant halves serve as the vessel for this scrumptious dessert sandwich. The combination of high-quality dark chocolate and sea salt flakes will literally melt in your mouth.

After smearing the sandwich with marshmallow fluff I decided I still wanted the crispy texture and smoky taste you get from traditional s’mores. After some research and tasty experimentation I determined that toasting the marshmallow with a kitchen torch or oven broiler will do the trick just fine.

Although it’s hard to top the original s’mores, the pastry lover in me almost prefers this treat. Almost.

Croissant S'mores
 
Yield: 1 serving
Ingredients
  • 1 croissant, carefully cut in half lengthwise to open it like a sandwich
  • 2-4 squares of high quality dark chocolate
  • ¼ cup Marshmallow Fluff
  • Pinch of coarse sea salt flakes
Directions
  1. If not using a kitchen torch, preheat the oven to broil. Line a small baking sheet with tin foil and set aside.
  2. Heat a grill pan or skillet over medium heat and lightly coat with cooking spray. Place the croissant halves cut side down on the heated pan and grill until warmed and slightly toasted, about 4-5 minutes. Remove from the heat and place cut side up. If using the broiler place the croissant cut side up on the prepared baking sheet.
  3. Place the chocolate on the bottom half of the croissant. Spread the Fluff on the top half of the croissant. If using the kitchen torch, torch the chocolate until melted and the Fluff until lightly charred. It’s ok if it catches on fire, just blow it out! Everyone likes an extra toasted marshmallow. If using the broiler, place the baking sheet on the top rack of the oven and broil until the chocolate is melted and the Fluff is toasted, about 3-5 minutes, making sure you are watching carefully.
  4. Sprinkle the sea salt flakes on the melted chocolate then place the top half of the croissant fluff side down onto the melted chocolate half. Serve and enjoy or devour it right at the counter. I chose the later.


Hobo Egg Grilled Cheese

Naturally I ponder about my favorite foods multiple times throughout the day so it is no surprise that I also fantasize about ways to make them even better. To make the ultimate version of all your favorite foods, now that is the dream.

When I stumbled upon this ingenious idea to elevate my family’s beloved hobo egg I almost couldn’t breathe from the excitement. A. Hobo. Egg. Grilled. Cheese? Must. Make. One. Now.

And of course my list of recipes to try is so long I didn’t get to it until many months later, years even, but I’m so happy I finally did. Combining the best of breakfast and lunch this is a spot-on lazy Sunday brunch meal.

Cheese and eggs have been a classic combination since the stone age when a caveman accidentally knocked a bowl of cheese curds onto his sizzling dinosaur egg omelette, or so I imagine, so before even taking a bite you know this sandwich is about to blow your mind.

And it does, again and again with every bite until you find yourself standing over the stovetop already making a second one. I hope you enjoy as much as I did, and don’t forget the bacon!

Hobo Egg Grilled Cheese
 
Yield: 1 serving
Ingredients
  • 2 tablespoons butter, divided
  • 2 slices bread
  • 2 slices cheese, preferably cheddar, American, or any cheese that melts well
  • 1-2 slices cooked bacon
  • 1 egg
  • Salt and pepper
Directions
  1. Melt 1 tablespoon butter in a skillet over medium-low heat. Meanwhile prepare your grilled cheese by covering one of the slices of bread with the cheese and bacon then sandwiching the other slice of bread on top. When placing the bacon on the sandwich try to keep it around the corners of the bread so it doesn’t get cut out when you later cut out the circle from the middle.
  2. When the butter is melted and the pan is hot carefully place the grilled cheese in the skillet. Place a pan lid or tent a piece of foil over-top the sandwich in the skillet to help the cheese melt.
  3. When the cheese has started to melt and the bread is very lightly browned, about 2-3 minutes, carefully flip the grilled cheese. Cook until the other side of the bread is very lightly browned, about 1-2 minutes. Remove from the pan.
  4. Using the rim of a glass or a 2” cookie cutter cut a circle out of the center of the grilled cheese. Enjoy as a pre-meal appetizer. Press down on the sandwich to flatten it slightly.
  5. Melt the remaining tablespoon of butter in the skillet over medium heat and return the sandwich to the pan. Carefully crack an egg in the hole of the sandwich. Season with salt and pepper. Cook for 3 minutes then carefully flip over. Cook until the egg is no longer jiggling, but still feels soft to the touch, about 3-4 minutes. You want to make sure the whites are cooked through, but the yolk is still runny. Remove from the pan, cut in half and serve dipping the sandwich halves into the runny yolk.


Hobo Egg

This recipe goes by many different names, and very few of them make any sense at all. Toad-in-a-hole, egg in a basket, one eyed eEgyptians; where did these bizarre titles come from? In my family it is called a hobo egg. I thought my dad had just made that up one day and we were odd for calling it that, but I just Googled “hobo egg” and apparently other people call it a hobo egg as well! Fancy that.

If you haven’t had this fantastic breakfast staple it is essentially an egg fried in the hole of a piece of bread. You get a runny fried egg and a piece of buttery toast to sop up the yolk all at once.

It may seem like a simple dish, but I thought it was fitting with Father’s Day coming up on Sunday. This was, and still is, one of my favorite quick breakfast meals and was one of my dad’s specialities.

When I was younger only my dad could make the hobo egg, it just wasn’t the same if someone else made it. Our shared love of breakfast is just one of the many things my dad and I have in common. If I had a quarter for every time my dad and I got into such an intense laughing fit simply because the other person was laughing and had to stop ten minutes later because our sides were ready to split open, well you get the idea.

Other than our identical sense of humor and his signature laugh, my dad is my rock. He is smart, generous, sensitive, ambitious and is the person I always look to for guidance. I love our close relationship and am so lucky to call him dad. So happy Father’s Day, dad, and thanks for making me special hobo eggs all those years ago!

Hobo Egg
 
Yield: 1 serving
Ingredients
  • 1 tablespoon butter
  • 1 slice of bread
  • 1 egg
  • Salt and pepper
Directions
  1. Melt the butter in a skillet over medium heat. Using the rim of a glass or a round cookie cutter with a 2” diameter cut a circle out of the center of the slice of bread. Place the bread in the melted butter and let lightly brown a minute or two on each side.
  2. Carefully crack an egg in the hole of the bread while in the skillet. Season with salt and pepper. Cook for 3 minutes then carefully flip over. Cook until the egg is no longer jiggling, but still feels soft to the touch, about 3-4 minutes. You want to make sure the whites are cooked through, but the yolk is still runny.


Coffee Ice Cream Cookie Sandwich Cake with Salted Butter Caramel Sauce

Did you make the coffee ice cream I posted on Tuesday yet? No? Well you’re going to be kicking yourself for it after you see today’s post. But don’t worry! There’s still time to remedy your huge oversight. If you haven’t already started a grocery list after just reading the title, then let me get right to it: you need to make this dessert. Now.

Or this weekend, you know with that pesky little thing called work consuming the weekdays. Chocolate chip cookie cake with coffee ice cream and a salted butter caramel sauce. Woah, someone hold me, I’m weak in the knees!

The inspiration for this dessert phenomenon was my fellow ice-cream loving friend. We aren’t normal ice cream lovers. We are ice cream aficionados. We eat, sleep and breath ice cream. If we were on the top of Mount Everest we would say to one another, “P-p-pass the ice cream p-p-please.” In addition to our ice cream desires we also maintain our manners under extreme conditions. For her birthday I decided to turn one of our favorite ice cream truck treats into an ultimate dream cake. It’s dessert in a dessert times ten.

Although it looks like a monster of a project, if you split out the components it is completely do-able and so worth it. The strong coffee flavor, buttery and chocolately cookie, and warm caramel sauce will have you making obscene noises perhaps not suitable for children. I have never seen a dessert be devoured so quickly and neither will you.

Coffee Ice Cream Cookie Sandwich Cake with Salted Butter Caramel Sauce
 
Yield: 8-10 servings
Ingredients
for the cake
for the salted butter caramel sauce
  • 6 tablespoons unsalted butter
  • ¾ cup sugar
  • 1 cup heavy cream, divided
  • ½ teaspoon vanilla extract
  • 1 ¼ teaspoons coarse salt
Directions
for the cake
  1. Preheat the oven to 350 degrees F.
  2. Line a 9” round springform pan with parchment paper. Take half the cookie dough and evenly press into the bottom of the springform pan to create a large round cookie. Bake for 20 minutes. Do not overcook the cookie or it will be hard after freezing. Remove and let cool on a wire cooling rack. Repeat with the second half of the cookie dough.
  3. When the cookies are completely cool you can start assembling the cake. Place one of the cookies in the bottom of the springform pan lined with parchment paper. Scoop and evenly spread the coffee ice cream on top of the bottom cookie until you have about a 2” layer. You may not have to use all the ice cream. Place the second cookie on top, right side up, making sure not to press too hard. Wrap the entire pan in plastic wrap and freeze for at least 8 hours. Let the cake sit out and soften before serving.
for the salted butter caramel sauce
  1. Melt the butter over medium heat in a large heavy duty saucepan. Stir in the sugar with a heatproof spatula and continue stirring frequently until the mixture is a deep golden brown and starts to lightly smoke. The sugar will be completely dissolved at this point.
  2. Remove from the heat and carefully whisk in ½ cup of the cream. I recommend using an oven mitt as the mixture may bubble splatter. Stir in the rest of the cream, vanilla extract and salt until combined. If any sugar lumps remain gently whisk over low heat until dissolved. Serve warm.
Notes
Caramel should be stored in the fridge in an airtight container and can be reheated in a saucepan over low heat or in the microwave.